Swedish Pancake Recipe: Ever tried a pancake that’s as thin as a crepe but tender, buttery, and full of character? Welcome to the delicious world of Swedish pancakes! These delicate, lacy breakfast treats are like the soft-spoken cousin of the American flapjack, packing all the flavor without the fluff. The secret lies in the batter – it’s thinner, uses more eggs and milk, and results in a light and tender pancake that practically melts in your mouth.
What really sets Swedish pancakes apart is their versatility. While they’re usually served sweet – think jam, whipped cream, or powdered sugar – they can just as easily go savory with cheese, herbs, or smoked salmon. They’re perfect for breakfast, brunch, or even dessert.
Swedish pancakes are typically rolled or folded rather than stacked. This not only adds to their elegance but makes them ideal for a filling, allowing you to get creative with flavor combinations. Whether you’re prepping a cozy Sunday breakfast or impressing brunch guests, Swedish pancakes deliver every single time.
History and Cultural Significance
Swedish pancakes, or “Svenska pannkakor” in Swedish, have deep roots in Scandinavian culinary traditions. Historically, they were a special treat served on Thursdays after a hearty meal of pea soup – a tradition still alive today in many Swedish households. Unlike thick American-style pancakes, these were designed to be more of a light indulgence rather than a main meal.
The culture surrounding Swedish pancakes also emphasizes family and togetherness. They’re often prepared for birthdays, holidays, and Sunday family breakfasts. The process of making them, flipping them, and filling them at the table creates a shared experience that’s more than just about food – it’s about bonding.
Their popularity has spread beyond Sweden, especially among Scandinavian communities around the world, becoming a comforting symbol of heritage and nostalgia.
Ingredients You’ll Need
Essential Ingredients List
Creating authentic Swedish pancakes doesn’t require a pantry full of rare items. In fact, most of what you need is probably already in your kitchen. Here’s your must-have list:
- 3 large eggs
- 2 cups of whole milk
- 1 cup of all-purpose flour
- 2 tablespoons of granulated sugar
- ¼ teaspoon salt
- 2 tablespoons melted butter (plus more for greasing the pan)
Each of these ingredients plays a key role. Eggs and milk give the batter its signature richness and fluidity, while flour provides structure. Sugar adds just a hint of sweetness – perfect whether you’re going savory or sweet with your toppings. Melted butter helps bind the mixture and adds a delicious buttery note.
You can double the recipe if you’re cooking for a crowd or halve it for a solo brunch indulgence.
Optional Add-ons and Toppings
Here’s where things get exciting. The beauty of Swedish pancakes is in the toppings and fillings. Some traditional and modern favorites include:
- Lingonberry jam – a Swedish classic
- Whipped cream – light and fluffy goodness
- Fresh berries – blueberries, strawberries, raspberries
- Nutella or chocolate spread
- Powdered sugar
- Greek yogurt and honey
- Savory options – smoked salmon, sour cream, cheese, or fresh herbs
Don’t hesitate to mix and match. Want to go bold? Try crumbled bacon and maple syrup. Feeling fancy? A dollop of mascarpone and fruit compote will blow your mind.
Tools and Equipment Required
Kitchen Tools Checklist
You don’t need a ton of fancy gear to whip up Swedish pancakes, but having the right tools can make the process smoother:
- Blender or mixing bowl with whisk – for smooth batter
- Non-stick skillet or crepe pan – 8 to 10 inches in diameter is ideal
- Ladle or measuring cup – for pouring consistent batter amounts
- Spatula – preferably silicone or thin-edged for easy flipping
- Butter brush or paper towel – to grease the pan between pancakes
If you’re planning to make these a regular part of your kitchen routine (and you probably will), investing in a dedicated crepe pan can be a game-changer.
Substitutes for Specialized Equipment
No crepe pan? No problem. A regular non-stick skillet works just fine. And if you don’t have a blender, simply whisk the ingredients in a large bowl until smooth. The key is to eliminate lumps in the batter to ensure a light texture.
Using a thin spatula is important because Swedish pancakes are delicate and can tear easily if handled roughly. A fish spatula or even a flexible plastic spatula will do the trick.
Step-by-Step Guide to Making Swedish Pancakes
Step 1 – Preparing the Batter
Start by adding your eggs, milk, flour, sugar, salt, and melted butter into a blender or mixing bowl. Blend or whisk until the batter is smooth and lump-free. It should be thin and pourable – thinner than American pancake batter but slightly thicker than water.
Let the batter rest for about 20–30 minutes. This gives the flour time to absorb the liquid and results in a more cohesive texture. If you’re in a rush, you can skip this step, but for the best results, don’t.
Want an extra silky finish? Strain the batter through a fine mesh sieve before cooking.
Step 2 – Heating the Pan
Getting the pan to the right temperature is crucial for making perfect Swedish pancakes. Start by placing your non-stick skillet or crepe pan on medium heat. Let it heat for about 2–3 minutes before adding anything. You want the pan hot enough to cook the pancake quickly but not so hot that it scorches the batter.
To test if it’s ready, sprinkle a few drops of water onto the pan. If they sizzle and evaporate immediately, you’re good to go. Lightly grease the pan with butter using a paper towel or brush. This not only prevents sticking but adds a subtle richness that enhances the pancake’s flavor.
Remember, Swedish pancakes are super thin, so if the pan isn’t evenly heated, they’ll cook unevenly. Keep your heat consistent and adjust as needed. If the edges cook too fast while the center stays raw, your heat’s too high. If it takes longer than 60 seconds per side, turn it up a bit.
Step 3 – Cooking the Pancakes
Now for the fun part—cooking! Pour about ¼ cup of batter into the center of the hot pan. Immediately lift the pan and tilt it in a circular motion to spread the batter into a thin, even layer. Don’t worry if your first one is a little off—that’s the warm-up round!
Cook the pancake for about 45 seconds to 1 minute, or until the edges start to dry out and lift slightly. You’ll notice tiny bubbles and a golden hue forming underneath. That’s your cue to flip (more on that next).
As each pancake finishes, slide it onto a plate and cover with foil or a clean kitchen towel to keep warm. Don’t stack them directly if they’re still steaming hot—they can stick together. If you’re making a large batch, use your oven’s warm setting (around 200°F/90°C) to keep them hot.
Step 4 – Flipping Like a Pro
This step can feel intimidating at first, but once you get the rhythm, it’s easy. Using your thin spatula, gently slide under the edge of the pancake. Once it’s halfway under, lift and quickly flip the pancake over. If you mess up, don’t sweat it—just fold or roll the pancake and no one will notice.
Cook the second side for about 20–30 seconds. This side cooks faster, so don’t walk away. You’re looking for a lightly golden finish—not too crispy, but not doughy either.
Once done, transfer the pancake to your warm plate and continue with the rest of the batter. Give the pan a light butter touch every 2–3 pancakes to prevent sticking and keep that buttery flavor consistent.
Step 5 – Serving and Presentation
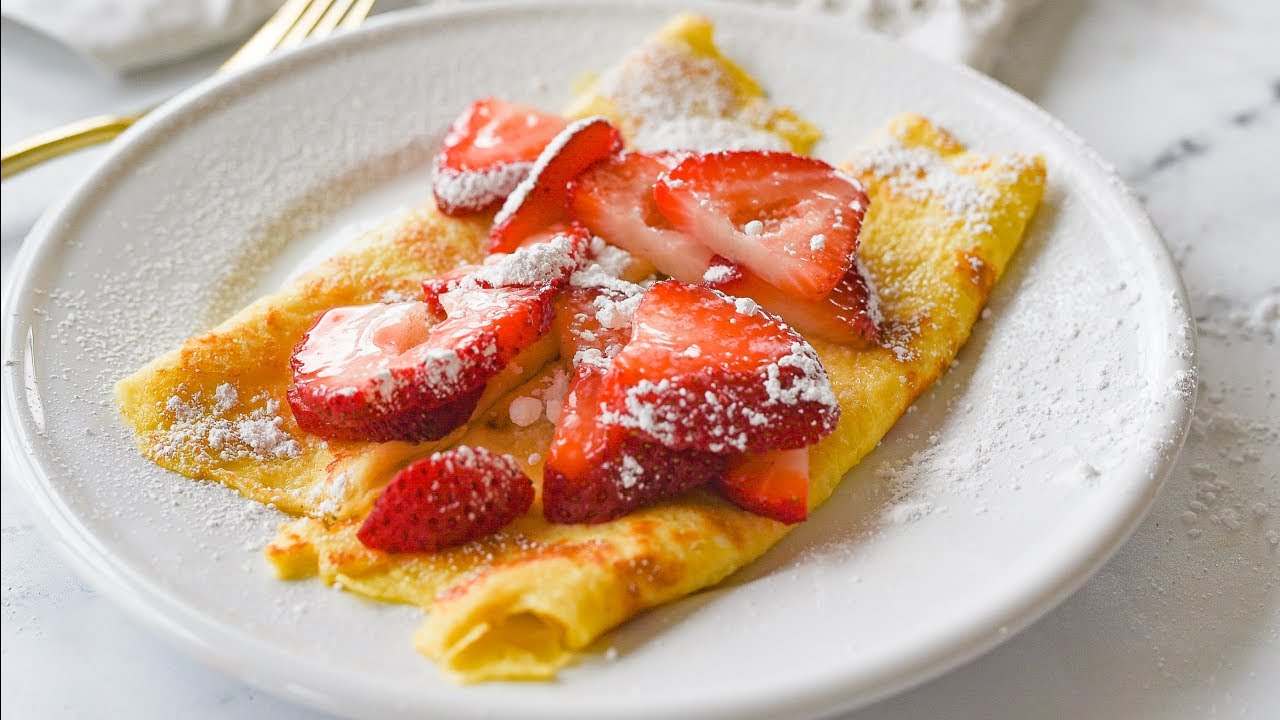
Swedish pancakes aren’t just delicious—they’re Instagram-worthy too. The classic method is to spread jam or berries across the surface, roll it up like a cigar, and dust with powdered sugar. Alternatively, fold them into quarters and add a dollop of whipped cream on top.
For a full Swedish breakfast experience, serve with lingonberry jam and crispy bacon or sausage. It’s the perfect blend of sweet and savory.
Want to go gourmet? Layer pancakes with cream cheese and fresh fruit in between, stack them high, and slice like a cake. Or create a savory crepe-style wrap with smoked salmon, crème fraîche, and chives.
Presentation tip: Use fresh herbs or edible flowers for garnish if you’re serving guests—it adds a professional touch that elevates the whole dish.
Tips and Tricks for the Perfect Pancake
Avoiding Common Mistakes
Even though Swedish pancakes are simple, a few mistakes can throw off your whole batch. Here’s what to watch out for:
- Too thick batter: This will result in chewy, heavy pancakes. Thin it with a splash of milk.
- Pan too hot: You’ll burn the outside before the inside cooks. Keep the heat moderate.
- Skipping the rest time: Batter needs a short rest to allow gluten to relax and air bubbles to settle. Don’t skip it if you want smooth pancakes.
- Overmixing: If using a whisk, mix just until combined. Overmixing can make pancakes rubbery.
- Wrong flipping technique: Don’t rush or force the flip. Wait for the edges to release naturally.
Make a mental note of these and you’ll become a pancake pro in no time.
Texture and Flavor Enhancements
Want to take your Swedish pancakes from good to mind-blowingly great? Here are some game-changers:
- Add vanilla extract or lemon zest to the batter for extra depth.
- Use buttermilk instead of regular milk for a subtle tang.
- Mix in cinnamon or cardamom for a Nordic spice twist.
- Cook them in brown butter for a nutty, caramelized flavor boost.
For savory versions, try adding chopped herbs or finely grated cheese into the batter. This small tweak creates endless possibilities, from brunch to light dinners.
Serving Ideas and Pairings
Sweet Toppings
Swedish pancakes shine brightest with sweet accompaniments. The traditional go-to? Lingonberry jam—a tangy, slightly sweet preserve that perfectly balances the buttery softness of the pancake. But don’t stop there. Here’s a list of irresistible sweet toppings to elevate your pancake game:
- Fresh berries (blueberries, raspberries, strawberries)
- Banana slices with a drizzle of honey
- Apple compote or spiced pears
- Whipped cream or crème fraîche
- Chocolate spread or Nutella
- Powdered sugar dusting
- Maple syrup or fruit syrups
- Yogurt with granola
Layer them up or try a new combo with each pancake. One fun idea? Set up a DIY toppings bar at your next brunch gathering and let everyone get creative with their favorite pairings. These pancakes are like a blank canvas—make them as indulgent or healthy as you like.
Savory Combinations
Don’t let the sweetness fool you—Swedish pancakes also know how to go savory. Their mild flavor makes them the perfect base for a range of hearty, elegant fillings. Here are some savory inspiration ideas:
- Smoked salmon with cream cheese and dill
- Sautéed mushrooms with garlic and thyme
- Shredded rotisserie chicken with a creamy herb sauce
- Feta cheese with spinach and sun-dried tomatoes
- Scrambled eggs and cheese
- Ham and Gruyère with Dijon mustard
Fold the pancake around your savory filling or serve open-faced with a fork and knife. These make an excellent light lunch or savory brunch option and pair beautifully with a fresh salad or a sparkling beverage.
Storage and Reheating Tips
Best Practices for Refrigeration
Made a batch of Swedish pancakes and have leftovers? Great! They store surprisingly well if done right. Place cooled pancakes in an airtight container or wrap them tightly in plastic wrap or foil. You can stack them, but it’s best to place parchment paper or wax paper between each pancake to prevent sticking.
Store in the refrigerator for up to 3–4 days. Beyond that, the texture may become rubbery or dry. When you’re ready to enjoy them again, reheating properly makes all the difference.
How to Reheat Without Losing Texture
Microwaving might be quick, but it often results in limp pancakes. Instead, try one of these methods:
- Stovetop: Warm each pancake in a non-stick skillet over medium heat for 30–60 seconds per side. This keeps the edges crisp and the center soft.
- Oven: Wrap the stack of pancakes in foil and bake at 300°F (150°C) for 10–15 minutes.
- Microwave (if in a rush): Place a damp paper towel over the pancake and microwave for 20–30 seconds.
Avoid overheating—they only need a quick warm-up to return to their tender, buttery selves. Reheated Swedish pancakes taste just as good the next day, especially with fresh toppings.
Nutritional Information
Caloric Content and Macros
While Swedish pancakes are thinner than American pancakes, they can still pack a caloric punch depending on how you top them. Here’s a rough estimate per pancake (plain, without toppings):
- Calories: ~90–110
- Protein: 3g
- Carbs: 12g
- Fat: 4g
Toppings can easily double or triple the calorie count. Add whipped cream, syrup, or jam, and you’re looking at 200–300 calories per pancake. Not that we’re complaining—they’re totally worth it.
That said, the high protein from the eggs and moderate fat content make Swedish pancakes a more balanced breakfast option than sugar-loaded cereals or pastries.
Making It Healthier
Want to lighten things up without sacrificing flavor? Try these tips:
- Use skim or plant-based milk to reduce fat.
- Swap sugar with a natural sweetener like stevia or honey.
- Use whole wheat flour or oat flour for extra fiber.
- Cook with coconut oil or avocado oil instead of butter.
- Add grated veggies like zucchini or carrots for a savory, nutrient-packed twist.
You can even serve them with Greek yogurt and fruit for a high-protein breakfast that keeps you full longer.
Variations of Swedish Pancakes
Vegan Swedish Pancakes
Yes, you can absolutely enjoy Swedish pancakes without eggs or dairy. Here’s a simple vegan version:
Ingredients:
- 2 cups plant-based milk (like almond or oat)
- 1 cup all-purpose flour
- 1 tbsp sugar
- 1 tbsp ground flaxseed + 3 tbsp water (egg substitute)
- 2 tbsp vegetable oil
- ¼ tsp salt
Mix the flaxseed and water first and let it sit for 10 minutes until gel-like. Then blend all the ingredients until smooth. Cook just like regular pancakes. These will be slightly softer but still deliciously satisfying.
Gluten-Free Options
For those avoiding gluten, Swedish pancakes are easily adaptable. Replace the all-purpose flour with any of these gluten-free alternatives:
- Rice flour
- Oat flour
- Almond flour (mixed with a binder like tapioca starch)
- Gluten-free flour blends
Just be aware: gluten-free batters can behave differently. You may need to adjust the liquid slightly for the right consistency. Also, let the batter rest a little longer (up to 45 minutes) to allow it to thicken and smooth out.
With the right tweaks, gluten-free and vegan Swedish pancakes can be just as indulgent and satisfying as the original.
FAQs about Swedish Pancake Recipe
1. Can I make Swedish pancakes in advance?
Yes! Make them the night before, stack with parchment paper in between, refrigerate, and reheat in a pan or oven when ready.
2. What is the best flour for Swedish pancakes?
All-purpose flour works best, but you can use whole wheat, oat, or gluten-free flour blends depending on dietary needs.
3. How thin should Swedish pancakes be?
Very thin—similar to crepes. Aim for a delicate texture that can be folded or rolled easily.
4. Are Swedish pancakes the same as crepes?
They’re similar but not identical. Swedish pancakes use more eggs and milk, resulting in a softer, richer pancake.
5. Can I freeze leftover pancakes?
Yes, wrap them individually or stack with parchment paper and freeze for up to 2 months. Reheat in a pan or oven before serving.
Conclusion
Swedish pancakes are more than just a meal—they’re an experience. Thin, buttery, and endlessly customizable, they’re the kind of breakfast that turns an ordinary morning into something special. Whether you go sweet or savory, traditional or modern, there’s no wrong way to enjoy these Scandinavian staples.
With simple ingredients, a few handy techniques, and your favorite toppings, anyone can master the art of Swedish pancakes. So grab that skillet, mix up some batter, and get flipping—because these pancakes are about to become your new go-to comfort food.


