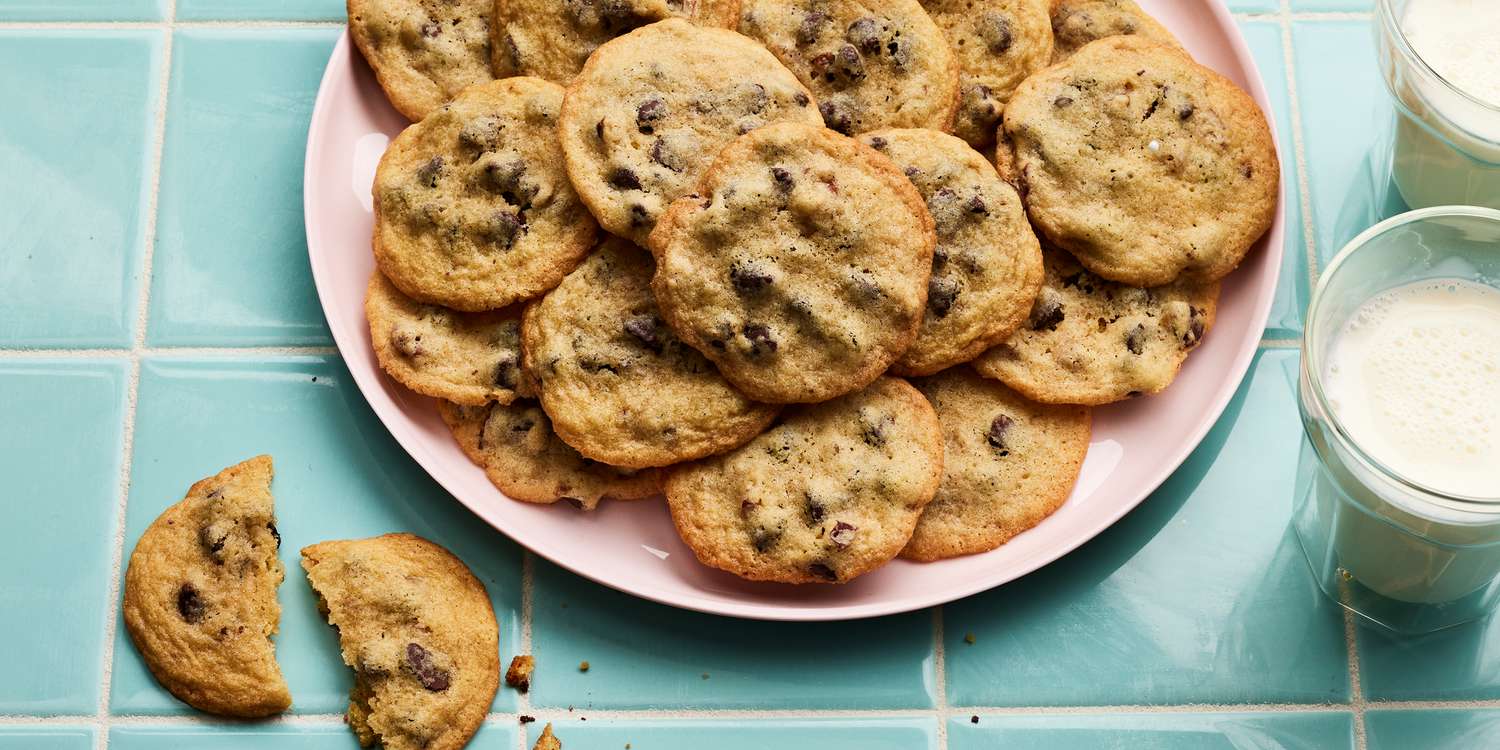
A Tollhouse chocolate chip cookie recipe is one of the most loved homemade cookie recipes because it delivers everything we expect from a perfect cookie: crisp golden edges, a soft chewy center, rich buttery flavor, and generous pockets of melted chocolate. This classic cookie has remained a favorite for generations because it is simple, reliable, and deeply satisfying.
When we prepare Tollhouse chocolate chip cookies at home, the goal is not just to mix flour, sugar, butter, eggs, and chocolate chips. The goal is to create cookies with the right texture, flavor, thickness, and aroma. Every step matters, from softening the butter correctly to measuring the flour accurately and baking the cookies just until the edges turn lightly golden.
This guide gives us a complete, step-by-step method for making homemade Tollhouse chocolate chip cookies with bakery-style results. We will cover the ingredients, preparation method, baking tips, storage instructions, and common mistakes to avoid.
Ingredients You’ll Need for Tollhouse Chocolate Chip Cookies
To make a rich and flavorful batch of Tollhouse chocolate chip cookies, we need simple pantry ingredients that work together to create the perfect cookie dough.
Dry Ingredients
- 2 ¼ cups all-purpose flour
- 1 teaspoon baking soda
- 1 teaspoon salt
Wet Ingredients
- 1 cup unsalted butter, softened
- ¾ cup granulated sugar
- ¾ cup packed brown sugar
- 2 large eggs
- 2 teaspoons vanilla extract
Chocolate and Add-Ins
- 2 cups semi-sweet chocolate chips
- 1 cup chopped nuts, optional
The all-purpose flour gives the cookies structure. Baking soda helps the cookies spread and rise slightly while baking. Salt balances the sweetness and enhances the chocolate flavor. Butter adds richness, tenderness, and that classic cookie aroma. The combination of granulated sugar and brown sugar creates the ideal balance of crisp edges and chewy centers. Eggs bind the dough together, while vanilla extract deepens the overall flavor. Finally, semi-sweet chocolate chips give the cookies their signature taste.
Best Equipment for Making Tollhouse Chocolate Chip Cookies
Before we start baking, we should prepare the right tools. A good cookie recipe becomes easier and more consistent when we use proper equipment.
We need a large mixing bowl, a medium mixing bowl, a hand mixer or stand mixer, measuring cups, measuring spoons, a rubber spatula, a baking sheet, parchment paper, and a cooling rack. A cookie scoop is also helpful because it allows us to portion the dough evenly, which helps every cookie bake at the same speed.
Using parchment paper prevents sticking and helps the bottoms of the cookies bake evenly. A cooling rack allows air to circulate around the cookies after baking, preventing them from becoming soggy.
Step-by-Step Guide to Making Tollhouse Chocolate Chip Cookies
Step 1: Preheat the Oven
We begin by preheating the oven to 375°F. A properly heated oven is important because cookie dough needs immediate heat to spread, rise, and set correctly. If the oven is too cool, the cookies may spread too much and become flat. If the oven is too hot, the edges may brown too quickly while the centers remain underbaked.
While the oven heats, we line our baking sheets with parchment paper. This keeps the cookies from sticking and makes cleanup easier.
Step 2: Combine the Dry Ingredients
In a medium bowl, we whisk together the all-purpose flour, baking soda, and salt. Whisking the dry ingredients first helps distribute the baking soda and salt evenly throughout the flour.
This step is important because uneven baking soda can cause some cookies to rise too much while others remain dense. Properly mixed dry ingredients help create consistent texture in every cookie.
Step 3: Cream the Butter and Sugars
In a large mixing bowl, we beat the softened butter, granulated sugar, brown sugar, and vanilla extract until the mixture becomes creamy and smooth.
This is one of the most important steps in the entire recipe. Creaming butter and sugar adds air to the dough, which helps the cookies bake with a lighter texture. The butter should be soft but not melted. Softened butter blends smoothly with the sugars, while melted butter can make the dough greasy and cause excessive spreading.
The mixture should look pale, fluffy, and creamy before we move to the next step.
Step 4: Add the Eggs One at a Time
Next, we add the eggs one at a time, beating well after each addition. Adding eggs gradually helps the dough stay smooth and properly combined.
Eggs add moisture, structure, and richness to the cookie dough. They help bind the ingredients and give the cookies a tender bite. If we add both eggs at once and mix too quickly, the dough may not emulsify properly. Adding them one at a time gives us a smoother, more stable dough.
Step 5: Gradually Add the Flour Mixture
Once the wet ingredients are smooth, we gradually add the dry ingredients into the butter mixture. We mix on low speed or stir gently with a spatula until the flour is just combined.
We should avoid overmixing at this stage. Overmixing develops too much gluten in the flour, which can make the cookies tough instead of soft and chewy. The dough should look thick, smooth, and slightly sticky.
Step 6: Fold in the Chocolate Chips
After the dough is mixed, we fold in the semi-sweet chocolate chips. If we are using chopped nuts, we add them at this stage as well.
Folding means gently stirring the chocolate chips through the dough until they are evenly distributed. This ensures every cookie has plenty of chocolate in each bite. We can also reserve a small handful of chocolate chips to press on top of the dough balls before baking for a more attractive bakery-style finish.
Step 7: Portion the Cookie Dough
Using a spoon or cookie scoop, we drop rounded portions of dough onto the prepared baking sheets. Each dough ball should be spaced about 2 inches apart to allow room for spreading.
For standard cookies, we can use about one tablespoon of dough per cookie. For larger bakery-style cookies, we can use two to three tablespoons of dough, but the baking time may need to be adjusted slightly.
Keeping the portions even is important because cookies of the same size bake more consistently.
Step 8: Bake the Cookies
We bake the cookies in the preheated oven for 9 to 11 minutes, or until the edges are lightly golden and the centers still look slightly soft.
The key to soft and chewy Tollhouse chocolate chip cookies is removing them from the oven before they look completely firm. Cookies continue to set on the baking sheet after they come out of the oven. If we wait until the centers look fully baked inside the oven, the cookies may become dry or overly crisp once cooled.
Step 9: Cool the Cookies Properly
After baking, we allow the cookies to rest on the baking sheet for about 2 minutes. This gives them time to firm up slightly so they do not break when moved.
Then we transfer them to a wire cooling rack. Cooling the cookies on a rack prevents trapped steam from softening the bottoms. This helps maintain the perfect balance of crisp edges and soft centers.
Tips for Perfect Tollhouse Chocolate Chip Cookies
For the best results, we should measure the flour carefully. Too much flour can make the cookies dry and dense. The best method is to spoon the flour into the measuring cup and level it off with a flat edge.
We should also make sure the butter is softened, not melted. Softened butter should hold its shape but give slightly when pressed. Melted butter can cause the cookies to spread too thin.
For thicker cookies, we can chill the dough for 30 minutes before baking. Chilling helps control spreading and allows the flavors to develop. This step is especially useful when baking in a warm kitchen.
For extra flavor, we can use a mix of semi-sweet chocolate chips and dark chocolate chunks. This creates deeper chocolate flavor and a more luxurious texture.
How to Make Chewy Tollhouse Chocolate Chip Cookies
To make the cookies chewier, we can slightly increase the brown sugar and reduce the granulated sugar. Brown sugar contains more moisture, which helps create a softer texture.
We can also avoid overbaking. The cookies should look slightly underdone in the center when removed from the oven. As they cool, they will finish setting while staying soft inside.
Another helpful method is chilling the dough before baking. Rested dough absorbs moisture more evenly, giving the cookies a richer flavor and better chew.
How to Make Crispy Tollhouse Chocolate Chip Cookies
For crispier cookies, we can bake them for an extra one to two minutes until the edges are deeper golden brown. We can also make the dough portions slightly smaller and flatter before baking.
Using more granulated sugar than brown sugar can also create a crispier texture. Granulated sugar encourages spreading and gives the cookies a lighter crunch.
Common Mistakes to Avoid
One common mistake is using butter that is too warm or melted. This can make the cookies greasy and flat. Another mistake is overmixing the dough after adding flour, which can make the cookies tough.
We should also avoid placing cookie dough on a hot baking sheet. A hot sheet can melt the dough before it enters the oven, causing the cookies to spread too much. If we are baking multiple batches, we should allow the baking sheet to cool before adding more dough.
Overbaking is another major issue. Cookies should be removed when the edges are set and the centers still look soft.
How to Store Tollhouse Chocolate Chip Cookies
Once the cookies are completely cool, we store them in an airtight container at room temperature. They usually stay fresh for about 4 to 5 days.
To keep them soft, we can place a small piece of bread in the container. The cookies absorb moisture from the bread, helping them maintain a tender texture.
For longer storage, we can freeze baked cookies in a freezer-safe bag or container. They can be frozen for up to 3 months. When ready to enjoy, we let them thaw at room temperature.
How to Freeze Tollhouse Cookie Dough
Freezing cookie dough is a great way to enjoy fresh cookies anytime. We scoop the dough into balls, place them on a baking sheet, and freeze until firm. Once frozen, we transfer the dough balls into a freezer-safe bag.
When baking frozen dough, we can place the dough balls directly on a prepared baking sheet and bake from frozen. We may need to add 1 to 2 extra minutes to the baking time.
This method is perfect for quick desserts, family treats, lunchbox snacks, or last-minute guests.
Serving Ideas for Tollhouse Chocolate Chip Cookies
These cookies are delicious on their own, but they can also be served in several creative ways. We can enjoy them warm with a glass of milk, serve them with vanilla ice cream, or use them to make cookie sandwiches.
For dessert platters, we can pair them with brownies, oatmeal cookies, and fresh fruit. For special occasions, we can drizzle cooled cookies with melted chocolate or sprinkle a little flaky salt on top before baking.
FAQs for about Toll House Chocolate Chip Cookie Recipe
1. What makes Toll House chocolate chip cookies special?
Toll House chocolate chip cookies are classic, buttery cookies known for their soft centers, lightly crisp edges, and rich chocolate flavor. They are one of the most popular homemade cookie recipes.
2. Can we chill the dough before baking?
Yes. Chilling the dough for at least 30 minutes helps the cookies hold their shape and creates a richer flavor. It can also prevent the cookies from spreading too much in the oven.
3. Why did my cookies turn out flat?
Cookies may turn flat if the butter is too soft, the dough is too warm, or there is not enough flour. For best results, measure ingredients correctly and avoid placing dough on a hot baking tray.
4. Can we use different types of chocolate chips?
Yes. We can use semi-sweet, milk chocolate, dark chocolate, or even white chocolate chips. Semi-sweet chocolate chips are the traditional choice for Toll House cookies.
5. How should Toll House chocolate chip cookies be stored?
Store the cookies in an airtight container at room temperature for up to 5 days. To keep them soft, we can place a small piece of bread in the container.
Final Thoughts
A well-made Tollhouse chocolate chip cookie recipe gives us cookies that are buttery, chocolate-filled, soft in the center, and lightly crisp around the edges. By using quality ingredients, measuring carefully, mixing properly, and baking at the right temperature, we can create cookies that taste homemade, classic, and memorable.
This recipe is simple enough for beginners and reliable enough for experienced bakers. Whether we are baking for family, guests, holidays, school snacks, or personal cravings, these homemade Tollhouse chocolate chip cookies deliver comfort and flavor in every bite.


