Summer Tortellini Skillet Recipe: Looking for a quick, flavorful, and totally satisfying summer dinner idea? Meet your new go-to: the Summer Tortellini Skillet. This vibrant, one-pan wonder is everything you want in a warm-weather meal—bright, fresh veggies, cheesy tortellini, and the kind of easy prep that leaves you more time to enjoy those golden evenings. No oven, no hassle, just a sizzling skillet full of comfort and color.
Why is it a summer superstar? For starters, it celebrates seasonal ingredients like zucchini, cherry tomatoes, and fresh basil. Plus, it’s ready in under 30 minutes. You can whip it up for a lazy weeknight dinner, or dress it up for a backyard gathering. Think of it as your summer escape—just in edible form.
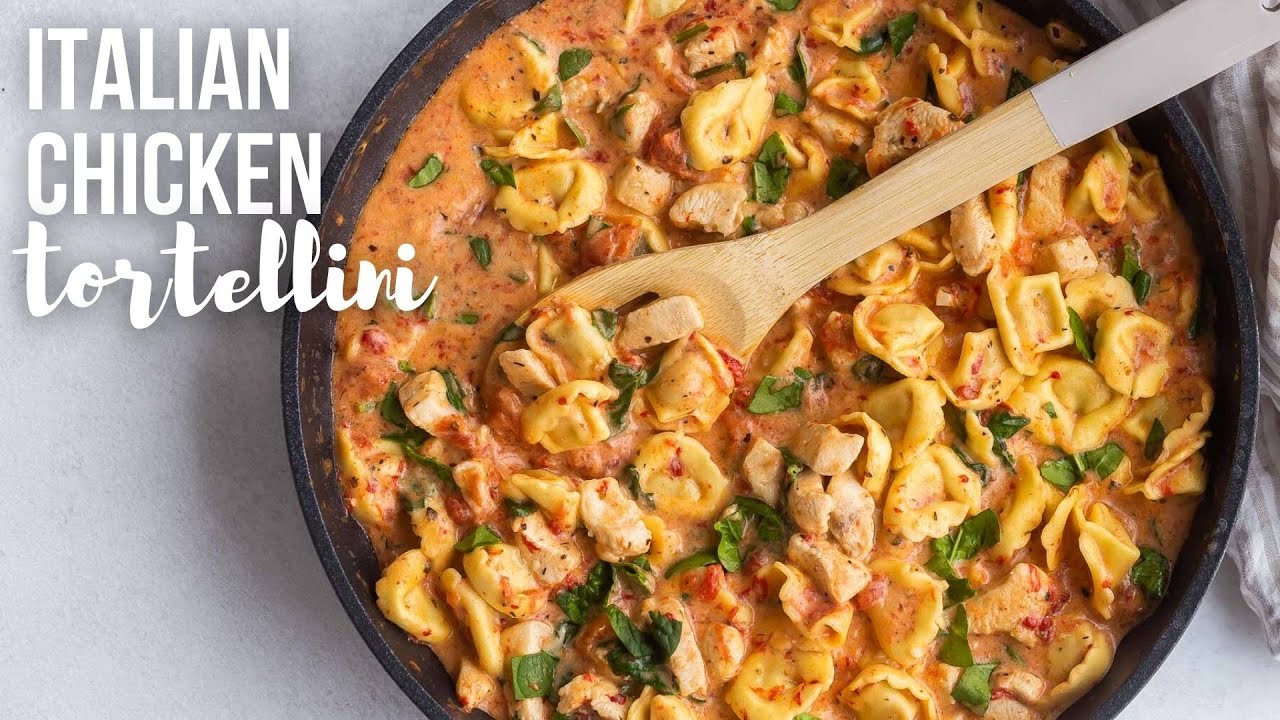
This skillet recipe doesn’t just taste good; it’s also visually stunning. Bursts of red, green, and yellow make it as much a feast for the eyes as for your taste buds. And the best part? It’s endlessly customizable. Keep reading to get every juicy, cheesy detail of this delightful summer dish.
Ingredients You’ll Need
To bring this seasonal delight to life, you only need a handful of ingredients. Most are either pantry staples or easy to grab on your next market run. Let’s break it down:
Main Ingredients
- 1 package of cheese tortellini (fresh or refrigerated) – This is the star of the show. Its creamy, cheesy center adds richness and body.
- 1 zucchini, sliced thin
- 1 bell pepper (any color), chopped
- 1 cup cherry tomatoes, halved
- 2 cloves garlic, minced
- ¼ cup red onion, finely sliced
- 2 tablespoons olive oil
Seasonings & Garnishes
- Salt and pepper to taste
- 1 teaspoon Italian seasoning
- Fresh basil leaves for garnish
- Parmesan cheese (optional)
Optional Add-Ons
- Grilled chicken or shrimp for extra protein
- Red chili flakes if you like a little heat
- A splash of lemon juice for brightness
- Spinach or kale for a leafy twist
This ingredient list is just the beginning. Depending on your cravings and what’s in your fridge, you can throw in extras like mushrooms, peas, or even artichoke hearts. It’s versatile, forgiving, and always delicious.
Kitchen Tools Required
This recipe keeps things simple—no fancy gadgets, no complicated prep. Just grab your basic kitchen essentials and you’re good to go.
Must-Have Tools
- Large skillet – A 10–12 inch non-stick or cast iron skillet works perfectly.
- Medium saucepan – For boiling the tortellini.
- Cutting board and sharp knife – To prep your veggies quickly and safely.
- Wooden spoon or spatula – For stirring and combining ingredients.
- Colander – To drain the tortellini after boiling.
Nice-to-Haves
- A zester for lemon or parmesan
- Herb scissors for fresh basil
- Tongs for flipping or stirring more delicately
Having these tools on hand helps streamline the cooking process. Plus, when everything is prepped and ready to go, the actual cook time flies by.
Preparation Tips Before You Cook
Here’s a secret: good prep makes cooking this recipe a breeze. Spend just 10 extra minutes upfront, and you’ll save double that during cooking (and avoid kitchen chaos).
1. Prep the Tortellini
If using fresh tortellini, keep them chilled until just before cooking. If using frozen, let them thaw slightly to prevent breakage. Either way, make sure to read the package instructions for ideal cook times—overboiling leads to mushy pasta, and no one wants that.
2. Chop Veggies Uniformly
Uniform slicing ensures even cooking. Thin slices for zucchini, medium chops for bell pepper, and halved cherry tomatoes make for a great texture mix. Don’t forget to mince that garlic fine—it infuses the oil beautifully.
3. Keep a “Mise en Place” Setup
Have all your chopped ingredients and seasonings ready in bowls before you start cooking. It’s a pro trick that makes one-skillet cooking seamless.
4. Optional Marination for Protein Add-Ons
If adding grilled chicken or shrimp, season them ahead of time with garlic, olive oil, lemon juice, and herbs. Let them marinate for at least 15 minutes while you prep the rest. It boosts flavor like magic.
Step-by-Step Cooking Instructions
Let’s dive into the magic moment—bringing all those beautiful ingredients together in your skillet.
Step 1: Boil the Tortellini
Fill a medium saucepan with water, add a generous pinch of salt, and bring it to a boil. Toss in the tortellini and cook according to package directions—usually 3 to 5 minutes. Stir occasionally so they don’t stick. When they float to the top, they’re done.
Drain immediately using a colander and rinse quickly with cold water to stop the cooking. Set aside in a bowl with a touch of olive oil so they don’t clump together. This step sets the foundation of your dish, so don’t skip it!
Step 2: Sauté the Veggies
Now it’s time to bring some life into the skillet. Heat 2 tablespoons of olive oil in your large skillet over medium heat. Once the oil shimmers, toss in the red onions and sauté for about 2 minutes until they soften and become fragrant. Add the minced garlic next and stir for another 30 seconds—don’t let it burn, just let it wake up the oil with flavor.
Next, add your sliced zucchini and chopped bell pepper. Cook them for about 5-7 minutes until they start to soften but still have a slight crunch. This is important—they shouldn’t be mushy! Finally, add the cherry tomatoes and sauté everything together for another 2-3 minutes until the tomatoes just start to blister and release a bit of juice. The key here is to cook just long enough to enhance the freshness without overdoing it. You want vibrant, lively textures—not soggy veggies.
If you’re using any optional greens like spinach or kale, toss them in now and stir just until wilted. The skillet should be looking colorful and smelling incredible by this point.
Step 3: Combine Tortellini with Vegetables
Time to marry the pasta and the veggies. Gently add your cooked tortellini into the skillet with the sautéed veggies. Stir carefully so you don’t break the tender pasta. The goal is to coat each piece of tortellini in all those juices and flavors from the vegetables and garlic.
If the skillet looks a bit dry, you can splash in a little vegetable broth or reserved pasta water to create a light sauce. This step also lets the tortellini soak up the flavor from the sautéed ingredients. Keep the heat on low and let everything cook together for 2-3 minutes, stirring occasionally.
This is where the flavors really start to build. The tortellini will begin to absorb the aromatic oils and tomato juice, creating a luscious, light coating that doesn’t need any heavy cream or complicated sauces.
Step 4: Add Seasonings and Herbs
Once everything is well-mixed and heated through, it’s time to take the flavor to the next level. Sprinkle in salt, freshly ground pepper, and 1 teaspoon of Italian seasoning. If you like a kick, now’s the time to add red pepper flakes. Stir gently to distribute the seasoning evenly.
Turn off the heat and toss in a generous handful of fresh basil leaves. Tear them with your hands instead of chopping to preserve their delicate flavor. If you’re using Parmesan cheese, grate some over the top and let it melt slightly from the residual heat. That combo of herbs and cheese gives the dish a summery, gourmet vibe without much effort.
Want a little zing? A quick squeeze of lemon juice or a dash of balsamic vinegar right before serving can brighten the whole dish.
Step 5: Let it Simmer and Serve
Once seasoned, let the skillet sit covered for about 2-3 minutes off the heat. This allows all the flavors to meld and the residual heat to keep the dish warm without overcooking anything.
Now you’re ready to plate. Spoon generous helpings into shallow bowls, making sure each serving has a colorful mix of tortellini and veggies. Top with more basil and grated cheese if you’re feeling extra. Want to go fancy? Add a drizzle of olive oil or balsamic glaze across the top for that Instagram-worthy finish.
Serve immediately while warm. Pair with a crisp white wine or iced lemonade for the ultimate summer dining experience. Whether you’re enjoying it indoors or on a sunny patio, this dish delivers comfort and sunshine in every bite.
Customization Ideas
What’s truly magical about this Summer Tortellini Skillet is how easy it is to customize. Think of it as your culinary canvas—just swap, mix, or match ingredients based on your preferences, dietary needs, or what you’ve got in your fridge.
Add a Protein Boost
Want more protein to make it a full-fledged dinner? Easy.
- Grilled chicken: Sliced and tossed in at the end adds hearty flavor.
- Shrimp: Quick-cooking and light—perfect for warm evenings.
- Tofu: Marinated tofu works beautifully if you’re going meatless.
- Chickpeas or white beans: For a plant-based protein hit, stir in a can of beans with your veggies.
Cheese Lovers’ Variation
Already cheesy with tortellini? Sure—but more cheese never hurts.
- Add dollops of ricotta before serving for a creamy texture.
- Sprinkle shredded mozzarella into the skillet and let it melt into gooey perfection.
- Go bold with crumbled feta or goat cheese to add a tangy contrast to the sweet veggies.
Go Vegan
Make it plant-based without losing the essence.
- Use vegan tortellini—many grocery stores now offer dairy-free options.
- Skip the cheese or swap with nutritional yeast for a savory punch.
- Load up on more veggies like mushrooms, corn, or roasted eggplant.
Switch Up the Veggies
Not a fan of zucchini? No problem.
- Try asparagus tips, broccoli florets, or snap peas for crunch.
- Use sun-dried tomatoes for deeper flavor if fresh aren’t available.
- A handful of arugula at the end adds a peppery finish.
No matter how you remix it, the dish stays bright, fresh, and satisfying—just how summer meals should be.
Storage and Reheating Tips
Whether you’re prepping for a busy week or have leftovers from dinner, the Summer Tortellini Skillet holds up beautifully with a few simple storage tricks.
How to Store
- Let the skillet cool to room temperature before storing.
- Transfer the leftovers into an airtight container.
- Store in the refrigerator for up to 3-4 days.
Pro tip: Store any added cheese (like ricotta or feta) separately to keep textures fresh when reheating.
Reheating Without Losing Flavor
- Microwave: Heat in 30-second intervals, stirring between to evenly warm.
- Skillet: Add a splash of water or broth and warm over medium heat. Stir gently to avoid breaking the tortellini.
- Oven: If you’re reheating a large batch, cover with foil and bake at 350°F (175°C) for 10-15 minutes.
Avoid overcooking during reheating—especially in the microwave—so the tortellini doesn’t become rubbery.
Freezing?
Not ideal. The texture of tortellini can suffer, especially when it’s already cooked. However, if you must freeze it, do so in a freezer-safe container and eat within a month. Thaw overnight in the fridge before reheating.
Nutritional Benefits
This skillet doesn’t just taste great—it also packs a healthy punch when made with balance in mind.
Nutrient Breakdown
- Carbs: Tortellini provides a good source of energy through complex carbs.
- Protein: Boost with add-ons like chicken, beans, or tofu for a well-rounded meal.
- Fiber: The abundance of summer vegetables like zucchini, tomatoes, and bell peppers keeps your digestion in check.
- Healthy Fats: Olive oil is rich in heart-healthy fats and brings flavor and function to the skillet.
Low-Guilt Indulgence
Compared to heavy cream-based pasta dishes, this one is light, veggie-packed, and far easier to digest during hot weather. Want to reduce calories? Skip the extra cheese, go for whole wheat or vegan tortellini, and lean heavier on the veggies.
Fits Many Diets
- Vegetarian: 100% as-is.
- Vegan: Simple swaps make it totally plant-based.
- Low-sodium: Easy to control salt levels when cooking at home.
- Gluten-free: Just sub in gluten-free tortellini, which are becoming more common in stores.
This recipe proves that you don’t have to sacrifice flavor to eat well—especially in summer when the best ingredients are at your fingertips.
Pairing Suggestions
Want to complete the perfect summer dinner? Let’s talk sides and drinks that make this dish shine.
Beverages
- White wine: A crisp Sauvignon Blanc or Pinot Grigio pairs perfectly with the herbs and light pasta.
- Iced tea with lemon and mint: Refreshing, simple, and family-friendly.
- Sparkling water with cucumber slices: Adds a spa-like vibe to your meal.
Side Dishes
- Garlic bread or grilled flatbread to scoop up every last bite.
- Simple green salad with a balsamic vinaigrette balances the rich tortellini.
- Roasted corn on the cob with lime butter keeps it seasonal and fun.
Want a show-stopping combo? Serve the skillet with a chilled pasta salad as an appetizer and a peach cobbler for dessert. That’s summer on a plate, start to finish.
Common Mistakes to Avoid
Even though this recipe is beginner-friendly, there are a few common slip-ups that could sabotage your skillet success. Let’s walk through them so you can avoid them like a pro.
1. Overcooking the Tortellini
This is the number one mistake—and the easiest to avoid. Tortellini cooks fast, often in under five minutes. Leave it in boiling water too long, and it turns to mush. Always follow the package instructions and test a piece for doneness. Once it floats, it’s usually done.
Pro tip: Rinse with cold water after boiling to stop the cooking process instantly.
2. Overcrowding the Skillet
Tempting as it is to dump everything in at once, too many ingredients crammed into your pan will steam instead of sauté. This leads to soggy, lifeless veggies. Use a large skillet and give your veggies room to breathe so they can brown slightly and keep their texture.
3. Skipping the Seasoning
Don’t rely solely on the tortellini filling for flavor. This dish shines when you layer in salt, pepper, Italian seasoning, and fresh herbs. Skipping them makes your skillet flat and forgettable.
4. Not Draining Veggies
If your tomatoes release too much liquid and you don’t let it simmer off, you might end up with a watery sauce. Let the skillet simmer a few minutes uncovered before combining with the tortellini to reduce any excess moisture.
5. Adding Cheese Too Early
If you add cheese while the skillet is still on high heat, it may melt too quickly and clump or burn. Instead, stir in delicate cheeses like ricotta or feta after removing from heat, or sprinkle on just before serving.
Avoiding these pitfalls keeps your dish looking and tasting like it came straight from a summer bistro—even if you made it barefoot in your kitchen.
FAQs about Summer Tortellini Skillet Recipe
1. Can I freeze this dish?
Freezing cooked tortellini isn’t ideal as it can get mushy upon thawing. If you must freeze, let it cool completely, store it in an airtight container, and eat within one month. Thaw overnight in the fridge and reheat gently.
2. What if I don’t have fresh tortellini?
No problem! Frozen tortellini works just as well—just cook according to package directions. Dry tortellini is an option too, though it may require a longer cook time and slightly more sauce to soften.
3. What herbs go best with this dish?
Fresh basil is the classic choice, but you can also use parsley, thyme, oregano, or even mint for a unique twist. A dash of Italian seasoning helps tie it all together.
4. How can I make it spicier?
Add red chili flakes, a pinch of cayenne pepper, or even diced jalapeños when sautéing the veggies. You could also top it with spicy sausage or hot sauce for an extra kick.
5. Is this meal kid-friendly?
Absolutely. Most kids love tortellini, and the vegetables can be chopped small or even pureed into the sauce if you’re dealing with picky eaters. Stick to milder seasonings and skip the spice for a family-friendly version.
Conclusion
It’s the kind of meal that makes you feel like a chef without spending hours in a hot kitchen. From the juicy tomatoes and sautéed zucchini to the cheesy tortellini and aromatic herbs, every bite is bursting with seasonal joy.
Plus, with how customizable it is, this one-skillet wonder can be whatever you want it to be—light and veggie-forward, hearty and meaty, dairy-rich, or fully vegan. Serve it up with your favorite summer drink and a slice of crusty bread, and you’ve got yourself a dinner worth repeating all season long.
So grab your skillet, hit up the farmers’ market, and bring this summer classic to life. Your taste buds (and your dinner guests) will thank you.


