Best Tiramisu Recipe: Tiramisu isn’t just a dessert—it’s an experience. A cloud of creamy mascarpone, layers of coffee-soaked ladyfingers, and a dusting of cocoa that feels like love at first bite. This isn’t just any recipe.
This is your golden ticket to making the best, authentic, Italian tiramisu that’ll impress guests, family, or anyone lucky enough to get a slice.
Let’s break it down step by step, with tips, tricks, and the kind of culinary love that only tiramisu can inspire.
What is Tiramisu?
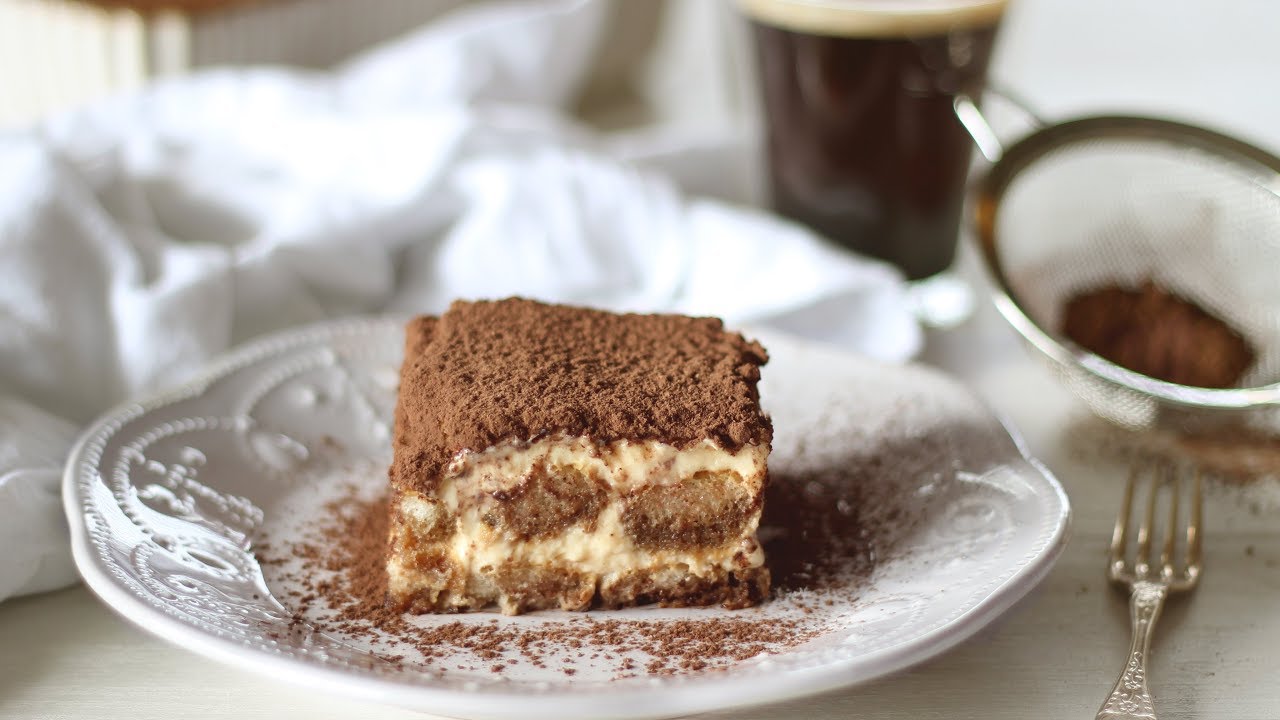
Tiramisu is a classic Italian dessert known for its rich flavor and light texture. The name “Tiramisu” literally means “pick me up” or “cheer me up” in Italian—and honestly, that’s exactly what it does. This no-bake dessert is traditionally made of layers of ladyfinger biscuits (savoiardi) dipped in espresso, spread with a whipped mixture of eggs, sugar, and mascarpone cheese, and finished with a generous dusting of cocoa powder.
This isn’t just a sweet treat—it’s a decadent expression of Italian culinary tradition. Its creamy yet airy texture, combined with the bold notes of coffee and chocolate, offers an irresistible experience for the palate. One bite, and you’re transported straight to a cozy café in Rome.
Origin and Cultural Significance
While many regions in Italy claim to be the birthplace of tiramisu, most food historians trace its roots to the Veneto region, specifically Treviso. Originally crafted in the 1960s or 70s, it was believed to be a modern twist on traditional layered desserts. Over the decades, it’s gone from being a restaurant favorite to a globally beloved homemade delight.
Culturally, tiramisu is more than dessert—it’s a celebration. It’s a staple at birthdays, weddings, and holidays in Italian households. And now, you’re about to learn how to bring that tradition into your own kitchen.
Key Ingredients Needed
Essential Ingredients List
Before you start, gather everything you need. Here’s a list of the core ingredients that make tiramisu truly magical:
- Ladyfingers (Savoiardi): These are dry, sponge-like biscuits that absorb espresso without falling apart.
- Espresso or Strong Coffee: Rich and bold, coffee is the heart of the tiramisu flavor profile.
- Mascarpone Cheese: Creamy, smooth, and slightly tangy, this cheese creates that lush, velvety filling.
- Egg Yolks: Used to create a thick custard base for the cream layer.
- Granulated Sugar: Adds sweetness and structure to the cream.
- Heavy Cream (or Whipping Cream): When whipped, it gives volume and lightness to the mascarpone mixture.
- Cocoa Powder: A final dusting gives that classic tiramisu finish.
- Coffee Liqueur (Optional): A splash of Kahlúa or Marsala wine enhances depth of flavor.
Why Quality Ingredients Matter
Here’s the thing—tiramisu has a relatively short list of ingredients, so every single one counts. Go for the best you can get. Use freshly brewed espresso instead of instant coffee. Choose a high-quality mascarpone cheese with a fresh, clean taste. Organic eggs and fresh cream will make the custard taste like heaven. If you can, find authentic Italian ladyfingers—they have a crunchier texture that holds up better to the espresso soak.
Remember, tiramisu is all about balance: creamy yet light, sweet yet bold. The better your ingredients, the more unforgettable your dessert will be.
Equipment You’ll Need
Basic Kitchen Tools
You don’t need fancy equipment to make tiramisu, but having the right tools makes things smoother. Here’s a quick checklist:
- Mixing bowls (medium and large)
- Electric hand mixer or stand mixer
- Rubber spatula
- Whisk
- Measuring cups and spoons
- 9×9 inch or 9×13 inch baking dish (depending on how thick you want your layers)
- Fine mesh sieve (for dusting cocoa powder)
Optional Tools for Precision
If you’re a kitchen perfectionist, here are some bonus tools:
- Kitchen scale (for exact measurements)
- Piping bag (for neater cream layers)
- Offset spatula (for smooth spreading)
- Thermometer (to monitor egg temperature if using a cooked custard method)
Even with just the basics, you’re fully equipped to whip up an incredible tiramisu. But these extras can help you reach dessert nirvana.
Preparing the Ingredients
Step-by-Step Breakdown
This isn’t a dessert you want to rush. Take your time with the prep—every layer should be thoughtful and delicious.
- Brew the Espresso: Use strong espresso, about 1 to 1.5 cups. Let it cool to room temperature before using. Add a tablespoon or two of coffee liqueur if you like a boozy kick.
- Separate the Eggs: Carefully separate the yolks from the whites. You’ll only need the yolks for the custard base.
- Measure Out Ingredients: Get your sugar, mascarpone, cream, and ladyfingers ready. Having a clean setup makes the process way more enjoyable.
- Chill the Bowl and Whisk (Optional): If you want your whipped cream to form faster and stay stable, chill your mixing bowl and whisk for about 10 minutes in the freezer.
Tips for Freshness and Flavor
- Use Fresh Espresso: Pre-brewed or day-old coffee loses flavor. Always brew fresh.
- Keep Ingredients Cold: Cold mascarpone and cream whip better and hold structure.
- Taste as You Go: Adjust the sweetness in the cream to your liking. Not too sweet? Add a touch more sugar.
Making the Perfect Mascarpone Cream
Beating Egg Yolks and Sugar
Start by beating the egg yolks and sugar together. Use a hand mixer to beat them until the mixture turns pale yellow and thick—this takes about 5–7 minutes. This base is crucial—it gives your tiramisu that luscious, melt-in-your-mouth quality. You’re looking for a ribbon-like consistency when the beaters are lifted.
Now, this step can vary. Some recipes call for heating the yolks over a double boiler to create a zabaglione (Italian egg custard). If you’re worried about raw eggs, you can definitely go that route. Just whisk the yolks and sugar over simmering water until they reach 160°F (70°C) to kill any bacteria.
Folding in Mascarpone and Whipped Cream
Next, gently fold the mascarpone cheese into your egg yolk mixture. Don’t overmix—just stir until it’s fully incorporated and smooth.
Separately, whip your cold heavy cream until stiff peaks form. This takes about 3–5 minutes with a hand mixer. Then, fold the whipped cream into the mascarpone mixture in batches. Use a gentle folding motion with a spatula to keep the cream airy and fluffy.
When done right, your mascarpone cream should be light, smooth, and hold its shape. Taste it—it should feel like a cloud of joy on your tongue.
Assembling the Tiramisu
Layering the Ladyfingers and Cream
Now that you’ve got your mascarpone cream ready and your espresso cooled, it’s time to build the tiramisu. This is where the magic happens.
Start by dipping each ladyfinger into the espresso. Don’t soak—just a quick dip! These biscuits are like sponges, and if you overdo it, they’ll turn to mush. A 1–2 second dip per side is perfect. Place each dipped ladyfinger in your baking dish, lining them up closely to cover the bottom entirely.
Next, spread a generous layer of the mascarpone cream over the soaked ladyfingers. Use a spatula to smooth it out evenly.
Repeat the process with a second layer of dipped ladyfingers and top it with the remaining cream. Depending on your dish’s size and depth, you might get two or three layers. The top should be a smooth, even layer of that gorgeous mascarpone mixture.
Tips for a Neat Assembly
- Use a piping bag for clean, even layers.
- Clean the edges with a paper towel for a picture-perfect finish.
- Tap the dish lightly on the counter to eliminate air pockets.
Remember, presentation is key. But don’t stress—this dessert is forgiving and always tastes incredible, even if it’s a bit rustic.
Chilling Time – The Key to Great Tiramisu
Why Tiramisu Needs Time to Set
Here’s the hardest part—waiting. But trust me, it’s worth it. After assembling your tiramisu, cover it with plastic wrap or foil and refrigerate it for at least 6 hours, though overnight is best. This chilling time allows the flavors to meld beautifully, and the cream to firm up for perfect slicing.
As it chills, the ladyfingers soften slightly, absorbing the espresso and becoming cake-like. The mascarpone mixture firms up, holding everything together like a dreamy custard cloud.
Storage Tips
- Store in the fridge, tightly covered, for up to 3–4 days.
- For longer storage, freeze in an airtight container for up to 2 months. Thaw in the fridge overnight before serving.
Serving Your Tiramisu
How to Serve Like a Pro
When you’re ready to serve, dust the top generously with unsweetened cocoa powder using a fine mesh sieve. You can also sprinkle some chocolate shavings or a light drizzle of espresso for an extra fancy touch.
Use a sharp knife to slice clean portions. A flat spatula works great for lifting out servings without ruining the layers.
Pro Tip: Clean your knife between slices for those crisp, Instagram-worthy layers.
Perfect Pairings
- Serve with a cup of espresso or cappuccino for a true Italian café feel.
- Add a side of fresh berries for a burst of acidity to balance the richness.
- For an adult twist, pair with a glass of dessert wine or liqueur like Vin Santo or Kahlúa.
Variations of Tiramisu
Creative Twists on the Classic
Tiramisu is incredibly versatile. Here are some popular (and delicious) variations:
- Strawberry Tiramisu: Replace espresso with strawberry syrup and layer with fresh berries.
- Chocolate Tiramisu: Add layers of chocolate ganache or cocoa-soaked biscuits.
- Lemon Tiramisu: Use lemon curd and zest for a bright, citrusy spin.
- Pumpkin Tiramisu: Perfect for fall, with layers of pumpkin puree, cinnamon, and nutmeg.
- Tiramisu Cups: Make individual servings in mason jars or glasses—perfect for parties!
These adaptations keep things exciting while staying true to the tiramisu spirit. Don’t be afraid to get creative!
Common Mistakes to Avoid
Troubleshooting Tips
Even seasoned bakers can run into hiccups. Avoid these common mistakes for a flawless dessert:
- Over-soaking ladyfingers: Makes them mushy and unappetizing.
- Using low-quality mascarpone: Results in a runny or bland cream.
- Not chilling long enough: Leads to messy slices and weak flavor.
- Over-whipping the cream: Can turn it grainy and dense.
- Skipping egg safety: If using raw eggs, ensure they’re fresh or use pasteurized.
Stick to the method, be patient with the process, and your tiramisu will be a showstopper every single time.
Healthier Tiramisu Options
Lighten It Up Without Losing Flavor
Love tiramisu but not the calorie count? No worries—you can still indulge without guilt. Here’s how to make a lighter version without sacrificing taste:
- Use light mascarpone or Greek yogurt: Greek yogurt brings a tangy note and lowers the fat content.
- Swap out sugar: Try natural sweeteners like stevia, monk fruit, or even a bit of honey.
- Opt for whole grain or sugar-free ladyfingers: Many stores offer healthier alternatives that still soak up espresso beautifully.
- Reduce or skip the alcohol: If you’re watching your calorie intake or serving kids, just leave it out or use a coffee extract instead.
- Use unsweetened cocoa and minimal toppings: That chocolate dusting can still be luxurious without piling on sugar.
This version might not be as rich, but it will definitely hit the spot—and make you feel a little better about going back for seconds!
Making Tiramisu Without Eggs
Perfect for Allergies or Concerns About Raw Eggs
If you or someone you’re serving has an egg allergy, or you’re not comfortable using raw eggs, you can still enjoy a luscious tiramisu. Here’s how:
- Eggless Mascarpone Cream: Simply mix mascarpone cheese with whipped cream and a bit of powdered sugar for sweetness and stability. No yolks required.
- Use Gelatin for Structure: If you’re worried about texture, add a bit of unflavored gelatin dissolved in water to your cream mixture. It’ll set nicely in the fridge.
- Custard Base with Cornstarch: For a cooked version, heat milk with sugar and cornstarch to create a thick pudding-like base. Let it cool and mix with mascarpone and cream.
This variation keeps the heart of tiramisu alive while being friendly to dietary restrictions—no compromise on the experience!
Tiramisu for Special Occasions
Make It the Star of Your Next Celebration
Tiramisu isn’t just a dessert—it’s a showstopper. And it can be the crown jewel of any event:
- Birthday Cakes: Build tiramisu in cake pans and top with whipped cream and candles.
- Wedding Desserts: Serve in elegant glass cups for a classy presentation.
- Holiday Gatherings: Add festive touches like peppermint dust, spiced cocoa, or layered fruit for Christmas or Thanksgiving.
Pro tip? Make a double batch—you’ll be surprised how quickly it disappears once guests get a taste. Want to make it fancier? Serve with chocolate curls, gold leaf, or custom stencils for your cocoa powder.
Storing and Reusing Leftover Tiramisu
Don’t Let a Single Bite Go to Waste
Leftover tiramisu is a gift that keeps on giving. Here’s how to store and repurpose it:
- Fridge: Store in an airtight container for up to 4 days.
- Freezer: Wrap tightly in plastic and foil. Thaw overnight in the fridge for best results.
Creative Leftover Ideas:
- Tiramisu Milkshake: Blend with vanilla ice cream and milk.
- Frozen Tiramisu Bites: Scoop into balls and freeze for snack-sized treats.
- Tiramisu Trifle: Layer leftovers with berries and whipped cream in a glass.
Tiramisu might age like fine wine—flavors deepen, textures become dreamier. But it rarely lasts long!
FAQs about Best Tiramisu Recipe
Q1: What is tiramisu made of?
Tiramisu is a classic Italian dessert made with layers of coffee-soaked ladyfingers, mascarpone cheese, eggs (or egg yolks), sugar, and a dusting of cocoa powder. Some recipes also include whipped cream or a splash of liqueur like Marsala or rum.
Q2: Can I make tiramisu without alcohol?
Yes, absolutely! You can skip the alcohol or use a non-alcoholic substitute like coffee syrup or vanilla extract. The flavor will still be rich and delicious.
Q3: How long does tiramisu need to chill?
For the best results, tiramisu should chill in the refrigerator for at least 6 hours, but overnight is ideal. This allows the flavors to meld and the dessert to set properly.
Q4: Is tiramisu safe to eat with raw eggs?
Traditional tiramisu uses raw eggs, but to be safe, many modern recipes call for pasteurized eggs or use a double boiler to cook the egg mixture gently. Alternatively, you can use whipped cream as a substitute.
Q5: How long does tiramisu last in the fridge?
Tiramisu can be stored in the refrigerator for up to 4 days. Make sure it’s covered tightly to keep it fresh and prevent it from absorbing other odors.
Q6: Can tiramisu be frozen?
Yes, tiramisu freezes well. Wrap it tightly in plastic wrap and foil, then freeze for up to 2 months. Thaw it overnight in the refrigerator before serving.
Q7: What’s the best coffee for tiramisu?
Strong brewed espresso or very strong coffee works best. It should be cooled before dipping the ladyfingers to avoid making them too soggy.
Q8: Can I make tiramisu ahead of time?
Yes! Tiramisu is actually better when made a day ahead. It allows the flavors to develop fully, making it even more delicious.
Conclusion
Making the best tiramisu isn’t just about following steps—it’s about creating an experience. From the velvety mascarpone cream to the bold espresso-soaked layers, every bite tells a story of tradition, passion, and indulgence. Whether you stick to the classic recipe or make it your own, this dessert has a way of stealing the spotlight.
So next time you’re looking to impress, satisfy your sweet tooth, or celebrate something special, remember this tiramisu recipe. Simple, elegant, and soul-soothing—it’s Italy on a plate, and it’s all yours.


