Tater Tot Recipe: Who doesn’t love tater tots? Those crispy-on-the-outside, fluffy-on-the-inside golden bites of potato perfection have been a favorite in homes and restaurants for decades. Whether you’re preparing a quick snack, serving a party platter, or just indulging in comfort food, this tater tot recipe is your golden ticket. And the best part? You don’t need to be a chef to pull it off. This guide breaks it all down – from ingredients to prep, from frying to baking – so you can make the best homemade tater tots that taste even better than the frozen store-bought ones.
Let’s dive into this delicious journey step by step.
Why Everyone Loves Tater Tots
Tater tots hit that sweet spot of comfort, nostalgia, and sheer deliciousness. They’re versatile – a side dish, a snack, even the base of creative recipes like tater tot casseroles or nacho tots (yes, it’s a thing). Kids adore them. Adults crave them. There’s just something universally satisfying about the crispy texture paired with the soft, seasoned potato center.
They’re also super customizable. Want them spicy? Add jalapeños. Craving cheese? Mix it into the blend. Watching your diet? Bake them instead of frying. You can take the basic tot and make it truly your own. Plus, they’re a crowd-pleaser, making them ideal for game nights, lunchboxes, or weeknight dinners.
Brief History of Tater Tots
Tater tots aren’t just tasty—they have a cool backstory, too. These crispy bites were created in 1953 by the founders of Ore-Ida (yes, the same brand you still see in stores). The goal? Find a use for leftover potato slivers from French fry production. The brothers came up with the idea to chop the scraps, season them, and form them into little cylinders. They called them “tater tots,” and the name stuck.
They became a staple in American households almost overnight. What began as a resourceful solution turned into an iconic food item. And now, decades later, homemade tater tots are making a comeback – better, tastier, and totally customizable.
Ingredients You’ll Need
Main Ingredients for Classic Tater Tots
Let’s get down to what you really need to make these crispy bites from scratch. Here are the main ingredients that form the base of any great tater tot recipe:
- Russet Potatoes (2-3 large) – These are starchy and perfect for crisping.
- Salt (1 tsp or to taste) – Essential for flavor.
- Black Pepper (½ tsp) – Adds a mild kick.
- All-purpose Flour (1 tbsp) – Helps hold everything together.
- Garlic Powder (½ tsp) – Optional, but adds depth.
- Onion Powder (½ tsp) – Boosts savory notes.
- Oil for frying (Vegetable or Canola) – If you’re going the classic fry route.
Russet potatoes are non-negotiable here. Their high starch content is what makes the tots crispy on the outside while staying fluffy inside. Don’t try to substitute with waxy potatoes unless you’re okay with losing that signature crunch.
Optional Add-ins for Extra Flavor
If you’re feeling adventurous or want to spice things up a bit, these optional ingredients can take your tots from basic to next-level:
- Shredded Cheddar Cheese (½ cup) – For cheesy goodness inside.
- Chopped Green Onions – Adds a pop of freshness.
- Bacon Bits – Smoky flavor and texture.
- Paprika or Cayenne Pepper – For a spicy punch.
- Chopped Parsley or Dill – Brightens the flavor profile.
- Parmesan Cheese – Salty and rich.
The beauty of homemade tater tots is you can tailor them to your taste buds. Just remember: don’t overload the mixture or the tots won’t hold their shape during cooking.
Substitutions for Dietary Needs
Want to keep it gluten-free, dairy-free, or vegan? No problem. Try these simple swaps:
- Gluten-Free Flour or Cornstarch instead of all-purpose flour.
- Vegan Cheese or skip cheese altogether.
- Olive Oil Spray and bake instead of frying for a lower-fat option.
By making these tweaks, you can still enjoy that iconic tater tot texture and flavor while keeping it aligned with your dietary needs.
Tools & Equipment Required
Kitchen Tools You’ll Need
Before you get started, make sure you’ve got these basic kitchen tools ready to go:
- Large pot – For boiling the potatoes.
- Box grater or food processor – To shred the cooked potatoes.
- Mixing bowls – For combining all ingredients.
- Spoon or spatula – To mix and shape.
- Baking tray (if baking) – With parchment paper or silicone mat.
- Slotted spoon or tongs – For frying.
- Paper towels – To absorb excess oil from fried tots.
Having the right tools makes the process smoother and faster. You don’t need fancy equipment—just the basics and a little elbow grease.
Recommended Appliances for Perfect Tots
While not mandatory, these appliances can upgrade your tot-making game:
- Air Fryer – For a crisp finish without deep frying.
- Deep Fryer – For consistent oil temperature.
- Food Processor with shredding disc – Speeds up the grating process.
If you’re a regular tot-maker, investing in an air fryer or food processor can seriously cut down on your time and effort in the kitchen.
Preparation Tips Before You Start
Prepping the Potatoes Right
This step is critical and often overlooked. Proper potato prep sets the foundation for your tater tots’ texture and taste.
- Peel the potatoes – Skins can interfere with the texture.
- Boil, don’t overcook – Boil until just tender, about 6–7 minutes. Too soft, and they’ll be mushy.
- Cool completely – This firms them up and makes shredding easier.
- Dry thoroughly – Moisture is your enemy. Let potatoes rest on paper towels or refrigerate for 20 minutes before shredding.
By following these steps, you’ll end up with perfectly textured, easy-to-shape potato shreds.
Keeping Ingredients Fresh and Ready
Get your mise en place (that’s a fancy term for prepping your ingredients ahead of time). This means chopping, measuring, and laying out everything before the cooking begins. It keeps the process smooth and stress-free, especially when shaping and frying the tots.
Step‑by‑Step Guide to Making Tater Tots
Step 1: Boil the Potatoes
Start by peeling and cutting your potatoes into chunks. Boil them in salted water for 6–8 minutes, just until slightly tender but not mushy. You want them par-cooked so they hold texture when grated. Drain well and let them cool for a few minutes.
Step 2: Grate and Remove Moisture
Using a box grater, shred the cooled potatoes. Place the grated potatoes in a clean kitchen towel and squeeze out as much moisture as possible—dry potatoes mean crispier tots.
Step 3: Season and Mix
Transfer to a bowl and mix with salt, pepper, a little flour or cornstarch, and optionally garlic powder or onion powder. Stir gently to combine without mashing.
Step 4: Shape the Tots
Scoop small portions and form them into tiny cylinders—classic tot shape. Press gently so they hold together.
Step 5: Fry or Bake Until Golden
For traditional crunch, deep-fry in hot oil (350°F / 175°C) until golden brown, about 3–4 minutes. For a lighter version, bake on a greased sheet at 400°F (200°C) for 20–25 minutes, flipping halfway. Serve hot with ketchup or spicy mayo—crispy perfection!
Baking vs. Frying Tater Tots
Health Benefits of Baking
If you’re watching your oil intake, baking (or air‑frying) your tots is a smart move. Baking uses significantly less oil, lowering total fat and calories without necessarily sacrificing flavour. Many home cooks find that while deep‑frying gets the crispiest exterior, modern ovens and air‑fryers come very close — especially when the potatoes are well‑prepped (i.e., moisture removed, thinly shredded). Herbs & Flour+1
For everyday eats, baked tots allow you to enjoy the comfort of tater tots without as heavy a guilt‑factor. You might notice they aren’t quite as deeply golden everywhere, but they still deliver crunchy bites with a fluffy core.
Flavor & Texture Differences
Here’s a comparison note:
| Method | Texture on Outside | Speed | Oil Usage | Flavor profile |
|---|---|---|---|---|
| Frying | Deep golden, extra crisp | Faster (~3‑5 min per batch) | Higher | Richer, slightly “fried potato” flavour |
| Baking | Golden‑crisp, less deep | Slower (~20‑25 min) | Much less oil | Cleaner potato flavour, less “fried” |
While frying will always give that classic “fast‑food tot” crunch, baking gives you almost the same satisfaction with less mess and healthier profile. Some people find baked tots slightly drier if overcooked, so watch them carefully and remove as soon as the exterior is crisp.
Serving Suggestions
Dipping Sauces and Sides
What’s a tot without the perfect dip? Serving your home‑made tots with tasty accompaniments elevates them from snack to star. Here are some ideas:
- Classic ketchup – simple and satisfying.
- Spicy mayo or chipotle mayo – a bit of heat, a bit of cream.
- Cheese sauce – smooth and gooey (perfect if you added shredded cheese inside the tots).
- Ranch or garlic‑herb dip – cool, creamy contrast to the hot crisp.
- BBQ sauce or honey mustard – sweet‑tangy pairs great with the potato flavor.
As for sides, serve with a green salad for balance, pair with grilled burgers or chicken, or simply enjoy as an appetizer.
Tater Tots as a Main or Snack
Don’t limit tots to just a side dish — these little cylinders are incredibly versatile. As a snack, serve a bowl of crispy tots at a movie night, topped with cheese, bacon bits, green onions and sour cream for “loaded tots”. As a main dish:
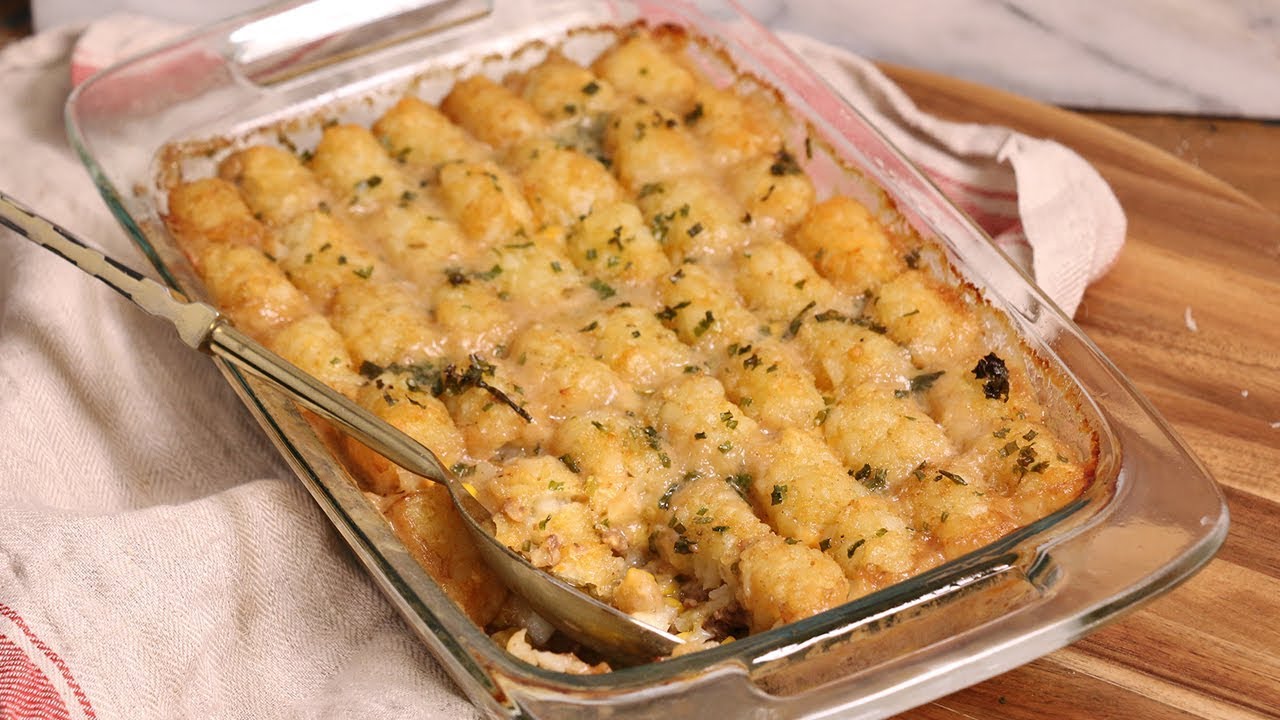
- Make a tot‑casserole, layering cooked ground meat, sauce and tots on top for baking. Allrecipes
- Use as a base for a “tot‑bar” where friends add toppings.
- Serve alongside eggs for brunch — tots can replace hash browns with flair.
The key takeaway: tots are multidimensional. They work as a companion, a snack, or the centerpiece of a dish.
Creative Variations of Tater Tots
Cheesy Tater Tots
Want to up the indulgence? Mix shredded cheddar (½ cup or more) into your potato mixture before shaping. As the tots cook, that cheese melts into gooey pockets. Top with extra cheese and maybe a sprinkle of chopped bacon for “cheese‑bacon tots”. You’ll get the crispy exterior, fluffy interior, and that stretchy cheese pull. Just be cautious the mixture doesn’t become too loose — extra cheese means more moisture, so increase the binding flour or chill the shaped tots before cooking.
Spicy Jalapeño Tots
For a heat kick: finely chop jalapeños (seeded or not, depending on your heat tolerance) and fold them into the shredded potato mixture. Add a touch of cayenne or smoked paprika for depth. Once baked or fried, serve with a cooling dip (like sour cream + lime) to contrast the spice. These make for a fantastic party snack or game‑night treat.
Vegan or Gluten‑Free Tots
Yes, you can absolutely make tater tots that fit specific diets. Use gluten‑free flour (or cornstarch) instead of all‑purpose flour. Omit cheese or use a vegan shredded cheese substitute. Bake or air‑fry instead of deep‑fry to reduce oil. Many recipes recommend russet potatoes + minimal binding ingredients and still deliver crisp, fluffy results. Herbs & Flour+1
By making these swaps, your tots can accommodate dietary needs without sacrificing the texture or fun.
Storage and Reheating Tips
Best Way to Store Leftovers
If you have leftovers (or make a big batch ahead), you can store cooked tots easily. After cooking, let them cool completely on a parchment‑lined tray (so they don’t steam and go soggy). Then transfer to an airtight container and place them in the fridge for up to 2‑3 days. For longer storage, arrange on a tray and freeze until firm; then transfer to freezer bags — they’ll keep for 1–2 months. Many home‑cook tips confirm this freezes well. Sprinkles and Sprouts+1
Label the container with date & method to help manage your inventory.
Reheating Without Losing Crunch
The key challenge with reheating tots is preserving the crunch. Here’s how to do it:
- Oven or toaster‑oven: Preheat to ~400°F (200°C). Spread tots out in a single layer on a baking sheet (no overcrowding). Bake for ~8‑10 minutes, flipping once midway through.
- Air‑fryer: Pre‑heat to ~375°F, pop in the tots for ~4‑6 minutes, shake or flip halfway.
- Avoid microwave (unless you’re in a hurry) — it softens the tots and removes the crisp.
By reheating this way, you restore much of the original texture and flavour.
Common Mistakes to Avoid
Overcooking or Undercooking
Homemade tater tots can be a bit finicky if you rush the process. One of the most common mistakes is overcooking or undercooking them — both during boiling and frying/baking.
Let’s start with boiling. If you overboil your potatoes before shredding, they’ll become too soft. You want them just fork-tender on the outside, but still firm in the center. If they’re too soft, they’ll turn to mush when shredded and won’t hold their shape.
Now onto frying or baking. If you fry tots at too low a temperature, they’ll absorb oil and become greasy. Too high, and the outside will brown before the inside cooks through. Stick to a frying temp of 350–375°F (175–190°C) and don’t overcrowd the oil.
For baking, placing tots too close together traps steam, making them soggy. Give them space and flip halfway through so they brown evenly on all sides. Also, keep an eye on the oven — even 2–3 extra minutes can take your golden tots into the burned zone.
Proper cooking is key to achieving that perfect contrast of crunchy outside and fluffy inside.
Not Removing Moisture Properly
Moisture is the enemy of crispy tater tots. If you skip the moisture-removal step after grating the potatoes, you’re setting yourself up for disappointment. Wet potatoes steam instead of crisp when cooked, leading to limp and soggy results.
Use a clean dish towel, cheesecloth, or even paper towels in a pinch to squeeze out all excess liquid. Some people even let the grated potatoes air dry for a few minutes after squeezing, or chill them uncovered in the fridge to let residual steam escape.
The drier your potato mixture, the crispier and more cohesive your tater tots will be.
Nutritional Value of Tater Tots
Calories and Macronutrients
Tater tots might be small, but their nutritional profile can add up — especially if you’re frying them. Here’s a rough breakdown for a standard serving (about 10 tots):
| Nutrient | Fried Tots | Baked Tots |
|---|---|---|
| Calories | 180–220 | 130–150 |
| Carbs | 20–25g | 20–25g |
| Fat | 10–12g | 4–6g |
| Protein | 2–3g | 2–3g |
| Fiber | 2g | 2g |
As you can see, baking significantly reduces fat and calorie content. Homemade tots, especially baked or air-fried, give you more control over what you’re putting into your body.
Making Tots Healthier
Want a healthier version? Here are a few simple tweaks:
- Bake or air-fry instead of deep frying.
- Use less salt or opt for sea salt.
- Sneak in veggies like finely grated carrots or zucchini.
- Swap out flour for oat flour or chickpea flour.
- Add flaxseed meal or chia seeds for a fiber and omega-3 boost.
You’ll still get that satisfying crunch and potato flavor — just with a bit more nutritional value.
Tater Tots for Parties and Gatherings
Making Them Ahead of Time
Tater tots are ideal for prepping ahead, especially for busy hosts or potluck dinners. Here’s how you can work ahead without sacrificing flavor or texture:
- Prepare the mixture and shape the tots 1–2 days ahead. Store them uncooked in the fridge, covered.
- Or, fully cook the tots and freeze them. Reheat in the oven or air fryer directly from frozen.
- If you’re cooking in bulk, a warming tray or oven on low heat (~200°F) can keep batches hot and crispy until serving.
This approach not only saves time, but ensures you’re not stuck in the kitchen while everyone else enjoys the party.
Fun Serving Ideas for Events
Let’s get creative — tater tots are the ultimate crowd-pleaser, so why not serve them with style?
- Tater Tot Skewers: Stick 4–5 tots on a skewer with layers of cheese cubes or grilled veggies.
- Tot Bar: Let guests build their own with toppings like chili, cheese, sour cream, scallions, salsa, or even pulled pork.
- Mini Tot Sliders: Use tots as the “buns” and sandwich meat or vegan patties in between.
- Tot Cones: Serve tots in mini paper cones or cups for an on-the-go finger food option.
These presentation tricks turn your tots into a visual and culinary centerpiece.
Kid-Friendly Tater Tot Ideas
Making Mealtime Fun
Getting kids excited about food can be a challenge, but tater tots are practically built for fun. You can shape the tots into mini balls, stars, or even letters using silicone molds or cookie cutters (especially before baking). Not only are they delicious, but they also offer a sensory experience — crunchy, salty, warm, and dip-ready.
To make things even more appealing for picky eaters, try:
- Colorful tots: Add mashed sweet potatoes or beets to brighten up the dish.
- Interactive plating: Serve with small dipping cups and let them “build” their plate.
- Fun names: Call them “tiny potato rockets” or “crunch nuggets” — you’d be amazed what a name can do.
The more engaging the meal, the more likely your kids are to eat (and enjoy!) it.
Creative Shapes and Flavors
For picky eaters or adventurous little chefs, try:
- Pizza Tots: Mix in a little grated mozzarella and chopped pepperoni.
- Breakfast Tots: Add a bit of scrambled egg and sausage to the mix.
- Rainbow Tots: Use a mix of white, sweet, and purple potatoes.
You can even let the kids help shape the tots — it makes them feel involved and more likely to taste what they helped create.
FAQs about Tater Tot Recipe
1. Can I freeze homemade tater tots?
Absolutely. Once shaped, place them on a baking tray in the freezer until firm, then transfer to a zip-top bag. They can be cooked from frozen — just add 2–3 minutes to the bake or fry time.
2. How do I make tater tots crispy in the oven?
Use a high temperature (425°F), don’t overcrowd the pan, and flip them halfway through. Lightly spray or brush with oil for a golden crunch.
3. What kind of potato is best for tater tots?
Russet potatoes are ideal due to their high starch content. They crisp up beautifully and have that perfect fluffy center.
4. Are tater tots healthier than French fries?
It depends on how you cook them. Baked or air-fried tots are often lower in fat and calories than deep-fried fries. Homemade gives you better control over ingredients.
5. Can I air-fry tater tots?
Yes! Air-frying is a great way to get crispy tots with very little oil. Set your air fryer to 375°F and cook for 10–12 minutes, shaking halfway through.
Conclusion
Tater tots may have humble beginnings, but they’ve grown into a kitchen staple that’s both nostalgic and endlessly versatile. Whether you’re frying them for game day, baking them for a family meal, or customizing them for a special event, homemade tater tots offer a level of flavor and satisfaction you simply can’t get from the frozen bag.
With just a few simple ingredients, the right technique, and a little creativity, you can master the art of making crispy, golden, fluffy-on-the-inside tots that wow every time. Try the basic version, then play around with variations. Make it spicy, make it cheesy, make it your own. There’s no wrong way to tot — as long as it’s crispy and shared with people you love.


