Peanut Butter Kiss Cookies Recipe: Peanut Butter Kiss Cookies are classic, soft, chewy, and beautifully finished with a chocolate kiss pressed into the center of each warm cookie. They combine the rich nuttiness of creamy peanut butter, the sweetness of a tender sugar-coated cookie, and the smooth chocolate center that makes every bite feel special. These cookies are perfect for holidays, family gatherings, cookie trays, bake sales, birthdays, or a simple homemade treat when we want something sweet, familiar, and comforting.
This Peanut Butter Kiss Cookies Recipe gives us cookies with a soft middle, lightly crisp edges, and a beautiful bakery-style finish. The dough is easy to prepare, the ingredients are simple, and the result is a batch of cookies that look impressive without requiring complicated techniques. With the right balance of peanut butter, sugar, flour, and chocolate, we can create cookies that stay tender, flavorful, and delicious from the first bite to the last.
List of Ingredients You’ll Need
To make the best Peanut Butter Kiss Cookies, we need simple pantry ingredients that work together to create the perfect cookie texture and flavor.
Main Cookie Ingredients
- 1 ¾ cups all-purpose flour
- 1 teaspoon baking soda
- ½ teaspoon salt
- ½ cup unsalted butter, softened
- ½ cup creamy peanut butter
- ½ cup granulated sugar
- ½ cup packed light brown sugar
- 1 large egg
- 2 tablespoons milk
- 1 teaspoon vanilla extract
For Rolling and Topping
- ¼ cup granulated sugar, for rolling the cookie dough balls
- 36 to 40 chocolate kisses, unwrapped
Best Peanut Butter for Peanut Butter Kiss Cookies
For this recipe, creamy peanut butter gives the smoothest texture and the most reliable result. Standard shelf-stable peanut butter works best because it blends evenly into the dough and helps the cookies hold their shape while baking. Natural peanut butter can sometimes separate, making the dough oily or dry depending on how well it is mixed. If we want consistent, soft, bakery-style cookies, creamy peanut butter is the best choice.
The peanut butter should taste rich but not overpowering. Since the chocolate kiss adds sweetness, the peanut butter cookie base should be flavorful, slightly salty, and balanced. This combination creates a cookie that is sweet, nutty, chocolatey, and satisfying without being too heavy.
Step-by-Step Guide for Peanut Butter Kiss Cookies
Step 1: Prepare the Baking Sheets
We start by lining our baking sheets with parchment paper. This prevents sticking, helps the cookies bake evenly, and makes cleanup easier. We should also make sure the oven rack is placed in the center position so the cookies bake with even heat.
Preheat the oven to 375°F (190°C). A properly heated oven is important because the cookies need to set quickly enough to hold their shape while still remaining soft in the center.
Step 2: Unwrap the Chocolate Kisses
Before mixing the dough, we should unwrap all the chocolate kisses and place them in a bowl. This step may seem small, but it is important because the cookies need to be topped immediately after they come out of the oven. If we wait too long, the cookies may firm up too much, making it harder to press the chocolate into the center neatly.
Keeping the chocolate ready allows us to work quickly and gives each cookie the classic Peanut Butter Kiss Cookies appearance.
Step 3: Mix the Dry Ingredients
In a medium bowl, whisk together the all-purpose flour, baking soda, and salt. Mixing the dry ingredients separately helps distribute the baking soda and salt evenly throughout the dough.
The baking soda gives the cookies lift and softness, while the salt balances the sweetness and strengthens the peanut butter flavor. This simple dry mixture forms the structure of the cookie and helps create a tender bite.
Step 4: Cream the Butter, Peanut Butter, and Sugars
In a large mixing bowl, add the softened butter, creamy peanut butter, granulated sugar, and brown sugar. Beat them together until the mixture becomes smooth, creamy, and slightly fluffy.
This step is important because creaming the fats and sugars together helps create a better cookie texture. The butter adds richness, the peanut butter adds nutty flavor, the granulated sugar helps with light crispness, and the brown sugar adds moisture and chewiness.
The mixture should look well blended and soft. We do not need to overmix, but we want everything fully combined before adding the egg and liquid ingredients.
Step 5: Add the Egg, Milk, and Vanilla Extract
Next, add the egg, milk, and vanilla extract to the peanut butter mixture. Beat until smooth and fully incorporated.
The egg helps bind the dough and gives structure to the cookies. The milk adds just enough moisture to keep the dough soft, while the vanilla extract deepens the overall flavor. These ingredients help create cookies that are tender, fragrant, and balanced.
Step 6: Combine the Wet and Dry Mixtures
Gradually add the dry ingredients into the wet mixture. Mix on low speed or stir gently until a soft cookie dough forms.
We should avoid overmixing once the flour is added. Too much mixing can make the cookies dense instead of soft and tender. The dough should be thick, smooth, and easy to scoop. If it feels slightly soft, that is fine; it will still roll well after a few minutes of resting.
Step 7: Shape the Cookie Dough Balls
Scoop the dough into small portions, about 1 tablespoon each. Roll each portion between our palms to form a smooth ball.
The size of the dough balls matters because these cookies should bake evenly and leave enough room for the chocolate kiss in the center. Smaller dough balls also give the cookies their classic rounded shape and make them perfect for serving on dessert trays.
Step 8: Roll the Dough Balls in Sugar
Place the extra granulated sugar in a small bowl. Roll each dough ball in the sugar until lightly coated on all sides.
This sugar coating gives the cookies a delicate sparkle and a slightly crisp exterior. It also adds a beautiful finish that makes the cookies look more polished after baking. The contrast between the sugar-coated peanut butter cookie and the chocolate center makes these cookies especially attractive.
Step 9: Arrange the Cookies on the Baking Sheet
Place the sugar-coated dough balls on the prepared baking sheets, leaving about 2 inches of space between each one. The cookies will spread slightly as they bake, so spacing helps them keep a neat shape.
Do not press the dough balls down before baking. They should go into the oven round. As they bake, they will spread naturally and create the perfect base for the chocolate kiss.
Step 10: Bake the Peanut Butter Cookies
Bake the cookies for 8 to 10 minutes, or until the edges are set and the tops look lightly puffed. The cookies may appear slightly soft in the center, but that is exactly what we want.
We should avoid overbaking because peanut butter cookies can become dry if left in the oven too long. The cookies will continue to firm up on the baking sheet after they come out of the oven.
The best texture comes from removing them when they are just set, not deeply browned.
Step 11: Press a Chocolate Kiss Into Each Cookie
As soon as the cookies come out of the oven, gently press one unwrapped chocolate kiss into the center of each cookie.
The cookie will crack slightly around the edges, creating the classic Peanut Butter Kiss Cookie look. Press gently but firmly enough for the chocolate to sit securely in the center. The chocolate will soften from the heat of the cookie, so we should avoid touching or moving the cookies too much after placing the kisses.
Step 12: Let the Cookies Cool
Allow the cookies to cool on the baking sheet for about 5 minutes before transferring them to a wire rack. This resting time helps the cookies firm up so they do not break apart.
Once transferred, let them cool completely. The chocolate kisses will remain soft for a while, so we should give them enough time to set before stacking or storing the cookies.
How to Get Soft and Chewy Peanut Butter Kiss Cookies
The secret to soft and chewy Peanut Butter Kiss Cookies is careful baking. We should remove the cookies from the oven when they look slightly underdone in the center but set around the edges. Overbaking causes them to lose moisture and become crumbly.
Using brown sugar also helps keep the cookies soft because it adds moisture and chewiness. The milk in the dough gives the cookies a tender texture, while the peanut butter adds richness and structure.
Another helpful tip is to store the cookies in an airtight container after they cool completely. This keeps them fresh and prevents them from drying out.
Helpful Tips for the Best Peanut Butter Kiss Cookies
For the best results, we should use room-temperature butter that is soft but not melted. Melted butter can make the dough too loose and cause the cookies to spread too much. Softened butter blends smoothly with peanut butter and sugar, creating the right texture.
We should also measure the flour correctly. Too much flour can make the cookies dry and heavy. The best method is to spoon the flour into the measuring cup and level it off with a flat edge.
The chocolate kisses should be pressed into the cookies immediately after baking. If the cookies cool too much, the chocolate will not sit properly in the center. Working quickly gives us the best shape and presentation.
Flavor Variations
We can easily adjust this Peanut Butter Kiss Cookies Recipe to create different flavors while keeping the same soft cookie base.
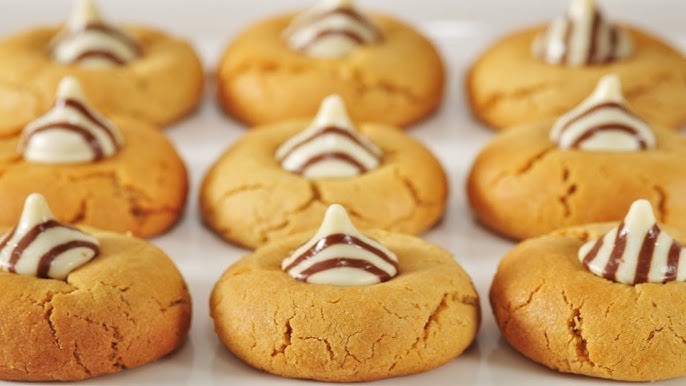
For a richer version, we can use dark chocolate kisses. For a sweeter holiday-style cookie, we can use striped chocolate kisses or caramel-filled kisses. For extra peanut flavor, we can add a small handful of finely chopped peanuts to the dough.
We can also roll the dough balls in colored sugar for festive occasions. Red and green sugar works beautifully for Christmas, while pastel sugar makes them perfect for spring celebrations.
How to Store Peanut Butter Kiss Cookies
Once the cookies are completely cool and the chocolate has set, place them in an airtight container. They can be stored at room temperature for about 4 to 5 days.
To keep the cookies soft, we can place a small piece of bread in the container. The bread helps maintain moisture, keeping the cookies tender without changing their flavor.
If stacking the cookies, place parchment paper between layers to protect the chocolate centers and keep the cookies looking neat.
Can We Freeze Peanut Butter Kiss Cookies?
Yes, Peanut Butter Kiss Cookies freeze well. After baking and cooling completely, place them in a freezer-safe container with parchment paper between layers. Freeze for up to 2 months.
To serve, allow the cookies to thaw at room temperature. The texture remains soft and delicious when stored properly.
We can also freeze the unbaked dough balls. Roll the dough into balls, coat them in sugar, and freeze on a baking sheet until firm. Then transfer them to a freezer bag. When ready to bake, place the frozen dough balls on a baking sheet and bake as directed, adding 1 to 2 extra minutes if needed. Press the chocolate kisses into the cookies immediately after baking.
Serving Ideas for Peanut Butter Kiss Cookies
These cookies are perfect with a cold glass of milk, hot chocolate, coffee, or tea. They also make a beautiful addition to holiday cookie boxes because they look festive and recognizable.
For dessert platters, we can serve them with chocolate chip cookies, sugar cookies, brownies, and shortbread. Their peanut butter flavor adds variety and makes the tray more appealing.
They are also excellent for gifting. Once the chocolate centers are fully set, we can package them in cookie tins, treat bags, or decorative boxes.
Common Mistakes to Avoid
One common mistake is overbaking the cookies. Peanut butter cookies can look pale even when they are done, so we should not wait for them to turn dark brown. The edges should be set, and the tops should look slightly puffed.
Another mistake is pressing the chocolate kisses too late. The cookies must still be warm so the chocolate can settle into the center properly.
Using natural peanut butter without stirring it well can also affect the dough. If the peanut butter is oily or too dry, the cookies may not bake evenly. A smooth, creamy peanut butter gives the most dependable result.
Why This Peanut Butter Kiss Cookies Recipe Works
This recipe works because it uses the right balance of fat, sugar, flour, and peanut butter. The butter adds richness, the peanut butter gives deep nutty flavor, and the combination of brown sugar and granulated sugar creates a soft yet lightly crisp texture.
The cookie base is sturdy enough to hold the chocolate kiss but tender enough to melt in the mouth. The sugar coating adds a pleasant finish, while the chocolate center makes each cookie feel complete.
With simple steps and reliable ingredients, this Peanut Butter Kiss Cookies Recipe gives us beautiful, delicious cookies that are perfect for nearly any occasion.
FAQs about Peanut Butter Kiss Cookies Recipe
What are Peanut Butter Kiss Cookies?
Peanut Butter Kiss Cookies are soft, chewy peanut butter cookies topped with a chocolate kiss candy in the center. They are popular for holidays, parties, bake sales, and family treats because they combine the rich flavor of peanut butter with smooth, sweet chocolate.
Why do my Peanut Butter Kiss Cookies crack?
Cracks are normal and even expected. The cookie dough spreads slightly while baking, and when the chocolate kiss is pressed into the warm cookie, the surface naturally cracks. This gives Peanut Butter Kiss Cookies their classic homemade look and texture.
When should I add the chocolate kiss?
The chocolate kiss should be added immediately after the cookies come out of the oven. Press it gently into the center of each warm cookie. Avoid pushing too hard, or the cookie may break. Let the cookies cool so the chocolate can firm up again.
Can I make Peanut Butter Kiss Cookies ahead of time?
Yes. We can prepare the dough in advance and refrigerate it for up to 2 days before baking. Baked cookies can also be stored in an airtight container at room temperature for about 4 to 5 days, making them perfect for planning ahead.
How do I keep Peanut Butter Kiss Cookies soft?
To keep them soft, avoid overbaking. Remove the cookies when the edges are lightly set but the centers still look slightly soft. Store them in an airtight container once completely cooled. Adding a small slice of bread to the container can help maintain moisture.
Final Thoughts
Peanut Butter Kiss Cookies are one of the most loved homemade cookies because they are simple, beautiful, and full of classic flavor. With a soft peanut butter cookie base and a smooth chocolate kiss in the center, every cookie delivers the perfect balance of nutty sweetness and chocolate richness.
By following this step-by-step guide, we can bake cookies that look polished, taste delicious, and stay soft after cooling. Whether we are preparing them for the holidays, a family dessert table, a party, or a simple treat at home, this recipe gives us a dependable batch of cookies that always feels special.


