Onion Jam Recipe: Onion jam is that kind of recipe that sneaks up on you—something you didn’t know you needed until you’ve tasted it. Sweet, savory, and rich in flavor, onion jam is a slow-cooked spread made primarily from caramelized onions, sugar, and a bit of acid like vinegar or wine. Unlike traditional fruit jams, it’s not meant for toast and butter (though you could do that); it’s more of a gourmet condiment for sandwiches, burgers, cheese boards, and roasted meats.
This condiment transforms the humble onion into a velvety, umami-rich spread. It’s a staple in many gourmet kitchens and is often found next to artisanal cheeses and crusty bread. Whether you’re a seasoned home chef or someone just diving into the world of cooking, onion jam is surprisingly simple to make and requires only a handful of ingredients.
It’s a perfect example of how low-and-slow cooking can elevate the simplest ingredients into something luxurious. And trust me, once you make it at home, store-bought versions won’t cut it anymore.
Why You’ll Love This Recipe
So why is onion jam so beloved by chefs, foodies, and weekend grillers alike? Here’s what makes it irresistible:
- Unmatched Flavor Depth – You get a layered taste: the sweetness from the onions and sugar, balanced by the tang of vinegar or wine, and possibly even a little heat or spice if you choose.
- Incredibly Versatile – Use it as a topping for burgers, mix it into pasta, serve it with cheese, or even swirl it into mashed potatoes.
- Budget-Friendly – Made with simple pantry staples, this is one of those recipes that delivers gourmet results without the gourmet price tag.
- Make-Ahead Friendly – It stores well, so you can prep it in advance for parties or weekly meal plans.
- Great for Gifting – Pour it into a mason jar, tie a ribbon around it, and boom—you have a homemade gift that screams effort and thoughtfulness.
This is one of those “once you know, you know” recipes. Get ready to impress yourself and everyone else around the table.
Ingredients You’ll Need
Basic Ingredients for Onion Jam
To make a classic, well-balanced onion jam, you’ll only need a handful of simple ingredients. These pantry staples come together in a way that’s surprisingly luxurious.
Here’s what you’ll need:
- Onions (4–6 large) – Yellow onions are most commonly used, but you can experiment with red or sweet onions for a different flavor profile.
- Olive oil or butter (2–3 tbsp) – For sautéing the onions. Butter adds a richer, creamier flavor while olive oil gives a slightly fruitier base.
- Brown sugar (1/3 cup) – Adds a deep molasses-like sweetness and enhances caramelization.
- Balsamic vinegar (2–3 tbsp) – Brings acidity and complexity. You can also use red wine vinegar or apple cider vinegar.
- Salt (1 tsp) – Enhances the sweetness and balances the flavors.
- Optional: Garlic (2 cloves, minced) – For extra depth.
- Optional: Fresh thyme or rosemary (1 tsp) – Herbs bring a lovely aromatic layer.
These are your building blocks. And while the ingredients list is short, the magic really comes from the cooking process—that slow transformation of onions into silky, jammy goodness.
Optional Add-ins for Flavor Variations
Want to give your onion jam a twist? Here are some creative flavor boosters:
- Red wine (2 tbsp) – Adds a bold, deep flavor—perfect with steak or rich cheeses.
- Chili flakes or cayenne pepper (¼ tsp) – Introduce a gentle heat.
- Maple syrup or honey (1–2 tbsp) – For a more natural sweetness.
- Bourbon or brandy (1 tbsp) – A splash adds complexity and a slightly boozy kick.
- Mustard seeds or Dijon mustard (1 tsp) – For a tangy, sharp undertone.
This is your jam (literally), so feel free to make it your own. Just be cautious with how much liquid you add—it should reduce nicely without becoming too watery.
Tools and Equipment Needed
Nothing fancy required here, but having the right tools makes things easier:
- Heavy-bottomed skillet or sauté pan – You’ll want something that retains heat well and won’t burn the onions.
- Sharp chef’s knife – For even slicing.
- Wooden spoon or spatula – For constant stirring as the onions cook down.
- Mason jars or airtight containers – For storing your finished jam.
- Measuring cups and spoons – Precision matters, especially with sugar and vinegar.
If you’ve got these kitchen essentials, you’re more than ready to dive into cooking!
Preparing for the Recipe
Choosing the Right Onions
This part is crucial. Not all onions are created equal—some are spicier, others sweeter. The type of onion you choose will influence the final taste and color of your jam.
- Yellow Onions – The most common choice. They become incredibly sweet and rich when caramelized.
- Red Onions – These give a slightly more complex, sharper edge and result in a darker-colored jam.
- Sweet Onions (Vidalia, Walla Walla) – Naturally sweeter, needing less added sugar. Great for a lighter, candy-like jam.
- Shallots – More refined and delicate in flavor. Use them if you’re going for an upscale, fine-dining twist.
Aim for freshness—firm, dry-skinned onions with no sprouting. The fresher the onion, the better the end result.
Prepping Your Ingredients
Before you dive into caramelizing and reducing, getting everything ready makes the entire process smoother and less stressful. Onion jam is all about low and slow cooking, so having your mise en place (a fancy term for “everything in its place”) is key.
Here’s how to prep like a pro:
- Slice the onions evenly. Thinner, uniform slices ensure the onions cook evenly and caramelize at the same rate. Aim for slices around ⅛ to ¼ inch thick. Too thick, and they’ll take forever; too thin, and they may burn.
- Measure out all your ingredients ahead of time. Sugar, vinegar, oil, and any optional flavorings should be portioned and set aside so you’re not fumbling around while your onions are on the stove.
- Peel garlic and tie herbs if using. If you’re adding herbs like thyme or rosemary, tie them together with kitchen twine so you can easily remove them later. It’s a chef’s trick to infuse flavor without leaving bits behind.
This stage only takes about 10 minutes but sets the tone for the whole recipe. Once your ingredients are ready and within arm’s reach, the actual cooking becomes far more enjoyable.
Tips Before You Start Cooking
Cooking onion jam is simple, but the devil’s in the details. These tried-and-true tips will help you avoid common pitfalls and get that perfect sticky, jammy consistency:
- Use a wide, heavy-bottomed pan. The wide surface area allows more of the onions to come into contact with the heat, ensuring even caramelization.
- Low and slow wins the race. Don’t rush it. Cooking on medium-low heat is essential. High heat will burn the sugars and leave you with bitter, overcooked onions.
- Don’t overcrowd the pan. If your onions are piled too high, they’ll steam instead of caramelize. Cook in batches if necessary.
- Stir occasionally—but not constantly. You want the onions to sit long enough to brown, but not so long that they stick and burn.
- Taste as you go. Don’t be afraid to adjust sweetness or acidity to your preference. The goal is balance: not too sweet, not too sharp.
With these tips in mind, you’re ready to move on to the main event—the actual cooking.
Step-by-Step Guide to Making Onion Jam
Onion jam is a rich, sweet, and savory spread made by slowly cooking onions until soft and caramelized. It is delicious on burgers, sandwiches, toast, or served with cheese.
Step 1: Gather the Ingredients
You will need:
- 4 large onions
- 2 tablespoons olive oil or butter
- 2 tablespoons brown sugar
- 2 tablespoons balsamic vinegar or vinegar
- Salt to taste
- Black pepper (optional)
- A little water if needed
Step 2: Slice the Onions
Peel the onions and slice them thinly. Thin slices cook more evenly and break down faster during cooking.
Step 3: Heat the Pan
Place a large pan on medium heat. Add the olive oil or butter and let it warm up.
Step 4: Cook the Onions
Add the sliced onions to the pan. Stir well so they are coated with the oil or butter. Cook slowly for about 15 to 20 minutes, stirring often, until they become soft and golden.
Step 5: Add Sugar and Seasoning
Sprinkle in the brown sugar, a pinch of salt, and black pepper if using. Stir well to combine.
Step 6: Add Vinegar
Pour in the balsamic vinegar or regular vinegar. This adds tangy flavor and helps balance the sweetness.
Step 7: Simmer Slowly
Reduce the heat to low and continue cooking for another 20 to 30 minutes. Stir from time to time until the mixture becomes thick, glossy, and jam-like. If it gets too dry, add a spoonful of water.
Step 8: Taste and Adjust
Taste the onion jam and adjust with more salt, sugar, or vinegar if needed.
Step 9: Cool the Jam
Remove from heat and let it cool completely. It will thicken more as it cools.
Step 10: Store and Serve
Transfer the onion jam to a clean jar or airtight container. Store in the refrigerator for up to 1 week.
Serving Suggestions
Best Pairings for Onion Jam
This is where onion jam really shines—it’s not just delicious, it’s ridiculously versatile. Whether you’re putting together a quick snack or creating a fancy dinner spread, this condiment can take almost any dish up a notch.
Here are some of the best pairings:
- Cheese Boards – Serve alongside brie, goat cheese, blue cheese, or aged cheddar. It balances strong flavors beautifully.
- Burgers and Sandwiches – A spoonful of onion jam on a burger? Game changer. It also works wonders on grilled cheese or paninis.
- Steaks and Roasts – Use it as a glaze or topping for beef, pork, or lamb. It adds a sweet-savory layer that complements rich meats.
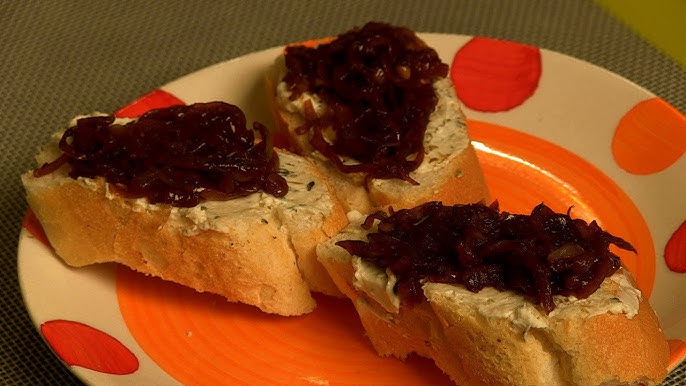
- Breakfast Dishes – Spread it on toast with cream cheese or swirl into scrambled eggs for a sweet, tangy twist.
- Pizza and Flatbreads – Top your pizza with dollops of onion jam, goat cheese, and arugula for an instant gourmet upgrade.
Think of onion jam like a flavor booster—it’s your secret weapon in the kitchen.
Creative Ways to Use It
Beyond the basics, there are some really fun and unexpected ways to incorporate onion jam into your meals. Here are a few ideas to spark your creativity:
- Stuffed Mushrooms or Chicken – Add a spoonful inside for extra richness.
- Pasta Sauce Enhancer – Stir a bit into cream or tomato sauces for depth.
- Savory Tarts or Quiches – Layer onion jam with cheese and veggies before baking.
- Wraps and Tacos – Yep, it even works in wraps, especially with grilled veggies or shredded meats.
- Salad Dressings – Mix a teaspoon into vinaigrettes for a unique, savory-sweet dressing.
This isn’t just a condiment—it’s a culinary chameleon. The more you use it, the more ways you’ll find to incorporate it into your daily cooking.
Storage and Shelf Life
Refrigerating and Freezing Tips
Once your onion jam is cooled and jarred, proper storage is essential to keeping it safe and delicious. Here’s how to do it right:
- Refrigerate immediately after cooling. Onion jam contains sugars and acids, but it’s still perishable.
- Store it in sterile, airtight containers to keep out bacteria and prevent spoilage.
- It will last for 2 to 3 weeks in the refrigerator—just be sure to use a clean spoon every time you scoop some out.
- For longer storage, freeze it in small portions (ice cube trays work well!). Once frozen, transfer cubes to a freezer-safe bag or container.
- Thaw in the refrigerator before use. Do not refreeze once thawed.
While it’s not shelf-stable like canned jams unless you use a proper canning method, it’s easy to store and use as needed when frozen in smaller batches.
Shelf Life and Spoilage Signs
Homemade onion jam doesn’t contain preservatives, so keeping an eye on freshness is important. Here’s how to tell if your jam has gone off:
- Smell – If it smells sour, funky, or off in any way, toss it.
- Appearance – Mold, discoloration, or cloudiness are red flags.
- Texture – If it becomes overly watery or oddly slimy, it’s past its prime.
To maximize shelf life:
- Always use a clean, dry utensil when scooping jam.
- Keep the container tightly sealed and refrigerated at all times.
- Label the jar with the date you made it.
Still with me? Awesome—we’ve got a few final sections to finish off this gourmet guide.
Troubleshooting Common Mistakes
Burnt Onions or Overcooking
One of the most common issues when making onion jam is burning the onions. Since the recipe relies on slow caramelization, rushing the process or using high heat can lead to bitter, overcooked onions—and that’s a flavor you can’t undo.
How to avoid it:
- Keep the heat low—especially after the onions start to brown. Patience is key.
- Use a heavy-bottomed pan to distribute heat evenly and prevent hot spots.
- Add liquid when needed—whether it’s water, wine, or vinegar—to loosen the mix and deglaze the pan.
If your onions are already burnt, unfortunately, it’s best to start over. Burnt flavors can overwhelm the entire batch and leave a bad aftertaste.
Too Runny or Too Thick Jam
Getting the texture just right can take a little practice.
If it’s too runny:
- Simmer uncovered for longer, stirring frequently to evaporate excess moisture.
- Make sure you didn’t add too much liquid during deglazing.
- Let it cool completely—it will thicken more as it sits.
If it’s too thick:
- Stir in a splash of warm water, broth, or even a little vinegar to loosen it.
- Be careful not to over-reduce the jam during cooking.
Consistency is subjective—some prefer a thicker, chunkier jam, while others want it more spreadable. Trust your instincts and go with what works for you.
Fixing Flavor Imbalances
Sometimes your jam might taste too sweet, too tangy, or just a little off. Don’t panic—most flavor imbalances are fixable.
Too sweet?
- Add a bit more vinegar or a pinch of salt to cut the sugar.
Too tangy or acidic?
- Stir in a teaspoon of brown sugar or honey.
- A small amount of butter can also help mellow harsh acidity.
Lacking flavor?
- Try a pinch of salt—it often enhances the existing sweetness and umami.
- Add fresh herbs or spices to layer in more complexity.
Taste often and adjust as needed. Onion jam is very forgiving and allows plenty of room to customize.
Customization Ideas
Sweet and Savory Blends
One of the best things about onion jam is how customizable it is. You can make it lean sweet, spicy, tangy, or somewhere in between.
Here are some sweet-savory combos to try:
- Onion + Apple – Add finely diced apples early in the cooking process.
- Onion + Fig – Stir in chopped dried figs for a deep, jammy sweetness.
- Onion + Bacon – Cook chopped bacon first, then caramelize the onions in the rendered fat for a smoky finish.
Balance is key. When adding fruits, reduce the amount of sugar to avoid an overly sweet product.
Spicy Onion Jam Options
Love a little heat? Onion jam can easily be turned into a fiery flavor bomb with the right additions:
- Chili flakes or cayenne – Add early for deeper heat or near the end for a more upfront kick.
- Fresh jalapeños or serranos – Dice and sauté with the onions for a bold twist.
- Smoked paprika or chipotle powder – For a smoky, spicy vibe.
Just remember, spicy elements intensify over time, especially in jam stored in jars. Start with a small amount and build up as needed.
Using Different Vinegars and Sugars
Want to experiment? Try swapping out your standard ingredients for new flavors.
Vinegar alternatives:
- Red wine vinegar – Sharp and acidic, great with red onions.
- Sherry vinegar – Adds complexity and a slightly nutty finish.
- Apple cider vinegar – Fruity and slightly sweet.
Sugar alternatives:
- Coconut sugar – Caramel-like and earthy.
- Maple syrup – Great for a natural, woodsy sweetness.
- White sugar – More neutral, but works in a pinch.
These swaps let you tailor the jam to your taste or what you have on hand.
Nutritional Value
Calories and Macronutrients
While onion jam is delicious, it’s good to know what you’re putting on your plate. Here’s a rough breakdown for a 1-tablespoon serving:
- Calories: 35–45
- Carbohydrates: 7–10g (mostly from sugar and onions)
- Fat: 1–2g (depending on oil/butter used)
- Protein: Less than 1g
- Fiber: Around 0.5g
Since it’s mostly onions, sugar, and vinegar, it’s not calorie-heavy—but it is high in natural and added sugars. Use it as a flavor enhancer, not a meal replacement!
Is Onion Jam Healthy?
Let’s be honest: onion jam isn’t a superfood, but it’s also not junk food.
Pros:
- Onions contain antioxidants, especially quercetin.
- Homemade versions have no preservatives or artificial additives.
- It’s portion-controlled—just a small spoonful adds big flavor.
Cons:
- High in sugar, even if you use natural sweeteners.
- Not ideal for diabetic diets without modifications.
If you’re watching your sugar intake, you can reduce the sugar or use alternatives like monk fruit or stevia to make a lower-glycemic version.
FAQs about Onion Jam Recipe
1. Can I Make Onion Jam Without Sugar?
Yes, but keep in mind that sugar helps with both caramelization and preservation. You can use natural sweeteners like maple syrup or honey, or sugar substitutes like monk fruit or erythritol, though texture and flavor may vary.
2. How Do I Can Onion Jam for Long-Term Storage?
Canning onion jam is possible but must be done carefully due to low acidity. Use vinegar-based recipes, sterilize jars, and process in a boiling water bath. Always follow approved canning safety guidelines to avoid spoilage or botulism.
3. Can I Use Red Onions or Shallots?
Absolutely! Red onions give a richer color and deeper flavor, while shallots offer a delicate, slightly garlicky sweetness. Feel free to mix and match for a layered flavor profile.
4. Is Onion Jam Vegan?
Yes—if you use plant-based oil or vegan butter and skip meat-based add-ins like bacon, your jam will be entirely vegan. Just double-check any flavorings (like Worcestershire sauce) for animal products.
5. How Much Onion Jam Does This Recipe Make?
This recipe typically yields about 1 to 1.5 cups of onion jam, depending on how much you reduce it and the size of your onions. It’s enough for a couple of cheese boards or to top 6–8 burgers.
Conclusion
Onion jam might just be the most underrated condiment in your kitchen. It’s sweet, savory, rich, and wildly versatile. From elevating burgers to starring on cheese boards, it turns simple meals into something special. And the best part? You don’t need fancy ingredients or chef-level skills—just a bit of patience and love.
Now that you’ve got the full step-by-step guide, plus all the tips and tricks, you’re ready to make your own batch of gourmet onion jam. Don’t be surprised when friends ask for the recipe or start hinting for a jar as a gift!
So go ahead—slice those onions, take it slow, and cook up something amazing.