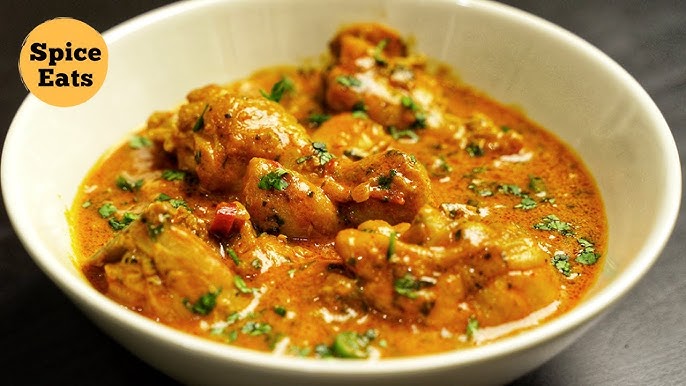
Coconut Curry Recipe: Coconut curry is a warm, comforting dish made by simmering aromatic spices with creamy coconut milk, vegetables, and protein of choice. Originating from Southeast Asian cuisines, particularly Thai and Indian, this dish is a staple in many households. It’s known for its rich texture, mildly sweet undertone from the coconut milk, and layers of flavor that come from the various spices used. Whether you’re new to cooking or an experienced chef, coconut curry is a recipe that invites experimentation and always ends up tasting like home in a bowl.
Why You’ll Love This Recipe
This coconut curry recipe is not only simple to follow, but it’s also incredibly versatile. You can make it spicy or mild, add chicken or keep it vegan, and include any vegetables you have lying around. It’s a fantastic way to clean out your fridge while still creating something utterly delicious. On top of that, it’s gluten-free, can be made dairy-free, and is packed with nutrients. The dish is perfect for busy weeknights, cozy weekends, or meal prepping for the week ahead.
Ingredients for the Perfect Coconut Curry
Core Ingredients
To start off, let’s talk about the must-haves for any delicious coconut curry:
- Coconut Milk: The star of the show. Full-fat coconut milk gives the curry its creamy texture and rich taste.
- Aromatics: Garlic, ginger, and onion form the flavor base.
- Spices: Curry powder, turmeric, cumin, and sometimes a dash of cinnamon.
- Vegetables: Bell peppers, carrots, and peas are classic, but feel free to toss in what you love.
- Protein: Chicken, tofu, shrimp, or chickpeas work beautifully.
- Oil: Coconut oil or any neutral oil for sautéing.
- Salt & Pepper: Essential seasonings to bring it all together.
These ingredients combine into a balanced, delicious curry with just the right amount of depth and complexity.
Optional Add-ins for Customization
Depending on your taste or what’s in your pantry, you might want to include:
- Fresh herbs like cilantro or basil for garnishing
- Chili flakes or fresh chilies for heat
- Lime juice or zest for brightness
- Fish sauce or soy sauce for umami
- Sugar or honey for balance
The beauty of coconut curry lies in its adaptability. You can truly make it your own.
Essential Equipment Needed
Kitchen Tools That Make the Process Easier
You don’t need a fancy setup to make coconut curry, but having the right tools can streamline the process:
- Large Skillet or Wok: Ideal for sautéing and simmering the curry.
- Cutting Board and Sharp Knife: For prepping your vegetables and proteins.
- Can Opener: You’ll need this for your coconut milk.
- Wooden Spoon or Spatula: Perfect for stirring without scratching your pan.
- Measuring Spoons and Cups: For accuracy, especially with spices.
If you’ve got these on hand, you’re more than ready to start.
Preparing the Ingredients
Chopping Vegetables and Prepping Protein
The first step is mise en place – having everything prepped and ready. Slice your onions thinly, mince your garlic and ginger, chop your vegetables into bite-sized pieces, and cube your protein.
If using chicken, go for boneless, skinless thighs or breasts. For tofu, press it well before cutting to remove excess moisture. If using shrimp, peel and devein them beforehand.
Having everything prepped not only speeds up the cooking but also ensures nothing gets overcooked or forgotten.
Tips for Using Fresh vs. Canned Ingredients
Fresh ginger and garlic offer a robust flavor, but you can substitute with pastes if you’re short on time. As for coconut milk, full-fat canned versions yield the best results. Avoid refrigerated or boxed coconut milk as they tend to be more diluted and less creamy.
For vegetables, fresh is great, but frozen ones (like peas or spinach) work fine too. Canned chickpeas are a convenient protein choice – just drain and rinse them well before use.
Cooking the Coconut Curry – Step-by-Step
Step 1: Sauté Aromatics
Heat a bit of oil in your skillet or wok. Toss in your chopped onions and cook until translucent, about 3–4 minutes. Add the minced garlic and ginger, cooking for another minute until fragrant.
This step is crucial – it builds the flavor base. Don’t rush it.
Step 2: Add Vegetables and Protein
Next, add your chopped vegetables and protein to the pan. Stir everything together and cook for about 5–7 minutes, allowing the flavors to mingle and the protein to start browning.
This stage is where the dish starts to come alive.
Step 3: Stir in the Coconut Milk and Simmer
Pour in the coconut milk and mix well. Lower the heat and let it simmer gently for 10–15 minutes. Stir occasionally to avoid sticking.
This is the magical step where all the flavors combine into a creamy, aromatic delight.
Step 4: Season to Taste
Now’s the time to add salt, pepper, and any additional spices. If you like a bit of heat, toss in some chili flakes or hot sauce. Want it sweeter? A touch of sugar or honey will do.
Taste and adjust – it’s your curry!
Step 5: Final Touches and Garnishing
Once the curry thickens and everything is cooked through, finish with fresh herbs, a squeeze of lime juice, or even a dollop of yogurt for contrast.
Serve hot and enjoy the rich, complex flavors you’ve built in one pan.
Serving Suggestions
Best Pairings for Coconut Curry
Coconut curry is a versatile dish that pairs wonderfully with various sides, enhancing its rich and creamy flavors. Here are some top pairings:
- Steamed Basmati Rice: The fluffy texture and subtle aroma of basmati rice complement the curry’s richness.
- Naan Bread: This soft, leavened flatbread is perfect for scooping up the curry and savoring every drop.
- Quinoa: For a protein-packed alternative, quinoa adds a nutty flavor and chewy texture.
- Cauliflower Rice: A low-carb option that absorbs the curry’s flavors well.
- Roti or Chapati: These unleavened flatbreads are traditional accompaniments in many South Asian cuisines.
Additionally, a side of cucumber raita or a fresh garden salad can provide a refreshing contrast to the curry’s warmth.
Presentation Tips
Presentation enhances the dining experience.
- Garnish with Fresh Herbs: Sprinkle chopped cilantro or basil on top for a burst of color and freshness.
- Add a Citrus Wedge: A slice of lime or lemon on the side allows diners to add a zesty kick.
- Use Vibrant Dishware: Serving the curry in brightly colored bowls can make the dish more visually appealing.
- Drizzle with Coconut Cream: A swirl of coconut cream on top adds a gourmet touch.
- Include Accompaniments: Present with small bowls of chutneys or pickles to offer a variety of flavors.
Storing and Reheating Leftovers
Best Practices for Storage
Proper storage ensures the coconut curry remains safe and delicious for later consumption:
- Cool Before Storing: Allow the curry to cool to room temperature before transferring to storage containers.
- Use Airtight Containers: Store the curry in airtight containers to prevent contamination and preserve flavor.
- Refrigeration: The curry can be refrigerated for up to 3-4 days.
- Freezing: For longer storage, freeze the curry in freezer-safe containers for up to 2 months.
How to Reheat Without Losing Flavor
Reheating properly maintains the curry’s taste and texture:
- Stovetop Method: Place the curry in a saucepan over medium heat, stirring occasionally until heated through.
- Microwave Method: Transfer the curry to a microwave-safe dish, cover loosely, and heat in intervals, stirring between each, until hot.
- Avoid Overheating: Overheating can cause the coconut milk to separate. Heat just until warm.
- Add Liquid if Needed: If the curry has thickened, add a splash of water or coconut milk to reach the desired consistency.
Nutritional Information
Health Benefits of Coconut Curry Ingredients
Coconut curry is not only flavorful but also offers various health benefits:
- Coconut Milk: Rich in healthy fats known as medium-chain triglycerides (MCTs), which may aid in weight management and provide quick energy.
- Spices: Ingredients like turmeric and ginger have anti-inflammatory properties and can boost the immune system.
- Vegetables: Common additions like bell peppers, spinach, and carrots are high in vitamins, minerals, and fiber.
- Lean Proteins: Using chicken, tofu, or legumes adds protein essential for muscle repair and overall health.
- Low in Sugar: Homemade versions allow control over sugar content, making it a healthier option compared to some restaurant dishes.
Incorporating coconut curry into your diet can contribute to a balanced and nutritious meal plan.
Variations to Try
Vegan and Vegetarian Options
If you’re following a plant-based diet or just want to go meatless for a day, coconut curry is your best friend. The creamy coconut base pairs beautifully with a wide array of vegetables and plant-based proteins, giving you endless possibilities without sacrificing flavor.
Start with tofu or tempeh for protein. Make sure to press tofu beforehand to remove moisture—it helps it absorb more of the curry flavors. You can also go with legumes like lentils or chickpeas for a hearty, filling alternative.
Vegetables that shine in vegan curries include:
- Sweet potatoes
- Cauliflower
- Spinach
- Zucchini
- Eggplant
- Mushrooms
Add them in layers—harder vegetables first (like potatoes and carrots), then softer ones later (like spinach or peas). This ensures everything cooks perfectly.
For added richness, a spoonful of cashew cream or a drizzle of olive oil can elevate the dish without using dairy.
Spicy vs. Mild Versions
One of the best things about coconut curry is how easily you can control the heat. Whether you like a mild, mellow flavor or a fiery explosion, it’s all up to you.
For mild curry lovers:
- Stick to mild curry powders.
- Avoid chili flakes or hot sauces.
- Balance spices with a bit of sugar or extra coconut milk.
For spice seekers:
- Use Thai red or green curry paste.
- Add fresh chilies or dried red pepper flakes.
- Include cayenne or spicy paprika.
You can also offer spice on the side if you’re serving guests—this way, everyone gets a plate they love.
Common Mistakes to Avoid
Tips to Make It Perfect Every Time
Coconut curry seems easy—and it is—but there are still a few mistakes that can throw it off. Avoid these common pitfalls to ensure you always make a restaurant-worthy dish:
1. Overcrowding the Pan: Adding too many ingredients at once can drop the temperature and steam the food instead of sautéing it. Cook in batches if needed.
2. Using Low-Quality Coconut Milk: Always go for full-fat, canned coconut milk for the best flavor and texture. Boxed versions or light coconut milk often make the curry watery.
3. Not Toasting Spices: Throwing in curry powder without letting it cook for a few seconds in oil can result in a flat-tasting dish. Toast your spices for depth and complexity.
4. Overcooking the Vegetables: Add your veggies in stages. Hard veggies first, soft ones last. Overcooking them turns your curry into mush.
5. Forgetting to Taste and Adjust: Every curry needs a final check for seasoning. Maybe a pinch more salt? A dash of lime juice? Tweak until it sings.
6. Not Letting it Simmer Enough: Rushing this step can mean underdeveloped flavors. Give it at least 10-15 minutes of gentle simmering.
Getting these basics right means your curry will come out rich, balanced, and bursting with flavor every single time.
FAQs about Coconut Curry Recipe
1. What is coconut curry made of?
Coconut curry typically includes coconut milk, curry spices (like turmeric, cumin, coriander, or curry powder), garlic, ginger, onions, and a protein or vegetable base such as chicken, tofu, or chickpeas. Fresh herbs and lime juice often enhance the flavor.
2. Can I make coconut curry vegan?
Yes! Simply use plant-based protein like tofu, lentils, or chickpeas, and ensure your curry paste or spice blend doesn’t contain animal products. Coconut milk is already dairy-free, making it ideal for vegan curries.
3. What kind of coconut milk is best for curry?
Full-fat canned coconut milk is best for rich, creamy curries. Light coconut milk works too but will yield a thinner sauce. Avoid the boxed variety meant for drinking—it’s too diluted for cooking.
4. How do I thicken my coconut curry?
You can simmer the curry uncovered to reduce the liquid, mash some of the vegetables or lentils, or add a cornstarch or flour slurry. Full-fat coconut milk naturally gives a thicker consistency.
5. What protein goes best with coconut curry?
Popular choices include chicken, shrimp, tofu, tempeh, chickpeas, and paneer. The rich, creamy sauce complements both meat and vegetarian options well.
6. How long does coconut curry last in the fridge?
Coconut curry stays fresh in the refrigerator for up to 3–4 days when stored in an airtight container. Reheat gently on the stove or in the microwave.
7. Can I freeze coconut curry?
Absolutely. Coconut curry freezes well for up to 2 months. Just allow it to cool completely before storing in freezer-safe containers. Thaw in the fridge overnight before reheating.
8. Is coconut curry spicy?
It depends on the recipe. Some versions are mild and sweet, while others are fiery hot. You can control the heat by adjusting the amount of chili or curry paste used.
9. What can I serve with coconut curry?
Serve it with rice (basmati, jasmine, or brown), naan bread, roti, or even quinoa. It also pairs well with fresh salad or sautéed greens for a balanced meal.
10. Can I use curry powder instead of curry paste?
Yes, curry powder can be used for a milder flavor. However, curry paste offers a deeper, more complex taste due to its mix of spices, herbs, and aromatics. You can adjust based on your preference.
Conclusion
Coconut curry is one of those magical dishes that feels like a warm hug in a bowl. It’s comforting yet vibrant, simple yet full of depth. Whether you’re making it for a busy weeknight dinner, a weekend gathering, or meal prep, it’s a recipe that never fails to impress. With its rich coconut base, aromatic spices, and flexibility for any diet or taste preference, it truly deserves a spot in your regular recipe rotation.
Don’t be afraid to experiment—try different vegetables, proteins, and spice levels. Once you get the basics down, coconut curry becomes one of those go-to dishes you can whip up without even thinking.
So grab your ingredients, fire up the stove, and let the aromas fill your kitchen. Happy cooking!