Baked Custard Recipe: There’s something deeply nostalgic about the first spoonful of a warm, silky baked custard. It’s creamy, subtly sweet, and perfectly smooth – like a soft whisper of comfort food. Whether you’re baking it for a cozy dinner night or impressing guests with a vintage dessert, this baked custard recipe will win hearts at the table. Let’s dive in and learn how to make this timeless dessert step by step.
What is Baked Custard?
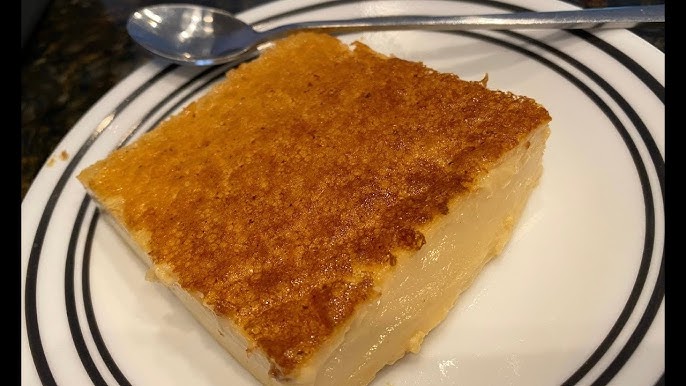
Baked custard is one of those classic desserts that has stood the test of time. It’s a smooth, creamy blend of eggs, milk, sugar, and flavoring, gently baked in the oven until just set. Unlike stovetop custards (like pastry cream), baked custards are typically made without cornstarch or thickeners – they rely purely on the magical transformation that happens when eggs are slowly heated in a water bath.
You might have had variations like crème brûlée, flan, or even egg tarts. All are part of the custard family, but baked custard is the most stripped-down, pure form. It’s humble but elegant, rich without being heavy, and it melts in your mouth with every bite.
Why You’ll Love This Classic Dessert
- Simple ingredients: You only need a few pantry staples to whip this up.
- Elegant presentation: Serve it in ramekins for that fine-dining touch.
- Customizable: Infuse it with vanilla, nutmeg, citrus, or even coffee.
- Make-ahead friendly: Baked custard can be prepared in advance and stored in the fridge.
- Naturally gluten-free: No flour or starch needed – just eggs and milk magic.
If you’ve never made custard from scratch before, don’t worry. This step-by-step guide will walk you through each stage, with pro tips and kitchen tricks to guarantee creamy success.
Ingredients You’ll Need
Let’s get started with the basics – the building blocks of your baked custard. The beauty of this dessert lies in its simplicity.
Basic Ingredients
Here’s what you’ll need for a classic vanilla baked custard:
| Ingredient | Quantity | Notes |
|---|---|---|
| Whole milk | 2 ½ cups | Warm, not boiling |
| Large eggs | 4 | Room temperature |
| Granulated sugar | ½ cup | Adjust to taste |
| Vanilla extract | 1 ½ teaspoons | Or use 1 vanilla bean |
| Salt | Pinch | Enhances flavor |
| Nutmeg (optional) | Light sprinkle | Traditional topping |
Optional Flavor Additions
Want to jazz things up a bit? Try these:
- Citrus zest (lemon or orange)
- Cinnamon or cardamom
- Coconut milk (substitute part of the milk)
- Espresso or coffee extract
- Maple syrup (in place of some sugar)
Tools You’ll Need
- Mixing bowls
- Whisk
- Measuring cups & spoons
- Fine mesh strainer
- Ramekins or small oven-safe cups
- Baking dish (for the water bath)
- Kettle or saucepan (for boiling water)
Tips Before You Start Baking
Before we jump into the step-by-step instructions, here are a few tips that can make or break your baked custard.
Choosing the Right Baking Dish
Individual ramekins give you that classic look and easy portioning. But you can also bake the custard in one larger dish, like a pie plate or casserole dish. Just remember: the larger the dish, the longer the baking time.
Importance of the Water Bath
This is non-negotiable. A water bath (aka bain-marie) surrounds the custard with gentle, even heat. This prevents curdling, cracking, or overcooked edges. You’ll place your ramekins inside a larger dish, then pour hot water around them before baking.
How to Make Baked Custard – Step-by-Step
Let’s break it down – no rushing, no skipping. Follow these steps and you’ll be rewarded with the creamiest custard imaginable.
Step 1: Preheat Your Oven
Set your oven to 325°F (160°C). This gentle heat is key for custard—it cooks slowly and evenly, giving that delicate, melt-in-your-mouth texture. Too high a temperature can cause curdling or a rubbery texture, so patience is everything here. While the oven warms, place a deep baking dish (or roasting pan) on the middle rack. You’ll use this later for the water bath.
Step 2: Prepare the Custard Mixture
In a medium saucepan, warm 2 cups whole milk (or half-and-half for richer flavor) over low heat until just steaming—don’t let it boil. In a bowl, whisk together 3 large eggs, ½ cup sugar, 1 teaspoon vanilla extract, and a pinch of salt until smooth and slightly frothy. Slowly pour the warm milk into the egg mixture while whisking constantly. This gradual mixing keeps the eggs from scrambling and ensures a creamy custard base.
Step 3: Strain for a Silky Texture
Once combined, strain the custard through a fine-mesh sieve into another bowl or large measuring cup. This step removes any tiny egg bits, leaving you with a smooth, velvety mixture—like a dessert whispering luxury.
Step 4: Pour Into Ramekins
Set out 4–6 ramekins (about 6 ounces each). Divide the custard evenly among them, filling each about three-quarters full.
Step 5: Set Up the Water Bath
Place the filled ramekins in your preheated baking dish. Pour hot water into the dish until it reaches halfway up the sides of the ramekins. The water bath (bain-marie) ensures even, gentle cooking that prevents cracking.
Step 6: Bake the Custard
Bake for 35–45 minutes, or until the custard is just set but still slightly wobbly in the center. Remove the ramekins carefully and let them cool on a rack.
Step 7: Cool and Chill
Once at room temperature, refrigerate for at least 2 hours. The custard will thicken and set completely. Serve chilled—plain, or topped with a sprinkle of nutmeg, caramel drizzle, or fresh berries for that classic, elegant finish.
Baked Custard Texture: How to Know When It’s Done
The perfect baked custard should be smooth and creamy, with a slight jiggle in the center. If it’s watery, it’s undercooked. If it’s firm and rubbery, it’s overcooked. Hitting the sweet spot takes a little attention, but once you get it right, it becomes second nature.
Signs It’s Done:
- The edges are set, but the center still jiggles.
- Knife inserted near the center comes out clean.
- No visible cracks on the surface.
- The custard doesn’t weep or separate when cooled.
Remember, custard is very sensitive to temperature. Always go low and slow for the most luscious texture.
Serving Suggestions
The beauty of baked custard is that it shines on its own, but you can absolutely dress it up when you want to make it special.
Serve Warm or Cold
- Warm: Straight from the oven after cooling for a few minutes, giving a soft, almost pudding-like texture.
- Cold: Chilled for a firmer, silkier bite – great for make-ahead entertaining.
Toppings and Garnishes
- Fresh berries (strawberries, blueberries, raspberries)
- Whipped cream
- Drizzle of caramel or honey
- A dusting of cinnamon or cocoa powder
- Toasted nuts or shaved chocolate
Presentation matters, especially if you’re serving guests. Add your favorite toppings just before serving for a beautiful contrast in color and texture.
Common Mistakes to Avoid
Let’s save you from some classic custard catastrophes. These are the most common pitfalls people run into – and how to steer clear of them.
- Skipping the water bath – You’ll end up with curdled custard or a tough texture.
- Using cold eggs – This can cause uneven mixing and cooking.
- Boiling the milk – It can scramble the eggs when added.
- Overbaking – Leads to cracks and a rubbery finish.
- Not straining the mixture – Results in a grainy texture instead of silky smooth.
One trick to remember: If in doubt, take it out. Custard will continue to cook slightly from residual heat even after you remove it from the oven.
Make-Ahead and Storage Tips
Baked custard is a make-ahead superstar. Here’s how to keep it fresh and delicious:
- Refrigerate: Once cooled, cover tightly with plastic wrap or lids and refrigerate for up to 4 days.
- Avoid freezing: Custard doesn’t freeze well. The texture changes, and it often separates when thawed.
- Make-ahead: You can prep and bake the night before serving. In fact, the texture improves after chilling overnight.
- Reheat: If you prefer it warm, just microwave individual ramekins for 15-20 seconds, or warm gently in a low oven.
Baked Custard Variations
Once you’ve mastered the basic recipe, the possibilities are endless. Here are some mouthwatering twists to try:
Caramel Baked Custard (Flan)
Line the ramekins with homemade caramel before pouring in the custard. Once baked and chilled, invert to reveal a golden caramel sauce on top.
Vanilla Bean Custard
Swap the vanilla extract with a whole vanilla bean. Split it, scrape out the seeds, and infuse it into the warm milk for deep, aromatic flavor.
Coconut Milk Custard
Replace half the milk with full-fat coconut milk. It adds a subtle tropical flavor and creaminess that pairs beautifully with toasted coconut topping.
You can even experiment with flavors like:
- Lavender
- Chai spice
- Chocolate (add cocoa or melted chocolate)
- Earl Grey tea (steep in the milk)
Nutritional Information (Per Serving – Classic Version)
| Nutrient | Amount |
|---|---|
| Calories | 180–220 kcal |
| Protein | 7–8g |
| Carbohydrates | 18–20g |
| Fat | 10–12g |
| Sugars | 17–18g |
| Calcium | High |
| Gluten | 0g (gluten-free) |
Note: This is an estimate and can vary based on ingredients used and portion sizes.
Pairing Ideas – What Goes Well With Baked Custard?
Looking to turn your baked custard into a full dessert experience? Try pairing it with:
- Espresso or cappuccino: The bitterness of coffee complements the sweet, creamy custard.
- Shortbread or biscotti: Adds a lovely crunch on the side.
- Fruit compote: Like cherry, plum, or blueberry.
- A glass of dessert wine: Think Moscato or Sauternes.
- Crispy phyllo or puff pastry shards: Adds texture and elegance.
Whether you’re ending a fancy dinner party or indulging in a midnight snack, baked custard has that “just right” vibe.
FAQs about Baked Custard Recipe
1. Can I make baked custard without ramekins?
Yes, you can use a ceramic pie dish or any oven-safe bowl. Just adjust the baking time – it’ll take longer in a larger dish.
2. Why is my baked custard watery?
That’s usually a sign of underbaking or skipping the water bath. Bake until the center is just set with a gentle jiggle.
3. Can I use plant-based milk?
Yes! Almond, oat, and coconut milk work well. Just expect slight changes in flavor and texture.
4. What’s the difference between baked custard and crème brûlée?
Both are custards, but crème brûlée has a sugar topping that’s caramelized with a torch. The custard base is very similar.
5. Can I double the recipe?
Absolutely. Just make sure to maintain even portions in the ramekins and use a large enough water bath pan.
Final Thoughts
Baked custard is one of those desserts that proves you don’t need anything fancy to make something truly extraordinary. It’s the kind of treat that connects generations – the dessert your grandma used to make, yet timeless enough to serve at a modern dinner table.
With this step-by-step guide, you’ve got everything you need to make a creamy, foolproof custard that’ll impress anyone who tries it. So go ahead – preheat that oven, grab those ramekins, and bring a little old-school sweetness into your kitchen.