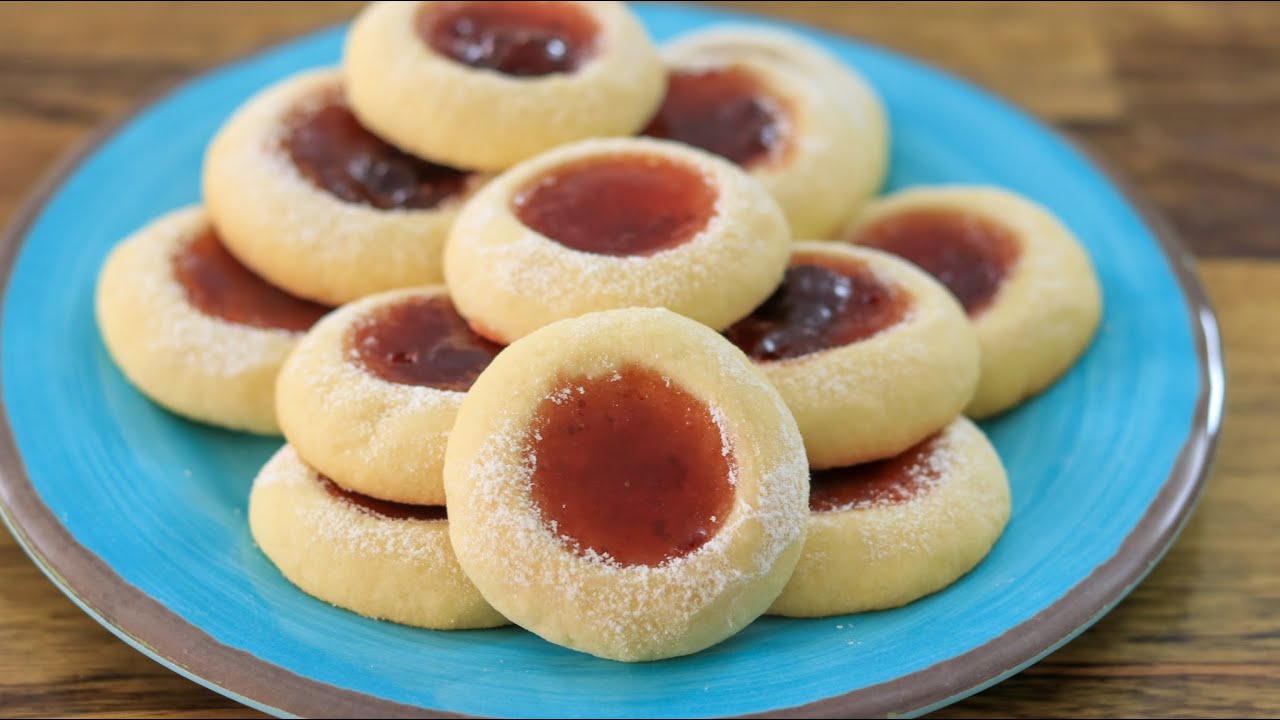
Thumbprint Cookies Recipe: Thumbprint cookies are one of the most loved homemade cookies because they combine a buttery, tender cookie base with a sweet, colorful filling in the center. These cookies are simple, beautiful, and perfect for holidays, birthdays, family gatherings, tea-time snacks, bake sales, and everyday dessert trays. Their signature look comes from the small indentation pressed into the center of each dough ball, usually filled with jam, preserves, chocolate, caramel, lemon curd, or nut-based spreads.
We prepare thumbprint cookies with basic pantry ingredients, yet the final result feels elegant and bakery-worthy. The cookie itself should be soft, lightly crumbly, rich with butter, and firm enough to hold the filling without spreading too much in the oven. When made properly, each cookie has a delicate golden edge, a tender bite, and a glossy center that makes it instantly attractive.
This thumbprint cookies recipe gives us a reliable method for making cookies that are flavorful, neat, and beautifully shaped. We focus on proper dough texture, chilling time, indentation technique, baking temperature, and filling choices so the cookies come out consistent every time.
Ingredients You’ll Need for Thumbprint Cookies
To make classic thumbprint cookies, we need simple ingredients that work together to create a rich, tender, and flavorful cookie dough.
For the Cookie Dough
- 1 cup unsalted butter, softened
- 2/3 cup granulated sugar
- 2 large egg yolks
- 1 teaspoon vanilla extract
- 1/4 teaspoon almond extract optional, for extra flavor
- 2 cups all-purpose flour
- 1/4 teaspoon salt
For the Filling
- 1/2 cup raspberry jam, strawberry jam, apricot preserves, or any preferred fruit jam
Optional Coating
- 1 cup finely chopped nuts, such as pecans, walnuts, or almonds
- 1 lightly beaten egg white, for helping the nuts stick to the dough
Optional Finishing Touch
- Powdered sugar, for dusting after baking
Best Jam for Thumbprint Cookies
The best jam for thumbprint cookies is thick, smooth, and flavorful. Thin or watery jam may bubble too much during baking and can run over the sides of the cookie. We recommend raspberry jam, strawberry jam, apricot preserves, blackberry jam, cherry preserves, or orange marmalade. These fillings hold their color well and give the cookies a beautiful contrast.
For a smoother center, we can lightly stir the jam before adding it to the cookies. If the jam contains large fruit pieces, we can press it through a small sieve or chop the fruit pieces finely. This helps the filling sit neatly inside the indentation and creates a polished finish.
Step-by-Step Guide to Making Thumbprint Cookies
Step 1: Soften the Butter Properly
We begin by using softened unsalted butter. The butter should be cool but soft enough to press with a finger. It should not be melted, greasy, or overly warm. Properly softened butter helps create a smooth dough and allows the sugar to blend evenly.
If the butter is too cold, it will not cream properly. If it is too soft or melted, the cookies may spread too much during baking. The right butter texture is one of the most important parts of making perfect thumbprint cookies.
Step 2: Cream the Butter and Sugar
In a large mixing bowl, we beat the softened butter and granulated sugar together until the mixture becomes light, creamy, and slightly fluffy. This step helps create a tender cookie texture. Creaming adds a small amount of air to the dough, giving the cookies a pleasant bite without making them cakey.
We should beat the butter and sugar for about 2 to 3 minutes using a hand mixer or stand mixer. The mixture should look pale and smooth before adding the next ingredients.
Step 3: Add Egg Yolks and Flavor Extracts
Next, we add the egg yolks, vanilla extract, and almond extract if using. Egg yolks give the dough richness and help bind the ingredients together. Vanilla adds warmth, while almond extract gives the cookies a classic bakery-style flavor.
We mix until everything is fully combined. At this stage, the dough base should look smooth and creamy.
Step 4: Add Flour and Salt
In a separate bowl, we whisk together the all-purpose flour and salt. Then we gradually add the dry ingredients to the butter mixture. We mix on low speed until the dough comes together.
The dough should be soft but not sticky. It should hold its shape when pressed. We avoid overmixing because too much mixing can make the cookies firm instead of tender. Once the flour disappears into the dough, we stop mixing.
Step 5: Chill the Cookie Dough
Chilling is important for thumbprint cookies because it helps the dough firm up and prevents excessive spreading. We cover the dough and refrigerate it for at least 30 minutes. If the kitchen is warm, we can chill the dough for up to 1 hour.
Cold dough is easier to roll, easier to shape, and better at holding the thumbprint indentation. This step also improves the final texture of the cookies.
Step 6: Preheat the Oven
We preheat the oven to 350°F / 175°C. A properly preheated oven helps the cookies bake evenly. If the oven is too cool, the cookies may spread before setting. If it is too hot, the edges may brown too quickly while the center remains underbaked.
We line a baking sheet with parchment paper to prevent sticking and make cleanup easier.
Step 7: Shape the Cookie Dough Balls
After chilling, we scoop the dough into small portions, about 1 tablespoon each. We roll each portion between our palms to form smooth balls. Keeping the dough balls even in size helps all the cookies bake at the same rate.
If we want nut-coated thumbprint cookies, we dip each dough ball lightly into beaten egg white, then roll it in finely chopped nuts. This creates a crunchy outer layer that pairs beautifully with the soft cookie and sweet filling.
Step 8: Make the Thumbprint Indentation
We place the dough balls on the prepared baking sheet, leaving about 2 inches between each cookie. Then we press gently into the center of each dough ball using a thumb, the back of a small spoon, or the rounded end of a wooden spoon.
The indentation should be deep enough to hold the filling but not so deep that it cracks through the bottom of the cookie. If small cracks appear around the edges, we can gently smooth them with our fingers.
Step 9: Add the Jam Filling
We spoon a small amount of jam into each indentation. About 1/2 teaspoon of jam is usually enough. We should avoid overfilling because the jam may bubble and overflow while baking.
For a clean look, we can use a small spoon or piping bag to add the filling. This gives the cookies a neat, professional appearance.
Step 10: Bake the Thumbprint Cookies
We bake the cookies in the preheated oven for 12 to 15 minutes, or until the edges are lightly golden and the bottoms are set. The tops should remain pale, while the edges may show a soft golden color.
We should not overbake thumbprint cookies. Overbaking can make them dry and crumbly. The cookies will continue to firm up slightly as they cool on the baking sheet.
Step 11: Cool the Cookies
Once baked, we remove the baking sheet from the oven and let the cookies rest for about 5 minutes. Then we transfer them to a wire rack to cool completely.
The jam will be very hot immediately after baking, so we allow the cookies to cool before serving. As the cookies cool, the filling thickens and sets beautifully in the center.
Tips for Perfect Thumbprint Cookies
For the best thumbprint cookies, we use high-quality butter, measure the flour correctly, and chill the dough before baking. Too much flour can make the cookies dry, while too little flour can make them spread. We spoon the flour into the measuring cup and level it off instead of packing it down.
If the dough cracks while making the indentation, it may be too cold. We can let it sit at room temperature for a few minutes before shaping. If the dough feels too soft, we chill it longer.
We should also avoid overfilling the centers. A small amount of jam gives a cleaner finish and prevents bubbling over the sides.
Thumbprint Cookie Variations
Thumbprint cookies are easy to customize. For a rich chocolate version, we can fill the centers with chocolate ganache, Nutella, or melted chocolate after baking. For a holiday version, we can use red and green jams or dust the cookies with powdered sugar.
We can also make lemon thumbprint cookies by adding lemon zest to the dough and filling the centers with lemon curd. For a caramel version, we bake the cookies without filling, then add soft caramel after they cool.
Nut lovers can roll the dough balls in chopped pecans, walnuts, almonds, or hazelnuts before baking. This adds texture and gives the cookies a more classic festive appearance.
How to Store Thumbprint Cookies
We store thumbprint cookies in an airtight container at room temperature for up to 5 days. To keep them neat, we place parchment paper between layers. If the filling is soft or sticky, single-layer storage is best.
For longer storage, we can refrigerate the cookies for up to 1 week. We can also freeze baked thumbprint cookies for up to 2 months. When ready to serve, we thaw them at room temperature.
If freezing unfilled cookies, we bake the cookie shells first, cool them completely, freeze them, and add fresh filling after thawing. This keeps the centers looking bright and fresh.
Common Mistakes to Avoid
One common mistake is using melted butter instead of softened butter. Melted butter changes the dough structure and can make the cookies spread too much. Another mistake is skipping the chilling step, which may cause flat cookies.
Overfilling the jam centers can also create messy cookies. We only need a small amount of filling in each indentation. Overbaking is another issue because thumbprint cookies should be tender, not hard.
We should also make sure the indentation is made before baking. If the center puffs up during baking, we can gently press it again while the cookies are still warm, then add a little extra jam if needed.
Serving Suggestions for Thumbprint Cookies
Thumbprint cookies are excellent with tea, coffee, hot chocolate, or a glass of milk. They look beautiful on dessert trays because the colorful jam centers create a bright and inviting presentation. These cookies are also perfect for Christmas cookie boxes, wedding dessert tables, birthday parties, and homemade edible gifts.
For a more elegant serving style, we can dust the cooled cookies lightly with powdered sugar. This gives them a delicate bakery-style finish without overpowering the flavor.
FAQs about Thumbprint Cookies Recipe
1. What are thumbprint cookies?
Thumbprint cookies are small, buttery cookies with a small indentation in the center, usually filled with jam, chocolate, caramel, or fruit preserves. They are soft, sweet, and perfect for holidays, parties, or everyday treats.
2. Why are my thumbprint cookies cracking?
Thumbprint cookies may crack if the dough is too cold, too dry, or pressed too deeply. To prevent cracking, let the dough soften slightly before shaping and press the center gently with your thumb or the back of a small spoon.
3. What is the best filling for thumbprint cookies?
The best filling depends on your taste. Popular options include strawberry jam, raspberry jam, apricot preserves, lemon curd, chocolate ganache, or caramel. Thick fillings work best because they stay in place while baking.
4. Can I make thumbprint cookies ahead of time?
Yes, thumbprint cookies can be made ahead. You can prepare the dough and refrigerate it for up to 2 days before baking. Baked cookies can also be stored in an airtight container for several days.
5. How do I store thumbprint cookies?
Store thumbprint cookies in an airtight container at room temperature for about 4 to 5 days. If filled with cream-based or fresh fruit fillings, keep them in the refrigerator to maintain freshness.
Final Thoughts
This thumbprint cookies recipe gives us buttery, tender, and beautifully filled cookies with a classic homemade taste. With simple ingredients, proper chilling, careful shaping, and the right amount of jam, we can make cookies that look attractive and taste delicious. Whether we choose raspberry, strawberry, apricot, chocolate, caramel, or lemon filling, these cookies remain one of the easiest and most rewarding treats to bake at home.
Thumbprint cookies are timeless because they are simple, customizable, and perfect for almost every occasion. When prepared with care, they deliver the ideal balance of buttery cookie texture and sweet filling in every bite.


