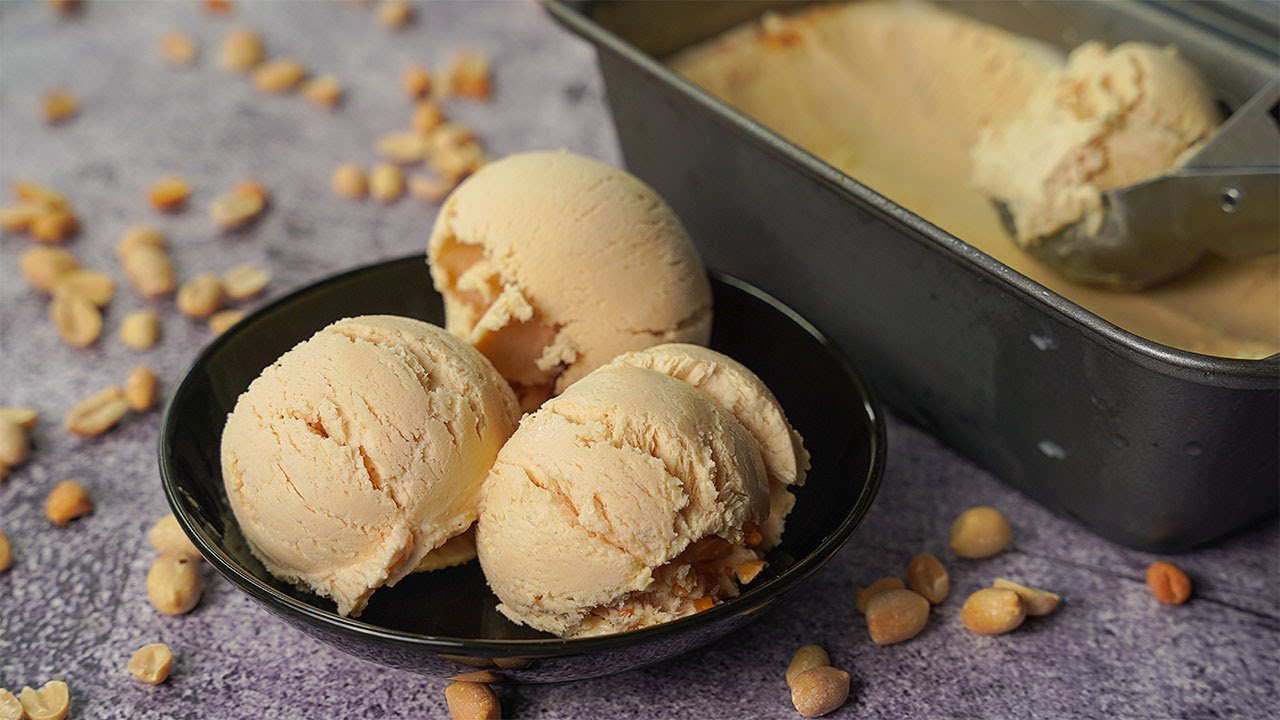
Peanut Butter Ice Cream Recipe: Peanut butter ice cream is one of the richest, creamiest, and most satisfying homemade desserts we can prepare with simple ingredients and a reliable method. With its smooth texture, deep nutty flavor, and luxurious frozen finish, this peanut butter ice cream recipe gives us the perfect balance of sweet, salty, creamy, and comforting in every spoonful.
This recipe is ideal for anyone who loves classic peanut butter desserts and wants a homemade ice cream that tastes indulgent, fresh, and full of real peanut butter flavor. Whether we serve it in a bowl, scoop it onto warm brownies, sandwich it between cookies, or drizzle it with chocolate sauce, this creamy frozen treat always delivers.
List Ingredients You’ll Need
To make a rich and smooth homemade peanut butter ice cream, we need ingredients that work together to create body, flavor, sweetness, and creaminess.
Main Ingredients
- 2 cups heavy cream
- 1 cup whole milk
- ¾ cup granulated sugar
- ¾ cup creamy peanut butter
- 4 large egg yolks
- 1 teaspoon vanilla extract
- ¼ teaspoon salt
Optional Add-Ins
- ½ cup chopped roasted peanuts
- ½ cup mini chocolate chips
- ½ cup peanut butter cups, chopped
- ¼ cup chocolate fudge sauce
- ¼ cup caramel sauce
- Crushed cookies or brownie pieces
For the best result, we should use creamy peanut butter instead of crunchy peanut butter in the ice cream base. Creamy peanut butter blends smoothly into the custard and gives the finished ice cream a silkier texture. If we want crunch, we can add chopped peanuts or peanut butter cups after churning.
Best Peanut Butter to Use for Ice Cream
The type of peanut butter we choose affects the final texture and flavor. A standard creamy peanut butter works beautifully because it contains enough fat, salt, and sweetness to blend smoothly into the base. Natural peanut butter can also be used, but it must be stirred very well before measuring because the oil often separates.
For a stronger roasted peanut flavor, we can use roasted peanut butter or add a small handful of chopped roasted peanuts during the final minutes of churning. If we prefer a sweeter dessert-style ice cream, a classic sweetened peanut butter gives the most familiar flavor.
Step-by-Step Guide for Peanut Butter Ice Cream
Step 1: Prepare the Ice Cream Base Ingredients
Before we begin cooking, we should measure all ingredients and keep them ready. Ice cream making works best when the process is organized because the custard needs gentle heat, constant attention, and smooth mixing.
Separate the egg yolks from the whites and place the yolks in a mixing bowl. The egg yolks give the ice cream a rich custard texture and help create a creamy mouthfeel. Set the heavy cream, milk, sugar, peanut butter, vanilla, and salt nearby so everything is easy to reach.
Step 2: Warm the Milk, Cream, and Sugar
In a medium saucepan, combine the whole milk, heavy cream, and granulated sugar. Place the saucepan over medium heat and stir gently until the sugar dissolves. We do not need to boil the mixture. We only need to warm it until it becomes hot and steamy.
Heating the dairy helps dissolve the sugar fully and prepares the mixture for tempering the egg yolks. A smooth base begins with properly dissolved sugar because undissolved granules can create an icy texture in the finished ice cream.
Step 3: Whisk the Egg Yolks
While the cream mixture is warming, whisk the egg yolks in a separate bowl until they become smooth and slightly lighter in color. This helps the yolks blend more easily with the hot liquid.
Egg yolks are important because they add richness and stability. They also help prevent the ice cream from becoming too hard in the freezer. A custard-style base gives this peanut butter ice cream a premium texture similar to high-quality scoop-shop ice cream.
Step 4: Temper the Egg Yolks Carefully
Once the milk and cream mixture is hot, slowly pour a small amount into the whisked egg yolks while whisking constantly. This process is called tempering. It gently raises the temperature of the yolks without scrambling them.
Add the warm liquid gradually, one ladle at a time, until the yolks are warmed through. Then pour the tempered egg mixture back into the saucepan with the remaining cream mixture. Stir well to combine.
Step 5: Cook the Custard Until Slightly Thickened
Return the saucepan to low or medium-low heat. Stir constantly with a wooden spoon or heat-safe spatula. The custard should thicken slightly and coat the back of the spoon. This usually takes a few minutes.
We should not let the custard boil. Too much heat can cause the eggs to curdle and create a grainy texture. The goal is a smooth, lightly thickened base that feels rich but still pourable.
A good test is to run a finger across the back of the coated spoon. If the line stays clear, the custard is ready.
Step 6: Add the Peanut Butter
Remove the saucepan from the heat. Add the creamy peanut butter, vanilla extract, and salt. Whisk until the peanut butter melts fully into the warm custard. The mixture should become smooth, glossy, and fragrant.
The salt is important because it balances the sweetness and strengthens the peanut flavor. Without salt, peanut butter ice cream can taste flat. With the right amount, every scoop tastes richer and more complete.
Step 7: Strain the Mixture for a Smooth Texture
Pour the custard through a fine-mesh strainer into a clean bowl. This removes any tiny bits of cooked egg or peanut particles and gives the ice cream a polished, velvety finish.
Even if the custard looks smooth, straining is still useful. It is one of the easiest ways to make homemade ice cream taste more professional.
Step 8: Chill the Ice Cream Base
Cover the bowl and refrigerate the base for at least 4 hours, or preferably overnight. The base must be very cold before churning. A properly chilled base freezes faster in the ice cream maker, which helps create smaller ice crystals and a creamier texture.
This chilling step also allows the peanut butter flavor to deepen. By the time the mixture is fully cold, it should taste rich, balanced, and intensely nutty.
Step 9: Churn the Peanut Butter Ice Cream
Pour the chilled base into an ice cream maker and churn according to the manufacturer’s instructions. Most machines take about 20 to 30 minutes to turn the liquid base into soft, creamy ice cream.
During churning, air is incorporated into the mixture while it freezes. This gives the ice cream its smooth, scoopable texture. When the ice cream reaches a soft-serve consistency, it is ready for add-ins.
Step 10: Add Mix-Ins for Extra Flavor
During the last few minutes of churning, we can add chopped peanut butter cups, roasted peanuts, chocolate chips, cookie pieces, or brownie chunks. Add-ins should be small enough to distribute evenly without damaging the machine.
For a peanut butter cup version, fold in chopped peanut butter cups after churning. For a chocolate peanut butter swirl, layer the churned ice cream with fudge sauce in the storage container instead of mixing the fudge directly into the machine.
Step 11: Freeze Until Firm
Transfer the churned ice cream into a freezer-safe container. Smooth the top with a spatula and press a piece of parchment paper or plastic wrap directly onto the surface. This helps prevent ice crystals from forming.
Cover tightly and freeze for at least 4 hours, or until firm enough to scoop. The ice cream will be soft immediately after churning, but it becomes scoop-shop firm after freezing.
Step 12: Serve and Enjoy
Before serving, let the ice cream sit at room temperature for 5 to 10 minutes if it is very firm. This makes scooping easier and improves the texture.
Serve in bowls, cones, waffle cups, or over warm desserts. Peanut butter ice cream pairs beautifully with chocolate cake, brownies, banana slices, caramel sauce, crushed cookies, and roasted peanuts.
No-Churn Peanut Butter Ice Cream Option
If we do not have an ice cream maker, we can still make a delicious no-churn version. Whip 2 cups of heavy cream until stiff peaks form. In another bowl, mix 1 can of sweetened condensed milk, ¾ cup creamy peanut butter, 1 teaspoon vanilla, and ¼ teaspoon salt. Fold the whipped cream into the peanut butter mixture until smooth.
Pour into a freezer-safe container, add mix-ins if desired, cover tightly, and freeze for at least 6 hours. The result will be creamy, sweet, and rich, though slightly different from custard-style churned ice cream.
Tips for the Creamiest Peanut Butter Ice Cream
For the best texture, we should always chill the base completely before churning. A warm or slightly cool base will not freeze properly and may become icy. The colder the base, the smoother the final ice cream.
We should also use full-fat dairy. Heavy cream and whole milk create the richness needed for a creamy frozen dessert. Low-fat milk can make the ice cream harder and less luxurious.
Another helpful tip is to avoid overloading the base with too many mix-ins. While peanut butter cups, chocolate chips, and peanuts taste wonderful, too many solid pieces can make the ice cream difficult to scoop. A balanced amount gives the best eating experience.
How to Make Chocolate Peanut Butter Ice Cream
To turn this recipe into chocolate peanut butter ice cream, add ¼ cup unsweetened cocoa powder to the milk and cream mixture while warming it. Whisk until smooth before tempering the egg yolks.
We can also add chocolate chunks or fudge ribbons after churning. The combination of cocoa, peanut butter, and cream creates a rich dessert that tastes like a frozen peanut butter cup.
How to Make Peanut Butter Banana Ice Cream
For a fruity version, add 1 ripe mashed banana to the warm custard after removing it from the heat. Blend the mixture until smooth before chilling. Banana adds natural sweetness and pairs perfectly with peanut butter.
This variation is especially delicious with chocolate chips, crushed graham crackers, or a caramel swirl.
How to Store Peanut Butter Ice Cream
Homemade peanut butter ice cream should be stored in an airtight, freezer-safe container. For the best flavor and texture, enjoy it within 2 weeks. It can last longer, but homemade ice cream is at its creamiest when eaten fresh.
To prevent freezer burn, keep the surface covered with parchment paper or plastic wrap before sealing the lid. Store it in the back of the freezer where the temperature stays most consistent.
Common Mistakes to Avoid
One common mistake is overheating the custard. If the mixture boils, the eggs may scramble and ruin the smooth texture. Keep the heat gentle and stir constantly.
Another mistake is skipping the chilling time. Churning a base that is not cold enough can lead to icy ice cream. Patience during chilling makes a major difference.
We should also avoid using watery or poorly mixed natural peanut butter. If the peanut butter is oily on top and dry underneath, it may not blend evenly. Stir it thoroughly before measuring.
Best Toppings for Peanut Butter Ice Cream
Peanut butter ice cream is rich enough to enjoy plain, but toppings can make it even better. Some of the best toppings include hot fudge sauce, caramel drizzle, chopped peanuts, crushed pretzels, banana slices, whipped cream, chocolate chips, and cookie crumbs.
For a salty-sweet finish, sprinkle crushed pretzels or roasted peanuts over each scoop. For a dessert-shop presentation, add warm chocolate sauce and chopped peanut butter cups.
Serving Ideas
This ice cream is perfect for classic bowls and cones, but it can also be used in more creative desserts. We can scoop it between two chocolate cookies to make ice cream sandwiches, layer it into a peanut butter brownie sundae, or blend it with milk for a thick peanut butter milkshake.
It also works beautifully in an ice cream pie. Press crushed cookies into a pie dish, fill with softened peanut butter ice cream, drizzle with fudge, and freeze until firm.
FAQs about Peanut Butter Ice Cream Recipe
1. Can we make peanut butter ice cream without an ice cream maker?
Yes, we can make peanut butter ice cream without an ice cream maker by using a no-churn method. Simply whip heavy cream until soft peaks form, then fold it with sweetened condensed milk, peanut butter, and vanilla extract. Pour the mixture into a freezer-safe container and freeze until firm.
2. What type of peanut butter is best for peanut butter ice cream?
Creamy peanut butter is usually the best choice because it blends smoothly into the ice cream base. However, if we want extra texture, we can use crunchy peanut butter or stir in chopped peanuts before freezing.
3. How long does peanut butter ice cream take to freeze?
Peanut butter ice cream usually takes about 6 hours to freeze properly. For the best texture, we should freeze it overnight. This helps the ice cream become firm, creamy, and easy to scoop.
4. Can we add mix-ins to peanut butter ice cream?
Yes, peanut butter ice cream works beautifully with mix-ins such as chocolate chips, crushed cookies, peanut butter cups, caramel swirls, roasted peanuts, or brownie pieces. We should fold them in gently before freezing.
5. How do we store homemade peanut butter ice cream?
Store homemade peanut butter ice cream in an airtight freezer-safe container. Press a piece of plastic wrap directly on the surface before covering to help prevent ice crystals. It is best enjoyed within 2 weeks for the freshest flavor and creamiest texture.
Final Thoughts
This peanut butter ice cream recipe gives us a rich, creamy, and deeply flavorful dessert that tastes homemade in the best way. With simple ingredients, careful custard preparation, proper chilling, and smooth churning, we can create a frozen treat that is sweet, nutty, and beautifully satisfying.
From the first scoop to the last, this ice cream delivers everything we want in a peanut butter dessert: creaminess, bold flavor, smooth texture, and a perfect balance of sweet and salty goodness.


