Crunchy Chickpeas Recipe: Crunchy chickpeas are one of the simplest, most satisfying snacks we can make at home. They are crisp, flavorful, affordable, and endlessly versatile. Whether we want a savory snack for midday cravings, a crunchy topping for soups and salads, or a smart alternative to heavily processed snacks, this recipe delivers a reliable result with very little effort. The key is using the right drying method, seasoning at the right time, and roasting the chickpeas until they develop a deep golden exterior with a light, crisp center.
This crunchy chickpeas recipe is designed for consistent texture, bold flavor, and excellent shelf life. We use basic pantry ingredients, a straightforward method, and a few practical roasting techniques that help chickpeas turn properly crisp instead of chewy. Once mastered, this recipe can be customized with smoky spices, spicy blends, herby notes, or even slightly sweet variations.
Why This Crunchy Chickpeas Recipe Works
A great crunchy chickpeas recipe depends on controlling moisture. Chickpeas naturally contain a lot of water, and if we skip the drying step or crowd the pan, they steam instead of roast. That leads to soft or uneven texture. In this method, we remove excess moisture thoroughly, coat the chickpeas lightly with oil, and roast them in a single layer so every chickpea has room to crisp.
The result is a batch of roasted chickpeas with a delicious crackly shell, nutty flavor, and satisfying bite. This recipe also works because the seasoning is balanced. Too much seasoning added too early can burn, while too little seasoning leaves the snack bland. By roasting carefully and seasoning with purpose, we get crunchy chickpeas that are flavorful from the first bite to the last.
Ingredients You’ll Need
To make this crunchy chickpeas recipe, we only need a small list of ingredients:
- 2 cans chickpeas (15 ounces each), drained and rinsed
- 1 to 2 tablespoons olive oil
- 1 teaspoon salt
- 1/2 teaspoon black pepper
- 1 teaspoon garlic powder
- 1 teaspoon smoked paprika
- 1/2 teaspoon onion powder
These ingredients create a classic savory version that works for snacking, topping bowls, or adding texture to salads. If we want to branch out later, this base recipe can handle many seasoning variations.
Optional Flavor Add-Ins
For more variety, we can add one of the following after roasting or during the final few minutes:
- Cayenne pepper for heat
- Ground cumin for warmth
- Chili powder for a bold savory kick
- Italian seasoning for a herby finish
- Parmesan powder after roasting for a rich salty edge
- Cinnamon and a touch of sugar for a sweet-savory version
These optional add-ins make crunchy chickpeas even more useful because one base recipe can become several different snacks.
Equipment for the Best Crunchy Chickpeas
We do not need special equipment, but a few basics make the process easier:
- Baking sheet
- Parchment paper or a clean baking surface
- Clean kitchen towel or paper towels
- Mixing bowl
- Measuring spoons
A large baking sheet is especially helpful because chickpeas crisp better when spread out in a single, even layer.
How to Prepare Chickpeas for Maximum Crunch
Preparation is where the texture is won or lost. First, drain the canned chickpeas and rinse them well under cool water. This removes excess starch and the canning liquid, both of which can interfere with crisp roasting.
Next, place the chickpeas on a clean kitchen towel or thick layer of paper towels. Pat them very dry. Then roll them gently between the towel layers to remove as much surface moisture as possible. Some of the skins may come loose during this step. That is helpful, not harmful. Removing loose skins can actually improve texture because the chickpeas roast more evenly.
Once dried, let them rest uncovered for a few minutes if needed. The drier they are before they go into the oven, the crunchier they will become.
Step-by-Step Guide to Making Crunchy Chickpeas
Step 1: Preheat the Oven Properly
Preheat the oven to 400°F (200°C). A fully heated oven is important because it starts the roasting process immediately. If the oven is not hot enough, the chickpeas sit and soften before they ever begin to crisp.
Line a baking sheet with parchment paper if desired. This helps with cleanup and prevents sticking, though chickpeas can also roast directly on the pan.
Step 2: Dry the Chickpeas Thoroughly
After rinsing, dry the chickpeas with complete attention. This step cannot be rushed. Moisture is the biggest reason roasted chickpeas turn soft. We want the outside of every chickpea to feel dry to the touch before adding oil.
If we have time, we can leave the dried chickpeas on the counter for another 10 to 15 minutes to air dry slightly more. This extra step can noticeably improve the final crunch.
Step 3: Season the Chickpeas
Transfer the dried chickpeas to a bowl. Add the olive oil, salt, black pepper, garlic powder, smoked paprika, and onion powder. Toss until every chickpea is lightly coated.
The oil should be just enough to coat the chickpeas without making them greasy. Too much oil can weigh them down and reduce crispness. A light coating is ideal.
Step 4: Spread in a Single Layer
Pour the seasoned chickpeas onto the baking sheet and spread them into a single layer. Make sure they are not stacked or crowded. Space matters because hot air must circulate around each chickpea to roast the exterior evenly.
This single-layer method creates better browning, better texture, and a more consistent batch.
Step 5: Roast Until Golden and Crisp
Roast the chickpeas for 30 to 40 minutes, shaking the pan or stirring them every 10 to 15 minutes. The exact time depends on oven strength, chickpea size, and how dry they were before roasting.
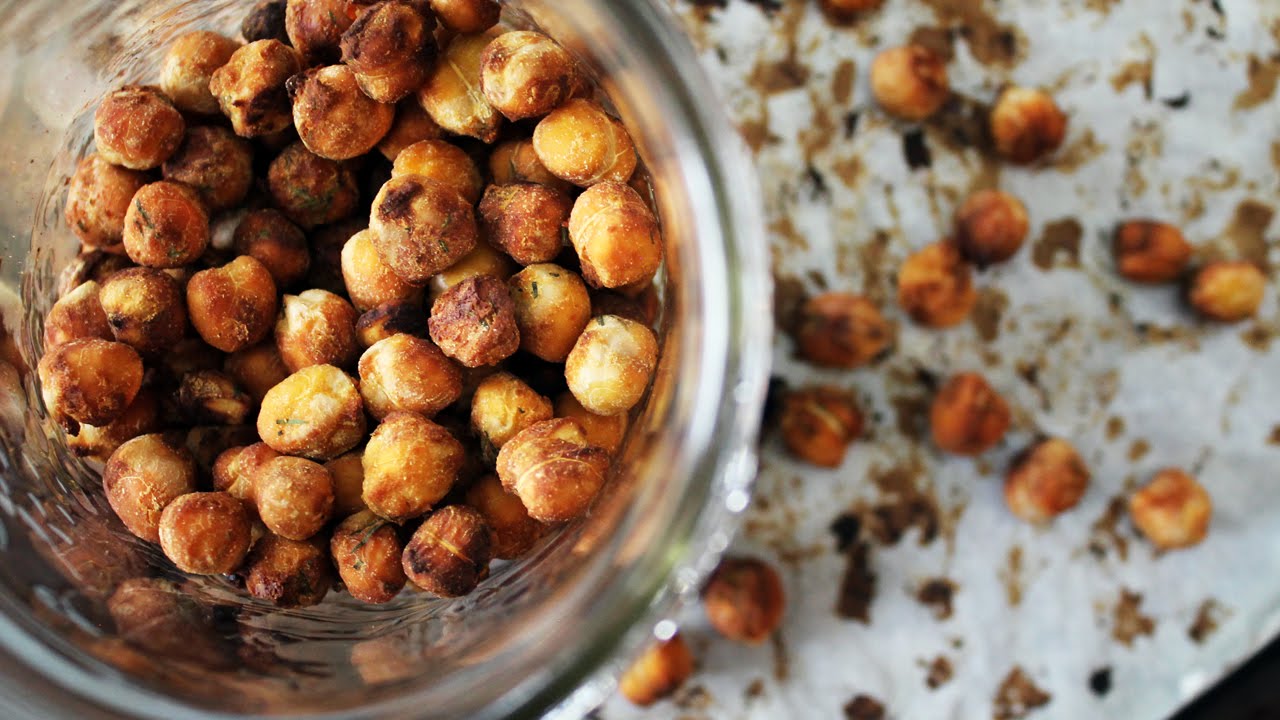
As they roast, they will gradually darken and firm up. We want them deep golden and crisp on the outside. Some may split slightly, and that is perfectly normal. That split texture often means they are crisping well.
For extra crunch, we can turn off the oven at the end of roasting and leave the chickpeas inside for another 10 to 15 minutes with the oven door slightly open.
Step 6: Cool Before Serving
Remove the chickpeas from the oven and let them cool fully on the baking sheet. They continue to crisp as they cool. Fresh from the oven, they may still seem slightly soft in the center. After cooling, the texture becomes firmer and crunchier.
This cooling stage is essential. Serving too early can make them seem less crisp than they really are.
Best Tips for a Perfect Crunchy Chickpeas Recipe
The most important rule is to dry the chickpeas completely. Even a small amount of extra moisture can affect texture.
The second rule is to avoid overcrowding the pan. Chickpeas need direct heat and airflow. If they are packed too closely, they steam.
The third rule is to roast long enough. Under-roasted chickpeas may seem crisp for a few minutes, then turn chewy as they cool. Deep golden color and firm texture are good indicators that they are ready.
Another useful tip is to store them only after they are fully cool. Warm chickpeas trapped in a container release steam, and steam ruins crispness quickly.
Seasoning Variations for Crunchy Chickpeas
One of the greatest strengths of this crunchy chickpeas recipe is flexibility. Once the method is in place, the flavor can change based on preference or meal use.
For a spicy version, we can add cayenne pepper, chili powder, and a little cumin. This gives the chickpeas a bold, snack-style profile.
For a Mediterranean version, we can use oregano, garlic powder, black pepper, and a pinch of lemon zest after roasting.
For a smoky version, extra smoked paprika with cumin and cracked black pepper works beautifully.
For a sweet-spiced version, we can reduce the savory spices and toss the roasted chickpeas with cinnamon, a little sugar, and a pinch of salt.
These variations keep the recipe fresh and useful across different menus and preferences.
How to Serve Crunchy Chickpeas
Crunchy chickpeas are far more than a simple snack. They can be served in several practical ways throughout the day.
They work beautifully as a grab-and-go snack for work, study time, or travel. They also make an excellent salad topping, replacing croutons with something more filling and flavorful. We can sprinkle them over creamy soups for contrast, add them to grain bowls for texture, or serve them as part of a snack board with dips, vegetables, and flatbread.
They also pair well with roasted vegetables, rice dishes, wraps, and lunch bowls. Their crisp texture adds structure to softer foods and helps simple meals feel more complete.
How to Store Crunchy Chickpeas
Once fully cooled, transfer the chickpeas to a loosely covered container or a jar that allows a little airflow. A tightly sealed container can sometimes trap residual moisture, especially if the chickpeas were not fully cooled first.
They are best enjoyed on the day they are made, when texture is at its sharpest. However, they can still keep well for 2 to 4 days at room temperature, depending on humidity. If they soften slightly, we can re-crisp them in the oven for a few minutes.
Avoid refrigerating them, as the cold environment often introduces moisture and softens the texture.
Common Mistakes to Avoid
A common mistake is seasoning heavily while the chickpeas are still wet. Moisture causes spices to clump and roast unevenly. Another mistake is using too much oil, which can make the chickpeas heavier instead of crisper.
Roasting at too low a temperature is another issue. Low heat dries them slowly but does not always create the crisp shell we want. Likewise, pulling them out of the oven too early can leave them chewy once cooled.
Finally, storing them while warm is one of the fastest ways to lose crispness. Cooling fully before storage makes a major difference.
Why Homemade Crunchy Chickpeas Are Better
Homemade crunchy chickpeas give us complete control over flavor, texture, and freshness. We can season them exactly how we like, adjust the salt level, and roast them to our preferred degree of crispness. They are affordable, practical, and adaptable to many meal styles.
They also solve a common kitchen problem: how to create a snack that feels substantial without being overly complicated. With one can of chickpeas and a few spices, we can make something crisp, savory, and deeply satisfying.
FAQs about Crunchy Chickpeas Recipe
1. What are crunchy chickpeas?
Crunchy chickpeas are roasted or air-fried chickpeas that turn crisp and flavorful. They are often enjoyed as a healthy snack or salad topping.
2. Do we use canned or dried chickpeas?
We can use either, but canned chickpeas are quicker and more convenient. Dried chickpeas work well too, as long as they are cooked first.
3. How do we make chickpeas extra crunchy?
Dry them very well before seasoning and roasting. Removing loose skins and cooking them long enough at the right temperature also helps.
4. What seasonings go well with crunchy chickpeas?
Popular options include salt, paprika, garlic powder, chili powder, cumin, curry powder, or even cinnamon and sugar for a sweet version.
5. Can we make crunchy chickpeas in an air fryer?
Yes, air fryers work very well. They can make the chickpeas crispy faster, but they should still be shaken often for even cooking.
6. Why did my chickpeas turn soft after cooling?
This usually happens if they were not dried enough before cooking or if they were stored while still warm. Let them cool completely before storing.
7. How long do crunchy chickpeas stay fresh?
They are best eaten the same day for maximum crunch, but they can stay fresh for about 2 to 3 days in a loosely covered container.
8. What can we serve crunchy chickpeas with?
They are great on salads, soups, grain bowls, or eaten on their own as a quick snack.
Final Thoughts
This crunchy chickpeas recipe is simple, dependable, and worth repeating often. With the right preparation and roasting method, we can turn basic canned chickpeas into a crisp, flavorful snack that fits into everyday cooking with ease. The ingredients are minimal, the process is straightforward, and the result is a versatile batch of crunchy chickpeas that works as a snack, topping, or side element.
Once we master the base version, it becomes easy to create new flavor profiles and make this recipe part of a regular kitchen routine. Crisp, well-seasoned, and deeply satisfying, crunchy chickpeas prove that pantry ingredients can deliver excellent texture and bold flavor with very little effort.


