Chocolate Mousse Pie Recipe: There are desserts you make once for a special occasion, and then there are desserts that quietly become part of your regular favorites because they hit every note perfectly. Chocolate mousse pie belongs in that second category.
It is rich but not heavy, elegant but not fussy, and impressive without demanding bakery-level skills. That is the beauty of this dessert. It looks like something you would order at a restaurant after pretending you are too full and then somehow finding room for every silky bite.
At the same time, it is surprisingly doable in an everyday home kitchen, which makes it a real keeper.
What Makes a Great Chocolate Mousse Pie
A great chocolate mousse pie is not just about tasting sweet or looking pretty when sliced. It is about harmony. Every layer and texture should work together so that nothing feels out of place. The crust should support the filling without crumbling into chaos. The mousse should be airy, smooth, and deeply chocolatey without becoming dense like pudding or stiff like frosting. A really good pie does not punch you in the face with sugar. It pulls you in with balance, and that balance is what separates a decent homemade dessert from one people talk about long after the plates are cleared.
The filling is where most of the magic happens. The mousse should feel light, but not empty. Think of it like a well-fluffed pillow that still has structure. It needs body, but it should not feel like eating a block of chilled ganache. The chocolate flavor should come through clearly, with enough richness to satisfy but enough softness to keep each bite inviting. This is why technique matters. Overmix the filling and it loses that cloudlike charm. Underwhip the cream and the pie may not set properly. Rush the chilling time and you will have a pie that looks more like a chocolate landslide than a clean slice.
A great mousse pie also knows how to use contrast. The crust provides a slight crunch or firmness against the creamy filling, and that textural difference is what keeps every bite interesting. Add a little whipped cream on top, a few chocolate curls, or even a sprinkle of flaky salt, and now the pie is speaking in layers rather than a single note. That is when it starts to feel special. It is not about making it complicated. It is about making each part intentional.
Presentation plays a role too, though not in a stiff, fancy way. A mousse pie should look inviting. The top should be smooth or softly swirled, the slices should hold their shape, and the filling should look lush rather than grainy. When you cut into it, you want that clean edge that says, yes, this dessert knows what it is doing. So while the ingredient list may be simple, the final result depends on paying attention to texture, flavor, and timing. That is what transforms this dessert from good to unforgettable.
The Balance Between Richness and Lightness
The real secret to a memorable chocolate mousse pie recipe is getting the balance just right between richness and lightness. Too rich, and the pie becomes tiring after two bites. Too light, and it starts to feel like chocolate-flavored air with commitment issues. The sweet spot sits right in the middle, where the flavor is bold and luxurious, but the texture still feels soft, airy, and easy to eat. That balance is what makes mousse pie such a clever dessert. It satisfies like a chocolate treat should, but it does not sit like a brick.
Chocolate is naturally rich, especially when you use high-quality semi-sweet or dark varieties. That richness is part of the charm, but it needs something to lift it. That is where whipped cream comes in. When folded into the chocolate base correctly, it introduces volume and softness without watering down the flavor. It is almost like taking a dramatic solo singer and giving them the perfect backing choir. The chocolate still leads, but now the whole performance feels fuller, smoother, and more emotionally stable.
Sweetness plays into this balance too. Many homemade desserts go wrong because they assume more sugar equals more pleasure. It does not. In a mousse pie, too much sugar can flatten the chocolate flavor and make the whole thing taste one-dimensional. A better approach is to let the chocolate do the heavy lifting while using sugar with restraint. This helps the pie feel sophisticated instead of syrupy. A pinch of salt can also work wonders here, sharpening the chocolate flavor and keeping the sweetness from becoming too loud.
Texture is the final piece of the puzzle. A properly balanced mousse should melt gently in the mouth, not cling to the spoon like wet cement. That is why gentle folding, proper chilling, and not overheating the chocolate matter so much. When each element is handled with a little care, the end result feels almost magical—decadent enough for celebration, light enough for one more bite, and flavorful enough to make people ask for the recipe before they leave the table.
Choosing the Right Chocolate for the Best Flavor
If the crust is the stage and the whipped cream is the supporting cast, then chocolate is the lead actor in this pie. Choosing the right one makes a huge difference. Since the flavor is front and center, this is not the time to use old baking chips that have been living in the pantry since last winter. A mousse pie depends on clean, rich chocolate flavor, so quality matters. You do not need the most expensive bar in the world, but you do want chocolate that melts smoothly and tastes like actual chocolate rather than sweet wax.
For most home bakers, semi-sweet chocolate is the best place to start. It offers a balanced flavor that is rich enough to feel indulgent without drifting too bitter or too sweet. It also tends to please a wider range of people, which is useful if you are serving this pie to family or guests with different tastes. Dark chocolate can also be fantastic if you want a more intense and slightly more elegant dessert. It creates a deeper flavor profile and gives the mousse a dramatic edge, but it can be a little strong if paired with a very sweet crust or topping.
Milk chocolate is generally less ideal for a classic mousse pie because it can make the filling too sweet and less stable in flavor. That said, it can work if you want a softer, sweeter dessert aimed at younger palates or anyone who prefers a gentler chocolate note. The main thing is to avoid chocolate that contains too many fillers or stabilizers, because those can affect how the chocolate melts and how smooth the mousse becomes. Baking bars usually perform better than standard chocolate chips because they are designed to melt more evenly.
Another smart move is to taste the chocolate before using it. That sounds obvious, but it is easy to forget. If the chocolate tastes flat straight from the package, it is not going to transform into brilliance once melted. Use something you genuinely enjoy eating. Because this pie is built around chocolate, the flavor you choose becomes the personality of the whole dessert. Pick a chocolate with depth and good meltability, and the pie will reward you with every single slice.
Ingredients You’ll Need
Below, the ingredients are broken into clear sections so the process feels easy to follow. That is especially helpful when you are making a layered dessert and want to avoid that moment of panic where you realize the whipped cream was supposed to be divided or the butter should have been melted earlier.
Ingredients for the Crust
For the crust, you want something that holds firmly, slices neatly, and tastes good with chocolate. One of the easiest and most dependable choices is an Oreo cookie crust or any chocolate sandwich cookie crust. It is rich, easy to make, and naturally pairs with the mousse filling. A graham cracker crust also works if you prefer a slightly lighter, more buttery flavor that lets the chocolate filling stand out. Either option can be homemade or store-bought, but homemade usually tastes fresher and gives you better control over thickness and texture.
Here is a reliable crust ingredient list:
- 24 chocolate sandwich cookies or about 2 cups cookie crumbs
- 5 tablespoons unsalted butter, melted
- 1 tablespoon granulated sugar if needed, especially for a less sweet cookie base
If you prefer a graham cracker version, use:
- 2 cups graham cracker crumbs
- 6 tablespoons unsalted butter, melted
- 2 tablespoons granulated sugar
The goal is a crumb mixture that feels like damp sand. It should press together when squeezed but not feel greasy. Too little butter and the crust becomes crumbly and fragile. Too much butter and it can harden too firmly or feel oily once chilled. Pressing the crust evenly into the pie plate matters too, because a lopsided crust can make slicing messy. Use the bottom of a measuring cup or glass to create a firm, even layer along the base and sides.
A good crust does more than hold the filling. It adds contrast. That slight crunch or compact bite beneath the mousse keeps the dessert from feeling too soft overall. It is the anchor beneath all that creamy chocolate. Think of it like the bassline in a song. You may not always focus on it, but without it, the whole thing feels less complete. So even though the crust is simple, it plays a huge role in making the pie taste balanced and finished.
Ingredients for the Chocolate Mousse Filling
The filling is the soul of the pie, and the ingredient list here is where everything starts to feel luxurious. Even though it is called mousse, the recipe is not trying to be fussy or fragile. It is designed to be smooth, stable, and full of chocolate flavor while still feeling airy. That balance comes from using the right ratio of chocolate to whipped cream, plus a few small ingredients that deepen flavor and improve texture. Once these are combined correctly, the filling becomes the kind of thing you have to stop yourself from eating straight from the bowl.
Here is what you need for the mousse filling:
- 8 ounces semi-sweet or dark chocolate, chopped
- 1 cup heavy cream for melting into the chocolate mixture
- 1 1/2 cups heavy cream, cold, for whipping
- 1/4 cup powdered sugar
- 1 teaspoon vanilla extract
- 2 tablespoons unsalted butter
- A pinch of salt
- 2 large egg yolks or 2 tablespoons cocoa powder as an egg-free flavor booster, depending on your preferred method
The heavy cream does double duty here, which is part of the reason the filling tastes so lush. One portion is warmed and combined with the chocolate to make a smooth base. The second portion is whipped until soft peaks form and then folded in to create that signature mousse texture. Powdered sugar works especially well because it dissolves easily and keeps the whipped cream silky. Vanilla softens and rounds out the chocolate flavor, while salt quietly sharpens everything in the background.
If you are using egg yolks, they can add richness and help the mousse feel especially velvety, but the recipe can still work beautifully without them if you prefer a simpler or egg-free approach. The real foundation is the chocolate itself. Choose one with a flavor you love, because that choice will define the final pie. Once the filling is made, it should look glossy, smooth, and inviting—the kind of mixture that signals good things are coming.
Optional Toppings and Garnishes
Toppings are not just decoration in a chocolate mousse pie. They are the finishing touch that can shift the entire personality of the dessert. Leave the pie plain, and it feels sleek, simple, and elegant. Add a crown of whipped cream and a snowfall of chocolate curls, and suddenly it looks celebration-ready. This is one of the nicest things about the recipe: you can keep it minimal or make it dramatic without changing the heart of the dessert at all. The base pie already does the heavy lifting, so toppings get to be fun rather than necessary.
Here are some of the best optional toppings and garnishes:
- Fresh whipped cream
- Chocolate shavings or curls
- Cocoa powder dusting
- Chocolate ganache drizzle
- Crushed cookies
- Fresh berries, especially raspberries or strawberries
- Toasted nuts, such as pecans or hazelnuts
- A tiny sprinkle of flaky sea salt
Whipped cream is the most classic topping because it echoes the softness of the mousse while adding a fresh, creamy contrast. Chocolate shavings make the pie look polished with almost no effort, and berries can brighten the flavor with a little tartness. Flaky salt is a small but powerful detail. It does not make the dessert salty. It simply wakes up the chocolate and gives each bite a more layered flavor. It is the culinary equivalent of turning on better lighting in a room—you suddenly notice more.
The important thing is not to overload the top. A mousse pie should still feel graceful and easy to slice. Too many wet toppings can make it messy, and too many crunchy elements can overwhelm the mousse. A restrained hand usually works best. The right garnish should make the pie look more tempting while still letting the chocolate remain the center of attention. That is the whole point. This dessert is already wearing a tailored suit. The toppings should act like a good watch, not a costume.
Kitchen Tools That Make the Process Easier
One of the best parts about making chocolate mousse pie is that you do not need an industrial kitchen or a drawer full of chef-approved gadgets. The process is much smoother, though, when you have a few basic tools ready before you begin. Having the right equipment saves time, reduces mess, and helps the mousse come together with the right texture. This dessert is all about smoothness and structure, so the tools you use can quietly make a big difference without taking over the recipe.
A 9-inch pie plate is the starting point. Glass, ceramic, or metal can work, though glass makes it easy to see if the crust is evenly pressed. You will also want a food processor if you are making a crumb crust from cookies or crackers, though a zip-top bag and rolling pin can get the job done in a pinch. A mixing bowl, rubber spatula, whisk, and measuring cups and spoons are essential. Since mousse depends on folding rather than aggressive mixing, a flexible spatula is especially useful for combining the whipped cream and chocolate base gently.
For melting chocolate, you can use either a double boiler or a heatproof bowl set over simmering water. A microwave also works if you melt the chocolate in short bursts and stir often. The goal is smooth melted chocolate, not a scorched chocolate tragedy. For the whipped cream, a hand mixer or stand mixer makes life easier and gives you more control over the peaks. You can whip by hand, but that turns dessert into an arm workout, and most people did not sign up for that.
A final tool worth mentioning is a sharp knife for slicing. Because mousse pie is chilled and delicate, clean cuts matter. Running the knife under hot water, drying it, and wiping it between slices helps create those neat bakery-style portions that make the dessert look as good as it tastes. None of these tools are fancy, but together they make the entire process more pleasant and more reliable. In baking, little conveniences often translate into better results, and this pie is no exception.
Step-by-Step Guide for Chocolate Mousse Pie
Below, each stage is explained in detail so you can move through the recipe with confidence. By the time the pie reaches the refrigerator, the hard part is already done.
Step 1: Prepare the Pie Crust
Begin by choosing your crust. A graham cracker, Oreo, or classic pastry crust all work well for chocolate mousse pie. If making a crumb crust, crush the cookies or crackers finely, mix with melted butter, and press the mixture firmly into a pie dish, covering the bottom and sides evenly.
Step 2: Bake or Chill the Crust
If your recipe calls for a baked crust, place it in the oven until lightly set and fragrant, then let it cool completely. For a no-bake crust, chill it in the refrigerator until firm. A fully cooled crust is important so the mousse keeps its light, silky texture.
Step 3: Melt the Chocolate Properly
Melt the chocolate gently in a heatproof bowl over simmering water or in short microwave bursts. Stir until smooth and glossy. Let it cool slightly before using so it blends easily without seizing or becoming grainy.
Step 4: Make the Mousse Base
Combine the melted chocolate with the mousse ingredients, such as egg yolks, sugar, or softened cream cheese, depending on the recipe. Mix until the filling is smooth, rich, and well blended.
Step 5: Fold in the Whipped Cream
Whip the cream in a separate bowl until soft peaks form. Gently fold it into the chocolate mixture in batches. This keeps the mousse airy and gives it that soft, cloud-like texture.
Step 6: Fill the Pie and Smooth the Top
Spoon the mousse into the prepared crust and spread it evenly with a spatula. Smooth the surface neatly so the pie looks attractive when set.
Step 7: Chill Until Set
Refrigerate the pie for several hours, or until the mousse is firm enough to slice cleanly. Serve chilled and top with whipped cream or chocolate curls for an extra-special finish.
Common Mistakes to Avoid
A mousse pie may look elegant and effortless on the plate, but a few common mistakes can get in the way of that smooth, professional finish. One of the most frequent issues is overheating the chocolate. When chocolate gets too hot, it can become grainy or seize, which means the filling loses the glossy texture it needs. Another common mistake is adding whipped cream to chocolate that is still too warm. That can deflate the cream and make the mousse heavy instead of airy. Temperature matters more than people think in recipes like this.
Another trap is overwhipping the cream. It is easy to go from soft peaks to overly stiff in what feels like seconds, especially with a mixer. Once the cream becomes too firm, it is harder to fold smoothly into the chocolate and can create a rough or dense texture. On the other hand, underwhipping leaves the mousse too loose to set properly. This dessert lives in the middle ground, and that is why paying attention during each small stage makes a big difference.
Rushing the chill time is another classic problem. People see that the pie looks set enough after a short time and decide that is close enough. Usually, it is not. A mousse pie needs several hours to settle fully. Cutting into it too early can lead to messy slices and a softer filling than intended. The flavor also improves after chilling, so impatience steals more than just presentation. It steals some of the dessert’s full character too.
The crust can also create problems if it is not pressed firmly or cooled before the filling goes in. A loose crust may crumble apart, while a warm one can soften the mousse. These mistakes are all avoidable with a little patience and attention. The good news is that none of them require advanced baking skills to fix. They simply ask for care, timing, and a willingness to let each stage do its job before moving on.
Tips for the Best Texture and Flavor
If you want your chocolate mousse pie to taste like something from a polished bakery case rather than just a decent homemade dessert, a few small tips make a big impact. First, use cold heavy cream straight from the refrigerator for whipping. Cold cream whips faster, holds air better, and creates a more stable mousse. It also helps to chill your mixing bowl and beaters for a few minutes before whipping. That sounds like a tiny detail, but in recipes where texture matters, tiny details pull a lot of weight.
Use good-quality chocolate and chop it evenly so it melts smoothly. Uneven chunks can melt at different rates and make the base harder to mix well. A pinch of salt is also worth keeping in the recipe, even if you are tempted to leave it out. Salt does not just season savory food. It sharpens sweetness and makes chocolate taste deeper and more complete. It is like adding contrast to a photo. Everything becomes clearer.
Do not skip the step of lightening the chocolate mixture with a small portion of whipped cream before folding in the rest. That makes the final mixing process easier and protects the airy structure of the mousse. Gentle folding is another major win. It may feel slower than stirring, but it is what keeps the filling fluffy rather than compact. Think of it as preserving the bubbles, because those bubbles are what make mousse mousse.
For flavor, let the pie chill overnight when possible. Not only does the structure improve, but the chocolate becomes fuller and more rounded. A final topping of lightly sweetened whipped cream and dark chocolate shavings can bring everything together beautifully. These are not dramatic tricks. They are the kind of smart, understated moves that make a dessert feel complete, balanced, and memorable from the first bite to the last.
Easy Variations to Try
One reason this chocolate mousse pie recipe earns repeat status is that it is easy to adapt without losing its core appeal. Once you understand the structure—crust, mousse, chill—you can change the mood of the dessert in all kinds of ways. Want something more intense? Use dark chocolate and a pinch of espresso powder. Want a more playful version? Add crushed peppermint candies on top during the holidays. The basic formula is strong enough to support creativity, which is exactly what makes a recipe worth keeping around.
A peanut butter chocolate mousse pie is one of the easiest and most crowd-pleasing variations. Spread a thin layer of peanut butter or peanut butter mousse over the crust before adding the chocolate filling. The combination tastes like a dessert version of your favorite candy bar. A salted caramel chocolate mousse pie is another excellent option. A light drizzle of caramel beneath or over the mousse adds warmth and depth without changing the recipe too much.
For coffee lovers, mix a little espresso powder into the warm cream before pouring it over the chocolate. It will not make the pie taste strongly like coffee, but it will intensify the chocolate in a really beautiful way. You can also switch the crust to change the character of the pie. An Oreo crust feels more decadent and dramatic, while a graham cracker crust offers a lighter, buttery contrast. Even a vanilla wafer crust can work if you want something a little softer in flavor.
Fruit can also shift the pie in a brighter direction. Raspberries or strawberries on top add tartness that cuts through the richness of the mousse. That contrast can make the whole dessert feel fresher and more dynamic. These variations work because the original pie has such a clear, balanced structure. Once the foundation is solid, adding a twist becomes fun rather than risky. It is like changing the jacket on a great outfit. The shape still works. The personality just changes a little.
How to Serve Chocolate Mousse Pie
Serving chocolate mousse pie well is about matching its texture and richness with a little intention. This is not a dessert that needs a lot of extra fuss, but presentation does matter because the pie already has a naturally elegant feel. Serve it well chilled so the slices hold their shape and the mousse stays silky rather than soft and droopy. Use a sharp knife dipped in hot water and wiped dry between cuts. That simple trick gives you cleaner slices, which immediately makes the dessert look more polished on the plate.
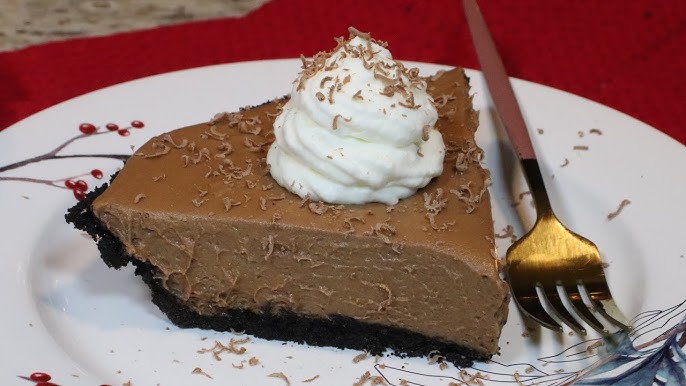
A plain slice can be lovely on its own, especially if the mousse is rich and the crust has good flavor. But a small dollop of whipped cream on top makes the whole thing feel finished. It adds visual height, softens the intensity of the chocolate, and introduces a fresh creamy note that works beautifully with the chilled filling. Chocolate shavings, cocoa powder, or a few berries can elevate the look without making the pie feel overloaded. This is one of those cases where less usually looks smarter.
Because the pie is rich, smaller slices are often the sweet spot. You do not need to serve giant wedges for the dessert to feel generous. A modest slice plated neatly can be more appealing because it invites the eater in rather than intimidating them. Pairing matters too. Coffee is an excellent companion because it balances the sweetness and echoes the deep notes of the chocolate. A glass of cold milk works for a more classic, cozy pairing, and fresh berries on the side can brighten the whole plate.
This dessert also shines at gatherings because it can be made ahead and served straight from the refrigerator. That means no last-minute baking and no frantic plating. Just slice, garnish, and serve. There is something wonderfully confident about a dessert that does not need theatrics to impress. Chocolate mousse pie walks to the table already knowing it has the room.
How to Store Leftovers Properly
One of the great practical advantages of chocolate mousse pie is that leftovers store quite well, provided you handle them properly. Because the filling is cream-based, the pie should always be kept refrigerated. Cover the pie loosely with plastic wrap or store slices in an airtight container. This helps protect the mousse from absorbing refrigerator odors and keeps the top from drying out. Chocolate may be strong, but it does not need to be sharing flavor notes with last night’s onions.
Stored correctly, the pie will usually keep well for about 3 to 4 days in the refrigerator. The texture is best within the first couple of days, when the mousse is still especially fresh and airy. After that, it can remain delicious, though the crust may soften slightly over time. That is not a disaster. It just means the pie shifts from crisp-contrasted to more uniformly tender. Still enjoyable, just a little different.
If you want to freeze it, that can work too. Freeze the pie or individual slices uncovered until firm, then wrap tightly and store for up to 1 month. Thaw in the refrigerator before serving. The texture may change a little after freezing, especially if the pie has a lot of whipped topping, but the flavor generally remains excellent. This can be a useful option if you want to make dessert ahead for an event or save leftovers without pressure.
The main thing is to keep the pie cold and protected. Do not leave it sitting out for long periods, especially in a warm room, because mousse softens quickly. This is a chilled dessert through and through. Treat it like one, and it will reward you with another round of smooth, rich, satisfying slices the next day.
FAQs about Chocolate Mousse Pie Recipe
1. Can I make chocolate mousse pie ahead of time?
Yes, chocolate mousse pie is a great make-ahead dessert. In fact, it tastes even better after chilling for several hours because the mousse has time to set properly. You can prepare it a day in advance and keep it covered in the refrigerator until ready to serve.
2. What type of chocolate is best for chocolate mousse pie?
Good-quality semi-sweet or dark chocolate usually gives the best flavor. Milk chocolate can also be used if you prefer a sweeter and lighter taste. The better the chocolate, the richer and smoother your pie will be.
3. Can I use a store-bought crust?
Absolutely. A store-bought pie crust can save time and still give delicious results. Graham cracker, cookie crust, or ready-made pastry crust all work well for this recipe.
4. How do I know when the pie is fully set?
The pie is ready when the mousse feels firm but still soft and creamy when sliced. It should hold its shape without running. Chilling for at least 4 to 6 hours usually gives the best texture.
5. Can I freeze chocolate mousse pie?
Yes, you can freeze it for longer storage. Wrap it well and freeze for up to one month. Before serving, let it thaw slightly in the refrigerator so the texture stays smooth and enjoyable.
6. What toppings go well with chocolate mousse pie?
Popular toppings include whipped cream, chocolate shavings, cocoa powder, fresh berries, or crushed cookies. These simple additions make the pie look more beautiful and add extra flavor.
Conclusion
This pie is also one of those desserts that rewards both beginners and experienced bakers. If you are new to homemade chilled desserts, the process is approachable and forgiving as long as you respect the key steps. If you already love baking, there is plenty of room to refine the chocolate choice, experiment with toppings, or personalize the crust. It has structure, but it is not rigid. That makes it a recipe with staying power rather than a one-time novelty.
Most of all, this dessert delivers on what people really want from a homemade treat. It tastes thoughtful. It looks elegant. It can be made ahead. And when served cold with a clean slice and maybe a little whipped cream on top, it feels like the kind of dessert people remember. That is the mark of a truly useful recipe. Not just something that fills a plate, but something that creates a moment. Chocolate mousse pie does exactly that—quietly, beautifully, and one silky forkful at a time.


