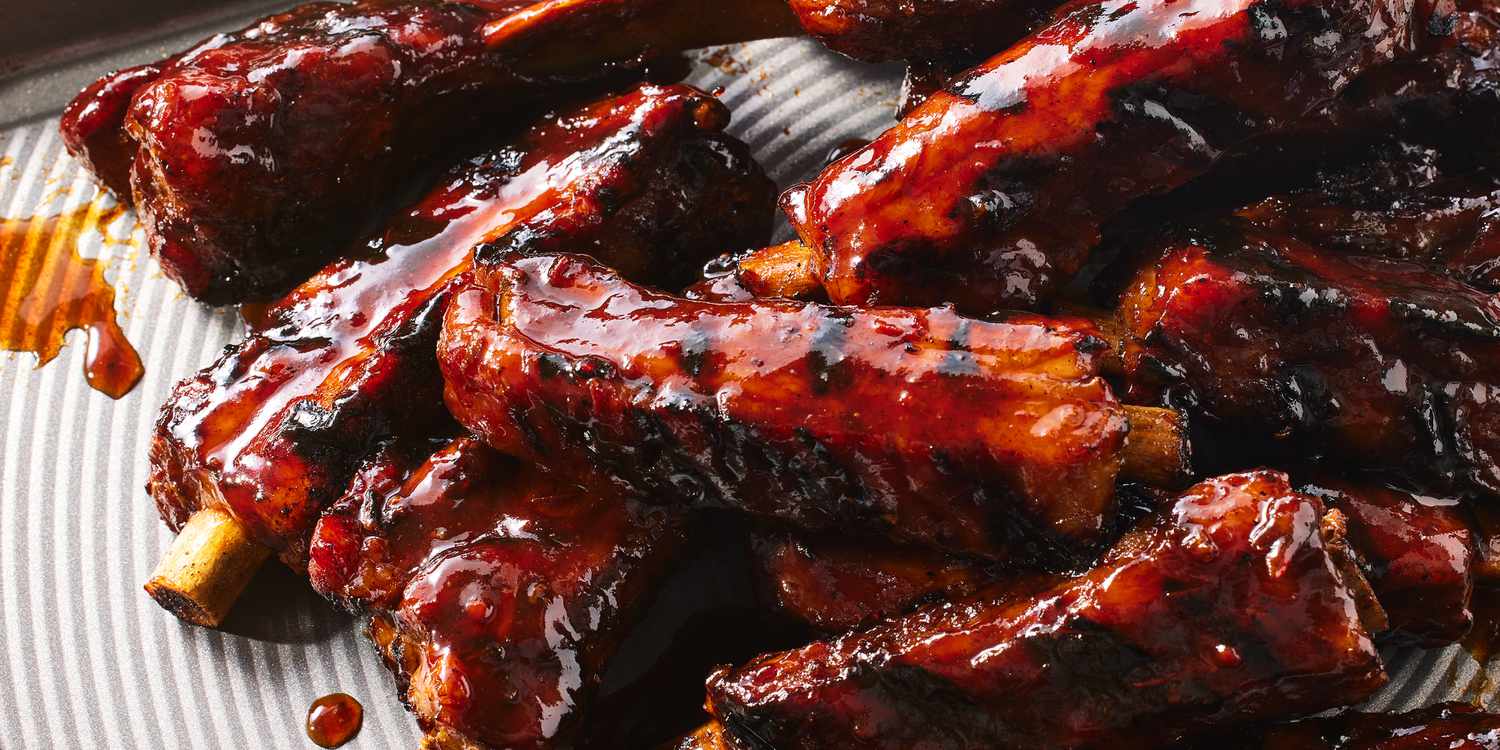
Grilled Ribs Recipe: Grilled ribs. Just the mention of them is enough to make mouths water and stomachs growl. Nothing screams summer BBQ louder than a rack of tender, juicy ribs sizzling over hot coals, releasing waves of smoky flavor into the air. Whether you’re hosting a backyard cookout or just want to treat yourself to something amazing, grilled ribs are a top-tier choice.
But let’s be honest—grilling ribs isn’t a quick “toss-on-the-grill-and-go” type of meal. It’s an art. It’s about patience, preparation, and perfecting each step so that when the ribs hit your plate, they fall off the bone with flavor in every bite. Don’t worry though—we’ve got you covered with this full, step-by-step guide.
Ready to master the grill and impress everyone at your next BBQ? Let’s dive into everything you need to know to make the perfect grilled ribs from scratch.
Types of Ribs You Can Grill
Before we throw anything on the grill, it’s important to know the different types of ribs available. Each one brings something different to the table in terms of flavor, texture, and cooking time.
Baby Back Ribs
These are the most popular and easiest to grill. They’re smaller, leaner, and cook faster than other types. Baby backs come from the upper part of the rib cage and have a slight curve to them.
Spare Ribs
Cut from the belly side of the rib cage, spare ribs are meatier and have more fat, making them extra flavorful when grilled properly. They take longer to cook but reward you with richer taste.
St. Louis Style Ribs
These are essentially spare ribs that have been trimmed into a rectangular shape for a cleaner look and even cooking. They’re a BBQ competition favorite due to their uniformity.
Beef Ribs
Bigger, bolder, and full of deep, beefy flavor, these ribs are often overlooked for pork. But when grilled low and slow, beef ribs are insanely good.
Knowing the difference helps you choose what’s right for your grill style and taste preferences.
Choosing the Right Ribs
Let’s be real: not all ribs are created equal. The quality of your ribs can make or break the final dish. So, when you hit the butcher or grocery store, here’s what you should look out for:
- Meat-to-Bone Ratio: Look for ribs with plenty of meat and minimal visible bone. Thin, overly trimmed ribs often dry out fast.
- Even Thickness: Uniform thickness means even cooking. Avoid racks that are thick on one end and thin on the other.
- Freshness: The meat should look pink and moist, not grey or slimy. If it smells funky, skip it.
If you have a local butcher, that’s even better. Ask for a fresh, meaty rack and let them know you’re grilling—they might even help with trimming.
List of Ingredients You’ll Need
Here’s what you’ll need to whip up the best grilled ribs ever:
For the Ribs:
- 1–2 racks of pork ribs (baby back or spare)
- Olive oil or yellow mustard (binder for rub)
Dry Rub Ingredients (DIY Spice Mix):
- 2 tbsp brown sugar
- 1 tbsp paprika (smoked if available)
- 1 tbsp garlic powder
- 1 tbsp onion powder
- 1 tsp chili powder
- 1 tsp ground black pepper
- 1 tsp salt
- 1/2 tsp cayenne pepper (optional, for heat)
BBQ Sauce (Optional but Recommended):
- 1 cup of your favorite BBQ sauce
- Add a splash of apple cider vinegar or honey for a custom twist
Optional Extras:
- Apple juice or apple cider vinegar (for spritzing)
- Aluminum foil or butcher paper (for wrapping)
- Wood chips (like hickory or applewood) for added smoke
Make sure all your ingredients are prepped and ready before firing up the grill. It’ll save you stress later and keep your workflow smooth.
Essential Tools for Grilling Ribs
You don’t need a professional outdoor kitchen to grill amazing ribs, but a few key tools will make your life a lot easier:
- Grill (Charcoal or Gas)
- Meat Thermometer – For checking doneness
- Tongs – Long-handled to protect your hands
- Basting Brush – For sauce or spritz
- Aluminum Foil or Butcher Paper – For wrapping
- Spray Bottle – To keep ribs moist
- Cutting Board & Sharp Knife – For prepping and serving
These tools help you manage temperature, handle your meat safely, and achieve pro-level results.
Preparing Your Ribs for Grilling
Preparation is the foundation of good BBQ. First things first: you’ve got to clean and trim those ribs.
1. Remove the Membrane
Flip the ribs over and locate the thin, shiny layer on the bone side. This membrane gets chewy if you don’t take it off. Slide a butter knife under the edge, grip it with a paper towel, and peel it off.
2. Rinse and Pat Dry
Give your ribs a quick rinse under cold water to remove bone dust and other residue. Pat them dry with paper towels—moisture will prevent a good sear and seasoning adhesion.
3. Trim Excess Fat
While some fat is great for flavor, you don’t want large chunks. Trim any thick, hard fat with a sharp knife.
Once that’s done, your ribs are ready to soak in flavor.
Creating the Perfect Dry Rub
Now it’s time to bring the flavor. A good dry rub is the heart of great ribs—it builds a deep, savory crust (aka the “bark”) that makes every bite unforgettable.
Why Use a Dry Rub?
Dry rubs season the meat without adding moisture, which helps create that crispy, flavorful outer layer. Plus, it’s super customizable depending on your taste—sweet, spicy, smoky, or all three.
Basic Dry Rub Recipe
Here’s a simple but powerful homemade dry rub:
- 2 tbsp brown sugar (adds sweetness and caramelization)
- 1 tbsp smoked paprika (adds color and smokiness)
- 1 tbsp garlic powder
- 1 tbsp onion powder
- 1 tsp chili powder (brings mild heat)
- 1 tsp salt (essential for flavor balance)
- 1 tsp ground black pepper
- 1/2 tsp cayenne pepper (optional for extra kick)
How to Apply the Rub
- Binder First: Lightly coat the ribs with olive oil or yellow mustard. This helps the rub stick and forms a crust.
- Rub Generously: Use your hands to apply the rub all over the ribs—front, back, and edges. Press it in so it sticks well.
- Let It Rest: For best results, wrap the ribs and let them sit in the fridge for at least 2 hours, or overnight for max flavor.
Don’t rush this step—the rub is what creates the crave-worthy outer layer everyone fights over at the cookout.
Marinating vs. Dry Rubbing
You might be wondering—should I marinate my ribs or just stick with the dry rub? Both methods have their perks, and knowing the difference helps you choose what’s best for your cook.
Dry Rub Pros:
- Forms a flavorful bark
- Easy to prepare and apply
- Doesn’t add extra moisture (good for grilling)
Marinade Pros:
- Adds deeper flavor penetration
- Can tenderize tougher ribs
- Works well for overnight prep
If you want juicy, fall-off-the-bone ribs with a sticky, savory crust, combine both: marinate first, then apply a dry rub before grilling. Just be sure to pat ribs dry before applying your rub to help it stick.
Prepping the Grill
Now that the ribs are seasoned and ready, it’s time to set the stage—your grill.
Charcoal vs. Gas Grill
- Charcoal Grill: Offers classic smoky flavor and higher heat. Use indirect heat by placing coals to one side and ribs on the other.
- Gas Grill: Easier to control temperature. Turn on one burner and place ribs on the opposite side for indirect cooking.
Temperature Matters
Ideal grill temp for ribs: 225–250°F (107–121°C). This low-and-slow method breaks down connective tissue for tender meat.
Add Wood Chips (Optional)
For that smoky punch, toss soaked wood chips like hickory, apple, or cherry onto the coals or into a smoker box on your gas grill.
Clean and Oil the Grate
Always start with a clean grate. Once hot, brush it and oil lightly with a paper towel dipped in vegetable oil. This prevents sticking.
Step-by-Step Guide to Grilling Ribs
Let’s get into the heart of it. Follow this foolproof step-by-step plan to grill ribs that are smoky, tender, and absolutely unforgettable.
Step 1: Preparing the Ribs
Start by removing the thin membrane from the back of the ribs. This helps seasonings penetrate and makes the ribs more tender. Rinse the ribs under cold water and pat them completely dry with paper towels.
Step 2: Applying the Rub or Marinade
Coat the ribs generously with a dry rub made from salt, pepper, paprika, brown sugar, and optional spices like garlic powder or chili powder. For a marinade, brush it on evenly. Let the ribs rest for at least 30 minutes, or refrigerate overnight for deeper flavor.
Step 3: Setting Up Your Grill
Preheat the grill for indirect heat. If using a charcoal grill, pile the coals on one side. For a gas grill, heat one burner and leave the other off. Aim for a steady temperature of about 135–150°C (275–300°F).
Step 4: Cooking Low and Slow
Place the ribs bone-side down on the cooler side of the grill. Close the lid and cook slowly for about 1½–2 hours, maintaining consistent heat. This gentle cooking breaks down connective tissue and keeps the meat juicy.
Step 5: Wrapping the Ribs (Texas Crutch)
Wrap the ribs tightly in foil with a splash of apple juice or broth. Return them to the grill and cook for another 30–45 minutes. This step locks in moisture and speeds up tenderization.
Step 6: Finishing Over Direct Heat
Unwrap the ribs and place them over direct heat for 5–10 minutes. Turn occasionally to caramelize the surface without burning. Remove, rest briefly, and serve hot.
Using BBQ Sauce Without Burning
Ever had ribs with sauce that’s burnt and bitter? That’s what happens when BBQ sauce hits direct heat too early.
When to Sauce
- Add BBQ sauce during the last 15–30 minutes
- Apply multiple thin layers, not one thick coat
- Flip occasionally to prevent scorching
Pro Tip: Mix your favorite BBQ sauce with a bit of honey, vinegar, or even whiskey for a custom touch. Just don’t go overboard—a little goes a long way.
How to Know When Ribs Are Done
Perfect ribs don’t need a timer—they tell you when they’re ready. Here’s how to know:
1. Bend Test
Pick up the rack with tongs and let one side hang. If the ribs bend and crack at the surface, they’re tender.
2. Toothpick Test
Insert a toothpick into the meat between the bones. If it slides in easily like butter, they’re done.
3. Internal Temperature
Use a meat thermometer. Aim for 195–203°F (90–95°C) for fall-off-the-bone ribs.
Avoid slicing too early. Letting them rest brings everything together.
Resting and Serving Your Ribs
Once your ribs are grilled to perfection, don’t cut right away—let them rest.
Why Resting Matters
Resting allows juices to redistribute inside the meat, so every bite stays moist and flavorful.
- Rest for 10–15 minutes
- Keep loosely tented with foil
How to Slice
Use a sharp knife and cut between the bones. Don’t saw—make clean, straight cuts. Arrange on a platter and get ready for the compliments to roll in.
Popular Side Dishes for Grilled Ribs
What’s a rib feast without some epic sides? Here are a few fan favorites:
- Cornbread – Sweet, crumbly, and perfect for soaking up BBQ sauce
- Coleslaw – Creamy and crunchy for balance
- Baked Beans – Sweet and smoky for double flavor
- Grilled Corn on the Cob – Classic BBQ side
- Potato Salad – Hearty and creamy
Mix and match to build the ultimate BBQ plate.
Common Mistakes to Avoid
Even seasoned grill masters can slip up when it comes to ribs. Avoiding these common mistakes can make the difference between dry disappointment and finger-licking greatness.
1. Cooking Too Hot and Fast
This is the biggest sin in rib grilling. Ribs need time—low and slow is the key. Cranking up the heat cooks the outside too fast, leaving the inside tough and chewy.
2. Skipping the Membrane Removal
That thin silver skin on the back of the ribs? It turns rubbery when cooked and blocks flavor from soaking in. Always remove it—it’s worth the extra minute.
3. Over-Saucing Too Early
Sugar-based BBQ sauces burn easily. Applying sauce too soon leads to a charred, bitter mess. Glaze only during the final 15–30 minutes over indirect heat.
4. Not Letting the Ribs Rest
Slicing too soon causes all those tasty juices to run out onto your cutting board. Give it at least 10 minutes before carving.
5. Ignoring Temperature Zones
If your grill has hot spots, your ribs may cook unevenly. Always use indirect heat and rotate the ribs occasionally to ensure they cook evenly.
6. Forgetting to Monitor Temperature
Don’t just trust your instincts. Use a reliable thermometer to keep your grill in the sweet spot (225–250°F) and check your ribs’ internal temp.
7. Over-Smoking
While smoky flavor is great, too much can overpower the meat. A handful of soaked wood chips every hour is usually enough. Trust your nose—if it smells perfect, it probably is.
Avoid these slip-ups, and you’re already ahead of the BBQ game.
FAQs about Grilled Ribs Recipe
1. How long do grilled ribs take to cook?
Typically, ribs take 4.5 to 6 hours to grill using the low-and-slow method at 225–250°F. Baby back ribs cook a bit faster than spare ribs. Always go by feel and internal temp (195–203°F), not just the clock.
2. Can I grill ribs without using foil?
Yes, but using foil (aka the Texas Crutch) helps speed up the tenderizing process and keeps ribs moist. If you skip it, expect a longer cook time and slightly firmer texture.
3. What’s the best wood for smoky flavor on ribs?
Hickory is a classic choice, delivering bold, bacon-like smoke. Applewood and cherry are milder and sweeter, ideal for pork. Try mixing woods for a custom flavor profile.
4. Can I grill frozen ribs?
Not recommended. Frozen ribs won’t cook evenly and may remain raw inside. Always thaw ribs completely in the fridge before grilling for safety and better results.
5. How do I keep ribs juicy on the grill?
Use a spritz of apple juice or cider vinegar every 30–45 minutes, cook over indirect heat, wrap mid-way, and don’t overcook. Resting after grilling is also key to locking in juices.
Conclusion
Grilling ribs isn’t just cooking—it’s an experience. It’s standing over the grill with a cold drink, enjoying the smell of smoke and spice, and anticipating that first glorious bite. From picking the right rack to building flavor with rubs and sauce, to the slow and steady grilling process—every step matters.
But here’s the thing: you don’t need to be a pro to make amazing ribs. With a bit of patience, the right tools, and this step-by-step guide, anyone can master the art of grilled ribs. So fire up the grill, follow the process, and let the flavors do the talking.
Your backyard BBQ just got a whole lot better.


