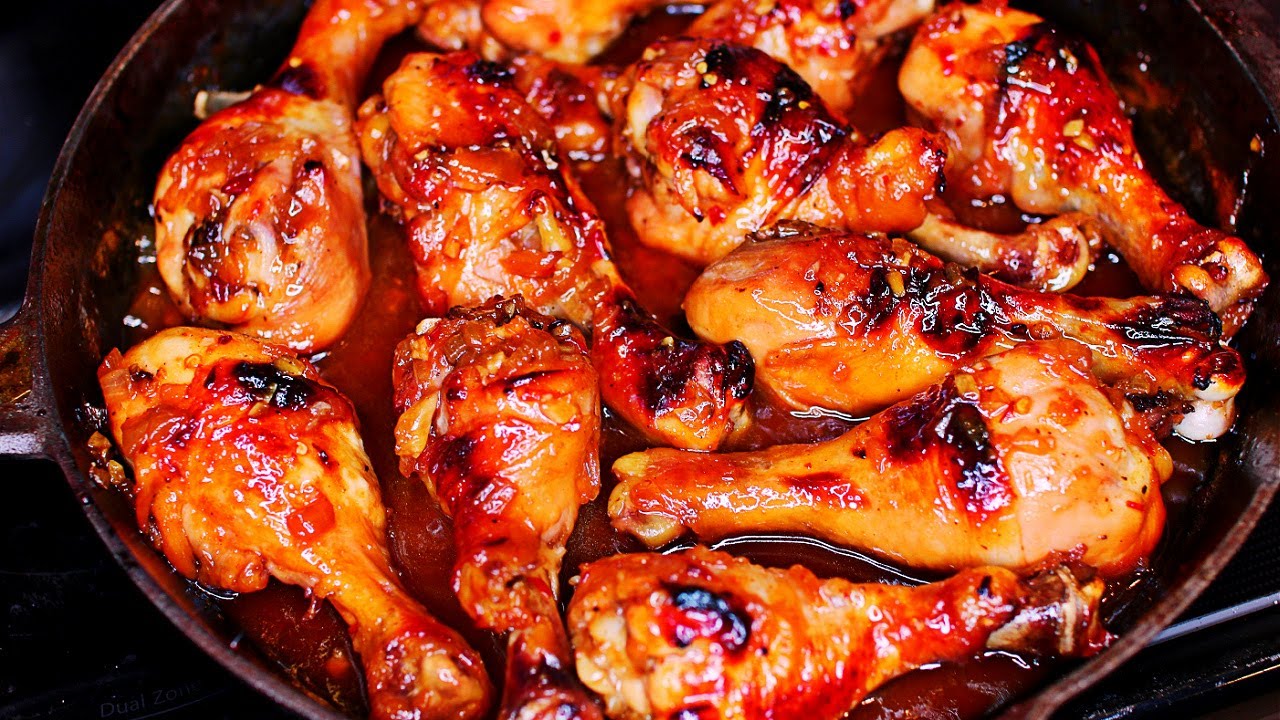
Baked Chicken Drumstick Recipe: Chicken drumsticks are one of those go-to dinner options that never go out of style. They’re juicy, affordable, easy to cook, and when baked just right—they’re absolutely irresistible. Whether you’re hosting a family dinner or meal-prepping for the week, this recipe gives you crispy skin, tender meat, and bold flavors that come together in one baking pan. The best part? No need to deep-fry or stand over a hot stove.
This guide isn’t just about tossing chicken into the oven. It’s about taking a few simple ingredients, applying a few tried-and-true techniques, and baking drumsticks so good, you’ll find yourself making them over and over. You don’t have to be a professional chef to nail this recipe. All you need is this step-by-step roadmap.
Why You’ll Love This Baked Chicken Recipe
There are countless ways to cook chicken, but baking drumsticks gives you the best of both worlds—crispy on the outside and juicy on the inside. If you’ve ever struggled with dry or bland chicken, this recipe changes everything. With the right marinade and baking technique, you’ll get flavor in every bite.
Here’s why people swear by this recipe:
- Easy Prep: Minimal chopping, no complicated ingredients.
- Healthier Than Frying: Less oil but all the crunch.
- Customizable: Switch up the spices to fit your taste.
- Meal Prep Friendly: Stores well and reheats like a charm.
- Budget-Friendly: Drumsticks are one of the most affordable cuts of meat.
And let’s not forget—your kitchen will smell AMAZING while these are baking. That aroma alone is worth it.
Ingredients You’ll Need
Let’s talk about what you need to make the perfect batch of baked chicken drumsticks. The beauty of this recipe is its simplicity, but that doesn’t mean it lacks flavor.
Essential Ingredients
Here’s the core ingredient list:
- 8–10 chicken drumsticks (skin-on, bone-in)
- 2 tablespoons olive oil
- 1 tablespoon garlic powder
- 1 tablespoon onion powder
- 1 teaspoon smoked paprika (adds a smoky depth)
- 1 teaspoon black pepper
- 1 teaspoon salt (or to taste)
- 1 teaspoon dried thyme or Italian seasoning
- 1 tablespoon soy sauce or Worcestershire sauce (for umami)
- Juice of 1 lemon (optional but brightens the flavor)
Optional Add-ons for Extra Flavor
These aren’t required but can take your drumsticks up a notch:
- 1 teaspoon cayenne pepper or chili flakes (for heat)
- 2 tablespoons honey or brown sugar (for a sweet kick)
- Fresh minced garlic (for bolder garlic flavor)
- Hot sauce (if you’re a spice lover)
- Fresh herbs like rosemary or parsley for garnish
Having a good balance of spices helps the chicken absorb flavor during marination and while baking. Don’t skip the oil—it helps crisp the skin.
Kitchen Tools and Equipment Required
Before diving into the cooking, make sure you have the right tools on hand. Having these ready will streamline the process and avoid scrambling halfway through the recipe.
- Large mixing bowl (for marinating)
- Tongs or clean hands (to coat the drumsticks)
- Baking tray or sheet pan
- Wire rack (optional but helps with even cooking)
- Aluminum foil or parchment paper (for easy cleanup)
- Oven mitts
- Basting brush (for applying extra marinade if needed)
- Meat thermometer (highly recommended for perfect doneness)
With these basics, you’re fully prepped for success. No fancy gadgets required!
How to Choose the Best Chicken Drumsticks
Not all drumsticks are created equal. Choosing the right chicken makes a world of difference in both flavor and texture. Here are a few pro tips:
- Go for bone-in, skin-on drumsticks for max juiciness and crispy skin.
- Avoid overly large drumsticks, as they might dry out before the inside is cooked.
- Check freshness – Look for pale pink meat, firm to the touch, and no weird odor.
- Organic or free-range chicken tends to have better flavor and texture.
Also, be sure to pat them dry before marinating—moisture on the skin can prevent it from getting crispy in the oven.
Step-by-Step Guide to Make Baked Chicken Drumsticks
Let’s break this down into clear, simple steps so you never have to guess. Follow these steps, and you’ll end up with golden, juicy chicken drumsticks that wow every time.
Step 1: Prep Your Chicken
Start by cleaning about 8–10 chicken drumsticks thoroughly. Pat them completely dry with paper towels—this is key to achieving crispy skin. Removing excess moisture helps the seasoning stick better and allows the oven heat to do its magic. If you want extra flavor, make a few small slits in each drumstick so the marinade seeps deep into the meat.
Step 2: Create the Perfect Marinade
In a large bowl, whisk together 3 tablespoons olive oil, 2 tablespoons soy sauce, 1 tablespoon lemon juice, 1 teaspoon paprika, 1 teaspoon garlic powder, ½ teaspoon black pepper, ½ teaspoon salt, and 1 tablespoon honey or brown sugar. This blend hits all the right notes—savory, tangy, and just a touch sweet, creating a balance that keeps your chicken juicy and flavorful.
Step 3: Marinate the Chicken (Time-Saving Tips!)
Add your drumsticks into the marinade, ensuring each piece is fully coated. For best results, marinate for at least 1 hour—or overnight in the fridge if time allows. If you’re in a rush, even 20–30 minutes can make a difference; just poke the chicken lightly with a fork before marinating to speed up absorption.
Step 4: Preheat the Oven for Perfect Baking
Set your oven to 400°F (200°C). A hot oven ensures the chicken skin crisps up while keeping the inside moist and tender.
Step 5: Arrange Chicken on Baking Tray
Line a baking sheet with foil or parchment paper for easy cleanup, and place a wire rack on top. Arrange the drumsticks in a single layer with space between each piece to promote even airflow and browning.
Step 6: Bake to Crispy Perfection
Bake for 35–40 minutes, flipping halfway through to ensure both sides cook evenly. You’ll know it’s done when the skin is golden brown and the internal temperature reaches 165°F (74°C).
Step 7: Broil for Extra Crispiness (Optional)
Want restaurant-style crisp? Switch the oven to broil mode for 3–5 minutes. Keep a close eye on it—broiling gives a beautiful char but can burn fast.
Step 8: Rest and Serve
Once baked, remove the drumsticks and let them rest for about 5 minutes. This helps the juices redistribute, keeping the meat succulent. Garnish with fresh parsley or squeeze of lemon, then serve hot with roasted veggies, fries, or a fresh salad. Juicy, crispy, and full of flavor—these baked chicken drumsticks are a weeknight dinner winner every time!
Tips for Juicy and Flavorful Baked Drumsticks
Here are some pro tips to elevate your baked chicken game:
- Always marinate: Even 30 minutes makes a difference. For max flavor, go overnight.
- Use skin-on drumsticks: The skin locks in moisture and gets crispy in the oven.
- Don’t overcrowd the pan: Give each drumstick space to crisp up evenly.
- Pat dry before marinating: This helps the seasoning stick and promotes browning.
- Use a thermometer: Avoid undercooked or dry chicken. 165°F is your magic number.
- Let it rest: This keeps the juices inside and makes each bite extra tender.
Baking chicken doesn’t have to be boring. With a little care, you can turn simple drumsticks into a dish that rivals your favorite restaurant’s.
How Long to Bake Chicken Drumsticks (Oven Temps & Times)
Baking times can vary based on your oven and the size of the chicken drumsticks, but here’s a quick breakdown:
| Oven Temperature | Baking Time | Notes |
|---|---|---|
| 350°F (175°C) | 45–55 minutes | Slower cook, very tender meat |
| 375°F (190°C) | 40–50 minutes | Balanced between tender & crispy |
| 400°F (200°C) | 35–45 minutes | Ideal for crispy skin |
| 425°F (220°C) | 30–40 minutes | Crispiest, but watch for burning |
Quick Tip: Always check with a meat thermometer to ensure doneness. The internal temperature should be 165°F (74°C).
For broiling: Broil for an extra 3–5 minutes at the end for that crispy top.
What to Serve with Baked Chicken Drumsticks
These drumsticks are super versatile, which means they pair well with just about anything. Here are some great options:
Starch Sides:
- Garlic mashed potatoes
- Rice pilaf or herbed rice
- Macaroni and cheese
- Buttery cornbread
Vegetable Sides:
- Roasted vegetables (carrots, broccoli, Brussels sprouts)
- Green beans with almonds
- Coleslaw
- Grilled corn on the cob
Sauces:
- Barbecue sauce
- Honey mustard
- Ranch dressing
- Hot sauce for heat lovers
Want to keep it light? A simple garden salad or cucumber-tomato mix works wonders too. These baked drumsticks adapt to any meal setting—from game day to date night.
Common Mistakes to Avoid
Even though this recipe is simple, a few common pitfalls can stand between you and the perfect baked chicken drumsticks. Here’s what to watch out for:
- Skipping the marinade
A dry rub is great, but marinating adds depth of flavor. Even a short 30-minute soak can dramatically improve taste and tenderness. - Not drying the chicken before baking
Wet skin means steamed, not crispy. Patting the drumsticks dry before seasoning or marinating is crucial for that golden, crackly finish. - Overcrowding the pan
This is a big one. If the drumsticks are too close together, they’ll steam instead of bake. Always leave space between each piece. - Using low oven temperatures only
While slow baking makes the meat tender, you might miss out on that beautiful skin. Start low if you want, but always finish on a higher heat or broil for crispy texture. - Not checking internal temperature
Don’t guess—use a thermometer. It’s the only way to ensure your chicken is safe (165°F) and not overcooked. - Skipping the resting period
Resting allows juices to redistribute. Cut into your drumsticks right away, and you’ll lose all those savory juices onto the plate.
Avoid these traps, and you’re already ahead of the game. The rest is just delicious reward.
Health Benefits of Baked vs. Fried Chicken
Let’s be real—fried chicken is delicious. But baked chicken can hit the same craving without all the guilt. Here’s why baked drumsticks are a smarter (and still satisfying) choice:
- Lower in fat: Baking uses way less oil than deep frying, cutting calories and saturated fat significantly.
- Heart healthier: Less oil means lower cholesterol risks and reduced inflammation.
- Fewer additives: Homemade baked chicken lets you control ingredients—no preservatives or MSG.
- Retains nutrients: Baked chicken holds onto more vitamins like B6 and niacin, which often get degraded in frying oil.
Want the crispy texture of fried without the downsides? Broiling or baking at a higher temperature gives you that crunch—without dunking it in oil. Best of both worlds.
Storage and Reheating Tips
Got leftovers? Lucky you! Baked chicken drumsticks store well and make amazing next-day meals. Here’s how to keep them just as tasty:
Storing
- Let drumsticks cool completely before storing.
- Place in an airtight container or wrap tightly in foil.
- Refrigerate for up to 4 days.
Reheating
The key is to avoid drying them out.
Oven method (best):
- Preheat oven to 375°F (190°C).
- Place drumsticks on a tray, lightly cover with foil.
- Heat for 15–20 minutes or until hot throughout.
- Remove foil for the last 5 minutes to crisp the skin.
Microwave method (quickest):
- Place drumsticks on a microwave-safe plate.
- Cover with a damp paper towel.
- Heat in 30-second bursts until warm.
Air fryer method (for max crisp):
- Preheat to 375°F.
- Reheat for 5–7 minutes.
Avoid reheating more than once—it dries out the meat and risks food safety.
How to Freeze Baked Chicken Drumsticks
Want to prep ahead or save leftovers long-term? Freezing is your best friend.
Freezing Tips:
- Allow cooked drumsticks to cool fully.
- Wrap each piece individually in plastic wrap or foil.
- Place wrapped pieces in a freezer bag or airtight container.
- Label with the date. Store for up to 3 months.
To Reheat from Frozen:
- Thaw overnight in the fridge.
- Reheat using oven or air fryer method above.
- For straight-from-freezer baking: cover in foil and bake at 350°F for 30–40 minutes, uncovering halfway.
They’ll taste just as good as fresh with a little care.
Baked Chicken Drumsticks for Meal Prep
If you’re into meal prepping, these drumsticks are a game-changer. They’re protein-packed, easy to portion, and reheat like a dream. Here’s how to build a full prep with them:
Meal Prep Ideas:
- Drumsticks + brown rice + steamed broccoli
- Drumsticks + quinoa salad + tzatziki sauce
- Drumsticks + roasted sweet potatoes + kale slaw
Tips:
- Store in portioned containers for grab-and-go meals.
- Add sauces on the side to keep things interesting.
- Switch up your seasonings weekly (BBQ one week, lemon herb the next).
Cook once, eat for days. Your future self will thank you.
FAQs about Baked Chicken Drumstick Recipe
1. Can I bake frozen chicken drumsticks directly?
Yes, but it’s best to thaw them first. Baking from frozen takes longer (about 50–60 minutes), and the seasoning won’t stick as well. Thaw in the fridge overnight for best results.
2. How do I keep the drumsticks from drying out?
Marinate them well, don’t overcook, and let them rest after baking. Using a meat thermometer helps ensure juicy, perfectly done chicken every time.
3. Can I use boneless drumsticks or thighs for this recipe?
Absolutely. Just adjust cooking times—boneless pieces bake faster, around 25–30 minutes at 400°F. Keep a close eye on them to avoid overcooking.
4. What’s the best way to get crispy skin without frying?
Broil the drumsticks for 3–5 minutes after baking. Also, make sure the skin is dry before baking and don’t overcrowd your pan.
5. How can I make these drumsticks spicy?
Add cayenne pepper, chili powder, or hot sauce to your marinade. You can also brush with buffalo sauce after baking for a fiery finish.
Conclusion
Baked chicken drumsticks aren’t just another chicken recipe—they’re a blank canvas. Whether you like them spicy, sweet, savory, or smoky, this method gives you crispy skin, juicy meat, and flavor in every bite.
Use this recipe as your foundation and build on it. Add different seasonings. Try unique marinades. Pair with creative sides. The possibilities are endless.
Once you master this basic method, you’ll always have a crowd-pleasing, family-favorite, weeknight-win dish in your back pocket.
So grab those drumsticks, fire up your oven, and get ready to impress yourself and everyone at the table.