Bake Cassava Cake Recipe: There’s something magical about the scent of cassava cake wafting through the kitchen—it smells like childhood, Sunday lunches, and family celebrations. If you’ve ever tasted this classic Filipino treat, you know exactly what I mean. And if you haven’t? Well, you’re in for a seriously delicious experience.
Whether you’re a seasoned baker or just starting out, this baked cassava cake recipe is simple enough to follow yet rich enough in flavor to make your taste buds dance. Let’s dive into the world of cassava cake and learn exactly how to make this beloved dessert from scratch.
What is Cassava Cake?
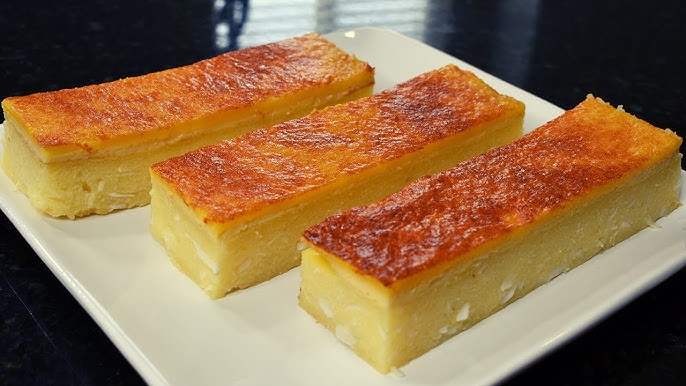
Cassava cake is a traditional Filipino dessert made primarily from grated cassava (also known as yuca or manioc), coconut milk, and condensed milk. It’s creamy, dense, and usually topped with a sweet custard-like layer that adds a delightful richness to every bite. Baked to perfection, this dessert strikes a perfect balance between sweetness and texture.
Cassava cake is incredibly popular in Filipino households during holidays, fiestas, birthdays, or even as an everyday snack. The main star—cassava—is a starchy root vegetable that’s naturally gluten-free and abundant in the tropics. When baked, it develops a sticky, chewy texture that pairs perfectly with coconut and other tropical flavors.
The best part? You can customize it in tons of ways, from adding macapuno strings to sprinkling cheese on top. It’s simple, soulful, and truly unforgettable.
Why You’ll Love This Cassava Cake Recipe
Wondering why this cassava cake recipe is worth your time? Let’s break it down:
- Easy to Make: No fancy equipment or complicated steps. Just mix, bake, and enjoy.
- Deliciously Addictive: Creamy, chewy, and just the right amount of sweetness.
- Customizable: You can tweak it with your favorite toppings like cheese, ube, or macapuno.
- Gluten-Free: Perfect for those avoiding gluten.
- Perfect for Any Occasion: From potlucks to holiday feasts, cassava cake is always a hit.
Whether you’re impressing your Filipino in-laws or just craving a cozy dessert with coffee, this recipe hits the spot every single time.
List of Ingredients You’ll Need
Let’s keep it simple and straightforward. Here’s what you’ll need to gather before you start baking:
Main Ingredients:
- 2 lbs grated cassava (fresh or frozen)
- 1 can (14 oz) condensed milk
- 1 can (13.5 oz) coconut milk
- 1 can (12 oz) evaporated milk
- 3 large eggs
- 1 cup granulated sugar
- 1/2 cup melted butter
- 1 teaspoon vanilla extract
Optional Toppings:
- Grated cheese (cheddar or quick-melt, for salty-sweet balance)
- Macapuno (sweet coconut strings)
- Extra condensed milk or custard mix
- Ube halaya (purple yam jam) for a twist
If you’re in the Philippines or an Asian market abroad, you’ll find most of these ingredients readily available. If not, frozen grated cassava is usually stocked in the international aisle of many grocery stores.
Equipment and Tools You’ll Need
Let’s not overcomplicate things. Here’s all you really need:
- Mixing bowls
- Whisk or spatula
- Measuring cups and spoons
- 9×13-inch baking pan (or two 8×8 pans)
- Oven
- Small saucepan (for custard topping)
- Cheese grater (if adding cheese)
- Brush for greasing pan (or cooking spray)
You probably already have most of this in your kitchen!
How to Choose the Best Cassava
Choosing quality cassava is key to getting that chewy, moist texture we all love in cassava cake. If you’re using fresh cassava, look for roots that are:
- Firm and free from soft spots
- Free of mold or discoloration
- White on the inside with no black streaks
For frozen cassava, just check the ingredients. Make sure it’s 100% grated cassava with no added preservatives or flavorings.
Fresh is great, but honestly? Frozen cassava is a huge time saver and works just as well—no judgment here.
How to Prepare Fresh Cassava (If Not Using Frozen)
Want to go the extra mile? Here’s how to prep fresh cassava like a pro:
- Peel the cassava: Use a sharp knife to remove the thick brown skin and the pinkish layer underneath.
- Rinse well: Wash off any dirt or debris.
- Grate it finely: Use a box grater or food processor.
- Squeeze excess liquid: Place grated cassava in cheesecloth and squeeze out the starchy liquid.
Pro tip: Some people let the cassava liquid sit and settle, then use the white starch (called tapioca starch) in the recipe. But for now, we’ll keep it simple and discard it.
Step-by-Step Guide to Making Cassava Cake
Now let’s get to the good part—baking! Follow these steps carefully, and you’ll end up with a creamy, chewy, golden-brown masterpiece.
Step 1: Prepare the Baking Pan
Grease a rectangular baking dish (about 9×13 inches) with butter or oil, then line it with banana leaves or parchment paper. The banana leaves give that authentic aroma and slight earthy flavor typical of Filipino-style cassava cake. Make sure the lining fits snugly with no gaps or wrinkles.
Step 2: Mix the Ingredients
In a large bowl, combine 2 packs (about 2 lbs) of grated cassava, 1 can condensed milk, 1 can evaporated milk, 1 can coconut milk, 1 cup sugar, 2 beaten eggs, and ½ cup melted butter. Stir thoroughly until everything blends into a smooth, thick batter. The key here is to ensure no dry cassava bits remain unmixed—smooth consistency means even baking.
Step 3: Preheat the Oven
Set your oven to 350°F (175°C) while you finish preparing the batter. Preheating ensures the cake rises evenly and bakes with a firm, slightly chewy texture.
Step 4: Bake the Cake
Pour the batter into the prepared pan and bake for 45–60 minutes, or until the top is lightly golden and a toothpick inserted in the center comes out clean.
Step 5: Make the Topping
While baking, mix 1 can coconut milk, ½ can condensed milk, 2 egg yolks, and ¼ cup sugar in a saucepan. Stir over low heat until it thickens into a custard-like consistency.
Step 6: Add Topping and Bake Again
Spread the topping evenly over the baked cassava base. Return to the oven and bake for another 15–20 minutes, or until the topping turns golden brown and slightly caramelized. Let it cool before slicing—each piece soft, creamy, and bursting with coconut sweetness.
Baking Tips and Tricks for Perfect Cassava Cake
Want a cassava cake that’ll impress even your Lola? Keep these handy tips in mind:
- Avoid overmixing. Just stir until everything’s combined. Overmixing can make the cake dense.
- Use room-temperature ingredients. They mix more evenly and create a better texture.
- Line the pan if needed. Banana leaves or parchment paper prevent sticking and add flavor.
- Let it cool before slicing. It needs time to firm up. Cutting too soon = a gooey mess.
- Add texture. Stir in macapuno strings or shredded coconut for a little bite.
And always—taste as you go. The mixture before baking should be sweet and coconutty. Adjust the sugar or vanilla if needed.
Common Mistakes to Avoid
Even a simple recipe like cassava cake has its pitfalls. Here’s what to watch out for:
- Using raw cassava improperly. Raw cassava contains cyanide compounds. Always peel, rinse, and cook thoroughly.
- Baking at the wrong temperature. Too hot, and the edges will burn before the center sets.
- Skipping the topping. That golden layer makes the cake extra special—don’t miss it!
- Too much sugar. Cassava has natural sweetness. Taste the mix before dumping in sugar.
And please—don’t rush the cooling process. Let the cake cool completely before slicing to avoid a gooey disaster.
Storage and Shelf Life
Cassava cake stores like a dream.
- At room temperature: Up to 2 days (in a sealed container).
- In the fridge: 5 to 7 days. Cover tightly with foil or plastic wrap.
- In the freezer: Up to 2 months. Wrap slices in cling film and store in freezer bags.
To defrost, just leave it in the fridge overnight. It tastes just as amazing—sometimes even better—the next day!
How to Reheat Cassava Cake
Want it warm and gooey again? Here’s how:
- Microwave: 30 seconds per slice.
- Oven: 300°F (150°C) for 10 minutes.
- Toaster oven: Also works great for a slightly crisp top.
Avoid overheating—it can dry out. A splash of coconut milk on top before reheating helps keep it moist.
Serving Suggestions
Cassava cake is a treat all on its own, but you can take it further with:
- Fresh coconut or grated cheese sprinkled on top
- A scoop of vanilla ice cream on the side
- Drizzle of condensed milk or coconut caramel sauce
- Hot coffee or tea for the perfect pairing
It also goes great with salty dishes—think of it as the dessert version of yin and yang.
Cassava Cake Variations to Try
Ready to experiment? Here are a few flavorful twists to keep things fresh:
Ube Cassava Cake
Add 1/2 cup of ube halaya (purple yam jam) to your cassava mixture for a beautiful color and subtle earthy flavor. Top with more ube and cheese—seriously dreamy.
Macapuno Cassava Cake
Stir in 1/2 cup of macapuno strings into the batter. Adds a chewy texture and makes the cake even more decadent.
Cheese Cassava Cake
Top your cassava cake with a generous amount of grated cheddar or quick-melt cheese before adding the custard topping. Bake as usual for a delightful salty-sweet contrast.
Health Benefits of Cassava (When Consumed in Moderation)
Cassava isn’t just tasty—it also offers some health perks, like:
- Naturally gluten-free: Great for those with gluten intolerance or celiac disease.
- Rich in carbohydrates: Provides quick energy.
- Contains resistant starch: May help with digestion and blood sugar control.
- Good source of vitamin C: Supports immune health.
Of course, moderation is key. Cassava is high in carbs and calories, and it must be cooked properly to avoid toxicity.
Cassava Cake vs. Other Filipino Desserts
Filipino desserts are a league of their own, but here’s how cassava cake stands out:
| Dessert | Main Ingredient | Texture | Sweetness Level | Oven-Baked |
|---|---|---|---|---|
| Cassava Cake | Grated cassava | Chewy, creamy | Medium-High | Yes |
| Bibingka | Rice flour | Fluffy, spongy | Mild | Yes |
| Sapin-sapin | Glutinous rice | Sticky, layered | High | No |
| Leche Flan | Egg yolks | Silky, custard-like | High | No |
Cassava cake lands somewhere between a pudding and a dense cake, with rich tropical flavors and the power to steal the show on any dessert table.
FAQs about Bake Cassava Cake Recipe
1. Can I use cassava flour instead of grated cassava?
Not recommended. Cassava flour doesn’t provide the same texture or moisture. Stick to fresh or frozen grated cassava.
2. Is cassava cake gluten-free?
Yes! Cassava is naturally gluten-free, making this cake perfect for those with gluten sensitivities.
3. Can I make this dairy-free?
Yes. Use coconut condensed milk and skip the cheese. There are also plant-based evaporated milk alternatives you can try.
4. How long does cassava cake last in the fridge?
It can last up to 7 days when stored in an airtight container in the refrigerator.
5. Can I freeze cassava cake?
Absolutely. Slice it into portions, wrap individually, and freeze for up to 2 months. Reheat and enjoy anytime!
Conclusion
Cassava cake is more than just a dessert—it’s a slice of home, a taste of the islands, and a comfort food classic. Whether you grew up with it or are just discovering it now, baking your own cassava cake is an experience full of love, flavor, and sweet nostalgia.
So, preheat that oven, gather your ingredients, and get ready to impress your friends, family, or even just yourself. This cassava cake recipe is foolproof, flavorful, and 100% worth it.


