Vanilla Paste Recipe: If you’ve ever wanted to bottle up the rich aroma of vanilla and use it in your baking adventures, then learning how to make homemade vanilla paste is your golden ticket. Unlike vanilla extract, which is alcohol-based and more diluted, vanilla paste packs an intense punch of flavor, complete with those tiny, flavor-packed seeds from vanilla beans. It’s like giving your desserts a first-class upgrade.
In this guide, you’ll not only discover how to make vanilla paste from scratch, but also understand the tools, techniques, and ingredients involved. Whether you’re a baking enthusiast or just someone who loves DIY kitchen projects, this recipe is about to become your go-to.
Why Make Your Own Vanilla Paste?
There’s something incredibly satisfying about making your own ingredients at home—especially something as decadent as vanilla paste. You might be wondering, “Why not just buy it from the store?” The answer lies in three simple reasons: quality, flavor, and customization.
Store-bought vanilla paste often comes with unnecessary preservatives or artificial enhancers. When you make your own, you control everything—what beans you use, the type of sweetener, and how intense the flavor is. Plus, homemade vanilla paste is often far more cost-effective, especially if you buy vanilla beans in bulk or have access to affordable sources.
Let’s not forget that the flavor of real vanilla beans is unmatched. Vanilla paste showcases the tiny black seeds—those are the real stars—providing not just flavor but a beautiful aesthetic in your desserts.
What Is Vanilla Paste?
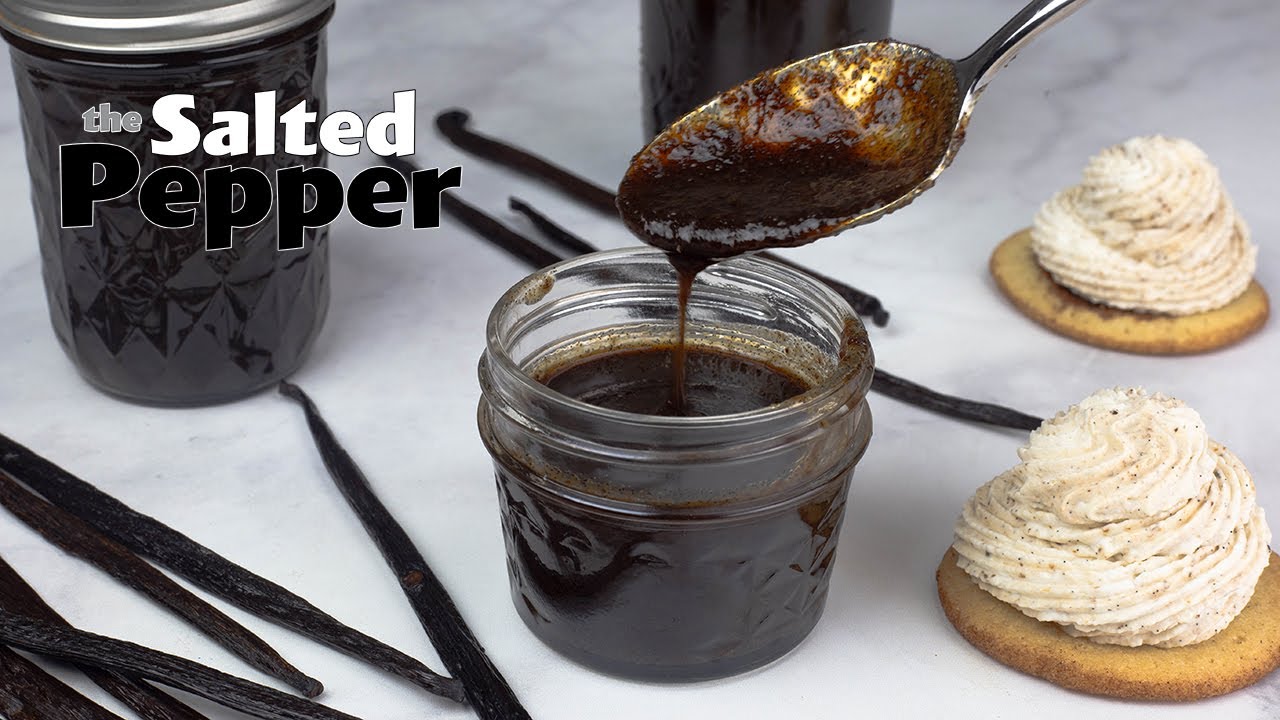
Vanilla paste is a thick, syrupy blend made from whole vanilla beans, sweeteners, and often a base like alcohol or glycerin. It contains both the extract and the bean specks, giving it that signature richness and texture. It’s a hybrid between vanilla extract and vanilla pods, offering the best of both worlds.
You’ll typically use it in recipes where you want to highlight the visual and aromatic presence of vanilla. Think crème brûlée, ice cream, cakes, and even smoothies. It’s thicker than extract, more potent than vanilla sugar, and way more visually appealing.
List of Ingredients You’ll Need
Before we dive into the step-by-step process, let’s talk about the ingredients. Making vanilla paste is relatively simple, but each component matters.
Vanilla Beans – The Star Ingredient
You can’t have vanilla paste without vanilla beans. These pods come from orchids, and their intense aroma is the soul of the paste.
- Types of Beans: Madagascar (rich, creamy), Tahitian (floral, fruity), and Mexican (bold, spicy).
- How Many: You’ll need about 6-10 beans for every 1 cup of base liquid.
- Tip: The plumper the bean, the better the flavor.
Always go for grade B beans for paste-making. They’re less expensive than grade A but perfect for extraction and blending.
Sweeteners – Choosing Between Honey, Sugar, or Syrup
This is where you can personalize your vanilla paste.
- Granulated sugar: Gives a neutral sweetness.
- Honey or agave syrup: Adds depth and floral undertones.
- Maple syrup: Perfect if you love warm, earthy tones.
Choose based on the flavor profile you want in your final product. A popular combo is equal parts sugar and water simmered to a syrup, then infused with the vanilla.
Alcohol or Glycerin – The Extracting Agent
This is optional but highly recommended.
- Vodka: A neutral base that won’t interfere with the vanilla flavor.
- Glycerin: Ideal for alcohol-free versions, especially for kids or specific diets.
- Rum or Bourbon: Adds a bold kick and works well in desserts like spiced cakes or chocolate puddings.
Just a few tablespoons go a long way and help preserve the paste longer.
Optional Ingredients for Flavor Enhancement
Want to get creative?
- Lemon zest or orange zest: Adds brightness.
- Sea salt: Balances sweetness.
- Cinnamon or nutmeg: Adds warmth.
While not necessary, these additions can make your paste even more unique and tailored to your taste.
Equipment You’ll Need
You don’t need fancy equipment, but having the right tools ensures a smooth process.
Essential Kitchen Tools
Here’s your basic toolkit:
- Sharp knife: For splitting and scraping the vanilla beans.
- Cutting board: Self-explanatory, but keep it dry to prevent soaking the beans.
- Blender or food processor: Essential for creating a smooth, creamy texture.
- Saucepan: To cook and reduce the mixture.
- Fine mesh strainer or cheesecloth: If you want a smoother finish.
A little investment in the right tools goes a long way in making your vanilla paste last longer and taste better.
Recommended Containers for Storage
Storage is critical for preserving freshness.
- Glass jars with airtight lids: Preferably dark-colored to protect from light.
- Amber dropper bottles: Great for portion control and longer storage.
- Labeling tags or masking tape: Always date your jars!
Avoid plastic containers—they can absorb and distort the rich vanilla aroma over time.
Step-by-Step Guide to Making Vanilla Paste
Step 1: Preparing the Vanilla Beans
Start with 4–5 plump vanilla beans. Using a sharp knife, slice them lengthwise and scrape out the seeds with the back of the blade. Cut the empty pods into small pieces—they’ll still add deep flavor to the paste.
Step 2: Blending Ingredients
In a blender or food processor, combine the vanilla seeds and pod pieces with ½ cup vegetable glycerin or light corn syrup and 1 tablespoon sugar. Blend until thick and speckled.
Step 3: Cooking the Mixture
Pour the blended mixture into a small saucepan. Simmer on low heat for 10–15 minutes, stirring occasionally until slightly thickened and fragrant.
Step 4: Cooling and Storing the Paste
Let the mixture cool completely, then strain out any large pod pieces. Transfer to a sterilized glass jar.
Step 5: Proper Labeling and Usage Tips
Label with the date—it lasts up to 6 months. Use 1 teaspoon of paste as a substitute for 1 vanilla bean in baking or desserts.
How to Store Vanilla Paste Properly
Shelf Life and Storage Conditions
Homemade vanilla paste, when made and stored correctly, has an impressive shelf life. Depending on the preservative used (alcohol vs. glycerin), it can last from 6 months to over a year.
To maximize freshness:
- Keep the jar tightly sealed at all times.
- Store in a cool, dark place away from direct sunlight or heat.
- For longer shelf life, refrigerate—just remember it may thicken slightly when cold. You can loosen it by warming the jar slightly in your hands or placing it in warm water.
What to Avoid:
- Don’t store near your stove or oven.
- Avoid exposure to air—oxygen can degrade the flavor over time.
- Never freeze your vanilla paste. Freezing alters its texture and can dull the flavor.
Signs of Spoilage and What to Do
Even though vanilla has strong preserving properties, it can still spoil under the wrong conditions.
Watch for:
- Mold growth or discoloration
- Off or sour smell
- Separation of ingredients that doesn’t remix when shaken
If any of these appear, it’s best to discard and start fresh. Always trust your senses—if it looks or smells off, it probably is.
How to Use Vanilla Paste in Recipes
Ideal Substitution Ratios
Using vanilla paste is incredibly easy, especially if you’re used to working with vanilla extract or beans. One of its biggest advantages is how seamlessly it substitutes for other forms of vanilla.
Here’s a quick conversion guide:
- 1 tablespoon of vanilla paste = 1 tablespoon of vanilla extract
- 1 tablespoon of vanilla paste = 1 whole vanilla bean
- 1 teaspoon of vanilla paste = 1 teaspoon of vanilla essence (although essence is artificial)
Because vanilla paste contains the seeds from the bean, it gives a more robust flavor and a stunning speckled look to your dishes. Think of it as a two-in-one combo—you get both the extract and the visual charm of the seeds.
You can use it:
- In baked goods like cookies, cakes, and muffins
- In custards, puddings, and ice creams
- In smoothies, lattes, and milkshakes
- To flavor whipped cream, frosting, or even pancake batter
Pro tip: Because it’s slightly more concentrated than extract, you can use a touch less if you want a more subtle flavor.
Best Recipes to Use Vanilla Paste In
Wondering where vanilla paste really shines? Here are a few tried-and-true ideas:
- Vanilla Bean Ice Cream: The flecks of vanilla seeds are a must-have in traditional homemade ice cream.
- Crème Brûlée: That creamy texture plus the bold vanilla flavor? Perfection.
- Vanilla Cupcakes or Layer Cake: Amplify the flavor in your batter or buttercream.
- Custards and Panna Cotta: Vanilla paste adds elegance and depth.
- Homemade Granola or Oatmeal: A dash of paste transforms these from bland to brilliant.
It’s also incredible in French toast batter, vanilla bean lattes, and even caramel sauces. Anywhere you want that next-level flavor—vanilla paste is the answer.
Benefits of Using Homemade Vanilla Paste
Healthier, Fresher, and More Flavorful
There’s a world of difference between store-bought vanilla flavorings and the real thing you craft in your kitchen. Homemade vanilla paste delivers a purer, more intense vanilla experience, free of synthetic chemicals or additives.
Here’s why it’s better:
- No preservatives or artificial coloring
- No corn syrup or fillers
- Full control over ingredients (great for allergies and dietary needs)
- Stronger aroma and richer flavor than extract alone
When you make it yourself, you’re using real vanilla beans, not imitation flavors. That alone is worth the effort.
And let’s not forget—it’s better for the environment too. No more tiny plastic bottles or mass-produced products. Just clean, sustainable vanilla made by you, for you.
Cost-Effective and Customizable
Buying high-end vanilla paste at the store can cost a small fortune. But making your own slashes the price per ounce dramatically, especially if you buy vanilla beans in bulk online or from local markets.
On top of that, you can tweak the recipe to suit your taste:
- Prefer a sweeter paste? Add more honey or maple.
- Want a spicier kick? Drop in a cinnamon stick during the cooking phase.
- Avoiding alcohol? Glycerin does the job beautifully.
That flexibility alone makes homemade vanilla paste a baker’s secret weapon.
Common Mistakes to Avoid
Overcooking or Burning the Paste
One of the most common slip-ups in making vanilla paste is applying too much heat for too long. Vanilla is delicate, and too much cooking can burn off its subtle aromas or leave you with a bitter aftertaste.
Avoid this by:
- Using low to medium heat only
- Stirring constantly during the cooking phase
- Keeping an eye on texture—stop cooking once it thickens to a syrupy consistency
Pro tip: It’s better to undercook slightly than to overcook and ruin a whole batch of premium beans.
Using Low-Quality Vanilla Beans
Your paste is only as good as your beans. If you’re using dried-out, brittle, or overly old beans, don’t expect much flavor.
Instead, choose:
- Plump, oily, fragrant vanilla beans
- Grade B beans (they’re more extract-friendly and cost-effective)
Also, avoid pre-ground vanilla powder or “vanilla flavoring”—they don’t offer the same depth or authenticity.
Other mistakes include:
- Storing in plastic containers (can leach flavor)
- Skipping the resting period after making the paste
- Not labeling or dating your jars
Each of these can impact both flavor and shelf life—so play it smart and be meticulous.
FAQs about Vanilla Paste Recipe
How long does homemade vanilla paste last?
If stored in a cool, dark place or the fridge, it can last 6 to 12 months, depending on whether you use alcohol or glycerin.
Can I use vanilla powder instead of beans?
Yes, but you’ll miss out on the beautiful specks and some of the complexity. Powder is a good backup but not a perfect replacement.
What’s the difference between vanilla paste and extract?
Paste is thicker, includes bean seeds, and offers a more intense flavor. Extract is thinner and more common but lacks visual flair.
Can I freeze vanilla paste for longer storage?
It’s not recommended. Freezing can alter the texture and dull the flavor. Fridge or pantry storage is best.
How many beans are in a tablespoon of paste?
Roughly one whole vanilla bean equals 1 tablespoon of paste in flavor strength and appearance.
Conclusion
Homemade vanilla paste is more than just a flavor enhancer—it’s a culinary upgrade. Rich, aromatic, and full of speckled charm, it brings desserts to life in ways vanilla extract just can’t compete with. From the moment you slice open a vanilla bean to the final jar of glossy, fragrant paste, the process is as enjoyable as the final result.
Best of all? You control the ingredients, the flavor intensity, and the storage method. Whether you’re baking a classic custard, whisking up a vanilla bean latte, or elevating your holiday cookies, your homemade vanilla paste will become your secret weapon in the kitchen.


