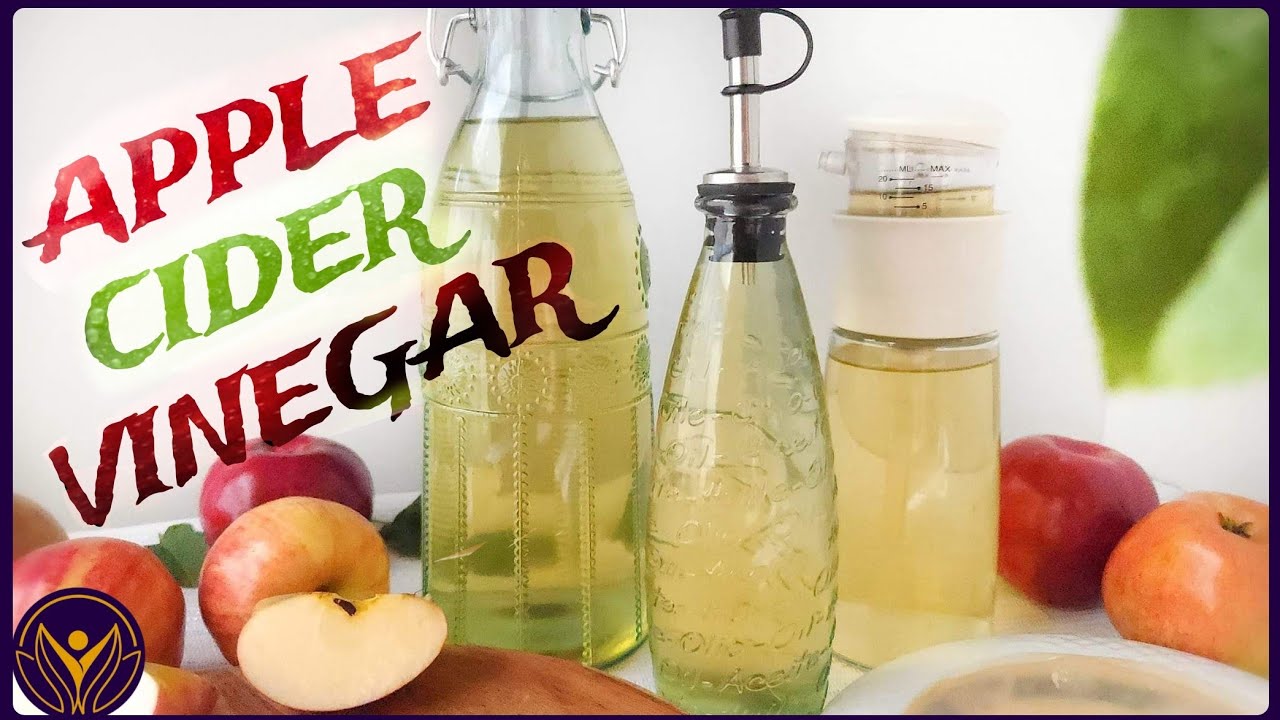
Apple Cider Vinegar Recipe: Apple cider vinegar (ACV) is one of those magical pantry items that has been around for centuries. From ancient civilizations to modern kitchens, it has been valued for its versatility. But here’s the thing: most people only know the store-bought version, which is often pasteurized, filtered, and stripped of the beneficial “mother” that makes raw ACV so powerful. When you make it at home, you get the real deal—a raw, unfiltered, probiotic-rich vinegar that not only tastes better but also offers maximum health benefits.
Think of ACV as more than just a kitchen ingredient. It’s a natural remedy, a cleaning agent, and even a beauty hack. If you’ve ever wondered how to make it yourself, you’re in the right place. The process is surprisingly simple, requires just a few ingredients, and delivers a product you’ll proudly use daily. By the end of this guide, you’ll know exactly how to turn apples into golden vinegar goodness with nothing more than patience and a glass jar.
Health Benefits of Apple Cider Vinegar
Homemade ACV is packed with nutrients and beneficial bacteria that commercial versions often lack. It’s rich in enzymes, acetic acid, and trace minerals that support overall health. Here are some of the top benefits:
- Improves Digestion – The probiotics and acetic acid in ACV help balance gut bacteria, making digestion smoother and reducing bloating.
- Supports Weight Management – Drinking diluted ACV before meals may help curb appetite and regulate blood sugar levels.
- Boosts Immunity – With its antimicrobial properties, ACV strengthens your body’s defense system.
- Balances Blood Sugar – Studies show ACV can improve insulin sensitivity and stabilize blood sugar spikes after meals.
- Natural Detoxifier – It helps flush toxins from the body and supports liver health.
- Skin and Hair Care – Applied topically, ACV can clear acne, soothe sunburn, and add shine to hair.
The best part? Homemade ACV keeps all these benefits intact, unlike commercial brands that are often pasteurized. So, when you take the time to make your own, you’re giving your body something much closer to what nature intended.
Ingredients You’ll Need
The beauty of apple cider vinegar is in its simplicity. You don’t need complicated ingredients—just fresh produce and a little sweetener to kickstart fermentation.
- Fresh Apples (6–8 medium-sized or apple scraps like peels and cores) – Organic apples are ideal since they’re free of pesticides and wax.
- Sugar or Honey (2–4 tablespoons) – Acts as food for the natural yeast and bacteria. Don’t worry, the sugar will be eaten up during fermentation.
- Filtered Water – Chlorine in tap water can hinder fermentation, so use filtered or bottled water.
- Optional Flavor Boosters – Cinnamon sticks, cloves, ginger slices, or herbs like rosemary and thyme for a unique twist.
That’s it—four basic things and you’re good to go. The fermentation process will do the rest, transforming simple apples into tangy, nutrient-packed vinegar.
Equipment Required
To make great apple cider vinegar, you don’t need fancy kitchen tools. A few basic items are enough:
- Large Glass Jar (1–2 liters) – Avoid plastic or metal, as they can interfere with fermentation.
- Cheesecloth or Coffee Filter – To cover the jar and allow airflow while keeping bugs and dust out.
- Rubber Band or String – To secure the cover in place.
- Wooden Spoon – Useful for stirring without reacting with the vinegar.
Using the right equipment ensures your ACV ferments properly. The key is to provide airflow while keeping the mixture safe from contaminants.
Step-by-Step Guide to Making Apple Cider Vinegar
Now comes the fun part—the actual process! Making ACV at home is basically controlled fermentation. You’ll start by fermenting the apples into alcohol (like cider), and then the bacteria take over to turn that alcohol into vinegar.
Step 1: Preparing the Apples
Wash the apples thoroughly and chop them into small pieces, including the cores and peels. If you’re using scraps, collect them from apple-based recipes like pies or juices. Place the apple pieces in a clean glass jar, filling it about ¾ full to leave room for expansion.
Step 2: Adding Sugar and Water
Dissolve sugar or honey in water (about 2–4 tablespoons per 1 cup of water). Pour this mixture over the apples until they are completely submerged. The sugar acts as food for yeast, which produces alcohol during fermentation.
Step 3: Fermentation Process
Cover the jar with cheesecloth and secure it with a rubber band. Store it in a dark, warm place (around 20–25°C / 68–77°F). Stir the mixture daily for the first week to prevent mold and keep the apples submerged. You’ll notice bubbling and a faint cider-like smell—this means fermentation is working.
Step 4: Straining and Second Fermentation
After 3–4 weeks, strain out the apple solids and pour the liquid back into the jar. Cover it again with cheesecloth and let it sit for another 3–4 weeks. During this stage, the alcohol transforms into vinegar.
Step 5: Storing and Aging
Taste your vinegar after 6–8 weeks. If it has the right tanginess, transfer it to a clean glass bottle with a tight lid. For stronger vinegar, let it age longer. Stored properly, homemade ACV can last for years.
How Long Does It Take to Make Apple Cider Vinegar?
Patience is the secret ingredient when making apple cider vinegar at home. Unlike quick recipes that promise overnight results, authentic ACV is a slow, natural process. The fermentation happens in two stages.
- Stage 1: Primary Fermentation (3–4 weeks) – This is when the apples, sugar, and water mixture starts bubbling. Yeast consumes the sugars and converts them into alcohol, giving off a cider-like aroma. You’ll notice foam, fizz, and bubbles forming, which are signs that the mixture is alive and active.
- Stage 2: Secondary Fermentation (3–4 weeks) – Once the apple pieces are strained out, the liquid continues to ferment. This is where bacteria known as Acetobacter step in and transform the alcohol into acetic acid—the tangy compound that makes vinegar, vinegar.
On average, it takes 6–8 weeks to make good-quality ACV, but letting it ferment longer results in a stronger, more robust flavor. Think of it like fine wine—the longer it ages, the better it gets. So, if you’re aiming for the perfect homemade vinegar, don’t rush the process.
Signs Your Apple Cider Vinegar is Fermenting Correctly
When you’re making ACV for the first time, it’s natural to worry if things are going right. Thankfully, fermentation gives off some clear signs that your vinegar is on track.
- Bubbles and Foam – During the first few weeks, you should see tiny bubbles rising to the surface. This is carbon dioxide, a byproduct of yeast activity.
- Cider Smell – The jar will first smell fruity, then develop a slightly alcoholic aroma before becoming tangy and vinegar-like.
- The “Mother” Formation – One of the most exciting parts is the appearance of the “mother”—a cloudy, jelly-like substance floating in your vinegar. It’s full of beneficial bacteria and enzymes, and it’s what makes raw vinegar so powerful.
- Change in Color – Over time, the liquid deepens in color, shifting from pale yellow to amber.
If your mixture smells rotten or develops fuzzy mold, something went wrong (usually because the apples weren’t submerged or the jar wasn’t clean). In that case, it’s safer to discard and start fresh.
How to Store Homemade Apple Cider Vinegar
Once your vinegar has reached the right tangy flavor, proper storage will keep it safe and potent for months—even years.
- Use Glass Bottles or Jars – Transfer your ACV to a clean, airtight glass container. Avoid plastic, as acids can react with it.
- Keep It in a Cool, Dark Place – A pantry or cupboard works perfectly. Direct sunlight can weaken the beneficial bacteria.
- Shelf Life – Properly stored homemade ACV can last indefinitely, though the flavor may evolve over time. The mother might continue growing, which is a good sign—it means your vinegar is alive and active.
- Refrigeration? – Not necessary. Unlike many foods, vinegar naturally preserves itself.
Pro tip: If you make ACV regularly, set aside some of the mother to “seed” your next batch—it speeds up fermentation and guarantees success.
Flavor Variations You Can Try
One of the joys of making ACV at home is that you can experiment with flavors. Instead of sticking to plain apple cider vinegar, try giving it a twist with different add-ins.
- Herbal Infusions – Add rosemary, thyme, basil, or mint during the secondary fermentation stage for a fragrant and earthy flavor.
- Spiced Vinegar – Drop in a cinnamon stick, cloves, or ginger slices to give your vinegar a warming kick, perfect for fall recipes.
- Fruity Variations – Mix apple scraps with pears, peaches, or berries for unique blends. Each fruit brings its own sweetness and aroma to the vinegar.
- Sweetened Versions – For a softer taste, add a touch of honey or maple syrup after fermentation is complete.
These variations make your vinegar even more versatile—use spiced ACV for holiday drinks, herbal versions in salad dressings, and fruity ones for marinades. It’s like having multiple types of vinegar from one base recipe!
Common Mistakes to Avoid
While making apple cider vinegar is simple, beginners often run into small mistakes that ruin the batch. Here are the top pitfalls to watch out for:
- Using Tap Water with Chlorine – Chlorine kills beneficial bacteria and yeast. Always use filtered water.
- Not Submerging Apples – If apple pieces float above the water, they may mold. Use a clean weight or stir daily to keep them submerged.
- Using Metal Containers or Utensils – Acidic vinegar reacts with metal, creating off-flavors. Stick to glass and wood.
- Adding Too Much Sugar – While sugar is needed for fermentation, excess sugar can make the process too alcoholic instead of vinegary.
- Poor Hygiene – Always use clean jars and tools. Even small amounts of contamination can spoil the batch.
- Rushing the Process – Vinegar needs time. Trying to speed it up usually results in weak flavor or failed fermentation.
Avoid these mistakes, and your homemade ACV will turn out rich, tangy, and full of beneficial probiotics every time.
Uses of Homemade Apple Cider Vinegar
Homemade apple cider vinegar isn’t just for salad dressings—it’s a multitasking powerhouse that can be used in countless ways.
Culinary Uses
- Salad Dressings and Marinades – ACV adds tang and depth to vinaigrettes, marinades for meat, and even sauces.
- Baking – A splash of vinegar helps activate baking soda, making cakes and muffins rise beautifully.
- Pickling – Use ACV as the base for homemade pickles—it adds a unique apple-like sharpness.
- Flavor Booster – A teaspoon can brighten up soups, stews, and stir-fries.
Health and Wellness Uses
- Morning Detox Drink – Mix 1 tablespoon of ACV with warm water and honey to kickstart your metabolism.
- Digestive Aid – Taking diluted ACV before meals can ease bloating and indigestion.
- Weight Support – Studies suggest ACV may help control appetite and blood sugar spikes.
- Skin and Hair Care – Use it as a natural toner for acne-prone skin or a hair rinse for extra shine.
Household Cleaning Uses
- Natural Cleaner – Mix ACV with water for a safe, eco-friendly cleaning spray.
- Deodorizer – Neutralizes bad odors in the kitchen or bathroom.
- Fruit and Veggie Wash – A vinegar rinse removes dirt and bacteria from fresh produce.
Truly, a single jar of homemade ACV can replace multiple store-bought products—saving money and reducing chemicals in your home.
Comparison: Homemade vs Store-Bought Apple Cider Vinegar
Not all apple cider vinegar is created equal. While store-bought versions are convenient, homemade ACV offers some undeniable advantages.
| Feature | Homemade ACV | Store-Bought ACV |
|---|---|---|
| Mother Present | Yes, naturally develops during fermentation | Sometimes (only in raw, unfiltered brands) |
| Nutritional Value | High in probiotics and enzymes | Lower in pasteurized varieties |
| Flavor | Rich, tangy, customizable | Standardized, less complex |
| Cost | Very low (just apples and water) | Can be expensive, especially organic |
| Freshness | Always fresh, made to your taste | Packaged and stored for months |
| Additives | 100% natural, no preservatives | Some brands contain additives |
Homemade vinegar doesn’t just save money—it gives you control over flavor, quality, and health benefits. Once you try your own batch, you may never go back to the store-bought kind again.
Tips for Best Results
Making apple cider vinegar is easy, but getting the best quality requires some smart practices. Here are tips to ensure every batch turns out perfect:
- Choose the Right Apples – Use a mix of sweet and tart apples for the best flavor balance. Organic apples are preferable.
- Use Glass, Not Metal or Plastic – Glass jars are safest for fermentation.
- Maintain Warm Temperatures – Fermentation works best between 68–77°F (20–25°C). Too cold and the process slows, too hot and bacteria may die off.
- Stir Daily in the First Week – This keeps mold away and ensures apples stay submerged.
- Taste Test Regularly – After 6 weeks, start tasting weekly until it reaches the flavor you like.
- Save the Mother – Reuse the vinegar “mother” from one batch to speed up future batches.
- Be Patient – Strong vinegar takes time. Don’t rush the process, let nature do its work.
Following these small but crucial steps can mean the difference between mediocre vinegar and a batch that rivals the best artisanal brands.
FAQs about Apple Cider Vinegar Recipe
1. Can you make ACV without sugar?
Yes, you can use honey as an alternative, though it may ferment more slowly. Sugar is essential for kickstarting the process, but it’s all consumed during fermentation.
2. How long does homemade ACV last?
Indefinitely, if stored properly in a sealed glass container. Vinegar is naturally self-preserving.
3. Can mold ruin apple cider vinegar?
Yes. If you see fuzzy, colored mold (not the cloudy mother), discard the batch and start over. Mold usually happens if apples aren’t fully submerged.
4. Can you use apple juice instead of apples?
Absolutely. Fresh, preservative-free apple juice works well, though you may need to add a vinegar “mother” to encourage fermentation.
5. Is homemade vinegar stronger than store-bought?
It can be! Since you control the fermentation time, letting it sit longer will create a more acidic, tangy vinegar.
Conclusion
Apple cider vinegar is more than just a tangy ingredient—it’s a natural health booster, a cleaning agent, and a kitchen staple. Making it at home may sound intimidating at first, but it’s actually a simple, rewarding process that only requires apples, sugar, water, and patience. With the step-by-step guide above, you can turn ordinary apples into golden vinegar that’s alive with probiotics and flavor.
Whether you use it in cooking, wellness routines, or around the house, homemade ACV is one of the most versatile and cost-effective DIY recipes you can master. Give it a try—you’ll be amazed at how much better it tastes compared to store-bought versions, and you’ll gain the satisfaction of creating something truly natural from scratch.


