Yellow Cake Recipe: Nothing beats the timeless charm of a homemade yellow cake. Its fluffy, buttery texture paired with its golden hue makes it a crowd-pleaser for birthdays, celebrations, or casual family desserts. This step-by-step guide will walk you through the process of making a perfect yellow cake from scratch, ensuring you get bakery-quality results every time. Ready to impress your loved ones with a classic yellow cake? Let’s get started!
What is a Yellow Cake?
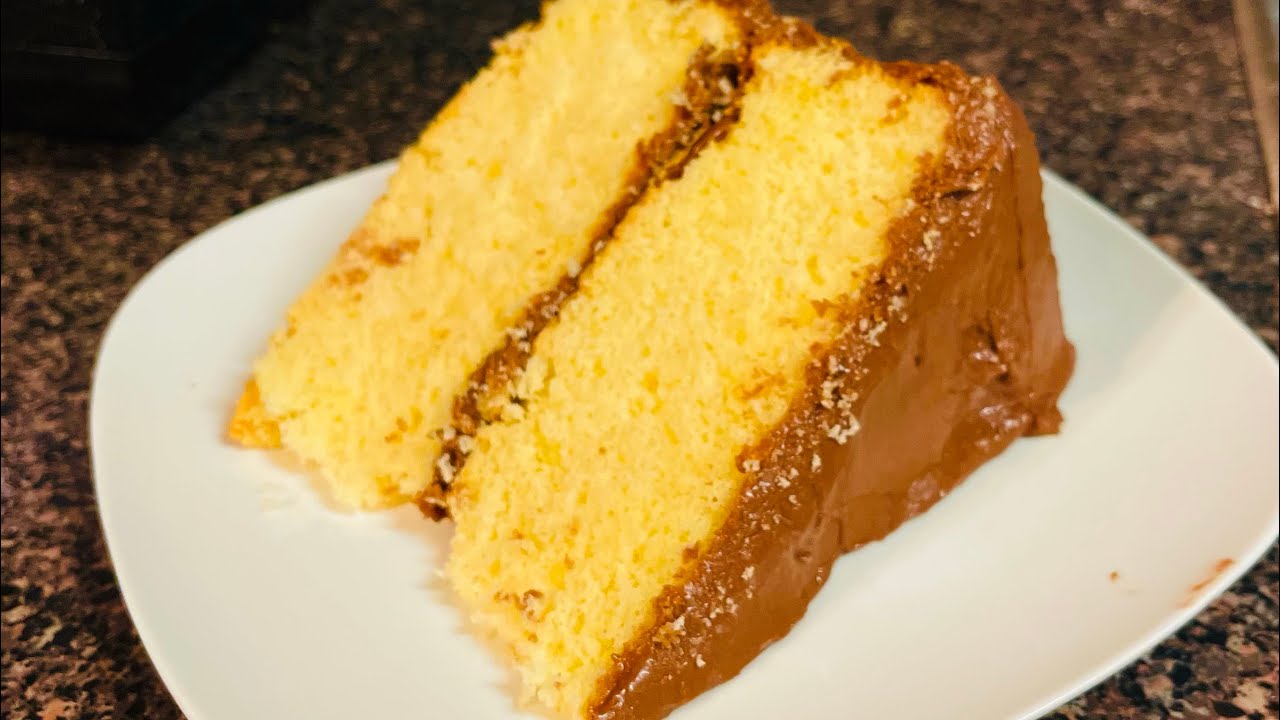
A yellow cake is a classic cake variety known for its rich, buttery flavor and golden color. Unlike white cake, which only uses egg whites, yellow cake incorporates whole eggs, giving it a moist, tender crumb and a vibrant yellow hue. It serves as a versatile base for various frostings like chocolate, vanilla, or buttercream, making it perfect for any occasion.
Ingredients Needed for Yellow Cake
Before you begin, ensure you have all the necessary ingredients.
Dry Ingredients
- 2 ½ cups all-purpose flour
- 2 ½ teaspoons baking powder
- ½ teaspoon baking soda
- 1 teaspoon salt
- 1 ½ cups granulated sugar
Wet Ingredients
- 1 cup unsalted butter, softened
- 4 large eggs, at room temperature
- 1 tablespoon vanilla extract
- 1 cup buttermilk, at room temperature
Tools and Equipment Required
Here are the essential tools to prepare your yellow cake:
- Mixing bowls (large and medium-sized)
- Measuring cups and spoons
- Hand or stand mixer
- Rubber spatula
- 9-inch round cake pans (2)
- Parchment paper
- Whisk
- Toothpick or cake tester
- Cooling rack
How to Make Homemade Yellow Cake
Step 1: Preparing the Ingredients
To ensure the cake turns out perfect, it’s essential to prepare all the ingredients in advance.
- Bring eggs and buttermilk to room temperature – This helps the ingredients combine smoothly.
- Soften the butter – Leave the butter out for about 30 minutes. It should be soft but not melted.
- Measure all ingredients precisely – Baking is a science, so accurate measurements are key.
Step 2: Preheat the Oven and Prepare the Baking Pan
- Preheat the oven to 350°F (175°C) – Ensure the oven is fully heated before baking.
- Prepare the cake pans:
- Grease two 9-inch round cake pans with butter or non-stick spray.
- Line the bottom of each pan with parchment paper for easy removal.
- Dust the pans lightly with flour to prevent sticking.
Step 3: Mixing the Dry Ingredients
In a medium-sized bowl:
- Sift together flour, baking powder, baking soda, and salt.
- Whisk the dry ingredients thoroughly to distribute the leavening agents evenly.
Sifting ensures there are no lumps and results in a lighter, fluffier cake.
Step 4: Creaming the Butter and Sugar
In a large mixing bowl:
- Add the softened butter and sugar.
- Use a hand mixer or stand mixer to cream the mixture on medium-high speed for about 3-5 minutes.
- Continue until the butter-sugar mixture becomes light, pale, and fluffy.
Why this step matters: Creaming incorporates air into the batter, creating a light and tender cake texture.
Step 5: Adding Eggs and Vanilla Extract
- Add the eggs one at a time, beating well after each addition. This ensures the eggs are fully incorporated without curdling.
- Once all the eggs are mixed in, add the vanilla extract and beat until combined.
Tip: Scrape down the sides of the bowl with a rubber spatula to ensure even mixing.
Step 6: Combining Dry and Wet Ingredients
To avoid overmixing, it’s crucial to alternate the dry and wet ingredients.
- Add ⅓ of the dry mixture to the butter-sugar-egg mixture. Mix on low speed until just combined.
- Pour in half of the buttermilk and gently mix.
- Repeat the process: Add another ⅓ of the dry ingredients, then the remaining buttermilk. Finish with the final portion of dry ingredients.
- Mix until the batter is smooth but be careful not to overmix, as this can make the cake dense.
Step 7: Pouring the Batter into the Pan
- Divide the batter evenly between the prepared cake pans.
- Use a spatula to smooth out the tops for even baking.
- Gently tap the pans on the counter to release any air bubbles trapped in the batter.
Step 8: Baking the Cake
- Place the cake pans in the preheated oven on the center rack.
- Bake for 25-30 minutes, or until the cakes are golden brown.
- Rotate the pans halfway through baking for even cooking.
Step 9: Testing for Doneness
To check if the cakes are fully baked:
- Insert a toothpick or cake tester into the center of each cake.
- If it comes out clean or with a few crumbs (but no wet batter), the cake is done.
If needed, bake for an additional 2-3 minutes and check again.
Step 10: Cooling the Cake
- Remove the cakes from the oven and place them on a cooling rack.
- Let the cakes cool in the pans for about 10 minutes.
- Run a knife around the edges of the pans and carefully remove the cakes.
- Allow the cakes to cool completely before frosting or decorating.
Step 11: Decorating Your Yellow Cake
Now that your cakes are baked and cooled, it’s time to decorate!
Ideas for Frosting
- Classic chocolate buttercream frosting
- Vanilla buttercream frosting
- Whipped cream and fresh berries
Simple Decoration Tips
- Use a piping bag for decorative frosting designs.
- Sprinkle powdered sugar or colorful sprinkles for a festive touch.
- Add chocolate ganache or caramel drizzle for extra flavor.
Step 12: Final Assembly of the Cake
Once your cakes are completely cooled, it’s time to assemble the layers.
- Level the cake layers: Use a serrated knife to trim the domed tops off each cake layer. This creates a flat surface for stacking.
- Place the first layer: Place one cake layer on a cake stand or serving plate.
- Add frosting: Spread a generous layer of your chosen frosting evenly over the top. Use an offset spatula for smooth application.
- Stack the second layer: Gently place the second cake layer on top of the frosted layer. Ensure it’s centered.
- Frost the top and sides: Cover the entire cake with a thin crumb coat (a thin layer of frosting to seal in crumbs). Chill the cake for about 20 minutes, then apply the final layer of frosting.
- Smooth the frosting: Use an offset spatula to smooth out the frosting for a professional finish.
Tips for the Perfect Yellow Cake
Follow these tips to ensure your yellow cake turns out perfect every time:
- Use room temperature ingredients: Room temperature eggs, butter, and buttermilk mix more evenly and create a smooth batter.
- Don’t overmix the batter: Overmixing can develop gluten and result in a dense cake instead of a fluffy one.
- Measure flour correctly: Use the spoon-and-level method to avoid compacting too much flour into your measuring cup.
- Preheat the oven: Always start with a fully preheated oven to bake your cakes evenly.
- Avoid opening the oven door early: This can cause the cake to collapse due to sudden temperature changes.
Common Mistakes to Avoid
Avoid these pitfalls when making your yellow cake:
- Skipping the sifting step: Unsifted flour may result in lumps and uneven texture.
- Using cold butter or eggs: This prevents proper creaming and blending of ingredients.
- Overbaking: Overbaked cakes can turn dry and lose their tender texture. Check for doneness early.
- Frosting a warm cake: Frosting will melt and slide off if the cake hasn’t completely cooled.
Storing and Freezing Yellow Cake
Yellow cake can be stored and enjoyed later with these tips:
- Room temperature storage: Cover the cake tightly with plastic wrap or place it in an airtight container. Store at room temperature for up to 2 days.
- Refrigeration: If frosted, store the cake in the refrigerator for up to 5 days. Let it sit at room temperature for 30 minutes before serving.
- Freezing:
- Wrap the cake layers individually in plastic wrap, followed by aluminum foil.
- Freeze for up to 3 months. Thaw the layers in the refrigerator overnight before frosting.
FAQs about Yellow Cake Recipe
1. What ingredients do I need for a classic yellow cake?
To make a classic yellow cake, you will need all-purpose flour, granulated sugar, baking powder, salt, unsalted butter, eggs, vanilla extract, and milk. These ingredients combine to create the cake’s signature moist texture and buttery flavor.
2. How do I ensure my yellow cake is moist and fluffy?
For a moist and fluffy yellow cake, ensure your ingredients are at room temperature before mixing. Cream the butter and sugar thoroughly to incorporate air and add volume. Be careful not to overmix the batter once you add the flour to keep it light.
3. Can I make this cake without a stand mixer?
Yes, you can make a yellow cake without a stand mixer. You can use a hand mixer or mix the ingredients by hand using a whisk and a sturdy spoon. The key is to ensure the butter and sugar are well-creamed to create a light and airy base.
4. What frosting pairs well with yellow cake?
Buttercream frosting pairs beautifully with yellow cake. You can also try chocolate ganache, cream cheese frosting, or even a simple dusting of powdered sugar for a lighter touch.
5. How long does yellow cake last?
A properly stored yellow cake can last up to three days at room temperature, covered in plastic wrap or an airtight container. If refrigerated, it can last up to a week. Always ensure it’s covered to prevent it from drying out.
6. Can I add mix-ins to my yellow cake batter?
Absolutely! Feel free to stir in nuts, chocolate chips, or even fruit like blueberries or raspberries to add a unique twist to your cake.
7. Is yellow cake the same as vanilla cake?
While both cakes may contain vanilla, yellow cake is distinct for its richer, buttery flavor due to the higher number of egg yolks, which also gives it its characteristic yellow color.
Conclusion
Making a classic yellow cake from scratch doesn’t have to be intimidating. By following this step-by-step guide, you’ll create a cake that’s moist, fluffy, and bursting with buttery goodness. Whether topped with chocolate frosting, vanilla buttercream, or left plain, this yellow cake is perfect for birthdays, celebrations, or casual desserts. So grab your ingredients, start baking, and enjoy the satisfaction of creating a homemade masterpiece that will have everyone asking for seconds!


