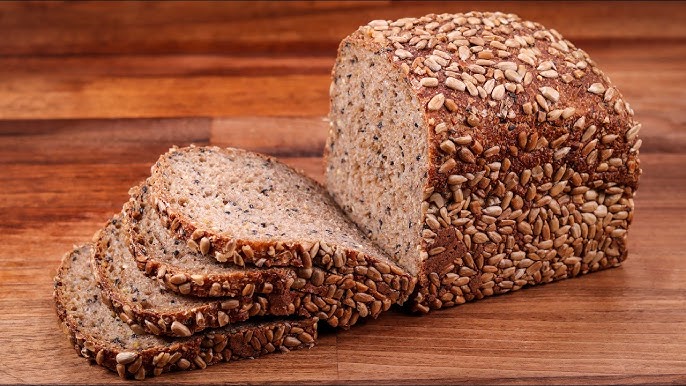
Whole Grain Bread Recipe: Who doesn’t love the smell of fresh-baked bread filling the kitchen? Making whole grain bread at home is not just rewarding, but it also ensures that you’re eating something healthy and free of preservatives. Whole grain bread is packed with fiber, vitamins, and minerals that promote digestion, heart health, and overall well-being. Plus, the taste and texture of homemade bread beat store-bought versions any day!
In this guide, I’ll walk you through the entire process, step by step, so you can bake perfect whole grain bread every time.
Ingredients Needed
Main Ingredients
To make a basic whole grain bread, you’ll need:
- Whole wheat flour – 3 cups (you can also use spelt or rye for variety)
- Warm water – 1 ¼ cups (about 110°F)
- Active dry yeast – 2 ¼ teaspoons (one packet)
- Honey or maple syrup – 2 tablespoons (for a touch of sweetness)
- Salt – 1 teaspoon
- Olive oil or melted butter – 2 tablespoons
Optional Add-Ins for Flavor
- Flaxseeds, chia seeds, or sunflower seeds for extra nutrition
- Oats or bran for a rustic texture
- Cinnamon and raisins for a sweet twist
- Nuts or dried fruit for variety
Essential Baking Equipment
Must-Have Tools
- Large mixing bowl
- Measuring cups and spoons
- Wooden spoon or silicone spatula
- Clean kitchen towel
- Loaf pan
Optional Tools for Convenience
- Stand mixer with a dough hook (for easy kneading)
- Dough scraper
- Proofing basket
- Kitchen thermometer (to check bread temperature)
How to Make Whole Grain Bread – Step by Step Guide
Step 1: Preparing the Dough
- Activate the yeast – In a small bowl, combine warm water, honey (or maple syrup), and yeast. Stir gently and let it sit for 5-10 minutes until foamy.
- Mix dry ingredients – In a large mixing bowl, combine whole wheat flour and salt.
- Combine wet and dry – Pour the activated yeast mixture into the dry ingredients. Add olive oil or melted butter.
- Mix until combined – Stir with a wooden spoon until a rough dough forms.
At this stage, the dough will be slightly sticky but should start coming together. If it’s too dry, add a tablespoon of water at a time. If it’s too wet, sprinkle in a little more flour.
Step 2: Kneading the Dough
Kneading is what gives bread its structure and chewiness.
Why Kneading is Crucial
- Develops gluten, which gives bread its elasticity
- Ensures even texture and prevents crumbliness
Different Kneading Techniques
- By hand: Turn the dough onto a floured surface and knead for about 8-10 minutes using the push-and-fold technique.
- Using a stand mixer: Mix on low speed with a dough hook for about 5-6 minutes.
The dough is ready when it becomes smooth and elastic. A good test is the “windowpane test”—stretch a small piece, and if it becomes thin without breaking, it’s perfect.
Step 3: First Rise (Proofing)
After kneading, place the dough in a lightly greased bowl and cover with a damp towel.
How Long to Let It Rise?
- About 1 to 2 hours, or until it doubles in size.
Best Conditions for Proofing
- A warm, draft-free area (inside an oven with the light on works great)
- If your kitchen is cold, place a bowl of warm water near the dough
Step 4: Shaping the Dough
Once your dough has risen, it’s time to shape it!
Tips for Even Shaping
- Gently deflate the dough and turn it onto a floured surface.
- Shape it into a tight log or round loaf.
- If using a loaf pan, press the dough into the pan evenly.
Step 5: Second Rise (Final Proofing)
After shaping, the dough needs a second proof to develop its final structure.
How to Check for Readiness?
- The dough should rise slightly above the pan’s edge (about 30-45 minutes).
- Lightly poke the dough—if it springs back slowly, it’s ready to bake.
Step 6: Baking the Bread
Ideal Baking Temperature and Time
- Preheat oven to 375°F (190°C).
- Bake for 30-35 minutes until the crust is golden brown.
Signs Your Bread is Perfectly Baked
- A hollow sound when tapped on the bottom.
- Internal temperature of 190°F (88°C) when tested with a thermometer.
Step 7: Cooling and Slicing
Why Cooling is Important
- Cutting too soon releases steam, making the bread gummy.
Best Way to Slice
- Let it cool for at least 1 hour before slicing with a serrated knife.
Common Mistakes to Avoid
Even experienced bakers make mistakes when baking whole grain bread. Here are some common pitfalls and how to avoid them:
1. Over-Kneading or Under-Kneading
- Over-kneading can make the bread too dense and chewy. If using a stand mixer, knead for about 5-6 minutes on low speed.
- Under-kneading results in a crumbly, weak bread structure. Make sure the dough passes the “windowpane test” before proofing.
2. Not Proofing Correctly
- If the dough doesn’t rise enough, it may result in a dense loaf. Make sure you proof in a warm, draft-free environment.
- Over-proofing can cause the dough to collapse. If the dough doubles in size, it’s ready for the next step—don’t wait too long!
3. Overbaking or Underbaking
- Bread is done when it sounds hollow when tapped.
- If underbaked, the bread will be doughy inside—use a thermometer to ensure an internal temperature of 190°F (88°C).
Storing Your Whole Grain Bread
Proper storage helps maintain the freshness of your homemade bread.
Best Storage Practices
- Store in a bread box or airtight container at room temperature for up to 4 days.
- Avoid refrigerating—it dries out the bread faster.
Freezing Tips
- Wrap the loaf in plastic wrap, then place it in a freezer bag.
- Freeze for up to 3 months.
- To use, let it thaw at room temperature or warm in the oven for a few minutes.
Serving Suggestions
Whole grain bread is versatile and can be enjoyed in many ways.
Pairing Ideas
- With butter and honey for a simple breakfast.
- With soup or salad for a hearty meal.
- As a sandwich with fresh veggies, cheese, and hummus.
Creative Ways to Use Leftover Bread
- Make croutons – Cube and toast for salads.
- French toast – Use thick slices for a delicious breakfast.
- Bread pudding – Turn stale bread into a sweet dessert.
Health Benefits of Whole Grain Bread
1. Rich in Fiber
Whole grains contain dietary fiber, which aids digestion and keeps you full longer.
2. Packed with Nutrients
- B vitamins – Essential for energy production.
- Iron and magnesium – Support heart health and muscle function.
- Antioxidants – Help fight inflammation.
3. Helps Maintain Blood Sugar Levels
Unlike white bread, whole grain bread has a lower glycemic index (GI), which means it doesn’t spike blood sugar levels.
4. Good for Heart Health
Studies show that whole grains help reduce the risk of heart disease by lowering cholesterol levels.
FAQs about Whole Grain Bread Recipe
What types of flour are best for whole grain bread?
For whole grain bread, the best types of flour are those that retain all parts of the grain kernel, including the bran, germ, and endosperm. Whole wheat flour, whole rye flour, and spelt flour are excellent choices. You can also use a mix of these to enhance flavor and nutritional value.
How does whole grain bread differ from white bread?
Whole grain bread is made from flour that includes the entire grain kernel, making it richer in fiber, vitamins, and minerals compared to white bread, which is made from refined flour that lacks the bran and germ. This results in a denser texture and a more robust flavor in whole grain bread.
Can I use a bread machine to make whole grain bread?
Yes, you can make whole grain bread in a bread machine. Most machines have a whole grain or whole wheat setting specifically for handling the heavier dough. Be sure to add ingredients in the order specified by the manufacturer for best results.
What are some tips for ensuring my whole grain bread turns out well?
To ensure your whole grain bread turns out well, make sure your yeast is fresh and active, maintain a warm environment for the dough to rise, and consider adding a small amount of vital wheat gluten to improve the bread’s structure and rise. Also, be patient with the rising process, as whole grain doughs can take longer to rise.
Can I add other grains or seeds to my whole grain bread recipe?
Absolutely! Adding grains like oats, barley, or seeds such as sunflower, flax, or pumpkin can enhance the texture, flavor, and nutritional profile of your bread. Just be sure to balance the amount of additional dry ingredients with enough liquid to maintain the dough’s consistency.
How long does whole grain bread stay fresh?
Whole grain bread typically stays fresh for about 2 to 3 days at room temperature when stored in a cool, dry place. To extend its shelf life, you can refrigerate it for up to a week or freeze it for up to 3 months. Always wrap it well to prevent drying out or freezer burn.
Conclusion
Making whole grain bread from scratch is a rewarding experience. Once you master the process, you’ll never go back to store-bought bread!
Key Takeaways for Perfect Bread:
✔ Use high-quality whole wheat flour for the best results.
✔ Knead properly to build gluten and structure.
✔ Give your dough enough time to rise, but don’t overproof.
✔ Bake at the right temperature and let it cool completely before slicing.
If your first loaf isn’t perfect, don’t be discouraged—practice makes perfect. Happy baking!