Whole Chicken Recipe: There’s something undeniably comforting about a perfectly roasted whole chicken. Whether it’s a lazy Sunday dinner or a family gathering, it has a way of bringing everyone to the table. You might think it’s complicated, but the truth is—it’s surprisingly simple and super rewarding. From the crackling, golden skin to the juicy, flavorful meat, a whole chicken can turn into a delicious centerpiece that doesn’t require a culinary degree.
So why should you cook a whole chicken? First, it’s more economical. Buying a whole bird often costs less per pound than buying chicken pieces. Plus, you get more out of it—meat for meals, bones for broth, and even the leftovers can spark some new meal ideas. It’s a fantastic way to stretch your grocery budget.
Second, roasting a chicken at home gives you full control over the flavor. You can season it how you like, stuff it with your favorite aromatics, and adjust cooking time to get the texture just right. You also skip the preservatives and unnecessary additives found in store-bought rotisserie chickens.
In this guide, we’ll break down everything—ingredients, prep steps, oven instructions, carving tips, and more—so you can confidently master this timeless dish. Get ready to impress yourself and anyone lucky enough to grab a plate.
Ingredients You’ll Need
Let’s keep it simple. A basic whole chicken recipe doesn’t need a ton of ingredients, but the key is to use fresh, quality items.
Basic Ingredients:
- 1 whole chicken (about 4–5 lbs)
- 2–3 tablespoons olive oil or melted butter
- 1 tablespoon salt
- 1 teaspoon black pepper
- 1 teaspoon paprika (optional for color)
- 1 teaspoon garlic powder
- 1 teaspoon onion powder
Aromatics for Stuffing (optional):
- 1 lemon, halved
- 1 onion, quartered
- 2–3 garlic cloves
- A few sprigs of rosemary, thyme, or parsley
These aromatics help infuse the meat with flavor from the inside out. Don’t worry if you’re missing one or two—just use what you have!
Optional Add-ins for Flavor Variations:
- Soy sauce or Worcestershire sauce for umami depth
- Chili flakes or cayenne for heat
- Fresh herbs chopped and mixed with butter for herb-butter rubs
- Mustard or honey glaze for sweetness and tang
You can experiment each time to create your signature roast chicken. That’s the beauty of this dish—it’s endlessly customizable.
Preparing the Chicken
Before we even fire up the oven, we need to get the chicken ready. Preparation makes a big difference in flavor and texture.
Step 1: Cleaning and Trimming
- Remove the chicken from its packaging and drain any excess liquid.
- Pat the chicken dry with paper towels—this helps the skin crisp up during roasting.
- Check the cavity for any giblets or neck. Remove those (you can save them for broth or gravy).
- Trim any excess fat or skin around the cavity opening.
Step 2: Marinating for Maximum Flavor
Now it’s time to season. You can go the dry rub route or marinate it in the fridge for a few hours.
Dry Rub: Mix salt, pepper, paprika, garlic powder, and onion powder. Rub this mix all over the chicken—don’t forget under the wings and legs.
Wet Marinade (Optional): Combine olive oil, lemon juice, crushed garlic, and herbs. Rub it thoroughly and let it rest for 2–3 hours or overnight in the fridge. The longer it sits, the more the flavors soak in.
Pro Tip: Gently loosen the skin over the breast and spread some seasoned butter or marinade directly onto the meat for even deeper flavor. It’s an easy trick that makes a big impact!
Step-by-Step Cooking Instructions
Now comes the fun part—roasting! Let’s walk through it together.
Step 1: Preheat Your Oven
- Set your oven to 425°F (220°C).
- Place the rack in the center.
Why this temp? It helps the skin brown and crisp while keeping the meat juicy.
Step 2: Seasoning the Chicken
Once out of the fridge, let the chicken sit at room temperature for about 30 minutes. This helps it cook more evenly.
If you didn’t marinate, brush the skin with olive oil or melted butter. Then apply your seasoning mix liberally.
Step 3: Stuffing the Chicken (Optional)
If you’re using aromatics, now’s the time to stuff them inside the cavity. Don’t overpack—it should be loose so air can circulate.
Step 4: Roasting the Chicken
- Place the chicken breast-side up on a rack in a roasting pan.
- Roast uncovered for 15 minutes at 425°F, then lower the temp to 375°F (190°C).
- Continue roasting for about 1 hour and 15 minutes, or until the internal temperature reaches 165°F (74°C) in the thickest part of the thigh.
Step 5: Checking for Doneness
Use a meat thermometer. Stick it into the thickest part of the thigh without touching bone. If it hits 165°F, you’re golden.
Also, juices should run clear—not pink—when pierced near the leg joint.
Resting and Carving the Chicken
You’ve roasted the chicken to golden perfection, and it smells amazing—but hold on! Don’t cut into it just yet. This step is crucial for juicy meat: resting.
Why Resting Matters: As the chicken cooks, the juices move toward the outer layers. If you slice it immediately, all those tasty juices will escape onto the cutting board. Letting the chicken rest for 10–15 minutes allows the juices to redistribute, keeping the meat tender and moist.
How to Rest Properly:
- Remove the chicken from the oven.
- Tent it loosely with foil (don’t wrap it too tight, or you’ll trap steam and lose the crisp skin).
- Let it sit for 10–15 minutes before carving.
Now onto carving—something that can seem intimidating but is actually straightforward once you know how.
Carving Tips:
- Place the chicken breast-side up on a clean cutting board.
- Pull one leg slightly away from the body and cut through the skin between the leg and body until the joint pops—then slice through the joint to remove the leg. Repeat on the other side.
- Do the same with the wings.
- For the breast, start from the center breastbone and slice downward along the bone, keeping the knife close to the ribcage. Slice the breast into thick, juicy pieces.
- Arrange the carved pieces neatly on a platter, or serve them straight from the cutting board for a rustic feel.
Don’t forget to save the bones—they’re perfect for making flavorful chicken broth!
Serving Suggestions
Now that your chicken is beautifully carved and resting proudly on a platter, let’s talk about making it a full meal.
Perfect Side Dishes: A whole roasted chicken pairs well with all kinds of sides. Here are some winning combinations:
- Roasted Vegetables: Carrots, potatoes, Brussels sprouts, and sweet potatoes cooked alongside the chicken absorb those rich juices.
- Mashed Potatoes or Cauliflower: Classic comfort food.
- Rice Pilaf or Couscous: Light grains that soak up all the delicious drippings.
- Salads: Try arugula, spinach, or a tangy coleslaw to balance out the richness.
- Bread: A crusty loaf or buttery dinner rolls make it easy to mop up every last drop of flavor.
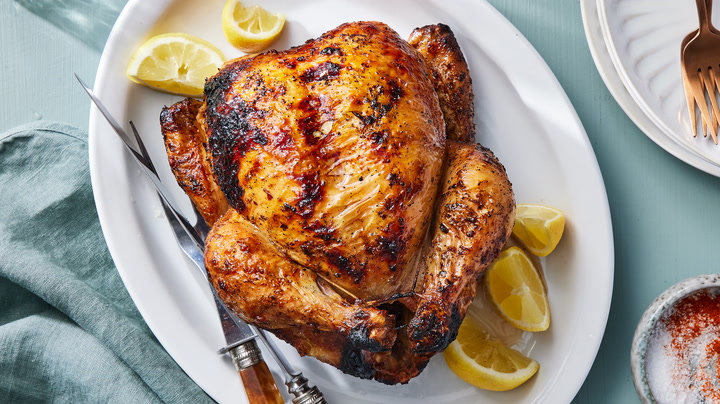
Presentation Tips: Want to wow your guests? Serve the chicken on a large wooden board or platter. Garnish with fresh herbs (like parsley or thyme), lemon slices, and a drizzle of olive oil. It turns your humble roast into a feast for the eyes.
Sauce Ideas: Though your roast chicken is flavorful on its own, here are some easy sauce options:
- Gravy: Use pan drippings for a homemade gravy.
- Garlic Butter Sauce: Melt butter with minced garlic and herbs—drizzle just before serving.
- Chimichurri: A fresh, herby kick if you want something different.
Remember, the goal is balance. Choose sides and sauces that complement rather than overwhelm the chicken.
Storing Leftovers
A whole chicken often feeds more than one meal—and that’s where the leftovers shine. Properly storing and repurposing them means no waste and more deliciousness later.
Refrigerating:
- Let the chicken cool completely before storing.
- Wrap tightly in foil or plastic wrap, or store in airtight containers.
- It will stay fresh in the fridge for up to 4 days.
Freezing:
- Slice or shred the meat for easy freezing.
- Store in freezer bags with air pressed out to prevent freezer burn.
- Label with the date, and it’s good for up to 3 months.
Leftover Ideas:
- Chicken Salad: Mix shredded chicken with mayo, mustard, and chopped celery.
- Chicken Soup: Use the bones and leftover meat to make a hearty broth and soup.
- Tacos or Wraps: Add spices, veggies, and a tortilla—dinner’s done!
- Casseroles or Pot Pies: Stretch leftovers into a comforting bake.
Using the entire bird maximizes value and opens up new meals throughout the week.
Common Mistakes to Avoid
Even though roasting a chicken is pretty forgiving, a few mistakes can make the difference between “meh” and “mouthwatering.” Let’s make sure you avoid them.
1. Skipping the Rest Period
We’ve said it before and we’ll say it again: let that bird rest! It’s the key to juicy meat.
2. Underseasoning
Don’t be afraid to use salt. It’s not just for taste—it helps crisp the skin and enhances natural flavors. Season inside the cavity, under the skin, and on the outside.
3. Overcooking
Roasting too long dries out the meat. Use a thermometer and check early. Remember: 165°F in the thigh = perfectly cooked.
4. Not Drying the Skin
If the skin is wet when it goes in the oven, it’ll steam instead of roast. Pat it dry thoroughly before seasoning.
5. Forgetting to Tie the Legs (Trussing)
This one’s optional, but tying the legs together with kitchen twine helps the bird cook evenly and keeps the stuffing in place.
6. Using a Cold Chicken
Let the chicken come to room temp for 30 minutes before roasting. It promotes even cooking.
Avoid these slip-ups, and you’ll be carving into a masterpiece every time.
FAQs about Whole Chicken Recipe
1. Can I cook a whole chicken in an air fryer?
Yes, you can! Just make sure your air fryer is large enough to fit the whole bird. Cook at 360°F (180°C) for about 45–60 minutes, depending on the size. Always check for doneness with a meat thermometer.
2. How long does it take to roast a whole chicken?
Typically, roast a whole chicken at 375°F (190°C) for about 20 minutes per pound. A 4- to 5-pound bird takes roughly 1 hour and 15 minutes to 1 hour and 30 minutes. Always verify with a thermometer—165°F (74°C) in the thigh is the magic number.
3. Can I use frozen chicken?
Not directly. A frozen chicken needs to be fully thawed before roasting to ensure even cooking. Thaw it in the refrigerator for 24–48 hours depending on size.
4. What are the best herbs for roasting a whole chicken?
Classic herbs like rosemary, thyme, sage, and parsley work beautifully. You can also try oregano, tarragon, or a mix of Italian herbs for added depth.
5. How do I keep the chicken juicy?
Three things: Don’t overcook, let it rest before carving, and season under the skin. A quick baste halfway through roasting can also help keep it moist.
Conclusion
There’s something timeless and satisfying about roasting a whole chicken. It’s a simple act that delivers big rewards—crisp skin, juicy meat, and the kind of aroma that instantly makes a place feel like home. Whether you’re cooking for yourself, your family, or a gathering of friends, this dish is the ultimate comfort food that’s both budget-friendly and endlessly versatile.
The best part? Once you master the basics, you can start playing around with flavors, stuffing variations, and different cooking techniques. It’s a canvas for creativity and a staple that never goes out of style. From prep to plate, this recipe isn’t just about feeding your stomach—it’s about feeding your soul.
So go ahead, roll up your sleeves, preheat that oven, and roast your way to something delicious. You’ll be surprised how easy and rewarding it is to make this kitchen classic from scratch. Trust me, once you try it, you’ll never want to go back to store-bought rotisserie chickens again.