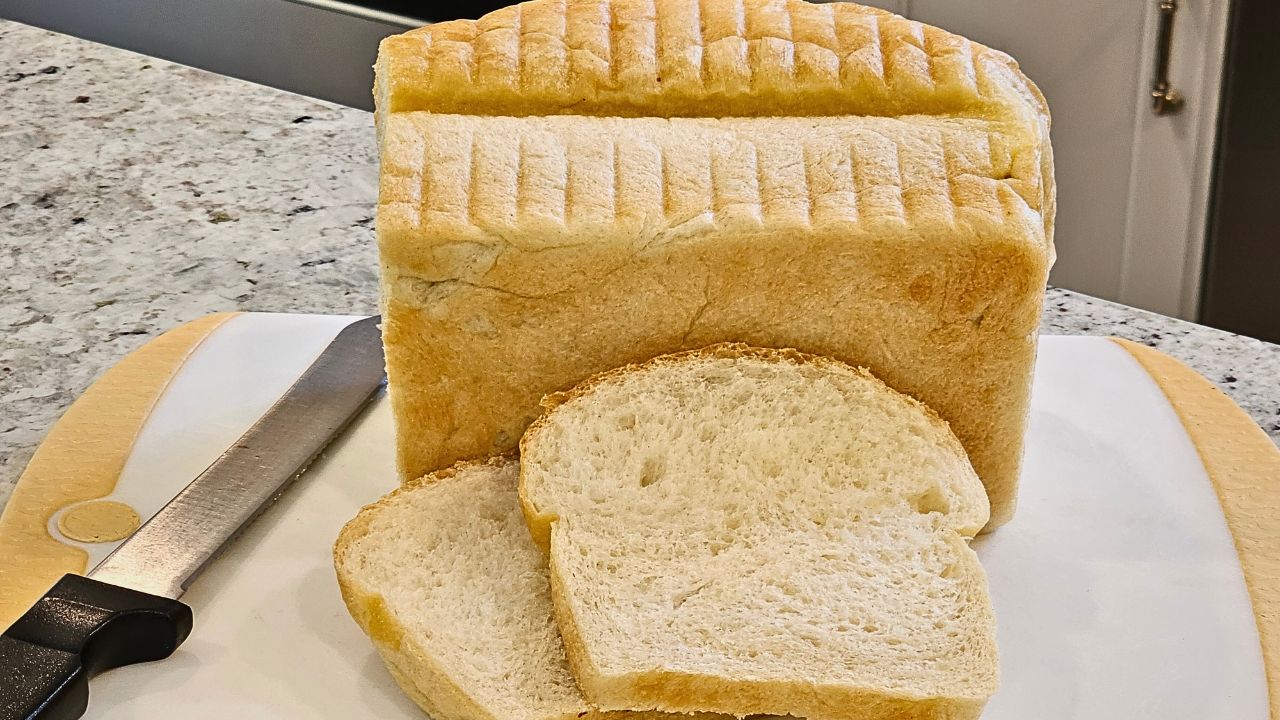
White Sandwich Bread Recipe: There’s nothing quite like the comforting smell of freshly baked bread wafting through your kitchen. Especially when it’s soft, fluffy white sandwich bread, homemade with love and just the right amount of golden crust. Store-bought bread is convenient, sure—but the taste, texture, and satisfaction of baking your own? Absolutely unbeatable.
White sandwich bread has earned its place as a household staple. Whether you’re layering slices for a hearty BLT, using it to soak up a fried egg at breakfast, or just enjoying it toasted with butter, it plays a role in nearly every meal of the day.
Making your own might sound intimidating—but it’s surprisingly straightforward. Once you get the hang of it, it becomes a simple, repeatable process you’ll love returning to every week.
What Makes a Great Sandwich Bread?
So, what separates great sandwich bread from the rest? It’s not just about taste—although that certainly helps. Great white bread should check off several important boxes:
- Soft but structured: The bread should hold up well when sliced, yet feel tender and pillowy in your mouth.
- Even crumb: A good sandwich bread has small, consistent holes—not big, airy pockets like sourdough.
- Mild flavor: You want it to be neutral enough to complement any filling but still tasty on its own.
- Golden crust: Not too thick or hard, but just firm enough to provide a gentle contrast to the soft interior.
Homemade bread gives you full control. You choose the ingredients, knead to the perfect texture, and bake it to golden perfection. Whether you’re a beginner or a baking pro, this guide is your go-to roadmap for success.
List of Ingredients You’ll Need
Let’s talk about what goes into making a classic white sandwich bread. These are basic pantry staples you probably already have at home.
Basic Ingredients:
- All-purpose flour – 3 ½ cups (or bread flour for extra chewiness)
- Warm water – 1 ¼ cups (around 110°F)
- Active dry yeast – 2 ¼ teaspoons (1 packet)
- Sugar – 1 ½ tablespoons (feeds the yeast and adds slight sweetness)
- Salt – 1 ½ teaspoons (enhances flavor)
- Butter – 2 tablespoons, softened (adds richness)
- Milk (optional) – Substitute a portion of the water for a softer crumb
Ingredient Tips:
- Flour: Bread flour will give you a slightly chewier texture, but all-purpose flour works just fine for beginners.
- Yeast: Make sure it’s fresh. Expired yeast = flat bread.
- Butter: Use unsalted butter for better control over saltiness.
- Water temp: Too hot will kill the yeast, too cold and it won’t activate.
Keep it simple or tweak the formula slightly as you gain confidence!
Equipment You’ll Need
To bake sandwich bread like a pro, you don’t need fancy tools—but having the right ones can make a difference.
Essential Tools:
- Mixing bowls
- Measuring cups & spoons
- Wooden spoon or dough hook
- 9×5 inch loaf pan
- Kitchen towel or plastic wrap
- Oven thermometer (optional but helpful)
- Wire rack for cooling
A stand mixer helps with kneading, but it’s not essential. Many bakers find hand-kneading relaxing and rewarding. Once you have these basics, you’re good to go.
How to Choose the Right Flour
Flour is the backbone of your bread. So, choosing the right type is key.
All-Purpose Flour vs. Bread Flour:
- All-purpose flour: Has a moderate protein content (10–11%) and gives you a soft, tender loaf. Perfect for beginners.
- Bread flour: Higher protein content (12–14%) which builds more gluten, making the bread a bit chewier with more structure.
If you like soft, fluffy bread, stick with all-purpose. If you want a denser, chewier sandwich loaf that holds up to heavier fillings, try bread flour.
The Science Behind Yeast in Bread
Yeast is where the magic happens. It’s the living organism that feeds on sugar, produces carbon dioxide, and causes your bread to rise.
Types of Yeast:
- Active dry yeast: Needs to be dissolved in warm water before use.
- Instant yeast (or rapid-rise): Can be mixed directly into the flour.
If you’re new to baking, active dry yeast is a great start—it gives you a visible sign (foamy bubbles) that your yeast is alive and ready.
Make sure your water is warm (around 105–110°F). Anything hotter may kill the yeast and leave your bread dense and lifeless.
Understanding the Dough-Making Process
Bread making is more than mixing ingredients—it’s a rhythm of rest, rise, and patience.
Key Stages:
- Kneading: Develops gluten for structure and elasticity.
- First rise (bulk fermentation): Allows yeast to do its work and double the dough in size.
- Shaping: Creates a tight surface that holds its form.
- Second rise (proofing): Final fermentation that gives bread its airy texture.
Each phase is important, so don’t rush. Let the dough guide you—if it’s sticky, knead more. If it’s stiff, rest it longer.
Step-by-Step Guide to Making White Sandwich Bread
Let’s break down the process into easy, foolproof steps:
Step 1: Activating the Yeast
In a bowl, combine warm water or milk (about 110°F / 43°C) with sugar and active dry yeast. Stir gently and let it sit for 5–10 minutes until foamy. This shows the yeast is active and ready to use.
Step 2: Mixing the Dough
Add melted butter or oil and salt to the yeast mixture. Gradually stir in bread flour until a soft, slightly sticky dough forms. Mix until all the flour is incorporated and the dough comes together.
Step 3: Kneading the Dough
Turn the dough onto a lightly floured surface and knead for 8–10 minutes, or until smooth and elastic. If using a stand mixer, knead with a dough hook for about 5–6 minutes. Proper kneading develops structure for a soft loaf.
Step 4: First Rise (Proofing)
Place the dough in a lightly greased bowl, turning once to coat. Cover and let it rise in a warm place for 1–1½ hours, or until doubled in size.
Step 5: Shaping the Dough
Punch down the dough gently to release air. Shape it into a tight log and place it seam-side down in a greased loaf pan, ensuring an even shape for uniform slices.
Step 6: Second Rise
Cover the pan loosely and let the dough rise again for 30–45 minutes, until it domes slightly above the pan’s edge.
Step 7: Baking the Bread
Preheat the oven to 350°F (175°C). Bake the loaf for 30–35 minutes, until golden brown and hollow-sounding when tapped. Remove from the pan immediately.
Step 8: Cooling and Storing
Cool completely on a wire rack before slicing. Store at room temperature in an airtight bag for up to 3 days, or freeze for longer storage.
Common Mistakes to Avoid
Even the best bakers hit bumps in the road. Here are some common mistakes to watch out for:
- Using water that’s too hot or cold – This can kill or slow your yeast.
- Not kneading enough – Under-kneaded dough results in poor structure.
- Adding too much flour – Can make the bread dry and heavy.
- Over- or under-proofing – Either extreme can lead to collapsed or dense loaves.
- Cutting too soon after baking – Slicing hot bread leads to gummy texture.
Stick to the timing and tips in this guide, and you’ll be golden.
Tips for Softer and Fluffier Bread
Everyone loves that soft, melt-in-your-mouth bread texture. Here’s how to get it:
- Add milk: Replacing some of the water with milk softens the crumb.
- Use butter or oil: Fats tenderize the dough and add richness.
- Don’t overbake: Keep a close eye on your oven to avoid a dry loaf.
- Cover during baking: Tent with foil if the top browns too fast.
- Steam the oven: Add a pan of hot water on the lower rack during the first 10 minutes of baking to improve softness and crust.
Want bakery-level fluffiness? Try letting the dough rise slowly in the fridge overnight during the first rise. This improves flavor and texture.
How to Store White Sandwich Bread
Proper storage keeps your bread fresh longer:
Short-Term Storage:
- Store at room temperature in a bread box or airtight container.
- Keep it away from direct sunlight and moisture.
- Don’t refrigerate—it dries out faster.
Long-Term Storage:
- Slice the loaf and freeze individual slices in a ziplock bag.
- When ready to eat, toast straight from frozen—no need to thaw.
Frozen homemade bread stays good for up to 3 months. It’s a great way to always have fresh bread on hand without the preservatives.
Serving Ideas and Pairings
Now that you have your beautiful homemade white sandwich bread, let’s put it to delicious use.
Classic Pairings:
- PB&J – The ultimate nostalgic comfort food.
- Grilled Cheese – Pairs perfectly with a warm tomato soup.
- Egg Sandwiches – Ideal for breakfast or brunch.
- French Toast – A sweet weekend treat.
Creative Ideas:
- Croutons – Cube stale slices, season, and toast for homemade salad toppers.
- Bread Pudding – Use leftover slices in a sweet custard bake.
- Bread Bowls – Hollow out a loaf for soup or dip.
The possibilities are endless. Once you start making this bread regularly, it becomes a blank canvas for countless recipes.
FAQs about White Sandwich Bread Recipe
Q1: Can I use whole wheat flour instead?
Yes, but it will change the texture and flavor. For best results, start by swapping only 25–50% of the flour with whole wheat.
Q2: How do I know if my dough has proofed enough?
Press your finger gently into the dough. If it springs back slowly, it’s ready. If it springs back too quickly, let it rise a bit more.
Q3: Why is my bread dense and heavy?
Most likely due to under-kneading or not allowing it to rise long enough. Also, old yeast can be a culprit.
Q4: What’s the best way to get an even golden crust?
Make sure your oven is preheated and evenly heated. Brushing the top with milk or butter before baking helps too.
Q5: Can I double the recipe?
Absolutely! Just make sure you have enough loaf pans, and don’t crowd your oven for even baking.
Conclusion
Homemade white sandwich bread is more than just a recipe—it’s a skill that brings warmth, comfort, and flavor to your kitchen. With just a few simple ingredients, a little time, and the right guidance, you can make soft, golden, bakery-quality bread right at home. Whether you’re toasting it, layering it into a towering sandwich, or enjoying it straight out of the oven, this loaf will become a staple in your baking rotation.
Give it a try, follow the steps, and before you know it, you’ll be baking like a pro. And the best part? You’ll never want to go back to store-bought again.


