White Frosting Recipe: White frosting has stood the test of time as one of the most beloved and versatile toppings in the baking world. Whether you’re decorating a birthday cake, wedding cupcakes, sugar cookies, or layered desserts, its clean, snowy appearance adds a touch of elegance and simplicity that never goes out of style. Unlike chocolate or colored frostings, white frosting offers a blank canvas—it can be left as-is for a minimalistic look or easily colored and flavored to suit any theme or taste. That’s what makes it a staple in every baker’s recipe arsenal.
The charm of white frosting also lies in its texture. When made right, it’s silky smooth, fluffy, and light, yet sturdy enough to hold its shape in piping bags or between cake layers. The taste? Sweet, creamy, and delicate—just enough to enhance your dessert without overwhelming it. From buttercream to whipped and cream cheese variations, the base recipe is so flexible that it can be adapted to cater to different dietary needs, such as vegan or sugar-free.
For anyone just starting in baking or looking to elevate their dessert decorating game, mastering a good white frosting recipe is a must. It’s one of those back-pocket recipes that come in handy time and time again.
Perfect Occasions to Use White Frosting
White frosting is incredibly versatile when it comes to the type of desserts and occasions it fits. Think of a baby shower with soft pastels—white frosting is the perfect base for creating delicate colors. For weddings, it adds that pure, romantic aesthetic to multi-tiered cakes. On birthdays, it becomes the canvas for colorful sprinkles, fondant figures, or edible glitter.
Beyond aesthetics, its neutral flavor makes it adaptable to complement just about any cake flavor—vanilla, lemon, strawberry, even bold options like red velvet or almond. Not to mention holiday-themed desserts like sugar cookies during Christmas or ghosts for Halloween—it’s your go-to base frosting that blends well with all types of decorations and edible colors.
If you’re hosting or attending a gathering and want to bake something impressive without going overboard, white frosting makes any dessert look polished and professional, even if it’s just a sheet cake. So whether it’s a fancy soirée or a casual family dinner, this frosting fits the mood every time.
Ingredients You’ll Need
Core Ingredients for White Frosting
To get that perfect white frosting, the ingredient list is actually pretty short and sweet. Here are the essentials you’ll need for a classic American-style buttercream white frosting:
- Unsalted butter – 1 cup (2 sticks), softened
- Powdered sugar (confectioners’ sugar) – 4 cups, sifted
- Milk or heavy cream – 2–3 tablespoons
- Pure vanilla extract – 1 teaspoon
- Salt – a pinch (to balance the sweetness)
Let’s break these down. The butter is your base—it gives the frosting structure and richness. Using unsalted butter allows you to control the salt levels better. Powdered sugar provides the sweetness and texture; it dissolves easily and whips up beautifully, creating a soft and fluffy frosting.
The milk or heavy cream is essential for controlling consistency. Add a little at a time to avoid a runny mess. Vanilla extract is the flavor booster. A high-quality pure vanilla gives a sweet, aromatic edge to the frosting. And don’t forget that pinch of salt—it cuts through the sweetness and brings out the flavors.
It’s worth noting that the butter should be room temperature—not melted, not cold. This helps it whip up to the right texture. If your kitchen is too hot, pop the butter in the fridge for a bit to firm it up before beating.
Optional Add-ins for Flavor & Texture
Once you’ve mastered the basic recipe, you can jazz it up with some creative add-ins. Here are a few favorites:
- Almond extract – For a nutty twist
- Lemon zest or juice – To add brightness
- Coconut milk – For a tropical flavor
- Marshmallow fluff – For a super smooth, light texture
Keep in mind that these additions may affect the consistency of your frosting, so always adjust the powdered sugar or milk if needed. For example, adding lemon juice may thin out the frosting, so reduce your liquid elsewhere.
Best Brands & Substitutions
Not all ingredients are created equal. If you’re looking for quality, consider these trusted brands:
- Butter – Kerrygold, Plugrá, or any European-style butter (higher fat content = creamier frosting)
- Powdered Sugar – Domino or C&H are well-refined and sift easily
- Vanilla Extract – Nielsen-Massey or McCormick for rich flavor
If you’re out of powdered sugar, you can make your own by blending granulated sugar in a high-speed blender until fluffy (though the texture may not be quite as smooth). For dairy-free or vegan options, swap butter with plant-based alternatives like Earth Balance or Miyoko’s Creamery vegan butter. Oat milk or almond milk can replace dairy milk in most cases—just start with less and add gradually.
Tools and Equipment Required
Must-Have Tools for a Perfect Frosting
Creating a perfectly smooth, fluffy white frosting isn’t just about the ingredients—you need the right tools to get the job done right. Whether you’re a seasoned baker or a beginner, having these essentials in your kitchen will make the frosting process smooth and hassle-free.
- Electric Mixer (Hand or Stand Mixer): This is absolutely non-negotiable if you want that silky, whipped texture. Mixing by hand just won’t give you the same results—it’s tough to incorporate enough air manually. A stand mixer with a paddle or whisk attachment makes the job even easier, especially when working with larger batches.
- Mixing Bowls: Use a large, deep bowl to avoid powdered sugar clouds all over your kitchen. Stainless steel or glass is best as they’re sturdy and don’t retain odors or oils.
- Rubber Spatula: Perfect for scraping down the sides of the bowl so no ingredients are left behind. Also handy for folding in any flavor add-ins gently at the end.
- Measuring Cups and Spoons: Precision matters. Always level off your powdered sugar and measure your liquids with proper utensils to maintain balance in texture.
- Fine Mesh Sifter: Powdered sugar tends to clump, and sifting it ensures your frosting is lump-free and smooth. Don’t skip this step—it makes a big difference.
Without these tools, your frosting might end up uneven, clumpy, or just plain frustrating to work with. Having the right gear makes the process enjoyable and efficient, which every home baker appreciates.
Optional Tools to Make It Easier
While the basics will get the job done, a few optional tools can elevate your frosting game to the next level:
- Offset Spatula: This is a must if you’re planning to frost cakes smoothly. It helps spread the frosting evenly without dragging crumbs around.
- Piping Bags and Tips: Want to decorate cupcakes, cookies, or cakes like a pro? Invest in a good quality piping bag and a few tips like the star tip or round tip. They allow you to create borders, swirls, flowers, and more.
- Cake Turntable: Especially useful when frosting large cakes. It spins your cake as you frost, making it easier to get smooth sides and sharp edges.
- Digital Kitchen Scale: Great for bakers who prefer weighing their ingredients for accuracy—especially if you’re following recipes in grams.
- Bench Scraper: Used to smooth out the sides of a cake. If you’re aiming for bakery-level presentation, this tool is a game-changer.
These tools aren’t mandatory, but if you plan to bake often or get into decorating more seriously, they’re worth the investment. Plus, they help create a clean, professional finish that turns your homemade desserts into showstoppers.
Step-by-Step Guide to Making White Frosting
Step 1 – Measure Your Ingredients Properly
Gather and measure all your ingredients before starting: 1 cup unsalted butter (softened), 4 cups powdered sugar, 2–3 tablespoons milk, and 1 teaspoon vanilla extract. Accurate measurements ensure the frosting’s perfect consistency.
Step 2 – Creaming the Butter
In a large mixing bowl, beat the softened butter with a hand or stand mixer on medium speed until light and creamy — about 2 minutes.
Step 3 – Gradually Add Sugar and Beat Until Fluffy
Add powdered sugar one cup at a time, beating on low speed to avoid a sugar cloud. Once combined, increase speed to medium and beat until fluffy.
Step 4 – Add Milk and Vanilla Extract
Pour in milk and vanilla, then mix again. Adjust milk to reach your desired texture.
Step 5 – Beat Until Smooth and Spreadable
Continue beating for another 2–3 minutes until the frosting is silky and airy. Use immediately to frost cakes, cupcakes, or cookies — smooth, sweet, and bakery-perfect.
Tips for Achieving Perfect Texture and Consistency
Room Temperature Ingredients Matter
One of the most overlooked secrets in frosting success? Room temperature ingredients. It’s not just a baking cliché—it’s essential. Using ingredients that are all at a consistent, room temperature ensures your frosting blends together smoothly and maintains the right texture.
Why it matters:
If your butter is too cold, it won’t whip up properly. Instead, it’ll stay chunky, and you’ll end up with a frosting that has visible lumps of butter—not ideal for a smooth finish. On the flip side, if your butter is too warm or even slightly melted, the frosting will turn greasy and won’t hold its shape, especially if you’re planning to pipe it.
The same goes for milk or cream. Adding cold liquids to already whipped butter can cause it to seize or become grainy. That’s why letting your dairy ingredients sit on the counter for about 30 minutes before use can make a big difference.
Tips for perfect room temp butter:
- It should be soft enough that a knife can glide through it but firm enough to hold shape.
- You should be able to press your finger in and leave a dent without it collapsing.
What to do if you forgot to bring ingredients to room temp?
- Cut butter into small cubes and let it sit out—it’ll soften faster.
- Gently warm your milk or cream for a few seconds in the microwave (not hot—just lukewarm).
- Do not microwave your butter unless you’re very experienced—it melts way too fast.
Room temperature ingredients create a more stable emulsion, which leads to a smoother, fluffier, and more consistent frosting. So take the extra few minutes to prepare properly—it’s worth it!
Adjusting Thickness Without Ruining Flavor
Sometimes, even when you follow the recipe to a tee, your frosting might come out a little too thick or too thin. Don’t worry—it happens to everyone, and the fix is usually simple. The trick is adjusting texture without compromising the taste.
Here’s how to do it like a pro:
If your frosting is too thick:
This usually happens when there’s too much powdered sugar or not enough liquid. To loosen it:
- Add 1 teaspoon of milk or cream at a time, then beat well and check the consistency.
- If you’re worried about diluting flavor, consider using heavy cream instead of milk—it’s richer and adds moisture without watering down the taste.
- You can also add a touch of vanilla extract, but only in small amounts—too much and it’ll overpower the frosting.
If your frosting is too runny:
This is more common in hot kitchens or when too much liquid has been added.
- Add 1–2 tablespoons of powdered sugar at a time, beating thoroughly after each addition.
- Don’t overdo it—too much sugar can make the frosting gritty or overly sweet.
- If temperature is the issue, refrigerate the frosting for 10–15 minutes and beat it again.
Pro Flavor Tip: Want to thicken frosting without sweetening it too much? Add a tablespoon of cornstarch or dry milk powder—both help absorb moisture while keeping the flavor balanced.
The key to successful adjustments is adding small amounts and testing frequently. Never pour in a big splash of milk or dump in a full cup of sugar—it’s harder to reverse once it’s gone too far.
Perfect frosting should feel light and fluffy on the spoon, but still firm enough to hold shape on a cake. Once you hit that balance, you’re golden.
How to Color White Frosting Without Compromising the Texture
Best Food Colors for White Frosting
White frosting is the perfect blank canvas, making it ideal for coloring. Whether you’re trying to match a party theme or create ombré cupcakes, you want colors that pop without ruining your frosting’s texture.
But here’s the catch—not all food colorings are created equal.
Top choices for coloring white frosting:
Gel Food Coloring:
- Highly concentrated
- Won’t thin out your frosting
- A little goes a long way
- Brands like AmeriColor, Wilton, and Chefmaster are top picks
Powdered Food Coloring:
- Great for deep, rich colors
- Won’t add any liquid
- Ideal for situations where moisture balance is critical (like piping intricate designs)
Oil-Based Food Coloring:
- Specifically made for oil-based recipes (like chocolate-based frostings)
- Works well in butter-heavy frostings without separation
Avoid liquid food colorings (the kind found at the grocery store in little plastic bottles). These are often too watery and can throw off the consistency of your frosting. If you must use them, do so very sparingly and expect to add more sugar to compensate.
How to add color:
- Always start small—a toothpick dipped in gel color and swirled into the frosting is often enough for pastel shades.
- Beat the color in fully before deciding to add more.
- Let the frosting sit for 15–20 minutes after mixing—colors often deepen over time.
Want a pure white frosting before adding color? Add a tiny dab of purple gel color to neutralize yellow tones from butter. Sounds odd, but it works—just a pinprick of violet cancels the yellow hue and gives you a whiter base to work from.
Avoiding Common Color-Adding Mistakes
Coloring frosting seems easy, but there are a few common mistakes that can ruin both your color and consistency. Let’s go over what to watch out for.
1. Using too much food coloring
You might be tempted to squeeze in more to get that bold red or deep black, but overloading your frosting with color can:
- Alter the flavor (some dyes have a chemical taste)
- Change the consistency (especially if using liquid)
- Stain your hands, utensils, and teeth
Fix: Stick to gel or powdered color for rich shades. For deep colors, make your frosting a day ahead—resting helps the color deepen naturally.
2. Coloring hot or cold frosting
Always add color to frosting at room temperature. Cold frosting won’t mix well and can cause streaks. Hot frosting (yes, it happens) will not hold color evenly and may even separate.
3. Skipping test batches
If you’re trying a new shade, test a small amount first. Mixing the whole bowl and realizing it’s the wrong tone is frustrating and wasteful.
4. Mixing too vigorously
Overmixing colored frosting can lead to a grainy or overly soft texture. Use medium speed, and stop once the color is even.
Bonus Tip: To create rich red or black frosting, start with a base of chocolate frosting or colored gel. These colors are hard to achieve from white without using tons of dye.
Adding color is supposed to be fun and creative—not stressful. With the right approach, your white frosting can transform into any color you dream of, all without sacrificing texture or taste.
Storing and Freezing White Frosting
How Long Can You Store It?
Made a big batch? Don’t worry—white frosting stores beautifully. In fact, many bakers swear it tastes better after resting overnight. But there’s a right and wrong way to store it.
Refrigerator Storage:
- Store frosting in an airtight container.
- Keeps well for up to 1 week in the fridge.
- Before using, let it come to room temperature, then re-whip it with a hand mixer to restore its fluffy texture.
Frosting straight from the fridge can be hard and difficult to spread, so don’t skip the warming and re-whipping step.
Countertop Storage:
If your kitchen is cool (below 72°F), you can store your frosting at room temperature for up to 24 hours. Any longer, and it’s best to move it to the fridge for food safety.
Best Practices for Freezing and Thawing
Want to prep ahead? White frosting is freezer-friendly—but only if you do it right.
Freezing Instructions:
- Scoop the frosting into a zip-top freezer bag or airtight container.
- Label with the date.
- Freeze for up to 3 months.
Thawing & Reusing:
- Transfer from freezer to fridge 24 hours before use.
- Let it come to room temperature.
- Re-whip it for 2–3 minutes to bring back its original texture.
Frosting can sometimes separate slightly after freezing. That’s normal. Re-whipping blends everything back together and restores the light, creamy consistency.
Pro Tip: Freeze frosting in piping bags if you’ve already colored or flavored it. Just let it thaw slightly, knead the bag, snip the tip, and you’re ready to decorate.
Frosting Application Tips
How to Frost Cakes Like a Pro
Now that you’ve whipped up the perfect white frosting, it’s time to apply it like a bakery pro. Whether you’re going for a rustic, naked cake or a smooth-as-glass finish, mastering your frosting technique is essential to elevating your dessert from homemade to high-end.
Step-by-step cake frosting process:
- Level your cake layers:
Always trim the tops of your cake layers with a serrated knife to ensure they’re flat. This prevents your cake from leaning or collapsing. - Apply a crumb coat:
A thin layer of frosting seals in all the crumbs. It doesn’t have to look perfect—it’s just the base layer. Chill the cake for 15–20 minutes after applying it to let the crumb coat set. - Add the final coat:
Apply a generous amount of frosting to the top of the cake. Use an offset spatula to spread it evenly. Then work your way down the sides. - Smooth it out:
Use a bench scraper or cake scraper to smooth the sides while slowly turning the cake on a turntable. Start from the bottom and work your way up in a circular motion. - Finish with the top:
After the sides are smooth, clean off your spatula and gently smooth the top. Use short, sweeping motions to create a polished finish.
Frosting tips for pro results:
- Always work with chilled cakes. Warm cake layers will melt your frosting.
- Use small amounts of frosting at a time to avoid overloading the cake and making it unstable.
- Keep a paper towel and warm water nearby to clean your tools as you go—clean tools make for clean edges.
Once you get the hang of it, frosting cakes can be relaxing and rewarding. Don’t rush. Take your time, spin the cake often, and don’t be afraid to redo a section. Practice makes perfect!
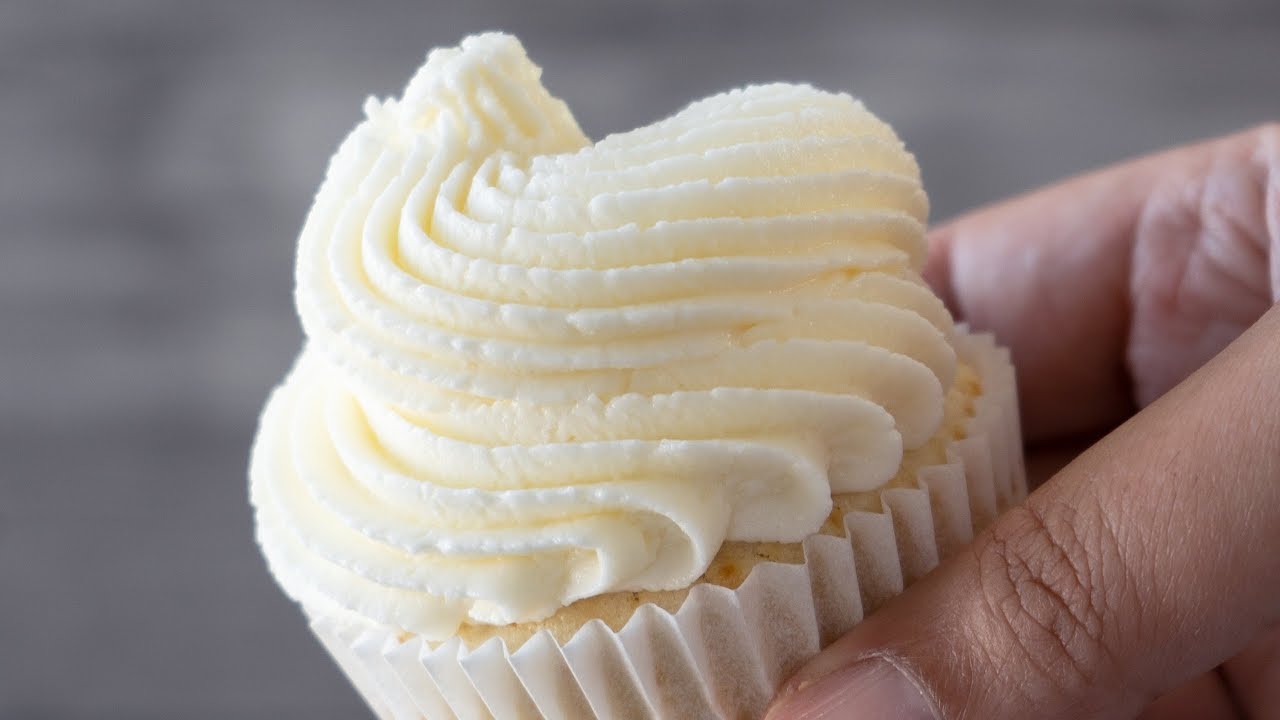
How to Pipe Frosting for Cupcakes
If you want cupcakes that look like they came straight from a fancy bakery, piping is the way to go. With a bit of practice, you can create everything from simple swirls to stunning rosettes and elegant peaks—all using white frosting.
What you’ll need:
- Piping bags – Disposable or reusable
- Piping tips – Popular options include:
- 1M tip for classic swirls
- 2D tip for rosettes
- Ateco 808 for thick, round blobs
- Couplers (optional) to easily change tips
How to pipe the perfect swirl:
- Fill the piping bag:
Place your piping tip in the bag, fold the bag over a glass, and scoop in your frosting. Fill it about 2/3 full. - Twist and grip:
Twist the top of the bag to close it. Hold with firm pressure using your dominant hand and guide with your non-dominant hand. - Start from the center:
Begin piping from the center of the cupcake, slowly working your way around and up in a spiral motion. Apply even pressure as you go. - Release with flair:
When you reach the top, stop squeezing and pull away gently to finish the swirl with a peak.
Troubleshooting piping issues:
- If your frosting is too stiff, it won’t pipe smoothly—add a splash of milk.
- If it’s too soft, it will collapse—chill the frosting for 10 minutes and try again.
- Always test your piping on parchment paper before decorating your actual cupcakes.
Decorating with white frosting is ideal because it allows colorful sprinkles, edible pearls, or food coloring accents to shine. You can even dust with edible glitter for extra flair!
Variations of White Frosting
Vegan White Frosting Option
If you’re baking for someone who avoids dairy, or you’re vegan yourself, don’t worry—you can still whip up a delicious, creamy white frosting that’s completely plant-based. And no, it won’t taste like coconut or chemicals—unless you want it to.
Vegan white frosting ingredients:
- 1 cup vegan butter (like Earth Balance or Miyoko’s)
- 4 cups powdered sugar (make sure it’s vegan-friendly)
- 1–2 tablespoons plant-based milk (almond, oat, or soy)
- 1 teaspoon vanilla extract
- Pinch of salt
How to make it:
- Beat the vegan butter until light and fluffy.
- Add powdered sugar, 1 cup at a time, mixing slowly at first.
- Add vanilla and plant milk to reach your desired consistency.
- Whip on high for 2–3 minutes until smooth and fluffy.
Texture Tips:
- Vegan butters are often softer than dairy butter, so you may need to chill your frosting slightly before using it, especially for piping.
- For a whiter appearance, opt for plant milks like oat or rice milk, which are lighter in color than soy or almond.
Sugar-Free White Frosting Recipe
Watching your sugar intake? No problem. You can still enjoy a silky white frosting with less guilt. Here’s a basic sugar-free version using alternative sweeteners.
Ingredients:
- 1 cup unsalted butter or sugar-free vegan butter
- 1 ½ cups powdered erythritol or monk fruit sweetener
- 1 teaspoon vanilla extract
- 2–3 tablespoons heavy cream or unsweetened almond milk
- Pinch of salt
Directions:
- Beat the butter until fluffy.
- Slowly add the powdered sweetener.
- Mix in vanilla and cream until desired texture is reached.
- Beat on high speed for 2–3 minutes.
Tips:
- Use a fine-powdered sugar substitute to avoid graininess.
- Let the frosting rest for 10 minutes after mixing to allow the sweetener to dissolve more fully.
- Taste as you go—some sugar-free sweeteners can have aftertastes.
This version is great for people with diabetes, low-carb eaters, or anyone looking to reduce their sugar intake while still enjoying a treat.
Pairing Ideas – What Goes Well With White Frosting?
Cakes and Cupcakes
White frosting is the Swiss Army knife of the dessert world—it pairs beautifully with just about any flavor. Its neutral, sweet creaminess complements bold, fruity, or rich cakes without overpowering them.
Top cake flavors to pair with white frosting:
- Vanilla cake: The classic combo—light, elegant, and universally loved.
- Red velvet: White frosting enhances the dramatic contrast of color and flavor.
- Lemon or citrus cakes: Adds sweetness to balance the tang.
- Carrot cake: White frosting (especially with a cream cheese base) brings creamy contrast to the dense, spiced cake.
- Chocolate cake: A light white frosting cuts through the richness of chocolate beautifully.
Want to get fancy? Add fruit compote, jam, or even chocolate ganache between layers with white frosting to create a flavor explosion in every bite.
Cookies, Brownies & More
White frosting doesn’t just belong on cakes. Its versatility makes it a winner for a wide range of baked goods.
More pairing ideas:
- Sugar cookies: Frost and decorate with sprinkles or colored icing for any holiday or event.
- Brownies: A dollop of white frosting on top creates a decadent two-layer dessert.
- Cupcake fillings: Use it as a filling inside chocolate or vanilla cupcakes for a surprise in the center.
- Cinnamon rolls: Whip a thinner version of white frosting to drizzle over warm rolls.
- Whoopie pies: Sandwich two soft cookies with a swirl of white frosting in the middle for a nostalgic treat.
Whether you’re frosting a cake or adding a swirl to a brownie bite, white frosting is incredibly flexible. Think of it as the creamy glue that holds your dessert world together.
Troubleshooting Common Issues
Frosting Too Runny or Too Thick
No matter how experienced you are in the kitchen, frosting consistency issues can still sneak up on you. It’s either too thick to spread, or worse, it’s running off the sides of your cake like a sugary landslide. Let’s tackle these problems head-on.
If your frosting is too runny:
There are a few culprits here—too much liquid, over-mixed butter, or a hot environment can all lead to loose, unstable frosting.
Fixes:
- Add powdered sugar one tablespoon at a time and mix well.
- If the weather is hot, refrigerate the frosting for 15–20 minutes, then re-whip.
- If you’re using low-fat milk or non-dairy alternatives, they may have more water content. Opt for heavy cream for thicker results.
Pro Tip: Avoid using melted butter. It’s tempting to soften it in the microwave but doing so can make the frosting permanently soft and unusable for piping.
If your frosting is too thick:
On the flip side, sometimes the frosting is so thick it’s tearing your cake or won’t pipe smoothly.
Fixes:
- Add 1 teaspoon of milk or cream at a time until the texture loosens.
- Warm the bowl with your hands or place it in a warm (not hot) area for a few minutes.
Always remember to make adjustments slowly. Frosting is delicate, and quick changes can ruin hours of work.
Grainy Texture – What Went Wrong?
Graininess is one of the most frustrating frosting fails. You followed the recipe exactly, and yet, the texture feels sandy instead of silky.
Reasons why frosting turns grainy:
- Undissolved powdered sugar: It may have clumps or wasn’t sifted properly.
- Low-quality sugar: Some cheaper brands have larger granules that don’t dissolve well.
- Too little mixing: The sugar didn’t have enough time to fully incorporate into the butter.
- Cold butter or liquids: They prevent the sugar from melting and bonding smoothly.
Solutions:
- Re-whip the frosting for several minutes on high speed to try to smooth it out.
- Add a teaspoon of warm milk or cream, then beat again—this can help melt any stubborn sugar crystals.
- If all else fails, press the frosting through a fine mesh sieve to break down clumps.
Going forward, always sift your sugar and let your butter and liquids come to room temperature. A little patience during prep can save you a lot of fixing later.
Nutritional Information
Calories Per Serving
Frosting isn’t exactly “light,” but it’s nice to know what you’re working with—especially if you’re baking for those with dietary goals. Here’s a general breakdown for classic white buttercream frosting:
| Nutrient | Per 2 Tbsp Serving |
|---|---|
| Calories | ~180 |
| Total Fat | ~10g |
| Saturated Fat | ~6g |
| Sugar | ~21g |
| Carbohydrates | ~24g |
| Protein | <1g |
| Fiber | 0g |
| Sodium | ~25mg |
Values are approximate and will vary based on exact ingredients and measurements.
Modifications to Make It Healthier
If you’re looking to lighten things up a bit without sacrificing flavor, try some of these swaps:
- Butter Substitute: Use half butter and half Greek yogurt or mashed avocado.
- Sugar Alternative: Use powdered erythritol or monk fruit sweetener.
- Milk Swap: Use low-fat milk, almond milk, or oat milk.
- Flavor Add-ins: Use citrus zest, almond extract, or spices (like cinnamon) to enhance flavor without adding calories.
While frosting will always be a treat, a few smart swaps can make it fit more comfortably into different diets—especially when enjoyed in moderation.
FAQs about White Frosting Recipe
1. Can I make white frosting ahead of time?
Yes! White frosting can be made up to 5–7 days ahead and stored in the fridge. Just bring it to room temperature before using and give it a good whip to refresh the texture. You can also freeze it for up to 3 months—just thaw overnight in the fridge, then re-whip.
2. What’s the best way to make it extra fluffy?
To get ultra-fluffy frosting, beat it for 5–7 minutes at high speed after all ingredients are added. The longer you whip (within reason), the more air you incorporate. Also, use heavy cream instead of milk for an airier texture.
3. Is there a dairy-free version?
Absolutely. Use plant-based butter (like Earth Balance) and a non-dairy milk (such as oat or almond). The result will still be creamy and delicious, just without the dairy.
4. Can I use white frosting under fondant?
Yes, you can! White buttercream is often used as a base layer under fondant. Just make sure it’s smooth and slightly chilled before applying the fondant to prevent shifting or tearing.
5. How do I make it snow-white for wedding cakes?
To get a bright white frosting, use clear vanilla extract and butter that’s light in color. You can also add a tiny bit of violet gel food coloring (just a pin-sized drop) to neutralize any yellow tint and make the frosting appear whiter.
Conclusion
The beauty of white frosting lies in its simplicity. Just a handful of ingredients—when measured correctly and handled with care—can whip up into something magical. With the tips, tricks, and step-by-step instructions you’ve now got in your hands, there’s nothing stopping you from mastering the art of perfect frosting.
Remember, baking is part science, part art, and always a little messy. Don’t be afraid to experiment. Try different extracts, play with colors, or pipe new patterns. Let your creativity flow, and most importantly—have fun with it!
Now go grab that mixer, and whip up some magic.


