Whipped Icing Recipe: Whipped icing is like the cloud of the dessert world. It’s airy, light, and just sweet enough to elevate any cake, cupcake, or fruit bowl. Whether you’re a baking newbie or a seasoned home baker, knowing how to make perfect whipped icing will open up endless possibilities for your sweet creations. Unlike heavy buttercream or sugary fondant, whipped icing is loved for its fluffy texture and mild taste. It pairs well with nearly any dessert, giving that luxurious yet melt-in-your-mouth finish that doesn’t overpower the treat.
Think of whipped icing as your go-to for summer cakes, birthday cupcakes, or even as a topping for your favorite mocha. It’s super versatile and takes just a few ingredients and minimal effort to make. In this guide, we’ll go step by step into how to make perfect whipped icing every single time.
Ingredients Needed for Whipped Icing
Basic Ingredients
To whip up the perfect whipped icing, you only need a handful of simple, easily available ingredients:
- Heavy whipping cream (1 cup) – This is the base of your icing. Make sure it has at least 36% milk fat for best results.
- Powdered sugar (2–4 tablespoons) – Also called confectioners’ sugar, it dissolves easily and gives the icing a smooth finish.
- Vanilla extract (1 teaspoon) – For flavor and aroma. Pure vanilla extract is best, but you can use artificial if that’s what you have.
These three ingredients alone can give you a classic whipped icing that is perfect for most desserts.
Optional Flavor Additions
Want to give your whipped icing a unique twist? Here are some ideas to experiment with:
- Almond extract or lemon zest – For a zesty or nutty punch.
- Cocoa powder or melted chocolate – If you’re craving a chocolate version.
- Cream cheese (2–3 tablespoons) – For a tangier, sturdier icing.
- Food coloring – If you’re decorating themed desserts.
Keep in mind that adding liquids or heavier ingredients can change the texture, so make sure you adjust your cream and sugar accordingly to maintain that fluff.
Tools and Equipment Required
Whipped icing is all about getting the texture just right, and for that, you need the proper tools. Here’s what you should have ready:
- Electric mixer (stand or hand-held) – This is non-negotiable unless you’re ready for an arm workout.
- Mixing bowl (preferably metal or glass) – Avoid plastic bowls as they can retain grease, which prevents proper whipping.
- Chilling space (freezer or fridge) – To chill your bowl and beaters before whipping.
- Rubber spatula – For folding in flavors or transferring icing gently.
Pro tip: Always chill your bowl and beaters before starting. Cold equipment helps the cream whip faster and hold its structure better.
Step-by-Step Whipped Icing Recipe
Step 1 – Chill Your Mixing Tools
Start by placing your mixing bowl and beaters in the fridge or freezer for about 10–15 minutes. This might seem like a small step, but it makes a huge difference in the whipping process. Cold tools help the cream form stiff peaks faster and ensure your icing stays fluffy longer.
Step 2 – Measure Ingredients Accurately
While your tools are chilling, get your ingredients ready. Pour 1 cup of heavy whipping cream into a measuring cup, sift 2–4 tablespoons of powdered sugar, and measure out 1 teaspoon of vanilla extract. Having everything prepped ensures a smoother process without pausing to grab something mid-whip.
Step 3 – Whipping the Cream
Once your tools are chilled, pour the cream into your mixing bowl. Start beating on medium speed and gradually increase to high. Within a minute or two, you’ll notice the cream turning foamy and thick. This is where the magic starts.
Keep going until you see soft peaks forming—meaning when you lift your beater, the cream forms a peak that droops slightly. This is the perfect stage to add your flavor and sugar.
Step 4 – Adding Sweeteners and Flavor
At the soft-peak stage, add the powdered sugar one tablespoon at a time, continuing to beat the cream as you go. Then, drizzle in the vanilla extract. Keep the mixer running and beat until stiff peaks form—where the peaks stand up straight when the beater is lifted. But don’t overdo it! Too much beating turns your icing into butter.
Step 5 – Beating to the Right Consistency
The key here is to stop at stiff peaks. At this stage, your whipped icing should be glossy, firm, and hold its shape well enough to pipe or spread on cakes. If you’re unsure, stop the mixer and test by pulling up the beaters—if the peaks don’t fall, you’re good.
Tips to Get Perfect Whipped Icing
Getting whipped icing just right can feel like an art, but it’s actually science mixed with a bit of patience. Here are some of the best tips to make your whipped icing turn out perfect every time:
- Use Cold Ingredients and Tools: Always use cold cream straight from the fridge and chilled tools. Warm cream or tools won’t whip properly and will result in a runny mess.
- Don’t Overbeat: Once you reach stiff peaks, stop mixing. Overbeating causes the cream to separate and turn into butter. If that happens, unfortunately, you’ll need to start over.
- Sweeten to Taste: Some people like a less sweet whipped icing, others like it extra sweet. Add sugar gradually and taste as you go so it fits your dessert perfectly.
- Stabilize It If Needed: If you’re decorating a cake that will be sitting out for a while, consider stabilizing your whipped icing with a bit of cornstarch, gelatin, or cream cheese. This helps it hold up longer without melting or deflating.
- Use Fresh Cream: Always check the expiration date on your heavy cream. Older cream won’t whip well and can lead to a sour taste.
Remember, practice makes perfect. Once you’ve whipped up a few batches, you’ll start to recognize the exact moment to stop mixing and get that dreamy, fluffy texture.
Common Mistakes to Avoid
Even though whipped icing is simple, there are a few common mistakes that can ruin the final product. Avoid these pitfalls to keep your icing light, smooth, and delicious:
- Using low-fat cream: You need at least 36% milk fat content. Anything lower won’t whip up properly.
- Warm kitchen environment: High temperatures can melt your cream before it has time to whip. Work in a cool area.
- Skipping the chill: Never skip chilling your mixing bowl and beaters. This step is crucial for success.
- Adding sugar too early: Wait until the cream has thickened slightly before adding sugar, or it may flatten your whip.
- Over-whipping: Once stiff peaks are achieved, stop. Going further leads to curdled cream or butter.
Awareness of these errors can save you from wasted ingredients and ensure consistently great results.
How to Store Whipped Icing
Whipped icing is best used fresh, but you can store it for later use if needed. Here’s how:
- Refrigeration: Store in an airtight container in the refrigerator for up to 24 hours. It may lose some volume, so re-whip gently before using.
- Freezing: While not ideal, you can freeze whipped icing. Place it in an airtight container and freeze for up to 1 month. Thaw in the refrigerator and re-whip to restore texture.
If you plan on using it for cakes or piping decorations, fresh is always better. Stored whipped icing may not hold its shape as well, especially without stabilizers.
Uses for Whipped Icing
Whipped icing is more than just a cake topping—it’s a dessert multitasker! Here are some delicious ways to use it:
- Cakes and cupcakes: Light and fluffy, whipped icing complements soft sponge and layered cakes beautifully.
- Pies and tarts: Add a generous dollop on top of fruit pies or custard tarts for an extra layer of richness.
- Parfaits and trifles: Use it in layers with fruit, cookies, and custard for an easy, crowd-pleasing dessert.
- Pancakes and waffles: Take your brunch to the next level with a swirl of whipped icing.
- Hot drinks: A spoonful on top of hot cocoa, coffee, or lattes makes any drink feel gourmet.
Whipped icing adds elegance and creaminess to nearly anything it touches. It’s especially great when you don’t want the heavy sweetness of buttercream.
Variations of Whipped Icing
If you’re feeling adventurous, here are a few whipped icing variations to spice things up:
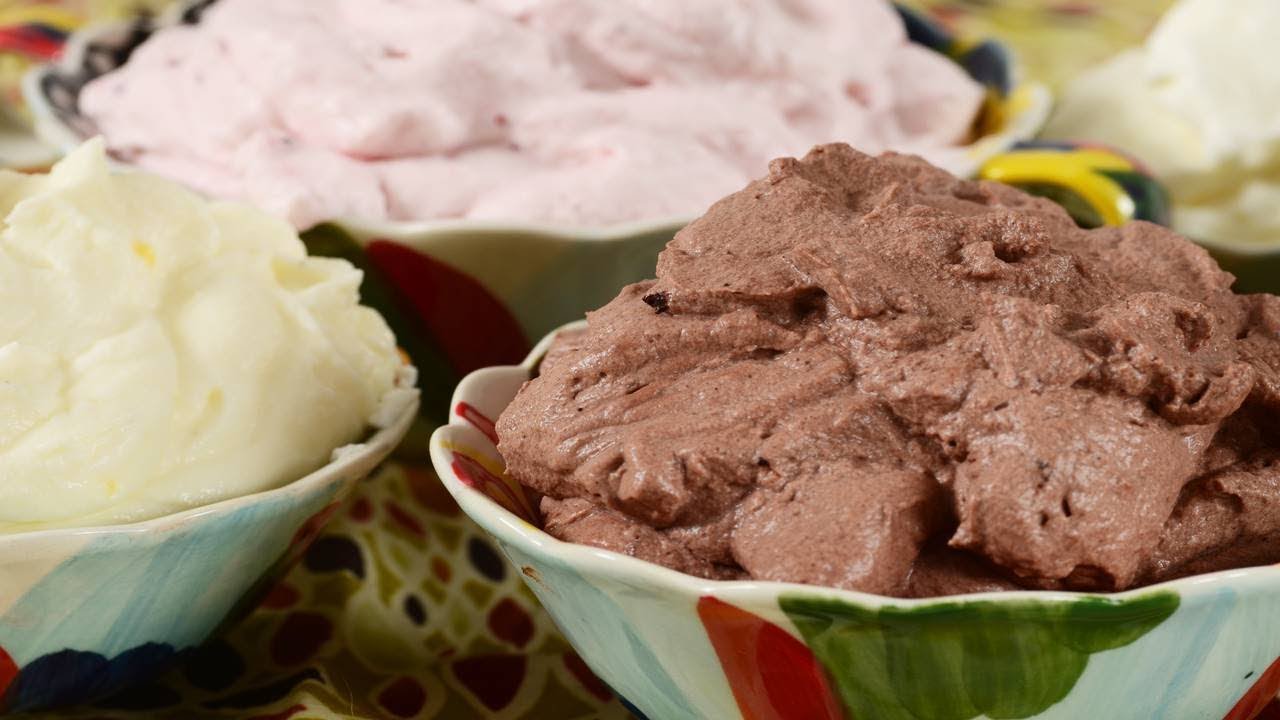
Chocolate Whipped Icing
Craving chocolate? Just sift in 2 tablespoons of cocoa powder with your powdered sugar. For a deeper flavor, add a touch of melted chocolate after reaching soft peaks. It’s perfect for chocolate cakes, brownies, or even as a frosting for mocha cupcakes.
Cream Cheese Whipped Icing
Add 2 ounces of softened cream cheese to your whipping cream during the initial mixing stage. This adds a tangy twist and gives the icing more body. It’s amazing on carrot cakes, red velvet, and banana bread.
Whipped Icing vs Buttercream – What’s the Difference?
At first glance, whipped icing and buttercream might seem interchangeable, but they’re actually quite different. Here’s how they compare:
| Feature | Whipped Icing | Buttercream |
|---|---|---|
| Texture | Light, fluffy, airy | Thick, rich, creamy |
| Flavor | Mildly sweet, subtle | Rich, sweet, buttery |
| Fat Content | Lower (cream-based) | Higher (butter-based) |
| Holding Power | Less stable at room temperature | Very stable, holds up well |
| Ideal For | Light cakes, fresh fruits | Layered cakes, elaborate decorations |
Whipped icing is ideal when you want something light and not overly sweet. It’s great for those who prefer a “less is more” approach. Buttercream, on the other hand, is a go-to for elaborate cake designs and piping work due to its sturdy structure. Choosing between the two depends on the dessert, the occasion, and your personal taste.
Can You Color Whipped Icing?
Absolutely! You can color whipped icing, but it’s important to use the right products and methods:
- Gel Food Coloring: This is the best option as it adds vibrant color without watering down the icing.
- Powdered Food Coloring: Another great choice—especially when you want to keep the consistency intact.
- Avoid Liquid Food Coloring: These can thin out the icing and cause it to lose its fluffy structure.
To color your whipped icing:
- Add a small amount of gel color at the soft-peak stage.
- Mix gently using a spatula or mixer on low.
- Adjust until you reach the desired shade.
Remember, whipped icing is delicate, so stir gently to maintain its volume. Bright and pastel colors both work well depending on your dessert theme.
Best Cakes and Desserts for Whipped Icing
Whipped icing is incredibly versatile and pairs well with many desserts. Here are some favorites:
- Angel Food Cake: The lightness of whipped icing perfectly complements this airy cake.
- Sponge Cake: A classic pairing, especially with layers of fruit.
- Strawberry Shortcake: Whipped icing is practically essential here.
- Chocolate Cake: A great way to balance out rich chocolate flavors.
- Fruit Tarts: A dollop on top adds creaminess without overpowering the fruit.
- Cupcakes: Pipe it high for a delicate, creamy topping.
Its gentle sweetness and fluffy texture make whipped icing an ideal match for just about any dessert that’s soft, fruity, or subtly sweet.
Healthier Alternatives and Substitutes
If you’re watching calories or have dietary restrictions, you still have options:
- Coconut Cream: Chill a can of full-fat coconut milk and scoop out the solid cream to whip.
- Greek Yogurt: Combine with a small amount of cream to create a tangy, protein-rich version.
- Cashew Cream: Blend soaked cashews with a bit of almond milk and sweetener, then chill and whip.
These alternatives won’t be exact replicas, but they’re great for vegans or those seeking lighter options. Just keep in mind that their textures and flavors may differ slightly from traditional whipped icing.
FAQs about Whipped Icing Recipe
1. Can I make whipped icing in advance?
Yes, but it’s best used fresh. If making ahead, store in the fridge in an airtight container for up to 24 hours and re-whip gently before use.
2. Why isn’t my whipped icing stiffening?
It could be due to warm cream, not enough fat content, or warm mixing tools. Make sure everything is chilled and you’re using heavy whipping cream.
3. How do I stabilize whipped icing?
You can add a small amount of gelatin, cream cheese, or cornstarch during mixing to help it hold its shape longer.
4. Can I pipe with whipped icing?
Yes! Just be sure it’s whipped to stiff peaks and used immediately. For more stability, try a stabilizer or mix with cream cheese.
5. Can I flavor whipped icing?
Definitely. Add vanilla, almond, or citrus extracts. You can also blend in cocoa powder, melted chocolate, or fruit purée for unique variations.
Conclusion
Whipped icing might be simple, but when done right, it’s absolutely magical. It adds elegance, lightness, and a touch of sweetness without overwhelming the dessert. The key is to use fresh, cold ingredients, whip just enough to reach those perfect peaks, and serve it promptly or store it properly.
Whether you’re frosting a birthday cake, adding flair to cupcakes, or just topping your evening dessert, whipped icing is your secret weapon in the kitchen. It’s easy to master, quick to make, and a crowd-pleaser every single time.
So go ahead—grab that mixer, chill your tools, and whip up some dessert magic!


