Whipped Frosting Recipe: Who doesn’t love a dessert topped with light, fluffy clouds of whipped frosting? Whether you’re planning to top cupcakes for a birthday party or just want to elevate a weekday treat, whipped frosting is a fantastic option that’s simple to make and incredibly satisfying.
In this guide, we’re diving deep into everything you need to know—from the ingredients and tools to the step-by-step method to achieve perfect, airy peaks every single time.
What is Whipped Frosting?
Whipped frosting, also known as whipped cream frosting, is a light, airy topping made primarily from heavy whipping cream, sweetener, and a touch of flavoring. It’s not as dense as buttercream or cream cheese frosting, making it perfect for those who want a lighter dessert option. The texture is smooth and silky, and it almost melts in your mouth. It’s ideal for layering cakes, topping cupcakes, and even filling pastries.
This type of frosting has a short preparation time but creates a big impact in flavor and aesthetics. Its fluffy consistency makes your desserts look like they came from a bakery, but the ease of making it means you can whip it up in your kitchen without breaking a sweat.
Why Choose Whipped Frosting?
There are plenty of reasons why whipped frosting is a favorite among home bakers and professionals alike. First, it’s incredibly quick to prepare—no complex cooking methods required. Second, it’s versatile; you can easily customize the flavor to suit any dessert. Lastly, it’s light and not overly sweet, making it a hit with those who prefer subtler sweets.
Another perk? Whipped frosting is very forgiving. Even if you’re new to baking, it’s hard to mess up. As long as you follow the basic rules—keep your ingredients cold and don’t overwhip—you’ll get fantastic results every time.
Ingredients for Whipped Frosting
Basic Ingredients
To get started, you’ll need a few key ingredients that are likely already in your fridge and pantry. Here’s what you’ll need:
- Heavy Whipping Cream (1 cup) – The star of the show. Make sure it’s cold for best results.
- Powdered Sugar (2-4 tablespoons) – Adds sweetness without grittiness.
- Vanilla Extract (1 teaspoon) – Gives a classic, rich vanilla flavor.
These three ingredients are your base. With just these, you can create a wonderfully delicious whipped frosting.
Optional Flavor Enhancers
Want to take your whipped frosting to the next level? Try adding:
- Almond or coconut extract – For a nutty twist.
- Cocoa powder (2 tablespoons) – For a chocolate whipped frosting.
- Instant espresso powder (1 teaspoon) – Pairs well with mocha or chocolate cakes.
- Zest of citrus fruits – Adds brightness and freshness.
Keep in mind that any liquids added should be minimal to avoid thinning the mixture. Stick to extracts and powders when possible.
Tools You’ll Need
Essential Kitchen Tools
Before you start whipping up your frosting, gather the tools that’ll help make your job easier and your frosting fluffier.
- Electric hand mixer or stand mixer with whisk attachment – Whipping cream by hand is possible, but it’s a serious arm workout.
- Mixing bowl – Preferably metal or glass, as plastic can retain grease which affects the cream.
- Measuring spoons and cups – Accuracy is key for consistency.
- Rubber spatula – Great for folding and spreading.
Handy Tips Before You Begin
- Chill everything – Not just the cream, but also your bowl and beaters. This helps the cream whip faster and hold its shape better.
- Clean tools thoroughly – Any trace of oil or residue can prevent your cream from whipping properly.
- Avoid over-whipping – Stop once you see stiff peaks. If you go too far, you’ll end up with butter instead of frosting!
Step-by-Step Instructions
Step 1: Chill Your Equipment
First things first—pop your mixing bowl and beaters into the fridge or freezer for at least 10-15 minutes. Why? Because cold tools make your cream whip up faster and yield a more stable frosting. This step might seem unnecessary, but it really makes a difference in achieving those luscious peaks.
While your tools are chilling, measure out your ingredients. Make sure your heavy cream is kept in the fridge until you’re absolutely ready to pour it into the bowl.
Step 2: Measure Your Ingredients Accurately
Precision is everything in baking. Use proper measuring cups and spoons to ensure you’re using the right amounts. Too much sugar can make the frosting overly sweet and grainy, while too little cream won’t give you the volume you want. If you’re customizing with cocoa or extracts, measure those out as well and have them ready to add mid-whip.
Step 3: Start Beating the Cream
Once your bowl and beaters are chilled, take them out and pour the cold heavy whipping cream into the bowl. Start mixing on a medium speed to begin incorporating air into the cream. You’ll notice it goes from liquid to slightly thick within a minute or two.
Don’t rush this step by jumping to high speed right away—it’s better to gradually work your way up to ensure an even texture and prevent splashing.
Step 4: Add Sugar and Flavor
Once your cream starts to thicken and you see soft peaks forming (this means when you lift the beater, the cream will form a peak that gently folds over), it’s time to add in your powdered sugar and vanilla extract. Reduce the mixer speed to low while you add them—this helps prevent the sugar from puffing into the air and making a mess.
Add the sugar gradually, tablespoon by tablespoon, and let it fully incorporate before adding more. The vanilla goes in last. You can taste the frosting at this stage to see if it’s sweet and flavorful enough. If not, add a little more sugar or a drop more vanilla.
At this point, you can also add any optional flavorings like cocoa powder or almond extract. Remember, a little goes a long way with extracts, so be cautious not to overpower the frosting.
Step 5: Whip to Stiff Peaks
Now, increase your mixer speed to medium-high. You’re looking to whip the cream until it forms stiff peaks. This means when you lift the whisk, the peaks will stand tall and firm without drooping.
Keep a close eye on the texture—this step can go from perfect to over-whipped in seconds. If you whip too long, the cream will start to break down, become grainy, and eventually turn into butter.
To test, stop the mixer and pull the whisk straight up. If the peak holds its shape and the frosting feels thick but smooth, you’ve nailed it.
Tips for Perfect Whipped Frosting
Common Mistakes to Avoid
Even though whipped frosting is relatively simple, there are a few common pitfalls to watch out for:
- Not chilling the tools or cream – This can cause your cream to stay runny and never reach stiff peaks.
- Adding sugar too late or too early – Timing matters. Add sugar once soft peaks form for best incorporation.
- Over-whipping – It’s tempting to just keep going, but resist! Watch the texture carefully and stop as soon as you hit stiff peaks.
How to Fix Over-Whipped Frosting
If you do over-whip your frosting and it begins to curdle or turn buttery, don’t panic. There’s a hack to rescue it:
- Add a tablespoon or two of fresh cold cream.
- Gently mix it in using a spatula or on the lowest mixer speed.
- This can help bring back some of the smooth, creamy texture.
If it’s too far gone and looks like butter, it might be better used for something else—like spreading on toast!
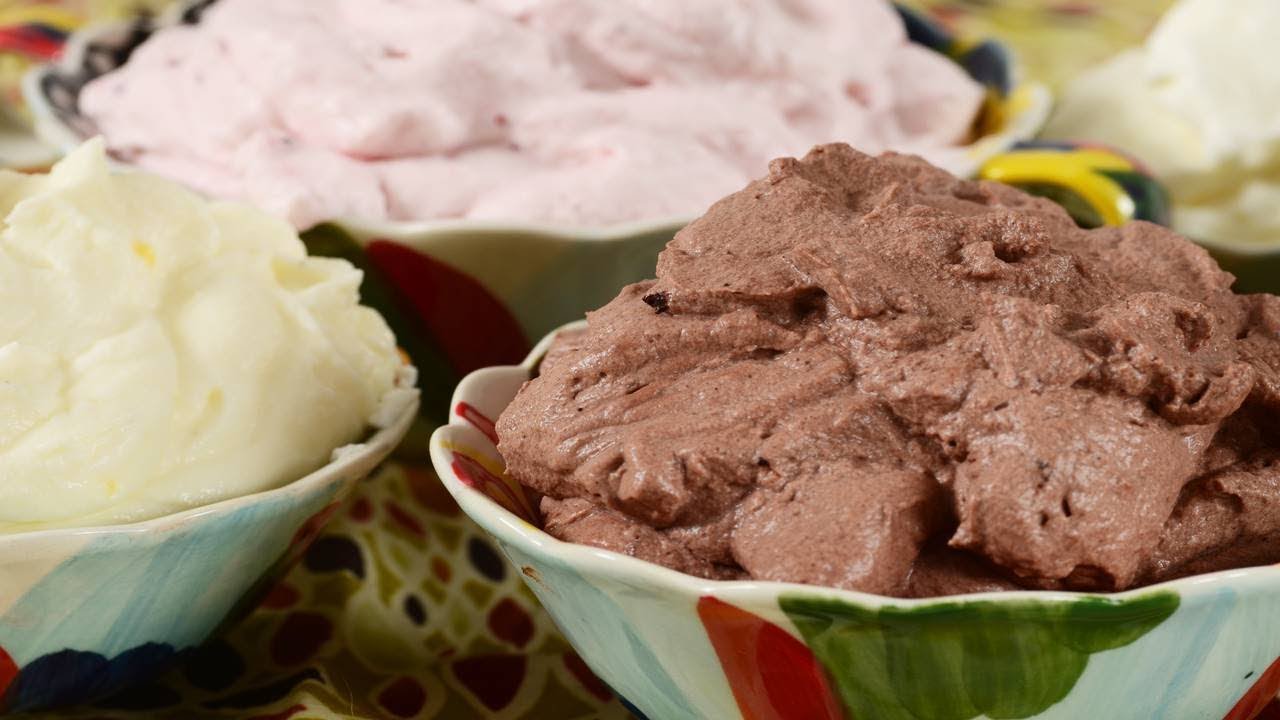
Flavor Variations and Customizations
Chocolate Whipped Frosting
To make a rich chocolate version, simply add 2 tablespoons of unsweetened cocoa powder to your base recipe. Mix it in when you add the powdered sugar. For a deeper chocolate flavor, you can even add a splash of coffee or espresso extract—it enhances the chocolate without overpowering it.
Optional additions:
- Mini chocolate chips for texture.
- Nutella or melted chocolate for a creamier, dessert-like finish.
Fruity Whipped Frosting Options
Want to infuse your frosting with fruit? Here are a few ideas:
- Strawberry or Raspberry Powder – Adds color and natural fruit flavor without making the frosting watery.
- Fruit Purees – Add a tablespoon of thick fruit puree, but be cautious not to thin the cream too much. If using puree, reduce the cream slightly to compensate.
- Lemon Zest or Orange Zest – Gives a bright, zippy flavor that pairs well with vanilla or citrus cakes.
How to Store Whipped Frosting
Best Storage Practices
Whipped frosting is best used fresh, but it can be stored in the refrigerator for up to 2 days. Place it in an airtight container and keep it chilled. Before using, give it a quick stir or re-whip to restore its texture.
If you’ve already frosted your cake or cupcakes, store the entire dessert in the fridge. Make sure it’s covered to avoid absorbing odors from other foods.
Can You Freeze Whipped Frosting?
Technically yes, but with caution. Whipped frosting can separate when thawed, losing its airy texture. If you must freeze it:
- Place it in an airtight container.
- Freeze for no more than one month.
- Thaw in the fridge, then re-whip on low speed to revive the texture.
Still, for the best flavor and texture, fresh is always the way to go.
Uses of Whipped Frosting
Cakes, Cupcakes & More
Whipped frosting pairs wonderfully with a variety of baked goods:
- Cakes – Layer it between sponge cakes or slather it on top.
- Cupcakes – Pipe it in decorative swirls for a bakery-style finish.
- Pastries and Tarts – Use as a filling or topping for a light touch.
Its fluffy texture makes it especially great for summer desserts where heavy frostings can feel overwhelming.
Creative Serving Ideas
Here are some out-of-the-box ways to use whipped frosting:
- Whipped Frosting Dip – Serve with fruit, cookies, or graham crackers.
- In Parfaits – Layer with fruit and granola for a no-bake treat.
- Topping for Hot Cocoa or Coffee – It adds a sweet creamy layer, better than store-bought whipped cream.
FAQs about Whipped Frosting Recipe
1. Can I use whipped frosting under fondant?
Whipped frosting isn’t ideal under fondant as it’s too light and moist. Fondant needs a sturdier base like buttercream to stay in place.
2. Is whipped frosting stable at room temperature?
No, whipped frosting should be kept chilled. It can sit out for 1–2 hours, but longer exposure will cause it to soften or collapse.
3. What’s the difference between whipped and buttercream frosting?
Whipped frosting is lighter and less sweet, made with cream instead of butter. Buttercream is denser, sweeter, and more stable at room temperature.
4. Can I make it dairy-free?
Yes! Use coconut cream or a non-dairy whipping cream substitute. Just ensure it’s cold and suitable for whipping.
5. How long does whipped frosting last?
It’s best used immediately, but you can refrigerate it for up to 2 days. Always store in an airtight container to keep it fresh.
Conclusion
Whipped frosting is one of those recipes that feels fancy but is surprisingly easy to make. With just a few simple ingredients and some care during the whipping process, you can create a light, flavorful topping that elevates any dessert. Whether you’re a beginner or a seasoned baker, this frosting offers a quick and delicious solution for all your cake-decorating needs.
Its versatility, speed, and delicious taste make it a staple for any kitchen. So the next time you need a frosting that’s impressive yet effortless, go for the whipped kind—you won’t regret it.


