Weed Killer Recipe: Let’s be honest: nobody enjoys weeding. Whether it’s the dandelions invading your lawn or the stubborn crabgrass between your driveway cracks, weeds are persistent, irritating, and plain ugly. But here’s the deal—you don’t have to rely on expensive, chemical-laden products to reclaim your yard. This guide will walk you through a simple, powerful, homemade weed killer recipe that uses ingredients you probably already have in your kitchen. It’s cheap, safe for the environment, and surprisingly effective.
More people are turning to natural alternatives not just for personal health, but also to reduce environmental harm. Chemical weed killers may do the trick fast, but they often come with a list of side effects, like harming nearby plants, polluting water systems, and even posing risks to pets and children. A homemade weed killer, on the other hand, gives you control, saves money, and lets you feel good about what you’re spraying on your soil.
So if you’re tired of invasive weeds and you’re ready to ditch the chemicals, this article is for you. Keep reading for the ultimate DIY weed killer recipe and application guide.
Common Weeds Found in Gardens and Lawns
Before we dive into mixing up your natural solution, let’s quickly talk about the enemy. Weeds come in many shapes and forms, but some of the most common culprits are:
- Dandelions – Bright yellow flowers that turn into puffy seed heads.
- Crabgrass – Low-growing grass that invades lawn spaces.
- Chickweed – Small, leafy plant that thrives in moist soil.
- Clover – While some like it, others consider it an invasive nuisance.
- Thistle – Spiny and aggressive, this one is tough to handle.
These weeds compete with your flowers, vegetables, and turfgrass for nutrients, water, and sunlight. The longer they stay, the stronger they get. And unfortunately, most of them spread rapidly, either through seeds or root systems. That’s why controlling them early—and consistently—is key to maintaining a healthy lawn and garden.
Ingredients for a Homemade Weed Killer
The magic behind homemade weed killer lies in its simplicity. You don’t need a chemistry degree to whip up a potent solution. Here’s what you’ll need:
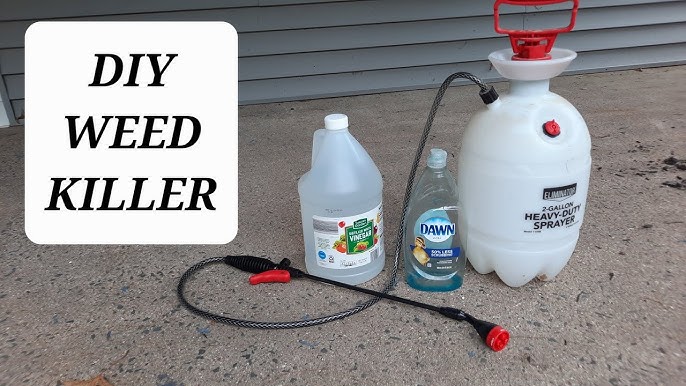
- White Vinegar (1 Gallon) – Contains acetic acid which dries out plant leaves and destroys cell structures.
- Salt (1 Cup) – Disrupts water balance in plant cells, eventually killing them.
- Dish Soap (1 Tablespoon) – Acts as a surfactant, helping the solution stick to weed leaves and penetrate more effectively.
- Optional Additives: Lemon juice, essential oils like clove or cinnamon oil for enhanced potency and scent.
This recipe is particularly effective for spot treatments on driveways, sidewalks, and gravel paths. Just keep in mind—it’s non-selective, meaning it will kill any plant it touches.
Step-by-Step Guide to Making the Weed Killer
Step 1 – Gather Your Ingredients
Start by collecting everything you need. You can use standard kitchen-grade vinegar (5% acetic acid), though horticultural vinegar (20%) is more potent if you’re dealing with tougher weeds. Make sure your salt is basic table salt—Epsom salts or sea salt won’t work the same way. Dish soap should be plain and free from added scents or moisturizers.
Step 2 – Mix the Solution Properly
In a large bucket, pour in the entire gallon of vinegar. Add one cup of salt and stir until fully dissolved. Then add the tablespoon of dish soap and mix gently to avoid creating too many suds. If you’re using any optional additives like lemon juice, add them at this stage.
This mixture creates a powerful desiccant that draws moisture out of the weed, essentially drying it up from the inside out.
Step 3 – Transfer to a Spray Bottle
Once your solution is well-mixed, use a funnel to pour it into a clean spray bottle or garden sprayer. Make sure the nozzle allows for a direct stream or a fine mist, depending on your target area. Always label your bottle clearly—“Weed Killer – Do Not Drink” should do the trick.
Step 4 – Choose the Right Time to Spray
Timing is everything. Spray on a warm, sunny day when no rain is forecast for at least 24 hours. Heat boosts the reaction, and dry conditions ensure the solution stays on the plant long enough to do its job. Morning is a great time, as leaves are fully open and able to absorb the liquid.
Step 5 – Apply the Weed Killer
Spray directly onto the leaves of the weeds, soaking them thoroughly. Don’t just mist the top—get under the leaves and around the base as well. Within a few hours, you’ll start to notice wilting. In most cases, full kill happens in 24-48 hours. For stubborn plants, a second application after a few days may be necessary.
Safety Tips and Precautions
When working with even natural weed killers, safety comes first. Just because a product is homemade doesn’t mean it’s entirely risk-free. Vinegar and salt, while non-toxic in most home applications, can still harm surrounding plants, pets, and even concrete surfaces if misused.
Here’s what you need to keep in mind:
- Avoid Over-Spraying: This DIY solution is non-selective, meaning it doesn’t know the difference between weeds and your prized roses. Be precise when spraying—use cardboard or plastic sheets to protect nearby plants.
- Wear Protective Gear: Even though it’s natural, vinegar at higher concentrations can irritate your skin and eyes. Wear gloves, long sleeves, and safety goggles for protection.
- Keep Pets and Kids Away: Allow the treated area to dry completely before letting pets or children back on it. While it’s safer than chemical options, ingestion can still cause stomach upset.
- Avoid Concrete Damage: High concentrations of salt can erode concrete or alter soil quality long-term. Use carefully around driveways or pavers and avoid drainage areas where salt could run off into the garden.
- Don’t Store in Metal Containers: Vinegar can corrode metal. Always use plastic containers or glass spray bottles for storage.
Natural doesn’t mean harmless. Think of this DIY weed killer like hot sauce—effective, but not something you want in your eyes or on your pet’s paws.
Best Practices for Using Natural Weed Killer
Getting the most out of your homemade weed killer isn’t just about mixing the right ingredients. It’s about how and when you use it. A little strategy goes a long way when you’re going up against nature’s most persistent intruders.
Here’s what works:
- Apply in Full Sunlight: Heat enhances the vinegar’s effect by accelerating dehydration. Pick a sunny day with no rain in the forecast for at least 24-48 hours.
- Use It Early in the Weed’s Life: Young weeds are easier to kill. Once they mature or develop deep roots, a single application might not be enough.
- Repeat Applications as Needed: Don’t expect miracles in one go. Some weeds bounce back, so don’t hesitate to hit them again in a few days.
- Avoid Spraying Before Watering or Rain: Water dilutes the mix and washes it away before it can do any real damage.
- Use Spot Treatments, Not Full Lawn Sprays: Since the mix is non-selective, spraying your entire lawn will kill the grass too. Stick to driveways, sidewalks, and gravel paths.
Also, timing your weed control with seasonal growth patterns can help. Early spring and mid-summer are peak weed growth seasons—strike during these windows for best results.
Effectiveness Compared to Store-Bought Weed Killers
You’re probably wondering—does this stuff actually work compared to those pricey bottles at the garden center? The answer is a mixed bag. Let’s compare:
| Feature | Homemade Weed Killer | Store-Bought Chemical Killer |
|---|---|---|
| Effectiveness | Great on young weeds | Effective on all weed stages |
| Speed of Results | 24–48 hours | 4–12 hours |
| Cost | Very low | Moderate to high |
| Selectivity | Non-selective (kills all) | Selective options available |
| Environmental Impact | Minimal | Can be significant |
| Safety for Pets/Kids | Safer with precautions | Hazardous if ingested |
In short, homemade weed killer is perfect for quick fixes, small areas, and eco-conscious gardeners. It may not wipe out an entire weed infestation with deep roots, but it’s fantastic for maintenance and spot control. Chemical options may be necessary for larger, more stubborn invasions—but they come with more risks.
Environmental Impact of Homemade vs. Chemical Weed Killers
We can’t talk about weed killers without addressing the elephant in the yard—environmental impact. Chemical herbicides like glyphosate have long been linked to soil degradation, water contamination, and harm to pollinators. Their long-term use can affect the balance of your garden’s ecosystem.
Homemade weed killers, on the other hand, are far gentler on the earth. Here’s why:
- Biodegradable Ingredients: Vinegar, salt, and soap break down naturally in the soil over time.
- No Persistent Chemicals: Unlike synthetic herbicides, they don’t leave behind harmful residues that linger for months.
- Safe for Insects and Wildlife: Bees, butterflies, and other beneficial insects aren’t directly harmed unless sprayed.
- Reduced Water Contamination Risk: Since you control where and when you spray, there’s less chance of run-off into storm drains or waterways.
That said, overuse of salt can lead to soil salinization, where the salt concentration becomes too high for anything to grow. Use it responsibly, and your garden will thank you.
Storing Your DIY Weed Killer
Got leftovers? No problem—this homemade mix stores well under the right conditions. Here’s how to do it right:
- Use Plastic or Glass Containers: As mentioned earlier, vinegar can corrode metal, so steer clear of tin or aluminum containers.
- Label Clearly: Always write the contents and date of mixing on the container.
- Keep Out of Direct Sunlight: UV rays can weaken the vinegar over time. Store in a cool, dark place like a garden shed or pantry.
- Shelf Life: Your mixture can last up to 3–6 months if sealed properly. Shake well before each use to redistribute ingredients.
Proper storage ensures that your weed killer remains potent and safe for future use. Just remember—it’s always best fresh, so mix in small batches unless you plan on frequent applications.
FAQs about Homemade Weed Killer
1. Can I use this weed killer on all surfaces?
Yes, but with caution. This DIY weed killer works well on hard surfaces like sidewalks, driveways, patios, and gravel paths. However, it’s non-selective—meaning it will kill any plant it touches. Avoid spraying near your flower beds, vegetable gardens, or lawn unless you’re targeting a very specific area. For cracks in pavement or pathways, it’s ideal. Just be careful not to let it run off into your lawn or areas where you’re growing plants intentionally.
2. Is it safe for kids and pets?
Generally, yes—especially compared to chemical herbicides. All the ingredients (vinegar, salt, dish soap) are household items, but that doesn’t mean they’re harmless. Vinegar, particularly in higher concentrations, can irritate skin and eyes. Salt can be harmful if ingested in large amounts. Always let the treated area dry completely before allowing pets or children to play nearby. Better safe than sorry.
3. Will it kill grass too?
Absolutely. This weed killer isn’t picky. If you spray it on your lawn, the grass will die just like the weeds. That’s why it’s best used as a spot treatment. For lawns, look into selective herbicides or manual removal methods that target weeds without destroying turfgrass.
4. How long before I see results?
You’ll typically see visible wilting within 3–6 hours of application on a warm, sunny day. Total kill might take 24 to 48 hours depending on the type and size of the weed. Larger or more resilient weeds might need a second application after a few days.
5. Can it be used in large areas?
Technically yes, but it’s not the most efficient method. Spraying a large field or lawn with this mix would be time-consuming and could potentially harm the soil with excessive salt. For large-scale weed control, you might want to explore vinegar-based commercial herbicides or more targeted weed control plans that are eco-friendly.
Conclusion
Getting rid of weeds doesn’t have to mean exposing your garden, family, or the environment to harsh chemicals. With just vinegar, salt, and dish soap, you’ve got a powerful natural remedy that’s simple, safe, and seriously effective for spot treatments and garden maintenance.
This homemade weed killer recipe gives you full control. It works best when used early, often, and responsibly—especially when timed with sunny weather. Keep it targeted, apply it with care, and your unwanted weeds will be history without the chemical fallout.
So next time you see a pesky dandelion popping up, skip the store-bought bottle and reach for your DIY solution. Not only will you save money, but you’ll also keep your soil, pets, and conscience clean.


