Weed Butter Recipe: Weed butter, also known as cannabutter, is a staple in the world of cannabis-infused cooking. It’s simply regular butter that has been infused with the active compounds in cannabis—mainly THC and CBD. This magical butter becomes the foundation for a wide range of edible recipes, from brownies and cookies to pasta sauces and even toast.
So, why is weed butter so popular? Simple—it’s an efficient and tasty way to consume cannabis without having to smoke it. Plus, it allows for precise control over dosing and effects, especially when you make it yourself. When done right, weed butter delivers a slow, long-lasting high that’s ideal for relaxing evenings, managing chronic pain, or simply enhancing your culinary creativity.
What makes weed butter even more interesting is its versatility. You can substitute it for regular butter in almost any recipe, which opens up a world of edible possibilities. Plus, it stores well, so you can prepare a batch once and use it over time, making it a great addition to any cannabis enthusiast’s kitchen.
Why Make Weed Butter at Home?
Making weed butter at home gives you complete control over everything—from strain selection and potency to ingredients and flavor. Unlike store-bought edibles, which often come with artificial ingredients or unclear dosages, homemade cannabutter ensures quality and transparency.
Also, let’s face it—buying edibles can get expensive. By making weed butter yourself, you save money in the long run. A single batch can yield enough butter for multiple recipes, meaning you’ll have a ready-to-use infusion whenever you need it.
And here’s the best part: it’s surprisingly simple. With just a few basic kitchen tools and ingredients, even total beginners can whip up a batch of potent, flavorful weed butter. Whether you’re making it for recreational use or for medical purposes like pain relief, anxiety reduction, or sleep support, DIY weed butter offers flexibility you just can’t get from pre-made products.
Finally, homemade means customization. Want something vegan? Use coconut oil instead of butter. Looking for mild effects? Adjust your flower-to-butter ratio. It’s your butter—make it how you like it.
The Benefits of Using Cannabutter in Edibles
Weed butter isn’t just about getting high—it’s a powerful way to experience the therapeutic effects of cannabis. By infusing THC (and possibly CBD) into a fat like butter, you allow your body to absorb cannabinoids more efficiently via the digestive system. That means longer-lasting effects compared to smoking or vaping.
Let’s break down the top benefits of using weed butter:
- Long-lasting relief: Perfect for chronic pain, insomnia, or anxiety.
- Discreet consumption: No smoke, no smell, just food.
- Versatility: Can be used in sweet or savory dishes.
- Better dosing control: You control how much goes into each bite.
- Cost-effective: A small amount of flower goes a long way when infused properly.
Plus, it’s just fun to cook with! Imagine pulling out a batch of homemade cookies made with your very own cannabutter—it’s both satisfying and therapeutic. For people who use cannabis medicinally, it’s a game-changer.
Understanding the Science Behind Weed Butter
What is Decarboxylation and Why It Matters
Decarboxylation is a critical first step when making weed butter. In simple terms, it’s the process of heating cannabis to activate its compounds, mainly THC and CBD. Raw cannabis contains THCA and CBDA, which are non-psychoactive. Heating converts THCA into THC—the compound responsible for the “high.”
If you skip decarboxylation, your butter may end up weak or completely inactive. That’s because cannabinoids need heat to bond with fats and become bioavailable. So, even if you slow-cook your butter for hours, without pre-decarbing your cannabis, you’re wasting valuable compounds.
Here’s how to decarb properly:
- Preheat your oven to 240°F (115°C)
- Break up your cannabis (not grind)
- Spread it on a baking tray lined with parchment paper
- Bake for 30 to 40 minutes, stirring occasionally
Once it turns a golden brown color and releases an earthy smell, it’s ready. Now, your cannabis is activated and ready to infuse into butter.
THC vs. CBD in Cannabutter
When making weed butter, your strain of choice matters—a lot. The two main cannabinoids you’ll want to consider are THC (tetrahydrocannabinol) and CBD (cannabidiol).
- THC gives you that euphoric, mind-altering high. It’s ideal for recreational users or those managing pain, appetite issues, or insomnia.
- CBD, on the other hand, doesn’t get you high. It’s more therapeutic—great for anxiety, inflammation, and focus.
The ratio of THC to CBD in your cannabutter depends entirely on the strain you use. Want something relaxing but non-intoxicating? Go for a high-CBD strain like Charlotte’s Web. Prefer a potent edible that’ll have you giggling on the couch? A high-THC strain like Girl Scout Cookies will do the trick.
You can even mix strains to create a balanced effect, especially if you’re aiming for a therapeutic benefit without being overwhelmed.
Potency and Dosing Considerations
One of the biggest challenges when making weed butter is getting the dosage right. Too little, and you won’t feel anything. Too much, and you’ll be stuck on the couch for hours wondering why the walls are breathing.
Here’s a quick formula to help you estimate potency:
Total THC (in mg) = Amount of cannabis (in grams) × THC % × 1000
So, if you use 7g of cannabis at 15% THC:
7 x 0.15 x 1000 = 1,050mg of THC total
If your batch yields one cup of butter (16 tablespoons), each tablespoon would contain roughly 65mg of THC. That’s very strong for beginners, so start small—like ¼ to ½ teaspoon per serving—and wait at least 1–2 hours before consuming more.
A good rule of thumb for beginners? 5–10mg of THC per serving.
Remember: edibles take time to kick in—sometimes up to 90 minutes or more. Be patient. The high is often more intense and longer-lasting than smoking, so don’t rush your next bite.
List of Ingredients You’ll Need
Essential Ingredients
Here’s what you need to get started:
- 1 cup (2 sticks) unsalted butter
- 7–10 grams of decarboxylated cannabis
- 1 cup of water (helps regulate temperature and prevent burning)
Why unsalted butter? Salt can affect the infusion process and alter the flavor of your final product. Unsalted butter gives you more control and a neutral base for sweet or savory recipes.
Water is optional but highly recommended. It acts as a buffer, maintaining a consistent temperature during the simmering process and ensuring that your butter doesn’t burn or brown too quickly. After the infusion, it separates naturally from the butter and can be discarded.
Optional Additions to Enhance Flavor
If you want to get fancy, here are a few extras to toss in:
- Garlic or herbs like rosemary or thyme
- Coconut oil as a butter substitute for vegan or lactose-free versions
- Vanilla or cinnamon for dessert-ready butter
- Soy lecithin to improve the bioavailability of THC
These extras can subtly enhance the taste and effects of your cannabutter, depending on your goals.
Tools & Equipment Checklist
You won’t need a professional kitchen—just a few basic tools:
- Oven (for decarbing)
- Grinder or hands to break up the bud
- Saucepan or double boiler
- Wooden spoon for stirring
- Fine mesh strainer or cheesecloth
- Glass container for storage
- Thermometer (optional but helpful)
Make sure everything is clean and dry. Cannabutter has a long shelf life, but only if you prepare and store it properly. Hygiene is key!
Step-by-Step Guide to Making Weed Butter
Step 1: Decarboxylate Your Cannabis
Before you even think about melting butter, decarboxylation is the most crucial step to activate the cannabis. Without it, your butter won’t have any psychoactive effects—it’ll just be butter with green bits. As mentioned earlier, raw cannabis contains THCA, which doesn’t get you high. Heat converts it to THC, the compound responsible for the high. So, don’t skip this!
Here’s how to decarb your weed properly:
- Preheat your oven to 240°F (115°C). This is the sweet spot for activating cannabinoids without burning off important compounds.
- Break up your cannabis buds using your fingers or a coarse grinder. Don’t grind it into powder—keep it chunky to avoid burning.
- Spread the cannabis evenly on a parchment-lined baking tray. You want a single, even layer for consistent heating.
- Bake for 30 to 40 minutes, gently stirring the buds every 10 minutes to ensure even exposure to heat.
After the process, your cannabis should have a light brownish hue and a strong, nutty smell. Let it cool for a few minutes before moving on to the next step. At this stage, it’s officially “activated” and ready to infuse into butter.
Pro Tip: You can decarb in advance and store the decarbed cannabis in a sealed jar until you’re ready to infuse.
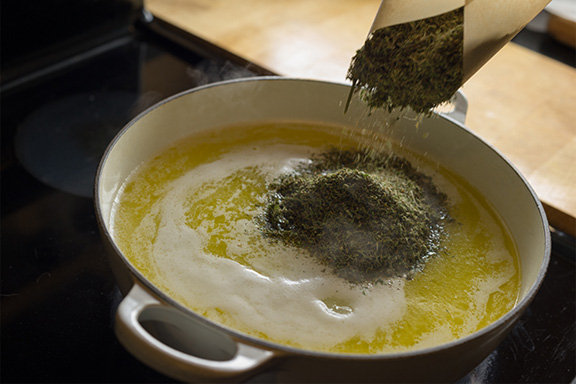
Step 2: Melt the Butter
Now, it’s time to prep your butter for infusion. This step is simple but requires attention. Butter can burn easily, especially without water to regulate the temperature.
Instructions:
- In a medium saucepan or double boiler, combine 1 cup of unsalted butter with 1 cup of water. Water will keep the butter from scorching and allow it to simmer gently for longer periods.
- Place the pan over low heat. The goal is to melt the butter slowly, not boil it. Keep the temperature between 160–200°F (70–93°C) if using a thermometer.
Once the butter is fully melted, it should have a clear golden liquid appearance floating on top of the water. Keep the heat low and steady.
Optional Twist: If you’re using coconut oil instead of butter (for vegan or lactose-free alternatives), the process is the same—just melt it gently with water.
Step 3: Infuse the Butter with Cannabis
Now for the fun part—infusion! This is where your decarbed cannabis gets cozy with the melted butter, slowly releasing all those wonderful cannabinoids into the fat.
Instructions:
- Add your 7–10 grams of decarbed cannabis to the melted butter mixture.
- Stir gently and ensure all the cannabis is fully submerged in the butter.
- Let the mixture simmer (not boil) on low heat for 2 to 3 hours, stirring occasionally.
Throughout the infusion, keep the temperature between 160°F and 200°F. If it gets too hot, you’ll risk destroying THC and other valuable compounds. You’ll know it’s working by the earthy, herbal smell that fills your kitchen.
Important: Don’t rush this process. The longer and slower the infusion, the better your results. This slow simmer allows the cannabinoids to bind to the fat in the butter, creating a potent final product.
Pro Tip: If using a slow cooker or Instant Pot, set it on low for the same duration—just remember to stir occasionally.
Step 4: Strain the Mixture
Once your butter is infused, it’s time to strain out the plant material. This is crucial for texture and taste. Nobody wants gritty cookies.
Steps to strain:
- Place a fine mesh strainer, cheesecloth, or even a coffee filter over a clean glass jar or bowl.
- Carefully pour the hot mixture through the strainer. Take your time—you don’t want to spill this liquid gold.
- Allow it to drain naturally. Don’t squeeze the cheesecloth too hard, as this can push bitter-tasting chlorophyll and unwanted residue into your butter.
Once you’ve strained everything, discard the leftover plant material responsibly. You should now have a smooth, greenish-yellow butter ready for storage.
Let it cool to room temperature before putting it in the fridge.
Step 5: Store Your Cannabutter Properly
After straining, allow your cannabutter to solidify in the fridge for a few hours or overnight. The butter will separate from the water and rise to the top.
Here’s what to do next:
- Once solidified, use a knife to carefully lift the butter layer from the top.
- Discard any remaining water at the bottom.
- Store the butter in an airtight container in the fridge for up to 3 weeks, or freeze for long-term use (up to 6 months).
Storage Tips:
- Use glass jars or silicone containers to avoid odor leakage.
- Label it clearly: “CANNABUTTER – NOT REGULAR BUTTER!”
- Cut it into portions or use silicone molds for easy dosing.
Well-made cannabutter should be smooth, aromatic, and potent. If it smells off or develops mold, toss it out. Proper storage will keep it fresh and effective for months.
Tips and Tricks for the Best Weed Butter
Avoiding Common Mistakes
Even though weed butter is fairly simple to make, there are a few pitfalls that can ruin your batch.
Top mistakes to avoid:
- Overheating: This is the #1 mistake. Too much heat will destroy THC. Always cook low and slow.
- Skipping decarboxylation: No decarb = no high. Always decarb your weed first.
- Using too much cannabis: More doesn’t always mean better. Overly potent butter can lead to unpleasant highs.
- Grinding the weed too fine: This makes straining harder and can lead to a grassy flavor.
- Not straining properly: Leftover plant matter makes your butter taste bitter and can affect texture.
Pro Tip: Always test your butter potency with a small amount before using it in a full recipe. This helps you gauge its strength and avoid overdoing it.
Flavoring Options and Enhancements
While classic cannabutter is effective as-is, why not take it up a notch with some flavor enhancements? After all, weed butter doesn’t have to taste like…well, weed. With a few tweaks, you can make your infused butter delicious enough to spread on toast or mix into gourmet dishes.
Flavor Boosting Ingredients:
- Fresh herbs like rosemary, thyme, or sage (infused during the simmering process)
- Garlic cloves for a savory kick
- Cinnamon sticks or vanilla extract for dessert-style butter
- Zest of lemon or orange for a citrusy twist
- Chili flakes or black pepper for a spicy infusion
These additions don’t just improve the taste; they can also mask some of the grassy, earthy flavor of cannabis that not everyone loves. If you’re planning to use your cannabutter for cookies or brownies, consider adding vanilla bean during the infusion process. For pasta or savory dishes, garlic and rosemary do wonders.
You can also experiment with compound butters—just like chefs do. Blend your finished weed butter with other soft ingredients like chives, cheese, or mushrooms to create unique flavor profiles tailored to specific recipes.
Pro Tip: Add flavorings during the last 30 minutes of simmering. That way, they don’t overpower the butter or interfere with the THC infusion.
Storing for Long-Term Use
Proper storage is essential if you want your weed butter to last—and stay potent. Unlike regular butter, cannabutter can lose its strength over time if it’s not stored correctly. Air, light, and temperature fluctuations are the biggest enemies of THC.
Short-Term Storage:
- Use glass jars with airtight lids.
- Store in the refrigerator for up to 3 weeks.
- Always use a clean utensil to scoop the butter to avoid contamination.
Long-Term Storage:
- Freeze it for up to 6 months.
- Use ice cube trays or silicone molds to portion your butter.
- Once frozen, transfer cubes to ziplock bags, and label with the date and potency estimate.
This method allows you to thaw only what you need and keeps the rest fresh and ready for future recipes. Bonus? It also helps with consistent dosing. Each cube can be measured and used without having to reheat or re-measure your entire batch.
Signs Your Butter Has Gone Bad:
- Sour or rancid smell
- Visible mold
- Change in texture or color
If you see any of these, it’s time to toss it and make a new batch. Properly stored cannabutter should smell pleasant, stay solid, and have a natural greenish-yellow hue.
How to Use Weed Butter in Recipes
Now that you’ve got your weed butter ready, the possibilities are practically endless. Cannabutter can be used in almost any recipe that calls for regular butter—just remember it’s infused with THC, so dose accordingly.
Sweet Edibles: Brownies, Cookies, Cakes
Ah yes, the classics! Sweet treats are arguably the most popular way to use weed butter.
Best Cannabis Dessert Recipes:
- Pot brownies (the OG edible)
- Chocolate chip cookies
- Banana bread
- Cakes or cupcakes
- Fudge and truffles
When baking, try to keep oven temperatures below 350°F (175°C) to avoid degrading THC. If a recipe calls for higher temperatures, consider baking at a lower temperature for a longer time.
Savory Dishes: Pasta, Sauces, and More
Sweet treats aren’t your only option. In fact, savory recipes often do a better job of masking the weed flavor.
Savory Ideas:
- Cannabis-infused garlic bread
- Mashed potatoes
- Weed mac and cheese
- Canna-buttered corn on the cob
- Stir-fried veggies or cannabis curry
You can also drizzle melted cannabutter over popcorn, mix it into a grilled cheese, or use it as a finishing butter for steak or fish.
Dosing Tips for Beginners
Start slow. The golden rule of edibles: You can always eat more, but you can’t eat less.
Beginner dosing guideline:
- Aim for 5–10mg of THC per serving.
- Wait at least 1.5 to 2 hours before consuming more.
- Keep your first edible experience low-stakes—stay home, stay comfortable.
You can calculate the approximate potency of your recipes by using online THC calculators or apps. But always remember that effects vary by person, metabolism, and even what you ate earlier that day.
Pro Tip: Keep some non-infused snacks on hand to curb the munchies and avoid accidental redosing!
FAQs about Weed Butter Recipe
1. How long does weed butter last?
When stored properly in an airtight container in the refrigerator, weed butter can last up to 3 weeks. If you freeze it, it can remain potent for up to 6 months.
2. Can you freeze weed butter?
Yes, absolutely. In fact, freezing is one of the best ways to preserve potency. Portion it out using ice cube trays for convenient dosing and future use.
3. Can you use stems or trim for weed butter?
Yes, you can. While they have less THC than flower, stems and trim can still be used—especially if you’re on a budget. Just know the resulting butter will be less potent.
4. How do you test the potency of weed butter?
There’s no perfect way to test it at home, but you can estimate using the THC percentage of your flower. For precision, use home THC test kits or try lab testing (if available). Always start with a low dose and adjust over time.
5. Is weed butter legal to make at home?
It depends on where you live. In areas where cannabis is legal for medical or recreational use, making weed butter at home is typically allowed. Always check your local laws before attempting any cannabis cooking.
Conclusion
Making your own weed butter at home isn’t just a fun kitchen experiment—it’s a game-changer for how you experience cannabis. From controlling your dosage and ingredients to customizing flavors and recipes, homemade cannabutter puts you in charge.
All it takes is some decarbed cannabis, unsalted butter, a little patience, and a lot of love. Whether you’re baking up brownies, whipping up some pasta, or just spreading it on toast, cannabutter opens the door to delicious, discreet, and long-lasting highs.
Just remember: low and slow wins the race—in both cooking and consumption. Respect the plant, respect your body, and you’ll be on your way to becoming a true edibles master.