Vietnam Pho Noodle Soup Recipe: There’s something magical about a steaming bowl of Vietnamese pho. From the aromatic broth that warms your soul to the tender beef slices and springy noodles that bring comfort with every bite—pho is more than just a dish, it’s an experience.
Whether you’ve tried it at a Vietnamese restaurant or heard about its legendary flavor from foodie friends, this guide is your ticket to mastering the art of making pho right in your own kitchen.
So roll up your sleeves and get ready to bring the streets of Hanoi into your home.
What is Pho?
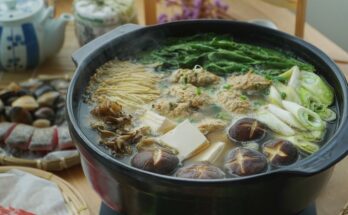
Pho (pronounced “fuh”) is a traditional Vietnamese noodle soup, beloved for its rich, aromatic broth and fresh toppings. The base is usually a slow-simmered bone broth seasoned with spices like star anise, cinnamon, cloves, and cardamom. Add to that thinly sliced meat, rice noodles, and a vibrant bouquet of herbs like cilantro, Thai basil, and scallions, and you’ve got a dish that’s not just food—it’s a full sensory experience.
What makes pho unique is its delicate balance. The broth isn’t just salty or spicy—it’s complex, slightly sweet, deeply savory, and absolutely soul-satisfying. While beef pho (pho bo) is the most iconic version, chicken (pho ga) and even vegetarian variations exist. Served typically with a side of bean sprouts, lime wedges, chili slices, and hoisin or sriracha sauce, pho is all about customization. Every bowl is a choose-your-own-adventure in taste.
The History and Origins of Pho
Pho traces its roots back to northern Vietnam in the early 20th century. It’s believed to have been influenced by both French and Chinese cuisines. During French colonial rule, beef became more accessible, and the Vietnamese began using beef bones to create soup bases—a rare practice before that time since beef was considered a luxury. Combine this with Chinese noodle soup traditions, and you get the early forms of pho.
Originally a street food served by vendors pushing carts through busy Vietnamese cities, pho became a national treasure. Over the decades, it evolved as it moved south, adopting bolder flavors, more garnishes, and regional flair. Today, it’s eaten at any time of day—breakfast, lunch, or dinner—and has become a global culinary ambassador for Vietnam.
Why Pho is More Than Just a Soup
Calling pho just “noodle soup” is like calling Beethoven’s 9th Symphony just “a song.” Pho is layered, deliberate, and nuanced. Each element—the bone broth, the noodles, the herbs, the spices—plays a vital role, and together, they create something greater than the sum of its parts.
Pho is also deeply cultural. It’s tied to family gatherings, street-side meals, and late-night comfort. It reflects a blend of tradition and innovation, of East and West, of simplicity and complexity. Whether you’re battling a cold, celebrating with friends, or just craving comfort food, pho delivers. Making pho at home isn’t just about food—it’s about honoring a culinary legacy that has touched millions of lives around the globe.
Ingredients You’ll Need
Essential Ingredients for Traditional Pho
Before you start, make sure your kitchen is stocked with these essentials:
For the Broth:
- 4-5 lbs of beef bones (marrow and knuckle bones work best)
- 1 large onion, halved
- 1 large piece of ginger, sliced lengthwise
- 1 cinnamon stick
- 4-5 star anise pods
- 4 cloves
- 1 cardamom pod (optional)
- 1 tbsp coriander seeds
- 1 tbsp fish sauce (to taste)
- 1-2 tbsp rock sugar or brown sugar
- Salt (to taste)
- 6-7 quarts of water
For the Noodles & Meat:
- 1 lb rice noodles (banh pho)
- 1 lb beef sirloin or eye of round, thinly sliced
- Optional: beef brisket or beef tendon (pre-cooked)
For the Garnishes:
- Fresh Thai basil
- Cilantro
- Green onions (sliced)
- Bean sprouts
- Lime wedges
- Jalapeño or bird’s eye chili slices
- Hoisin sauce and sriracha
This ingredient list is your foundation. With high-quality bones and fresh herbs, your pho will already taste restaurant-worthy.
Best Cuts of Meat for Pho
Choosing the right meat for pho is crucial. You want a balance between flavor and texture. Here are the top choices:
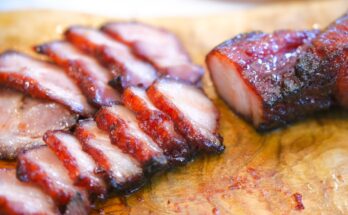
- Raw Eye of Round or Sirloin: Thinly sliced and added raw directly to the hot broth when serving. The heat of the soup cooks it instantly, keeping it tender.
- Beef Brisket or Shank: Simmered along with the bones for hours. It adds depth to the broth and can be sliced and served in the bowl.
- Oxtail or Bone Marrow: Not for eating necessarily, but incredible for building a gelatin-rich, umami-loaded broth.
- Beef Tendon or Tripe: Popular in more traditional pho bowls, offering a chewy texture.
Don’t skimp on the meat quality. Get fresh, high-grade beef from a butcher if you can, and slice it as thin as possible—partially freezing the meat beforehand helps achieve paper-thin slices.
Optional Toppings and Garnishes
Pho is a customizable masterpiece. Everyone has their own preference when it comes to toppings. Here are some optional (but highly recommended) garnishes:
- Bean Sprouts: Add crunch and freshness.
- Thai Basil: A must-have. Its licorice-like flavor complements the broth beautifully.
- Cilantro & Green Onions: Adds brightness and color.
- Lime Wedges: A squeeze of lime cuts through the richness.
- Chili Slices: Want heat? This is where you get it.
- Hoisin Sauce: Adds a sweet-savory layer.
- Sriracha or Chili Paste: Perfect for spice lovers.
Put these on a platter at the table so everyone can build their own flavor profile. It’s part of the pho experience!
Tools and Equipment Needed
You don’t need a professional kitchen to make pho, but having the right tools helps:
- Large Stockpot (at least 12-quart): Essential for boiling bones and creating that rich broth.
- Fine Mesh Strainer or Cheesecloth: For a clean, clear broth.
- Tongs & Slotted Spoon: To handle meat and bones during cooking.
- Knife & Cutting Board: For slicing meat and herbs.
- Noodle Strainer or Sieve: To cook noodles separately without overcooking them.
Optional but helpful:
- Skimmer: Helps remove scum from broth during simmering.
- Mandoline or Meat Slicer: To get ultra-thin meat slices.
Having everything prepped and ready will make your pho-making process smooth and enjoyable.
Preparation Before Cooking
How to Prepare the Beef Bones for the Broth
This is where the magic of pho truly begins. The depth and clarity of your broth hinge on how well you prep your beef bones. Don’t rush this part—treat it as the foundation upon which the entire dish is built.
Start by selecting a variety of bones—marrow bones, knuckle bones, oxtails, and a few meaty bones like shank or brisket. Wash the bones thoroughly under cold running water. Then comes a crucial step: parboiling.
Place all the bones in a large stockpot, cover with cold water, and bring to a rolling boil for about 10 minutes. You’ll notice a lot of scum and impurities rising to the top. This is exactly what you want to get rid of to achieve that clear, golden broth pho is famous for.
After boiling, discard the water and rinse the bones under cold water again, scrubbing off any residual impurities. Clean your stockpot as well, then refill it with fresh water and return the bones to the pot. Only now is your broth ready to truly begin simmering.
This step is non-negotiable if you’re after restaurant-quality pho at home. Skipping the parboil leads to cloudy broth with an off-putting taste and aroma. Treat this like cleaning your canvas before painting your masterpiece.
Roasting Spices and Aromatics for Maximum Flavor
This is one of the secret weapons behind the intoxicating aroma of pho—the roasted spices and aromatics. While the bones bring depth and body to the broth, it’s the spices that add character and complexity.
You’ll need:
- 1 large onion (halved)
- A big piece of ginger (about 4–6 inches, sliced in half lengthwise)
- 4–5 star anise
- 1 cinnamon stick
- 4 whole cloves
- 1 tablespoon coriander seeds
- 1 cardamom pod (optional)
Start by charring the onion and ginger. You can do this over an open flame (like a gas burner), under a broiler, or in a dry skillet. You want the outer skin to blacken and the flesh to soften slightly. This adds a smoky sweetness that makes your broth unforgettable.
Next, lightly toast the spices in a dry pan for 1–2 minutes until they become fragrant. Don’t overdo it—burning the spices can create bitterness. Once toasted, tie the spices in a cheesecloth or put them in a mesh spice ball so they’re easy to remove later.
This process elevates the broth from good to great. These warm spices—especially the star anise and cinnamon—give pho its signature aroma. When the scent fills your kitchen, you’ll know you’re on the right track.
Washing and Prepping Herbs and Garnishes
Your pho toppings should be as fresh and vibrant as the broth is deep and rich. And presentation? It matters. A beautiful garnish platter not only enhances the flavor but also brings that authentic Vietnamese street-food vibe into your home.
Here’s how to do it right:
- Thai Basil: Rinse the sprigs in cold water and shake off excess. Pinch off individual leaves if you prefer cleaner presentation.
- Bean Sprouts: Wash thoroughly under cold water. If they seem limp, soak them in an ice bath for 10 minutes to revive their crunch.
- Lime Wedges: Cut fresh limes into quarters. Avoid using pre-cut citrus or juice—nothing compares to a fresh squeeze.
- Chili Peppers: Thinly slice jalapeños or bird’s eye chilies. Handle with gloves if you’re sensitive to spice.
- Green Onions and Cilantro: Rinse well, then chop finely. These add brightness and freshness to each bite.
- Hoisin and Sriracha: Place in small dipping bowls or squeeze directly on the side of the bowl if desired.
Prepare this herb plate while your broth simmers—it’s a great way to multitask and have everything ready for when it’s time to assemble. Plus, giving your guests or family members their own little garnish buffet adds a fun, interactive element to the meal.
Step-by-Step Guide to Making Vietnam Pho Noodle Soup
Step 1: Making the Broth
Start by placing beef bones, oxtail, and brisket into a large pot. Cover with water and bring to a boil for about 10 minutes, then drain and rinse to remove impurities. Refill the pot with fresh water, add charred onions, ginger, star anise, cinnamon, cloves, and fish sauce. Simmer on low heat for 4–6 hours, occasionally skimming off any foam to keep the broth clear and aromatic.
Step 2: Straining and Skimming
Once the broth is rich and flavorful, remove the bones and meat. Strain the liquid through a fine sieve or cheesecloth into another pot. Skim off excess fat for a lighter, cleaner taste.
Step 3: Cooking the Noodles
Boil rice noodles separately in water until tender, about 2–3 minutes. Drain immediately and rinse under cold water to stop the cooking process.
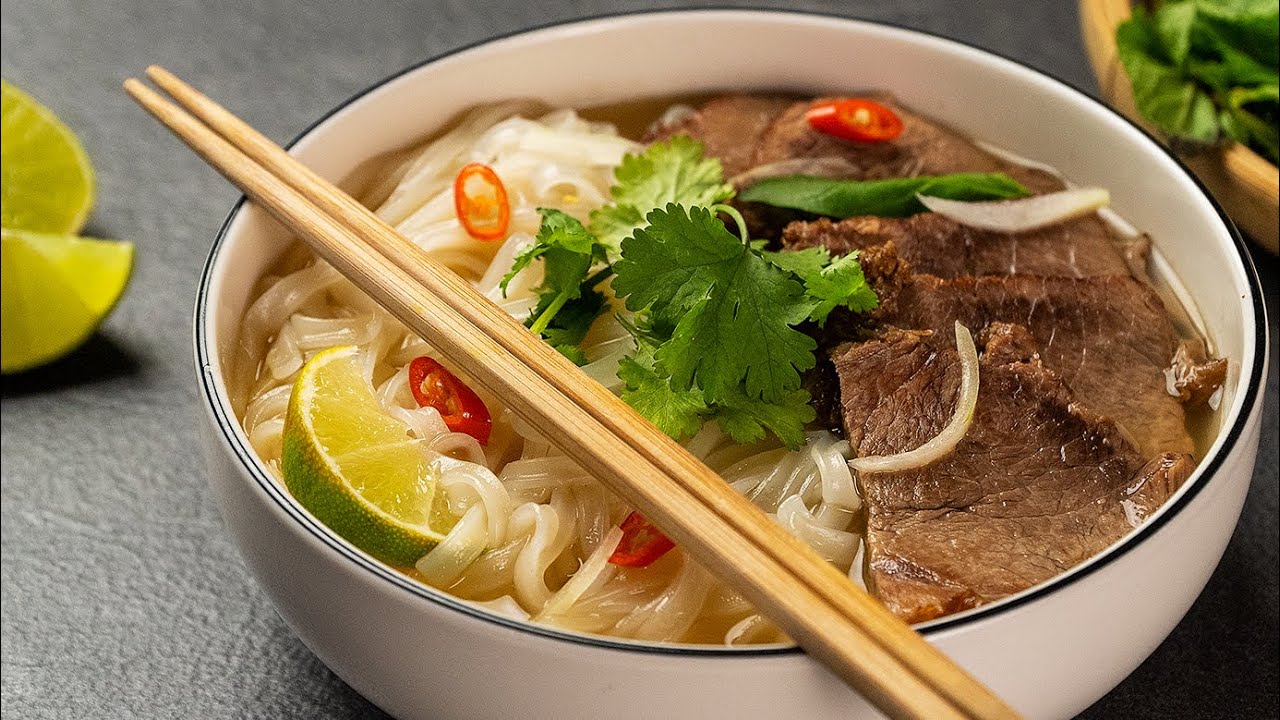
Step 4: Assembling Your Pho Bowl
Place a handful of noodles in each bowl. Add slices of cooked beef or brisket on top.
Step 5: Adding Toppings and Serving
Pour hot broth over the noodles and meat, allowing the heat to slightly cook thin beef slices. Add fresh herbs like basil, cilantro, and mint, along with bean sprouts, lime wedges, chili, and hoisin or Sriracha sauce to taste. Serve steaming hot and enjoy the symphony of flavors.
Tips for the Perfect Pho at Home
Common Mistakes to Avoid
Even though pho is a simple dish in its presentation, it’s surprisingly easy to go wrong if you don’t pay attention to a few crucial details. Here’s a breakdown of the most common mistakes home cooks make when attempting pho—and how you can avoid them.
1. Skipping the Parboil
This is the biggest mistake by far. If you don’t parboil your bones, your broth will end up cloudy, greasy, and full of impurities. That murky look? Totally preventable. Always boil your bones for about 10 minutes, then rinse them and start fresh with clean water.
2. Boiling the Broth Too Hard
Pho broth should simmer—not boil—for hours. A rolling boil can cause the broth to emulsify the fats and proteins, resulting in a greasy texture and a muddy flavor. Keep the heat low and let the broth gently bubble for clarity and depth.
3. Using Store-Bought Broth
Let’s keep it real—there’s no shortcut to pho broth. Boxed or canned broths just don’t have the collagen, depth, or flavor complexity that a homemade bone broth offers. It’s a labor of love, but it’s 100% worth it.
4. Overseasoning Too Early
Pho broth evolves over time. Adding too much fish sauce, salt, or sugar early in the cooking process can lead to an overpowering final product. Instead, wait until the final hour of simmering to taste and adjust the seasoning.
5. Overcooking the Noodles
Rice noodles cook incredibly fast—often in under a minute. Leaving them too long in hot water turns them to mush. Always follow the package instructions and rinse with cold water after cooking to stop the process.
6. Slicing Beef Too Thick
Your raw beef should be paper-thin so the broth can cook it instantly when poured into the bowl. If it’s too thick, it won’t cook evenly and could be chewy or raw. Tip: Freeze the meat for 30–45 minutes for easier slicing.
Avoiding these mistakes can be the difference between an okay bowl of pho and a bowl that transports you straight to the streets of Hanoi.
How to Store and Reheat Pho
If you’re going to spend 6–8 hours simmering broth, you may as well make extra, right? Thankfully, pho is incredibly make-ahead friendly—especially the broth. Here’s how to store and reheat it for future meals.
Storing Pho Broth:
- In the fridge: Let the broth cool completely and store it in airtight containers. It will keep for up to 5 days.
- In the freezer: For long-term storage, pour the broth into freezer-safe containers or heavy-duty zip bags (leave room for expansion). It can last up to 3 months.
If you’re freezing, you might want to portion the broth into individual servings. That way, you can thaw just what you need without defrosting the whole batch.
Storing Noodles & Toppings:
- Noodles: Store separately in a container with a touch of sesame oil to keep them from sticking. Use within 1–2 days.
- Meat: Store raw slices of beef covered, but if possible, slice fresh before serving.
- Herbs and veggies: Wrap them in damp paper towels and place them in a zip bag in the fridge. They’ll stay fresh for a couple of days.
Reheating Pho:
When you’re ready to enjoy another bowl:
- Reheat the broth in a saucepan until it’s steaming hot (boiling is fine here to ensure the beef cooks through).
- Quickly blanch the noodles again if they’ve hardened or clumped.
- Assemble the bowl as usual: noodles, raw beef, toppings, and hot broth.
With these tips, you can enjoy pho on demand—even on your busiest nights.
Variations of Pho
Pho Ga (Chicken Pho)
Not a fan of beef? No problem. Pho Ga, or Vietnamese chicken pho, is a lighter, equally satisfying alternative. It’s made the same way, but with chicken bones instead of beef.
Ingredients for Pho Ga:
- 1 whole chicken (or 4–5 lbs of chicken bones)
- 1 large onion
- 1 large piece of ginger
- Star anise, cinnamon, cloves, coriander seeds
- Fish sauce, rock sugar, salt
The process is very similar—parboil the chicken bones, toast the spices, char the aromatics, and simmer for 2–3 hours. Pho Ga has a lighter, cleaner broth with subtle sweetness, and it’s perfect for people looking for a healthier or more digestible option.
Use shredded poached chicken breast or thigh as the protein. Top it with the usual garnishes, and enjoy a bowl that’s a little less rich but every bit as delicious.
Pho Chay (Vegetarian Pho)
Yes, vegetarians can enjoy the beauty of pho too. Pho Chay is the meatless version that still offers bold flavor using plant-based ingredients.
Ingredients for Pho Chay:
- Roasted onions and ginger
- Vegetable broth or mushroom broth
- Toasted spices: cinnamon, star anise, coriander seeds
- Soy sauce or vegan fish sauce
- Carrots, daikon, mushrooms for body
- Tofu or tempeh (optional)
Simmer the broth for at least 1–2 hours, then strain and serve with rice noodles, sautéed mushrooms, and your favorite toppings. You can also add bok choy, baby corn, or bean curd for texture.
The result? A fragrant, umami-rich bowl that feels just as comforting without the meat.
Nutritional Value of Pho
Calories and Macronutrient Breakdown
Pho is a well-balanced meal—high in protein, moderate in carbs, and low in fat (depending on the cut of meat and how much fat you skim). Here’s an approximate breakdown for a standard bowl of beef pho:
| Nutrient | Amount per Serving |
|---|---|
| Calories | 350–450 kcal |
| Protein | 25–35 grams |
| Carbohydrates | 40–50 grams |
| Fat | 10–15 grams |
| Fiber | 2–3 grams |
| Sodium | 800–1200 mg |
Note: Toppings and sauces like hoisin and sriracha can increase sodium and sugar content.
Health Benefits of Pho Ingredients
Pho isn’t just delicious—it’s also surprisingly good for you.
- Bone broth is rich in collagen, which supports joint and skin health.
- Ginger and onion have anti-inflammatory and immune-boosting properties.
- Herbs like basil and cilantro contain antioxidants and vitamins.
- Rice noodles provide quick energy from carbohydrates.
- Lean meats add high-quality protein to support muscle repair.
Overall, pho is comforting, nourishing, and full of fresh ingredients that fuel your body and satisfy your soul.
Pho Around the World
How Pho is Enjoyed Globally
Pho may have started in Northern Vietnam, but today it’s a global culinary icon. From hip fusion restaurants in Los Angeles to street-side cafes in Paris and pho food trucks in Sydney, this dish has become an international star.
In the U.S., pho has become a comfort food staple in cities with large Vietnamese communities like Houston, San Jose, and Seattle. In Australia and Canada, it’s enjoyed both in Vietnamese eateries and at home. Even Michelin-star chefs have taken a crack at modernizing pho with wagyu beef, foie gras, and truffle oil.
Social media has also helped pho go viral, with thousands of Instagram photos showcasing mouthwatering bowls from around the world. No matter where it’s served, pho remains a symbol of Vietnam’s rich culture and resilient spirit.
Regional Twists on the Classic Dish
While the core components stay the same, different regions (even within Vietnam) put their own spin on pho:
- Northern Pho (Hanoi-style): Simpler, with a clear, clean broth and minimal garnishes. It’s all about the broth and noodles.
- Southern Pho (Saigon-style): More aromatic and sweet, with lots of fresh herbs, lime, hoisin, and chili sauce on the side.
- International Versions: Some places use brisket, ribs, or even pork. Others serve it dry (without broth) with dipping sauce on the side.
The adaptability of pho is what makes it so beloved. Each version offers a new take on a time-honored tradition.
FAQs about Vietnam Pho Noodle Soup Recipe
1. What’s the difference between pho and ramen?
Great question! While both are beloved noodle soups, pho is Vietnamese and typically features a clear, aromatic broth made from beef or chicken bones, rice noodles, and fresh herbs. Ramen is Japanese, made with a richer, often cloudy broth (like tonkotsu or miso) and wheat-based noodles. Ramen toppings also include eggs, seaweed, and pork belly—very different from pho’s fresh herbs and lean meats.
2. Can I use chicken instead of beef for pho?
Absolutely! That variation is called Pho Ga, and it’s a lighter alternative to the beef version. The process is similar—simmer bones, roast spices, and use fresh toppings—but with chicken thighs or a whole chicken for flavor. It’s a great choice if you prefer poultry or are cooking for someone who doesn’t eat red meat.
3. How long can I store homemade pho broth?
Homemade pho broth can be stored in the fridge for up to 5 days, or frozen for up to 3 months. Always cool it completely before transferring to airtight containers. If you refrigerate it, you’ll notice a fat layer forms on top—this actually helps preserve the broth. Just skim it off before reheating.
4. Is pho gluten-free?
Yes—pho is naturally gluten-free when made traditionally. The broth doesn’t use any wheat-based products, and the noodles are made from rice. Just make sure your fish sauce is gluten-free (some brands may contain additives), and skip soy sauce unless it’s a gluten-free version.
5. Can I freeze pho broth?
Definitely. In fact, many home cooks like to make large batches of broth and freeze it in portion-sized containers or freezer bags. Let the broth cool completely, label your containers with the date, and freeze. When you’re ready to eat, just thaw and reheat on the stove until boiling hot.
Conclusion
There you have it—a complete, step-by-step guide to mastering the art of Vietnamese pho noodle soup at home. From carefully choosing the right bones and spices for a rich, soul-soothing broth to slicing meat thin enough to melt in your mouth, every element of pho demands both patience and passion. But here’s the thing: once you’ve tasted the result of your own homemade pho, every hour spent simmering and prepping becomes absolutely worth it.
What makes pho truly special isn’t just the taste—it’s the experience. It’s the smell of spices toasting in your kitchen, the sound of bubbling broth, the beauty of fresh herbs laid out for garnishing, and the warmth you feel with every spoonful. Pho is more than just a meal—it’s a story told through flavor, a celebration of Vietnamese culture, and a dish that brings people together around the table.
So whether you’re making Pho Bo (beef), Pho Ga (chicken), or even Pho Chay (vegetarian), don’t just follow the recipe—immerse yourself in it. Take your time. Taste everything. Adjust. Experiment. And when you finally sit down with that bowl, steaming hot and fragrant, give yourself a pat on the back. You didn’t just cook—you created comfort in a bowl.