Venison Chili Recipe: If you’re looking for a hearty, flavorful, and protein-packed chili, venison chili is the perfect dish! Whether you’re an avid hunter or simply want to try a leaner alternative to beef, venison offers a unique taste and texture. This recipe will guide you step by step in making a rich, savory chili that’s perfect for cold nights, family gatherings, or meal prep.
Venison is an excellent choice for chili because it’s leaner than beef and has a deep, rich flavor. By combining it with the right spices, tomatoes, and optional beans, you can create a comforting dish that will become a household favorite.
Let’s dive into the step-by-step guide for making the best venison chili!
Ingredients Required
Main Ingredients:
- 2 lbs ground venison (or diced if preferred)
- 2 tbsp olive oil or butter
- 1 large onion, chopped
- 3 cloves garlic, minced
- 1 bell pepper, chopped (red, green, or yellow)
- 1 can (28 oz) diced tomatoes
- 1 can (6 oz) tomato paste
- 2 cups beef broth (or venison broth)
- 1 can (15 oz) kidney beans (optional)
- 1 can (15 oz) black beans (optional)
Spices & Seasonings:
- 2 tbsp chili powder
- 1 tsp cumin
- 1 tsp smoked paprika
- ½ tsp cayenne pepper (adjust for heat preference)
- 1 tsp oregano
- 1 tsp salt (adjust to taste)
- ½ tsp black pepper
Optional Ingredients for Extra Flavor:
- 1 tbsp Worcestershire sauce
- 1 tsp cocoa powder (for depth)
- 1 tbsp brown sugar (to balance acidity)
- 1 cup corn (for sweetness)
Substitutions & Variations:
- Swap beef broth for vegetable broth for a lighter flavor
- Use pinto beans instead of kidney beans
- Add jalapeños or habanero peppers for extra spice
How to Make Venison Chili – Step by Step Guide
Step 1: Preparing the Venison
Choosing the right venison cut is crucial. If you’re using freshly harvested venison, trim any silver skin and excess fat, as they can contribute to a gamey taste. If using ground venison, ensure it’s properly thawed before cooking.
For diced venison, cutting the meat into small, bite-sized pieces helps with tenderness. Marinating in a mix of Worcestershire sauce, a splash of vinegar, and seasonings for 30 minutes can enhance the flavor.
Step 2: Sautéing the Aromatics
Start by heating olive oil or butter in a large pot over medium heat. Add the chopped onions and cook until they turn translucent (about 5 minutes). Next, add the minced garlic and bell peppers, stirring until they soften.
Why is this step important? Sautéing these aromatics creates a flavor foundation that will infuse into the chili. Be sure not to burn the garlic, as it can turn bitter.
Step 3: Browning the Venison
Once your aromatics are soft, add the venison to the pot. Brown the meat, breaking it apart with a wooden spoon.
Pro Tips:
- Don’t overcrowd the pan; it can cause steaming instead of browning.
- Let the meat sit in the pan for a minute before stirring to get a good sear.
- If the venison releases a lot of liquid, drain some to prevent a watery chili.
Deglazing the pan with a splash of broth or Worcestershire sauce after browning helps lift all those flavorful bits from the bottom of the pot.
Step 4: Adding the Base Ingredients
Once the venison is browned, it’s time to build the chili base. Stir in the tomato paste and cook for a minute to intensify the flavor. Then, pour in the diced tomatoes and beef broth.
At this point, add the chili powder, cumin, smoked paprika, cayenne pepper, oregano, salt, and black pepper. Stir well to distribute the spices evenly.
Fresh vs. Canned Ingredients:
- Canned tomatoes add convenience, but fresh tomatoes work well if you have them.
- Tomato paste thickens the chili and adds a deeper tomato flavor.
Step 5: Adding Beans and Vegetables (Optional)
If you prefer a beanless chili, you can skip this step. However, if you’re adding beans, drain and rinse them before stirring them into the pot.
For extra heartiness, toss in corn, chopped zucchini, or even sweet potatoes.
Step 6: Simmering to Perfection
Lower the heat and let the chili simmer for at least 45 minutes to an hour. The longer it cooks, the richer the flavors become. Stir occasionally to prevent sticking.
If using a slow cooker, set it on low for 6-8 hours or high for 3-4 hours.
Step 7: Adjusting Seasonings
After simmering, it’s time to taste your venison chili and fine-tune the flavors. This step is crucial because the seasonings can mellow out over time, and adjustments might be needed.
Key Adjustments:
- If the chili is too acidic, add a pinch of sugar or honey.
- For more depth, stir in a dash of cocoa powder or a splash of balsamic vinegar.
- If it needs more spice, sprinkle in extra chili powder, cayenne, or hot sauce.
- To thicken the chili, let it simmer uncovered for an additional 15-20 minutes, or mix in a cornstarch slurry (1 tbsp cornstarch + 2 tbsp water).
Let the flavors meld for another 5-10 minutes before serving.
Serving the Venison Chili
Venison chili is incredibly versatile and can be served in multiple ways.
Best Serving Options:
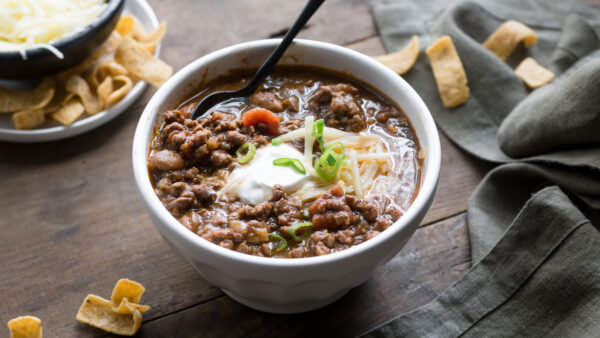
- Classic bowl: Serve hot in a bowl with toppings like shredded cheese, sour cream, chopped cilantro, or diced onions.
- Over rice or pasta: A great way to make it a complete meal.
- With cornbread: The slight sweetness of cornbread perfectly complements the spicy chili.
- As a chili dog topping: Spoon over hot dogs or baked potatoes for a delicious twist.
For a restaurant-style presentation, garnish with avocado slices, jalapeños, or a squeeze of lime juice.
Storing and Reheating Tips
One of the best things about chili is that it tastes even better the next day! The flavors continue to develop, making leftovers a real treat.
Storage Tips:
- Refrigerator: Store in an airtight container for up to 4 days.
- Freezer: Freeze in portioned containers for up to 3 months.
Reheating Instructions:
- Stovetop: Heat over medium-low, stirring occasionally until warmed through.
- Microwave: Heat in 1-minute intervals, stirring in between.
- Slow Cooker: Reheat on low for 2-3 hours.
If the chili thickens too much when reheating, simply add a splash of broth or water to adjust the consistency.
Variations and Customizations
One of the best things about venison chili is how easily you can tweak it to fit your preferences.
Spicy Venison Chili
- Add extra cayenne or chipotle powder for a smoky heat.
- Stir in diced jalapeños or habaneros for an extra kick.
- Mix in hot sauce or crushed red pepper flakes for more spice.
Keto & Low-Carb Venison Chili
- Skip the beans and add extra meat or vegetables.
- Use bone broth instead of regular broth for added nutrients.
- Serve over cauliflower rice instead of regular rice.
Tex-Mex Style Venison Chili
- Stir in corn and black beans.
- Add tortilla strips and a dollop of guacamole as toppings.
- Season with cumin, lime juice, and cilantro for a fresh flavor.
Slow Cooker or Instant Pot Adaptation
For a slow cooker, brown the venison and sauté the aromatics first, then add everything to the crockpot and cook on low for 6-8 hours or high for 3-4 hours.
For an Instant Pot, use the sauté function for browning, then pressure cook on high for 25 minutes, followed by a 10-minute natural release.
FAQs about Venison Chili Recipe
What kind of venison is best for chili?
For venison chili, you’ll want to use ground venison as it mixes well with other ingredients and absorbs flavors effectively. If ground venison isn’t available, you can also use cubed venison stew meat.
Can I make venison chili in a slow cooker?
Absolutely! A slow cooker is perfect for venison chili. Combine all ingredients in the slow cooker and set it on low for 6-8 hours or on high for 3-4 hours. This slow cooking process helps tenderize the venison and meld the flavors beautifully.
What are the best spices to use in venison chili?
Chili powder, cumin, smoked paprika, and a touch of cayenne pepper are great choices. These spices create a robust flavor profile that complements the rich taste of venison.
Is venison chili healthy?
Yes, venison chili is a healthy option. Venison is leaner than beef and high in protein, making it a great choice for a nutritious meal. Plus, when loaded with vegetables like tomatoes, onions, and beans, it becomes a hearty, balanced dish.
How can I thicken my venison chili?
To thicken your chili, you can use a few tablespoons of tomato paste or let it simmer uncovered for an extra 20-30 minutes to reduce the liquid. Alternatively, mashing some of the beans can naturally thicken the chili without altering the flavor.
Can venison chili be frozen?
Yes, venison chili freezes very well. Allow the chili to cool completely before transferring it to freezer-safe containers. It can be stored in the freezer for up to 3 months. Thaw in the refrigerator overnight and reheat on the stove or in a microwave.
Conclusion
Making venison chili is a rewarding experience that brings together bold flavors, lean protein, and customizable options. Whether you prefer it spicy, mild, with or without beans, this recipe offers something for everyone. The best part? It gets even better the next day, making it a fantastic meal for meal prep or gatherings.
So grab your ingredients, follow these steps, and enjoy a steaming bowl of rich, flavorful venison chili. Don’t forget to experiment with different toppings and variations to make it your own!