Veal Parmesan Recipe: There’s something magical about a perfectly cooked Veal Parmesan. The moment your fork cuts through that crispy golden crust and sinks into the tender veal beneath, you know you’re about to experience comfort food at its finest. Then comes the rich marinara sauce, followed by a blanket of melted mozzarella and nutty Parmesan cheese—each bite layered, balanced, and deeply satisfying.
This step-by-step guide will walk you through everything you need to know. From selecting the best ingredients to mastering the breading and frying process, you’ll gain the confidence to cook Veal Parmesan like a professional chef. So tie on your apron, preheat that oven, and let’s turn your kitchen into an Italian trattoria.
The Origin and History of Veal Parmesan
To truly appreciate Veal Parmesan, it helps to understand where it comes from. Despite its strong Italian roots, this beloved dish is actually more Italian-American than purely Italian. Its story begins with traditional Italian recipes like “Melanzane alla Parmigiana” (Eggplant Parmesan), which originated in Southern Italy. When Italian immigrants arrived in America in the late 19th and early 20th centuries, they brought their culinary traditions with them.
In Italy, meat was often expensive and reserved for special occasions. But in America, meat was more accessible and affordable. Immigrant families began adapting their classic eggplant dish by substituting veal cutlets. The result? A heartier, protein-rich variation that quickly gained popularity.
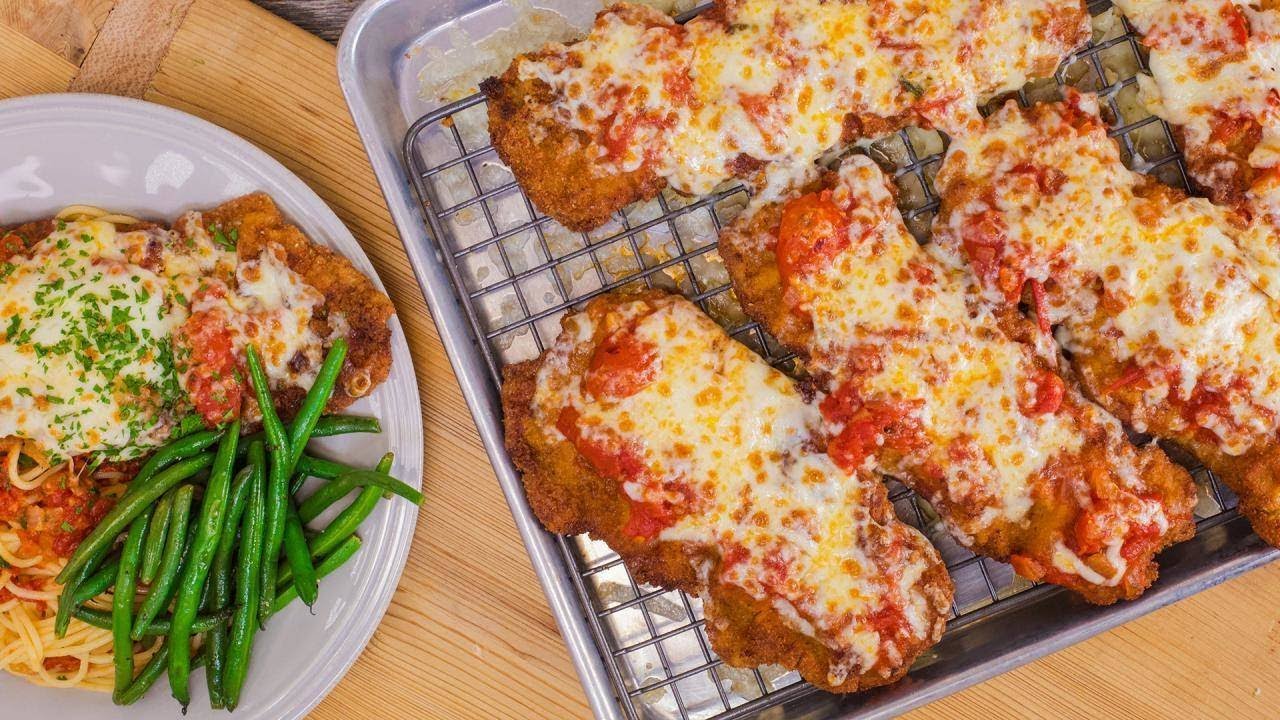
Over time, Veal Parmesan became a staple in Italian-American restaurants across the United States. It evolved into the version we know today: breaded and fried veal cutlets topped with marinara sauce and melted mozzarella, then baked until bubbly and golden.
Interestingly, in Italy, you won’t commonly find Veal Parmesan served exactly the same way as in American restaurants. This dish represents the beautiful fusion of old-world traditions and new-world ingredients. It’s a symbol of culinary adaptation—a recipe that tells a story of migration, resilience, and creativity.
So when you prepare Veal Parmesan at home, you’re not just cooking dinner. You’re recreating a piece of history—one that connects generations through food, flavor, and family traditions.
Why You’ll Love This Classic Italian-American Dish
Let’s be honest—there’s no shortage of comfort food options out there. So what makes Veal Parmesan stand out?
First, it’s the balance. The crispy breading contrasts perfectly with the tender veal inside. The acidity of the tomato sauce cuts through the richness of the cheese. And that final baked layer ties everything together like a perfectly orchestrated symphony.
Second, it’s incredibly satisfying. This isn’t a light snack—it’s a full, hearty meal. Pair it with pasta, garlic bread, or a fresh salad, and you’ve got a restaurant-quality dinner right at home.
Another reason you’ll love this recipe? It’s surprisingly achievable. While it might sound fancy, the process is straightforward when broken down step by step. Once you understand the basics—proper breading, frying temperature, layering—you’ll realize it’s more about technique than complexity.
And let’s not forget versatility. You can customize the sauce, experiment with different cheeses, or even adjust the thickness of the cutlets to suit your preference. Want extra crispy? Double bread it. Prefer more sauce? Layer it generously. It’s your kitchen—your rules.
Finally, there’s the emotional factor. Few dishes bring people together like Veal Parmesan. It’s the kind of meal that makes everyone linger at the table just a little longer. And really, isn’t that what great cooking is all about?
Ingredients You’ll Need
Great Veal Parmesan starts with quality ingredients. Think of it like building a house—you need a solid foundation. Each component plays a crucial role in flavor, texture, and overall success.
Here’s what you’ll need:
For the Veal Cutlets
- 4 veal cutlets (about 1/4-inch thick)
- Salt and freshly ground black pepper
- 1 cup all-purpose flour
- 2 large eggs
- 1 tablespoon milk
- 1 1/2 cups Italian-style breadcrumbs
- 1/2 cup freshly grated Parmesan cheese
- Olive oil (for frying)
For the Marinara Sauce
- 2 tablespoons olive oil
- 3 cloves garlic (minced)
- 1 can (28 oz) crushed tomatoes
- 1 teaspoon dried oregano
- 1 teaspoon dried basil (or fresh if available)
- Salt and pepper to taste
- A pinch of sugar (optional)
For the Topping
- 1 1/2 cups shredded mozzarella cheese
- 1/4 cup grated Parmesan cheese
- Fresh basil (optional garnish)
Let’s talk about quality for a moment. Fresh veal makes all the difference. Look for pale pink meat with a fine texture. Avoid anything grayish or overly wet. When it comes to cheese, freshly grated Parmesan beats pre-packaged every single time. The flavor is sharper, richer, and more authentic.
Remember, Veal Parmesan is a simple dish at heart. Because of that simplicity, every ingredient matters. Choose wisely, and your final result will speak for itself.
Kitchen Tools and Equipment Required
Before you dive into cooking, it’s smart to prepare your kitchen setup. Ever tried frying cutlets while scrambling to find a baking dish? Not fun. Organization makes the process smoother and more enjoyable.
Here’s what you’ll need:
- Large skillet (preferably heavy-bottomed)
- Tongs
- Three shallow bowls (for breading station)
- Baking dish
- Meat mallet (if pounding is needed)
- Paper towels
- Wire rack (optional but recommended)
- Oven
A heavy-bottomed skillet ensures even heat distribution, which is crucial for achieving that golden-brown crust. Uneven heat can leave some parts undercooked and others burnt.
A wire rack is especially helpful after frying. Instead of placing cutlets directly on paper towels (which can trap steam and make them soggy), resting them on a rack helps maintain crispiness.
Think of your tools as teammates. The right equipment doesn’t just make cooking easier—it elevates your results. When everything is within reach and properly prepared, you can focus entirely on technique and timing.
Cooking should feel smooth, not chaotic. And a well-prepared kitchen sets the stage for a flawless Veal Parmesan.
How to Choose the Best Veal for Parmesan
Choosing the right veal is like choosing the right foundation for a house—everything depends on it. You can follow every step perfectly, but if the veal isn’t good quality, the final result won’t shine the way it should. So let’s slow down for a second and talk about what to look for.
First, pay attention to color. Fresh veal should be pale pink, almost blush-colored. If it looks grayish or dull, skip it. That’s a sign it’s been sitting around too long. The texture should be firm but tender to the touch—not sticky or slimy. Fresh meat always feels clean and slightly moist, never wet.
Thickness matters too. For Veal Parmesan, you want cutlets that are about 1/4 inch thick. If they’re thicker, you’ll need to pound them down using a meat mallet. Why? Because thin cutlets cook evenly and quickly. Thick ones risk burning on the outside while staying undercooked inside. And nobody wants that.
If possible, ask your butcher to slice the cutlets fresh for you. A good butcher can trim excess fat and ensure uniform thickness, which makes cooking easier. Don’t be shy—this is one of those dishes where precision pays off.
Finally, consider freshness over convenience. Pre-packaged veal might seem easier, but freshly cut meat delivers better flavor and texture. When you invest in quality veal, you’re investing in a restaurant-level experience right in your own kitchen.
Preparing the Veal Cutlets Properly
Preparation is where good cooks separate themselves from great ones. Before you even think about breading, you need to prep your veal correctly. This step sets the stage for everything that follows.
Start by placing the veal cutlets between two sheets of plastic wrap or parchment paper. Using a meat mallet, gently pound them to an even thickness—about 1/4 inch. Don’t go full force here. You’re tenderizing, not demolishing. Think controlled taps, not aggressive swings.
Why is this important? Even thickness ensures even cooking. If one side is thicker than the other, it’ll cook unevenly. The thin part will dry out while the thick part remains undercooked. Consistency is key.
Next, pat the cutlets dry with paper towels. This step might seem small, but it’s crucial. Excess moisture prevents proper browning and can cause the breading to slide off. Dry meat equals better crust—simple as that.
Now season generously with salt and freshly ground black pepper on both sides. Don’t rely solely on the breadcrumbs for flavor. The seasoning needs to penetrate the meat itself. Think of it like layering flavors instead of stacking them all on top.
Once seasoned, let the veal rest at room temperature for about 15–20 minutes. This helps it cook more evenly. Cold meat straight from the fridge tends to tighten up in hot oil, which can affect texture.
Preparation may not be glamorous, but it’s powerful. Get this part right, and the rest becomes much easier.
Setting Up the Perfect Breading Station
Breading might look simple, but it’s an art. A proper breading station keeps things organized and prevents messy chaos. And trust me, once your hands are coated in egg and breadcrumbs, you don’t want to be scrambling.
You’ll need three shallow bowls:
- Flour
- Egg mixture
- Breadcrumb mixture
In the first bowl, add all-purpose flour. This is your foundation layer. It helps the egg stick to the veal.
In the second bowl, whisk together two eggs with one tablespoon of milk. The milk loosens the eggs slightly, creating a smoother coating.
In the third bowl, combine Italian-style breadcrumbs with freshly grated Parmesan cheese. This mixture adds texture and flavor. The Parmesan brings that salty, nutty bite that makes Veal Parmesan unforgettable.
Now here’s the trick: use one hand for dry ingredients and the other for wet. This prevents your fingers from turning into breadcrumb clubs. Dip the veal into flour first, shaking off excess. Then coat it in the egg mixture. Finally, press it firmly into the breadcrumb mixture, making sure both sides are fully covered.
Press—don’t just sprinkle. Pressing ensures the breadcrumbs adhere properly. You want a firm, even crust.
Once breaded, place the cutlets on a plate and let them rest for 10–15 minutes. This allows the coating to set, reducing the chances of it falling off during frying.
Organization makes cooking feel effortless. A clean breading station is like a well-planned road trip—you know exactly where you’re going next.
Step-by-Step Guide to Making Veal Parmesan
Now comes the exciting part—the actual cooking. Take a deep breath. You’ve prepared everything carefully, and now it’s time to bring it all together.
Step 1: Seasoning the Veal
Even though you seasoned earlier, give the cutlets one final light sprinkle of salt before frying. This enhances the flavor and ensures nothing tastes flat. Flavor layering is what separates average dishes from unforgettable ones.
Step 2: Breading the Cutlets
Follow the flour → egg → breadcrumb sequence carefully. Make sure every inch of the veal is coated evenly. Thin spots in the breading can lead to uneven browning.
Press the breadcrumbs firmly into the surface. Think of it like packing snow into a snowball—you want it compact and secure.
Step 3: Frying to Golden Perfection
Heat olive oil in a large skillet over medium heat. The oil should shimmer but not smoke. If it’s too hot, the crust will burn before the veal cooks. Too cool? It absorbs oil and turns greasy.
Carefully place the cutlets in the pan without overcrowding. Fry for about 3–4 minutes per side until golden brown. You’re not cooking them fully yet—just creating that crispy crust.
Transfer the fried cutlets to a wire rack. Let them rest briefly.
Step 4: Preparing the Marinara Sauce
In a saucepan, heat olive oil and sauté minced garlic until fragrant—about 30 seconds. Add crushed tomatoes, oregano, basil, salt, and pepper. Simmer for 15–20 minutes.
Taste it. Adjust seasoning. A pinch of sugar can balance acidity if needed.
Homemade sauce makes a world of difference. It’s fresh, vibrant, and far superior to most store-bought options.
Step 5: Assembling the Dish
Preheat your oven to 375°F (190°C). Spread a thin layer of marinara sauce in a baking dish. Place the fried veal cutlets on top.
Spoon sauce over each cutlet—but don’t drown them. Too much sauce makes the crust soggy. You want a balance.
Top with shredded mozzarella and a sprinkle of Parmesan cheese.
Step 6: Baking to Melted Perfection
Bake for 15–20 minutes until the cheese melts and becomes bubbly. For extra golden color, broil for the last 2–3 minutes—but watch carefully.
Remove from oven and let rest for 5 minutes before serving. This helps the cheese set slightly and keeps everything intact.
Tips for Achieving Crispy, Tender Veal Parmesan
Want restaurant-quality results? Focus on these details:
- Don’t skip resting the breaded cutlets before frying.
- Maintain consistent oil temperature.
- Use freshly grated cheese.
- Avoid over-saucing.
- Let the dish rest before serving.
Think of crispiness like a delicate balance. Too much moisture ruins it. Too little seasoning makes it bland. Precision is everything.
Common Mistakes to Avoid
Even experienced cooks slip up. Here are pitfalls to watch for:
- Overcrowding the pan while frying
- Using oil that’s too hot or too cold
- Skipping seasoning
- Using watery sauce
- Overbaking
Each mistake affects texture or flavor. The good news? They’re all easy to avoid with attention and patience.
Serving Suggestions and Side Dishes
Veal Parmesan pairs beautifully with:
- Spaghetti or linguine
- Garlic bread
- Caesar salad
- Roasted vegetables
- Creamy mashed potatoes
A simple arugula salad with lemon vinaigrette also balances richness perfectly. The peppery greens cut through the cheese like a refreshing palate cleanser.
Storage and Reheating Tips
Store leftovers in an airtight container for up to 3 days. Reheat in the oven at 350°F to maintain crispiness. Avoid microwaving—it softens the crust.
For longer storage, freeze before baking. Wrap tightly and freeze up to 2 months.
Variations and Creative Twists
Feeling adventurous?
- Add prosciutto between layers.
- Use smoked mozzarella.
- Try a spicy arrabbiata sauce.
- Substitute chicken for a classic Chicken Parmesan twist.
Small changes create exciting new flavors without losing authenticity.
Nutritional Information and Health Considerations
Veal Parmesan is rich and satisfying. It contains protein from veal and calcium from cheese. To lighten it up:
- Bake instead of fry.
- Use part-skim mozzarella.
- Serve with vegetables instead of pasta.
Balance is key. Enjoy it as part of a well-rounded diet.
FAQs about Veal Parmesan Recipe
1. Can I use store-bought marinara sauce?
Yes, you can. Choose a high-quality marinara for the best flavor. You can also enhance it by simmering with fresh garlic, basil, or oregano for a more homemade taste.
2. How do I keep the breading from falling off?
Make sure the veal cutlets are patted completely dry before breading. Press the breadcrumbs firmly onto the meat and allow the breaded cutlets to rest for a few minutes before frying. This helps the coating adhere better.
3. Can I prepare Veal Parmesan ahead of time?
Yes. You can fry the breaded veal cutlets in advance and store them in the refrigerator. When ready to serve, assemble with sauce and cheese, then bake until heated through and bubbly.
4. What oil is best for frying?
Olive oil works well and adds flavor, especially for shallow frying. Vegetable oil is also a good option if you prefer a higher smoke point.
5. Can I make this gluten-free?
Absolutely. Simply substitute gluten-free flour and gluten-free breadcrumbs. The result will still be crispy and delicious.
These tips ensure your Veal Parmesan turns out crispy, flavorful, and perfectly prepared every time.
Conclusion
Veal Parmesan isn’t just a meal—it’s an experience. From selecting quality veal to achieving that perfect golden crust, every step matters. When done right, the result is crispy, tender, cheesy perfection layered with rich tomato sauce.
With patience, attention to detail, and quality ingredients, you can create a dish that rivals any Italian restaurant. Now that you have the step-by-step guide, it’s time to step into your kitchen and make it happen.


