Vanilla Mug Cake Recipe: There’s something magical about being able to whip up a warm, fluffy cake in just a few minutes without turning on the oven. A vanilla mug cake is the ultimate comfort treat—simple, quick, and endlessly customizable. Whether you’re craving dessert after dinner, need a sweet pick-me-up during study time, or just want to try your hand at a no-fuss recipe, this guide will walk you through every step to create the perfect vanilla mug cake right in your microwave.
Introduction to Vanilla Mug Cake
When you think of cake, you might imagine a long process: mixing, baking, frosting, and waiting. But what if you could skip all that and still enjoy the soft, moist texture of cake in just a few minutes? That’s exactly where a mug cake comes in.
A mug cake is a single-serving dessert made in a mug and cooked in the microwave. It’s ideal for anyone who loves dessert but doesn’t want to deal with complicated baking. Vanilla mug cake, in particular, is one of the simplest and most versatile options. The flavor is mild, comforting, and pairs beautifully with a variety of toppings like whipped cream, chocolate sauce, or fresh fruit.
What makes vanilla mug cake so special? It’s the perfect balance between simplicity and satisfaction. You don’t need fancy ingredients or professional baking skills. In fact, most of the ingredients are things you already have in your kitchen. And because it’s a single-serving recipe, there’s no risk of overindulging—you make just enough to satisfy your sweet tooth.
So, if you’re ready to treat yourself to a little slice of heaven without the hassle, let’s dive into the ingredients and steps to create your perfect vanilla mug cake.
Ingredients You’ll Need
One of the biggest advantages of a vanilla mug cake is its simplicity. You don’t need to run to the grocery store for hard-to-find items; most of the ingredients are pantry staples. The key is to get the right balance between dry and wet ingredients so that your cake comes out fluffy, moist, and perfectly cooked in the microwave.
Let’s break it down into essential ingredients (the ones you must have) and optional ingredients (fun extras that can elevate your cake).
Essential Ingredients
- All-purpose flour – The foundation of your cake. It provides structure and helps the cake rise.
- Sugar – Sweetness is what makes cake irresistible. Regular granulated sugar works best.
- Baking powder – This is the magic ingredient that makes your cake rise and stay fluffy.
- Milk – Adds moisture and binds everything together. You can use dairy or plant-based milk.
- Vanilla extract – The star of the show. It gives your cake that rich, classic vanilla flavor.
- Oil or melted butter – Adds moisture and richness, keeping the cake from becoming dry.
Optional Ingredients
If you want to have fun with your vanilla mug cake, consider adding some of these:
- Chocolate chips – Melt into gooey pockets of sweetness.
- Sprinkles – Turn your cake into a celebration-worthy funfetti treat.
- Cocoa powder – For a marbled vanilla-chocolate swirl effect.
- Chopped nuts – Add crunch and nutty flavor.
- Cinnamon or nutmeg – For a warm, spiced twist.
The beauty of a mug cake is that you can keep it classic or dress it up depending on your mood.
Equipment Required
Before we get into the step-by-step guide, let’s talk about the tools you’ll need. Thankfully, this recipe doesn’t require mixers, ovens, or fancy gadgets.
- A microwave-safe mug – This is your “baking pan.” Choose a mug that holds at least 12 ounces to prevent overflow while cooking.
- A microwave – The cooking method that makes this recipe so quick. Every microwave is a bit different, so you may need to adjust the cooking time.
- A fork or small whisk – For mixing your ingredients right inside the mug.
- Measuring spoons and cups – Accuracy matters when baking, even with a mug cake.
That’s it! With just these basics, you’re ready to create your dessert masterpiece.
Step-by-Step Guide to Making Vanilla Mug Cake
Making a mug cake might sound simple—and it is—but a few little tricks can make a huge difference in how your cake turns out. Follow these steps carefully, and you’ll end up with a perfectly soft, fluffy vanilla mug cake every time.
Step 1 – Prepare Your Mug
The first and most important step is choosing the right mug. You’ll want one that’s at least 12 ounces (350 ml) in size, preferably wider rather than taller. Why? Because the cake needs space to rise in the microwave. If the mug is too small, your cake will overflow, leaving a messy microwave to clean.
Once you’ve picked your mug, lightly grease the inside with a small amount of butter or oil. This prevents the cake from sticking and makes cleanup easier. Some people skip this step, but trust me—it makes a difference when you’re scooping out your cake later.
Step 2 – Add Dry Ingredients
Now, it’s time to start mixing. Add your dry ingredients directly into the mug: flour, sugar, and baking powder. Use a fork to stir them together until they’re well combined. This step ensures that your leavening agent (baking powder) is evenly distributed, which helps your cake rise properly.
A common mistake here is rushing and not mixing enough, which can lead to uneven texture. Take a few extra seconds to stir thoroughly, breaking up any clumps of flour or sugar. A smooth, uniform mixture is the foundation of a fluffy mug cake.
Step 3 – Mix Wet Ingredients
Once your dry ingredients are combined, it’s time to add the wet ones. This is where the magic happens because the liquids bring everything together and transform the dry mix into a smooth batter.
Start by pouring in the milk, followed by the vanilla extract, and then add the oil or melted butter. Each of these ingredients plays an important role:
- Milk provides moisture and binds the dry ingredients.
- Vanilla extract enhances the flavor, giving that sweet, comforting aroma.
- Oil or butter adds richness and ensures your cake doesn’t turn out dry.
Now, take your fork or whisk and gently stir the mixture. Make sure you scrape the sides and bottom of the mug so no flour pockets are left behind. The key here is balance: mix just enough to get a smooth batter, but don’t overdo it. Overmixing can knock the air out and make the cake dense instead of fluffy.
At this point, your batter should look silky and slightly thick, similar to pancake batter. If it feels too dry, add a teaspoon of milk; if it seems too runny, sprinkle in a tiny bit more flour. This little adjustment can make a world of difference in the final texture.
Step 4 – Stir and Blend Together
Now that all the ingredients are in, it’s time to bring everything together into a uniform batter. Stirring may seem like a simple step, but it can make or break your mug cake.
Here’s a trick: stir in gentle, circular motions rather than aggressively whipping the batter. This keeps the mixture airy and ensures the baking powder has a chance to do its job when heated. A few lumps are okay, but large streaks of flour mean you need to mix a bit more.
If you’re adding optional ingredients like chocolate chips, sprinkles, or nuts, this is the perfect moment to fold them in. Just sprinkle them over the batter and give a couple of light stirs. Folding instead of heavy mixing helps keep the cake fluffy and prevents everything from sinking to the bottom.
Remember, the goal here isn’t perfection—it’s comfort food. A little unevenness adds character to your mug cake, making it feel even more homemade.
Step 5 – Microwave the Mug Cake
This is where the real magic happens: turning that mug of batter into a warm, fluffy cake in minutes. Place your mug in the center of the microwave and cook it on high power.
- Cooking time: Generally, 70–90 seconds is enough. Start with 70 seconds, then check. If the cake still looks undercooked in the middle, heat it in 10–15 second intervals until it’s done.
- Testing doneness: The cake should rise nicely and look set on top. If you gently press the surface and it springs back, it’s ready. A toothpick inserted into the center should come out clean or with just a few moist crumbs.
Be careful not to overcook. Because microwaves vary in power, your cake can go from perfectly soft to dry and rubbery in seconds. It’s better to slightly undercook and let the residual heat finish cooking it than to overdo it.
When done, let the cake cool for a minute or two before digging in. This helps the texture settle and prevents burning your tongue (trust me, it’s tempting to eat it right away!).
Tips for the Perfect Vanilla Mug Cake
Now that you know the steps, let’s talk about how to make your mug cake turn out amazing every single time. Even though it’s a simple recipe, a few little adjustments can take it from “just okay” to “wow, this is incredible!”
- Don’t skip the vanilla extract – It’s the star flavor here. Without it, the cake can taste flat.
- Balance the sweetness – If you like your desserts less sweet, reduce the sugar slightly. For an indulgent treat, add an extra teaspoon.
- Prevent dryness – Always measure your flour correctly. Too much flour can make the cake dry. Use the “spoon and level” method instead of scooping straight from the bag.
- Mind the microwave – Every microwave is different. If your cake is rubbery, reduce the cooking time next round.
- Add moisture boosters – A tablespoon of sour cream or yogurt can make your mug cake extra soft and moist.
- Experiment with toppings – A dollop of whipped cream, a drizzle of caramel, or a scoop of ice cream can transform your mug cake into a restaurant-worthy dessert.
With these little hacks, you’ll never have a disappointing mug cake again.
Common Mistakes and How to Fix Them
Even though a vanilla mug cake is one of the easiest desserts you can make, it’s still possible to run into little hiccups along the way. Luckily, most of these problems are easy to fix once you know what caused them. Let’s look at the most common mistakes and how you can avoid or correct them.
1. Undercooked cake
Sometimes, you’ll pull your mug out of the microwave and notice the top looks cooked, but the inside is still gooey. This happens if the cooking time is too short or your microwave’s power is lower than average. The fix is simple: pop it back in for an additional 10–15 seconds. Always check doneness with a toothpick or by lightly pressing the surface.
2. Overcooked cake
On the opposite end, your cake may come out rubbery or dry. This usually means you microwaved it too long. Because mug cakes keep cooking for a minute after the microwave stops, it’s better to slightly undercook them. Next time, reduce your cooking time by 10 seconds and let the cake rest before eating.
3. Dense texture
If your cake feels heavy instead of light and fluffy, the problem is often overmixing. When you stir too aggressively, you knock out the air that helps the cake rise. Another cause could be too much flour. Always measure flour correctly by spooning it into the measuring cup and leveling it off.
4. Overflowing batter
Ever had your mug cake explode over the sides? That’s usually because your mug was too small. Always use a mug that holds at least 12 ounces, and don’t fill it more than halfway with batter. The cake needs room to rise.
5. Bland flavor
If your cake turns out tasteless, you probably skipped or skimped on the vanilla extract. It’s the key flavor in this recipe. Another way to boost flavor is to add a pinch of salt, which balances the sweetness and enhances the overall taste.
By keeping these tips in mind, you’ll troubleshoot your mug cakes like a pro and get consistent, delicious results every single time.
Creative Variations of Vanilla Mug Cake
One of the best parts about making a vanilla mug cake is how easy it is to customize. Think of the classic vanilla version as your canvas—you can add different flavors, textures, and toppings to create endless variations. Here are some fun ideas to inspire you:
1. Vanilla with chocolate swirl
Add a teaspoon of cocoa powder to half the batter and swirl it gently before microwaving. You’ll end up with a beautiful marbled effect and a mix of vanilla and chocolate in every bite.
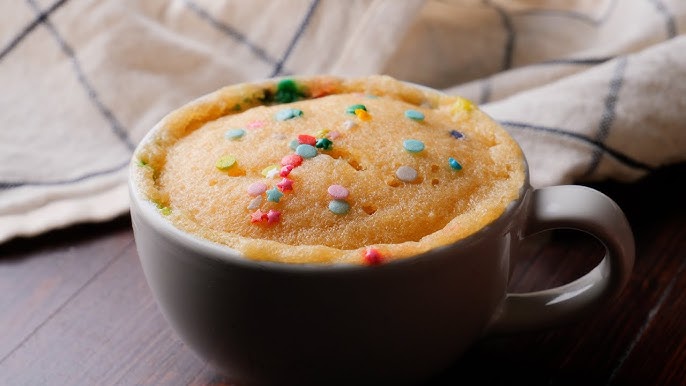
2. Funfetti mug cake
Stir in a tablespoon of rainbow sprinkles to the batter. When the cake cooks, the sprinkles melt slightly, giving you a colorful, party-ready dessert that’s perfect for birthdays or celebrations.
3. Nutty vanilla cake
Mix in a tablespoon of chopped walnuts, pecans, or almonds for added crunch. Nuts pair beautifully with vanilla and make the cake feel a little more filling.
4. Chocolate chip surprise
Fold in a handful of chocolate chips before cooking. They’ll melt into gooey pockets of chocolate that make the cake extra indulgent.
5. Spiced vanilla cake
Add a pinch of cinnamon, nutmeg, or cardamom to the batter for a warm, aromatic twist. Perfect for fall evenings with a cup of tea.
6. Fruity delight
Mix in a few small pieces of strawberries, blueberries, or banana slices. Fruit adds natural sweetness and moisture, making the cake taste fresh and unique.
The possibilities are endless. You can even experiment with toppings like caramel drizzle, peanut butter, or whipped cream to elevate your mug cake. The fun part? Each version only takes minutes to create, so you can try a new variation every time you make one.
Serving Suggestions
A vanilla mug cake is delicious on its own, but with the right toppings and pairings, you can turn this quick dessert into a gourmet experience. Here are some serving ideas:
- Whipped cream and berries: A dollop of whipped cream with fresh strawberries or raspberries adds freshness and a pop of color.
- Ice cream topping: Place a scoop of vanilla, chocolate, or caramel ice cream on top of the warm cake. The contrast between hot and cold is simply irresistible.
- Chocolate drizzle: Melt some chocolate chips and drizzle them over the cake for a decadent touch.
- Caramel or butterscotch sauce: These sweet sauces add richness and elevate the flavor.
- Nut butter swirl: A spoonful of peanut butter, almond butter, or Nutella spread on top makes the cake extra indulgent.
When it comes to drinks, pair your vanilla mug cake with a hot cup of coffee, tea, or even a glass of cold milk. It’s the perfect comfort food combination for cozy evenings.
Storage and Reheating Tips
Although a mug cake is designed to be eaten fresh, you might sometimes want to save it for later. Here’s how to do it:
- Storage: If you have leftovers, cover the mug with plastic wrap or transfer the cake to an airtight container. Store it in the refrigerator for up to 2 days.
- Reheating: To reheat, place the cake back in the microwave for about 15–20 seconds. Be careful not to overheat, or it will dry out.
- Make-ahead option: You can mix the dry ingredients in advance and keep them in a small jar or container. When you’re ready, just add the wet ingredients and microwave.
That said, the texture of a mug cake is always best when it’s fresh, so whenever possible, enjoy it right after making it.
Healthier Vanilla Mug Cake Alternatives
Craving a sweet treat doesn’t always mean you have to abandon your healthy eating habits. With a few simple swaps, you can turn your vanilla mug cake into a lighter, guilt-free dessert that still tastes amazing. Here are some healthier alternatives you can try:
1. Whole wheat flour instead of all-purpose flour
Using whole wheat flour adds extra fiber, making your cake more filling and nutritious. The texture might be slightly denser, but the nutty flavor complements vanilla beautifully.
2. Natural sweeteners instead of sugar
Swap regular sugar with honey, maple syrup, coconut sugar, or even stevia for a lower-calorie version. These sweeteners also add unique flavors to the cake. For example, honey gives a rich floral sweetness, while maple syrup adds warmth.
3. Low-fat milk or plant-based milk
Instead of whole milk, try almond milk, oat milk, or soy milk. They provide creaminess with fewer calories, and some varieties add extra flavor.
4. Yogurt or applesauce for oil
To cut down on fat, replace oil or butter with unsweetened applesauce or Greek yogurt. Both make the cake moist and soft while reducing calories.
5. Egg-free and vegan options
For a vegan-friendly mug cake, use plant-based milk and replace eggs (if you normally add them) with mashed banana or flaxseed meal mixed with water.
6. Add-ins with benefits
Instead of chocolate chips or candy, stir in chia seeds, flax seeds, or a few nuts. They add crunch, protein, and healthy fats.
With these adjustments, you can enjoy your vanilla mug cake without feeling guilty. Plus, it’s a fun way to experiment and discover new flavors while staying true to your health goals.
Why You’ll Love This Recipe
There are countless dessert recipes out there, but the vanilla mug cake has a special charm. Here’s why this little treat is a favorite for so many people:
- Quick and easy: You can go from craving to eating in less than five minutes. No waiting for the oven to preheat or cakes to cool.
- Minimal cleanup: Since everything is mixed and cooked in the same mug, you only have one dish to wash. Perfect for lazy evenings or late-night cravings.
- Customizable: Whether you like it plain, chocolatey, nutty, or fruity, you can tweak the recipe to match your mood.
- Single-serving: Unlike a full cake, a mug cake makes just enough for one person, so you won’t be tempted to overindulge.
- Kid-friendly: Kids love making mug cakes because they’re easy, fun, and safe (no oven required). Plus, they can decorate their cakes with sprinkles, frosting, or candy.
- Comfort food: Sometimes you just want a warm, homemade dessert without the hassle. This recipe delivers exactly that—a cozy little cake made with love.
In short, a vanilla mug cake is proof that good things really do come in small packages.
FAQs about Vanilla Mug Cake Recipe
1. Can I bake this instead of microwaving?
Yes, you can bake a mug cake in the oven at 350°F (175°C) for about 12–15 minutes. Just make sure your mug is oven-safe.
2. How do I make it eggless?
This recipe is naturally egg-free, but if you want to add structure, you can use a tablespoon of yogurt, applesauce, or mashed banana as a replacement.
3. Can I double the recipe in one mug?
It’s better to make two separate mug cakes instead of doubling the recipe in one mug. A larger portion often doesn’t cook evenly in the microwave.
4. What type of milk works best?
Any milk works well—whole, skim, or plant-based. Almond milk gives a light, nutty flavor, while oat milk adds creaminess.
5. Can I prepare it in advance?
You can mix the dry ingredients ahead of time and store them in a small jar. When you’re ready, just add the wet ingredients and microwave for a fresh cake anytime.
Conclusion
A vanilla mug cake is the ultimate quick dessert: simple, satisfying, and endlessly customizable. With just a handful of pantry staples and a microwave, you can create a fluffy, sweet treat that feels like a hug in a mug. From the essential recipe to fun variations, tips for success, and even healthier swaps, this guide has shown you everything you need to master the art of the mug cake.
So the next time a dessert craving hits, skip the complicated recipes and reach for a mug. In just minutes, you’ll have a warm, homemade vanilla cake ready to enjoy—no oven, no stress, just pure comfort.