Vanilla Muffin Recipe: There’s something incredibly comforting about a warm vanilla muffin fresh out of the oven. It’s simple, sweet, and timeless. Unlike fancy desserts loaded with layers and frosting, vanilla muffins rely on pure flavor and perfect texture. They don’t try too hard — and maybe that’s exactly why we love them.
Think about it. Whether it’s breakfast on a rushed Monday morning, a lunchbox surprise, or a cozy afternoon snack with tea, vanilla muffins fit effortlessly into any moment. They’re like that reliable friend who always shows up. No drama. Just comfort.
In this professional guide, you’ll learn everything from the essential ingredients to expert-level baking tips. We’ll walk through each step carefully, so even if it’s your first time baking, you’ll feel confident. By the end, you’ll not only know how to bake vanilla muffins — you’ll understand why each step matters.
Ready to turn your kitchen into a bakery? Let’s begin.
What Makes This Vanilla Muffin Recipe So Special?
You might be wondering, “Aren’t all vanilla muffins the same?” Not quite. The difference between an average muffin and an exceptional one often comes down to technique and balance.
This recipe focuses on three key principles: moisture retention, flavor enhancement, and texture perfection. Many muffin recipes end up too dry, too dense, or overly sweet. Here, we avoid those pitfalls with precise ingredient ratios and smart mixing methods.
First, moisture. The combination of milk and oil (or butter) ensures a soft crumb that stays tender even the next day. Oil adds lasting moisture, while butter provides richness. It’s like combining comfort with luxury in every bite.
Second, flavor depth. Vanilla isn’t just about adding extract and calling it a day. The quality of your vanilla matters. Pure vanilla extract creates warmth and complexity that artificial flavors simply can’t replicate. A small pinch of salt enhances sweetness and balances the profile beautifully.
Third, texture. Overmixing is the enemy of fluffy muffins. Stirring gently keeps the gluten from overdeveloping, resulting in a light and airy structure.
This recipe has been carefully structured to help you avoid common baking mistakes. It’s beginner-friendly yet professional enough to impress guests. Whether you’re baking for your family or preparing treats for a gathering, these vanilla muffins will deliver consistent, bakery-quality results every time.
And trust me — once you make them from scratch, store-bought muffins won’t taste the same again.
Ingredients You’ll Need
Before diving into the baking process, let’s talk ingredients. The beauty of vanilla muffins lies in their simplicity. You probably already have most of these items in your kitchen.
Dry Ingredients
- 2 cups all-purpose flour
- 1 cup granulated sugar
- 2 teaspoons baking powder
- ½ teaspoon salt
Wet Ingredients
- 2 large eggs
- 1 cup whole milk
- ½ cup vegetable oil (or melted butter)
- 2 teaspoons pure vanilla extract
Optional Add-Ins for Extra Flavor
- ½ teaspoon vanilla bean paste
- ¼ cup sour cream or yogurt (for extra moisture)
- A sprinkle of coarse sugar for topping
Each ingredient plays a critical role. Flour forms the structure. Sugar sweetens and helps create that golden top. Baking powder gives lift. Eggs bind everything together. Milk adds tenderness. Oil or butter contributes richness.
Quality matters more than quantity here. Use fresh baking powder — expired leavening agents lead to flat muffins. Choose pure vanilla extract instead of imitation for a deeper flavor. Even small upgrades can transform your results dramatically.
When you measure ingredients, accuracy is key. Spoon flour into your measuring cup and level it off rather than scooping directly from the bag. That simple habit can prevent dense muffins caused by excess flour.
Now that your ingredients are ready, let’s talk about tools.
Kitchen Tools Required for Perfect Muffins
You don’t need a commercial kitchen setup to bake perfect vanilla muffins. In fact, the magic happens with basic tools you likely already own. But using the right equipment can make the process smoother and the results more consistent.
Here’s what you’ll need:
- Mixing bowls (one large, one medium)
- Measuring cups and spoons
- Whisk
- Rubber spatula
- Muffin tin (12-cup standard size)
- Paper liners or non-stick spray
- Cooling rack
Why does this matter? Because preparation prevents problems. For example, using a proper muffin tin ensures even heat distribution. Cheap or thin pans may cause uneven browning.
A whisk helps incorporate air into wet ingredients, giving your muffins a lighter texture. A rubber spatula is ideal for folding batter gently without overmixing. Remember, muffins aren’t cakes — they don’t require aggressive beating.
Paper liners make cleanup easier and keep muffins from sticking. If you skip liners, grease your pan thoroughly. There’s nothing more frustrating than beautifully baked muffins that refuse to come out of the tin.
Finally, a cooling rack allows air to circulate underneath the muffins. Leaving them in the pan too long can trap steam and create soggy bottoms.
Simple tools. Smart techniques. Big difference.
Understanding the Role of Each Ingredient
Baking isn’t just mixing and hoping for the best. It’s chemistry. When you understand how ingredients interact, you gain control over the final result.
Why Flour Matters
Flour provides structure. It contains proteins that form gluten when mixed with liquid. Too much mixing strengthens gluten, making muffins tough instead of tender. That’s why gentle stirring is crucial.
The Science Behind Baking Powder
Baking powder is your rising agent. It releases carbon dioxide when combined with liquid and heat, creating air pockets that make muffins fluffy. If your baking powder is old, those air bubbles won’t form properly.
Choosing the Right Vanilla Extract
Vanilla is the star flavor. Pure vanilla extract contains natural compounds that deliver warmth and depth. Artificial vanilla may taste sharp or overly sweet. For bakery-quality results, always go pure.
Understanding these fundamentals transforms you from someone following a recipe into someone mastering it.
Step-by-Step Guide to Making Vanilla Muffins
Now comes the exciting part — baking. Follow these steps carefully for perfect results.
Step 1: Preheat and Prepare
Preheat your oven to 375°F (190°C). Temperature consistency is critical. An underheated oven can ruin texture before you even begin.
Line your muffin tin with paper liners or grease it lightly. Preparation ensures smooth baking later.
Step 2: Mixing the Dry Ingredients
In a large bowl, whisk together flour, sugar, baking powder, and salt. This evenly distributes the leavening agent, preventing uneven rising.
Whisking also aerates the flour slightly, contributing to a lighter texture.
Step 3: Combining the Wet Ingredients
In a separate bowl, whisk eggs, milk, oil (or butter), and vanilla extract until smooth. Make sure eggs are at room temperature for better blending.
This step builds the flavor base of your muffins.
Step 4: Bringing It All Together
Pour wet ingredients into the dry mixture. Gently fold using a spatula. Stop mixing as soon as the flour disappears. Small lumps are perfectly fine.
Overmixing leads to dense muffins — resist the urge.
Step 5: Filling the Muffin Cups
Fill each liner about ¾ full. This gives room for rising without overflow.
Optional: Sprinkle coarse sugar on top for a bakery-style finish.
Step 6: Baking to Golden Perfection
Bake for 18–22 minutes. Muffins are done when a toothpick inserted in the center comes out clean.
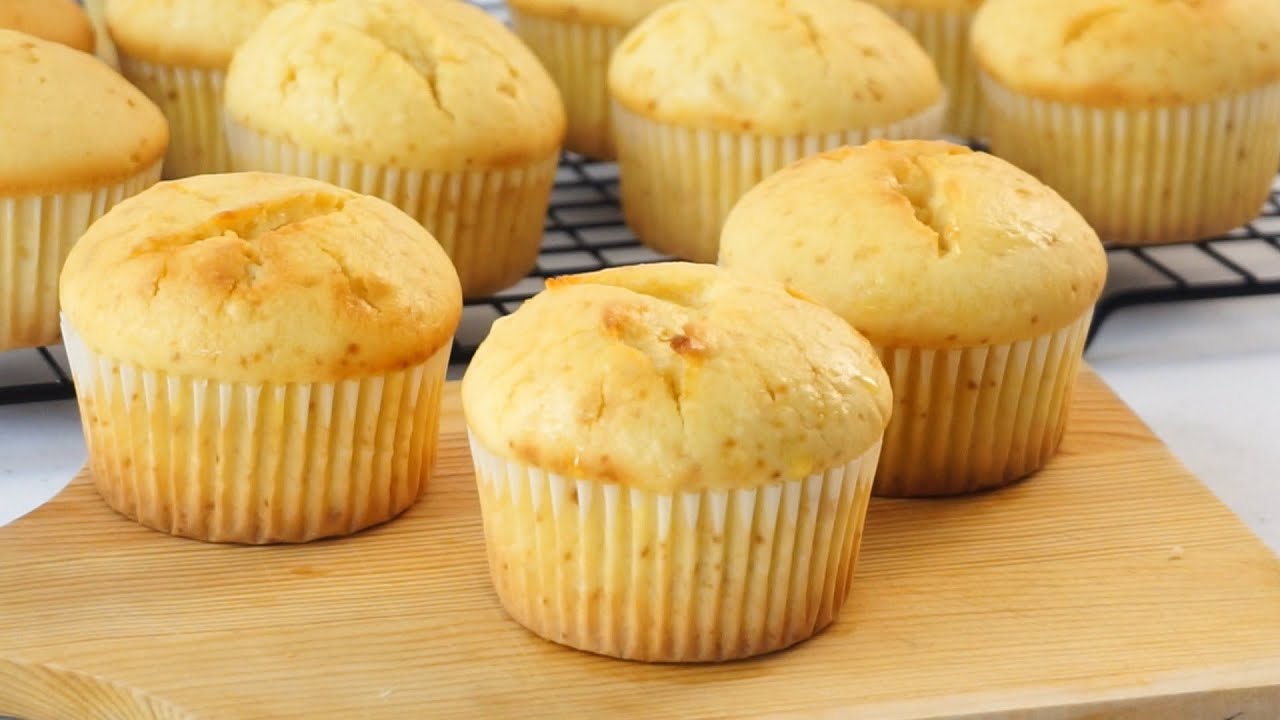
The tops should be lightly golden and spring back when touched.
Step 7: Cooling and Serving
Let muffins cool in the pan for 5 minutes, then transfer to a cooling rack. Serve warm or at room temperature.
And just like that — you’ve created homemade vanilla muffins from scratch.
Pro Tips for Soft and Moist Vanilla Muffins
If you’ve ever baked muffins that looked perfect on the outside but turned out dry inside, you’re not alone. The good news? Moist, fluffy vanilla muffins aren’t about luck — they’re about smart technique. Let’s talk about the small details that make a big difference.
First, don’t overmix the batter. This is probably the most important rule in muffin baking. When you overmix, you develop too much gluten, which makes muffins dense and chewy instead of soft and tender. Stir just until the dry ingredients disappear. A few lumps are completely fine. In fact, they’re a good sign.
Second, measure flour correctly. Scooping flour directly from the bag compacts it, leading to excess flour in your batter. Instead, spoon the flour into your measuring cup and level it with a knife. This simple habit keeps your muffins light.
Another secret? Room-temperature ingredients. Eggs and milk blend more smoothly when they’re not cold. This helps create a uniform batter and better texture.
If you want bakery-style moisture that lasts for days, add a tablespoon or two of sour cream or plain yogurt. It boosts richness without making the muffins heavy.
Lastly, avoid overbaking. Even two extra minutes can dry them out. Start checking at the 18-minute mark. When a toothpick comes out clean or with a few moist crumbs, they’re ready.
Moist muffins aren’t magic — they’re method.
Common Mistakes to Avoid
Baking vanilla muffins is simple, but a few common mistakes can ruin the result. Let’s break them down so you never repeat them.
One major mistake is using expired baking powder. If your muffins don’t rise properly and feel flat or dense, this could be the reason. Baking powder loses strength over time, so always check the expiration date.
Another issue is overfilling the muffin cups. It might be tempting to pour the batter to the top, but that leads to overflow and uneven baking. Stick to filling each cup about ¾ full for a perfect dome shape.
Skipping oven preheating is also a problem. Muffins rely on immediate heat to activate the baking powder. Putting them in a cold oven results in poor rise and uneven texture.
Opening the oven door too early can cause sinking. Resist checking on them during the first 15 minutes. Temperature fluctuations affect structure.
And here’s a subtle one — packing the flour. As mentioned earlier, too much flour equals dry muffins. Always measure carefully.
Avoid these mistakes, and you’ll consistently bake soft, golden vanilla muffins that taste professional.
How to Store Vanilla Muffins Properly
So you’ve baked a beautiful batch of vanilla muffins. Now what? Proper storage keeps them fresh and flavorful for days.
If you plan to eat them within 2–3 days, store them in an airtight container at room temperature. Place a paper towel at the bottom of the container and another on top of the muffins. This absorbs excess moisture and prevents sogginess.
Avoid refrigerating unless necessary. Refrigerators tend to dry baked goods quickly. Room temperature is usually best for short-term storage.
For slightly longer freshness, wrap each muffin individually in plastic wrap before placing them in a container. This locks in moisture.
If your kitchen is particularly warm or humid, you can refrigerate them — but warm them slightly before serving to restore softness.
Here’s a quick storage guide:
| Storage Method | Duration | Notes |
|---|---|---|
| Room Temperature | 2–3 days | Store in airtight container |
| Refrigerator | Up to 5 days | May slightly dry texture |
| Freezer | Up to 3 months | Best for long-term storage |
Proper storage ensures your muffins taste just as good tomorrow as they did today.
Freezing and Reheating Tips
Want to bake ahead? Vanilla muffins freeze beautifully, making them perfect for meal prep or busy weeks.
To freeze, allow muffins to cool completely. Warm muffins create condensation, which leads to freezer burn. Once cooled, wrap each muffin tightly in plastic wrap, then place them in a freezer-safe bag or airtight container.
Label with the date — frozen muffins are best within three months.
When you’re ready to enjoy them, you have options:
- Room Temperature Thawing: Leave wrapped muffins out for 1–2 hours.
- Microwave Method: Heat for 20–30 seconds for a warm, soft texture.
- Oven Reheat: Bake at 300°F (150°C) for about 8–10 minutes.
For extra freshness, brush the tops lightly with melted butter before reheating. It restores moisture and enhances flavor.
Freezing doesn’t compromise taste when done correctly. In fact, having homemade muffins ready anytime feels like a secret baking superpower.
Creative Variations You Can Try
Once you master the classic vanilla muffin recipe, the fun really begins. Vanilla is like a blank canvas — simple, versatile, and ready for creativity.
Want to add texture? Fold in:
- Chocolate chips
- Blueberries
- Chopped nuts
- Dried cranberries
For a richer twist, replace part of the milk with buttermilk. It adds slight tanginess and extra tenderness.
You can also experiment with toppings. Try a crumb streusel topping made from butter, flour, and sugar for a bakery-style finish. Or drizzle a simple vanilla glaze over cooled muffins for added sweetness.
Looking for something seasonal? Add cinnamon and nutmeg for a warm autumn flavor. Mix in lemon zest for a bright spring touch.
Even simple adjustments — like using brown sugar instead of white — create deeper caramel notes.
The base recipe stays the same, but small tweaks transform the experience. That’s the beauty of vanilla. It adapts to your mood, your season, and your creativity.
Nutritional Information Overview
Understanding what you’re eating matters, especially if you’re mindful of your daily intake. While vanilla muffins are a treat, they can fit into a balanced diet when enjoyed in moderation.
Here’s an approximate breakdown per standard muffin:
| Nutrient | Amount |
|---|---|
| Calories | 220–250 kcal |
| Carbohydrates | 30–35g |
| Protein | 4–5g |
| Fat | 9–11g |
| Sugar | 14–18g |
Keep in mind that variations and add-ins will change these numbers.
To make them slightly healthier, you can:
- Substitute half the flour with whole wheat flour
- Reduce sugar slightly
- Use Greek yogurt instead of some oil
- Add fresh fruit for natural sweetness
Balance is key. A warm vanilla muffin paired with fruit and coffee can be part of a wholesome breakfast.
Serving Suggestions for Any Occasion
Vanilla muffins may be simple, but they’re surprisingly versatile when it comes to serving.
For breakfast, slice one in half and spread a little butter or fruit jam. Pair it with coffee or tea for a comforting start to your day.
Hosting brunch? Arrange muffins in a basket lined with a cloth napkin for a rustic presentation. Dust lightly with powdered sugar for elegance.
For dessert, warm a muffin slightly and serve with a scoop of vanilla ice cream and fresh berries. It transforms into something restaurant-worthy.
Packing school or office lunches? These muffins travel well and stay soft for hours.
You can even turn them into mini celebration treats by adding frosting and sprinkles for birthdays.
Simple doesn’t mean boring. With the right pairing, vanilla muffins shine in every setting.
Why Homemade Vanilla Muffins Are Better Than Store-Bought
Store-bought muffins may look appealing, but homemade always wins in flavor and quality.
Commercial muffins often contain preservatives to extend shelf life. Homemade versions use fresh ingredients without unnecessary additives.
Another difference? Texture. Many store muffins are oversized and overly sweet. Homemade muffins strike a better balance — light, fluffy, and just sweet enough.
There’s also something deeply satisfying about baking from scratch. The smell filling your kitchen, the anticipation as they rise, the first warm bite — it’s an experience, not just a snack.
And let’s be honest. When someone asks, “Did you make these?” and you say yes, it feels pretty great.
Homemade vanilla muffins aren’t just food. They’re comfort, creativity, and care baked into every bite.
FAQs about Vanilla Muffin Recipe
1. Can I use butter instead of oil in vanilla muffins?
Yes, melted butter can replace oil for a richer flavor. However, oil typically makes muffins slightly more moist and soft.
2. Why did my muffins turn out dense?
Overmixing the batter or using too much flour are common causes. Mix gently and measure accurately.
3. Can I make this recipe dairy-free?
Absolutely. Substitute milk with almond, soy, or oat milk, and use oil instead of butter.
4. How do I know when muffins are fully baked?
Insert a toothpick into the center. If it comes out clean or with a few crumbs, they’re done.
5. Can I double this vanilla muffin recipe?
Yes, simply double all ingredients evenly. Ensure you don’t overcrowd the oven for even baking.
Conclusion
From understanding ingredient roles to mastering mixing techniques, every step contributes to the final result. Avoid common mistakes, follow proper storage methods, and experiment with creative variations to make the recipe truly your own.
Whether you’re baking for breakfast, brunch, or an afternoon treat, this step-by-step vanilla muffin guide ensures consistent, delicious results every time.
Now it’s your turn. Preheat that oven and let the aroma of fresh vanilla fill your home.


