Vanilla Latte Recipe: There’s something magical about a vanilla latte. It’s smooth, creamy, slightly sweet, and comforting in a way that feels like a warm hug in a mug. If you’ve ever stood in line at a café, inhaling that rich espresso aroma while waiting for your name to be called, chances are you’ve either ordered a vanilla latte—or at least thought about it.
In this guide, you’ll learn how to make a professional-quality vanilla latte at home—step by step. Whether you’re a coffee beginner or someone looking to upgrade your morning routine, this article will walk you through every detail. By the end, you won’t just be making coffee. You’ll be crafting an experience.
Let’s get started.
The Origin and Evolution of the Vanilla Latte
Coffee has been around for centuries, but flavored lattes? That’s a more modern love story.
The traditional Italian latte—short for “caffè latte”—simply meant coffee with milk. It was straightforward, no syrups, no extra sweetness. But as coffee culture expanded globally, especially in the United States during the late 20th century, experimentation began. Coffee shops started adding flavored syrups to attract customers who wanted something less bitter and more indulgent.
Vanilla quickly became the star of the show.
Why vanilla? Because it’s universally loved. It enhances sweetness without being overwhelming. Unlike chocolate or caramel, vanilla doesn’t compete with espresso—it complements it. It smooths out sharp notes and enhances the natural sweetness already present in good-quality coffee beans.
By the 1990s and early 2000s, the vanilla latte became a coffee shop staple. It was approachable, Instagram-worthy, and customizable. Hot or iced. Whole milk or almond milk. Extra shot or sugar-free syrup. The possibilities were endless.
Today, the vanilla latte represents more than just a drink. It symbolizes comfort, productivity, and even a little daily luxury. And the best part? You don’t need a barista badge to make one. With the right knowledge and technique, you can create a café-style vanilla latte right in your kitchen.
Why Make a Vanilla Latte at Home?
Let’s be honest. Coffee shop drinks add up fast. Spending $5 or $6 daily on a vanilla latte might not seem like much at first, but multiply that by 30 days and suddenly you’re looking at a small monthly bill that could rival your utility payments.
Making a vanilla latte at home isn’t just cost-effective—it’s empowering.
First, you control the ingredients. Want less sugar? Adjust the syrup. Prefer oat milk over dairy? Swap it in. Love strong coffee? Add a double shot. When you make it yourself, you’re the barista.
Second, it’s healthier. Many commercial lattes contain high amounts of added sugar. By preparing your own, you can choose natural vanilla syrup, reduce sweeteners, or even make a sugar-free version. Small adjustments can significantly reduce calorie intake without sacrificing taste.
Third, it’s convenient. No waiting in line. No misheard names. No rushed mornings. You wake up, head to the kitchen, and within minutes you’re holding a perfectly crafted latte.
And let’s not ignore the satisfaction factor. There’s something incredibly rewarding about pouring steamed milk over espresso and watching it blend into that beautiful caramel color. It feels professional. It feels intentional.
In short, making a vanilla latte at home saves money, improves health control, and enhances your daily routine. Once you master the process, you might never look at your local coffee shop the same way again.
Ingredients You’ll Need for the Perfect Vanilla Latte
Great coffee starts with great ingredients. The beauty of a vanilla latte is that it requires only a handful of components—but each one matters.
Here’s what you’ll need:
Core Ingredients
- 1–2 shots of espresso (or ½ cup strong brewed coffee)
- 1 cup milk (whole, skim, or plant-based)
- 1–2 tablespoons vanilla syrup
- Optional: whipped cream for topping
That’s it. Four simple ingredients.
But let’s break them down.
The espresso is the foundation. It provides that bold, slightly bitter backbone that balances the sweetness of vanilla. Without strong coffee, your latte will taste flat and overly sweet.
Next comes the milk. Milk adds creaminess and body. It transforms sharp espresso into a smooth, comforting beverage. The type of milk you choose will affect both texture and flavor.
Then there’s the vanilla syrup—the star flavor. This ingredient determines how sweet and aromatic your latte will be. High-quality syrup makes a noticeable difference.
Optional toppings like whipped cream or a light dusting of cinnamon can elevate the drink visually and taste-wise. They’re not required, but they add a café-style touch.
Quality matters here. Freshly brewed espresso, good milk, and authentic vanilla flavor will produce a latte that tastes professional, not homemade in a rushed way.
In the next sections, we’ll dive deeper into choosing the best beans, milk, and syrup to ensure your vanilla latte tastes exceptional every single time.
Choosing the Right Coffee Beans
If espresso is the backbone of your vanilla latte, then coffee beans are the DNA. Choose the wrong beans, and even the best milk and vanilla syrup won’t save your drink. Choose the right ones, and suddenly your homemade latte tastes like it came straight from a specialty café.
So what should you look for?
First, go for Arabica beans if possible. Arabica beans are smoother, more aromatic, and naturally sweeter than Robusta. Since a vanilla latte already includes sweetness from syrup, Arabica blends beautifully without creating a harsh or overly bitter finish. Robusta, while stronger in caffeine, can taste sharp and earthy—sometimes overpowering the vanilla notes.
Next, consider the roast level. For vanilla lattes, a medium to medium-dark roast works best. Here’s why:
- Light roast: Too acidic and bright. It may clash with the sweetness of vanilla.
- Medium roast: Balanced, smooth, slightly sweet—perfect for flavored drinks.
- Dark roast: Bold and smoky, excellent if you love strong coffee flavor.
Freshness is critical. Always check the roast date. Beans are best within 2–4 weeks of roasting. Stale beans produce flat espresso, and flat espresso equals a dull latte.
If possible, grind your beans fresh before brewing. Pre-ground coffee loses aroma quickly. Think of it like spices—freshly ground always tastes better.
Pro tip: Look for tasting notes like chocolate, caramel, nuts, or brown sugar. These natural flavor hints pair beautifully with vanilla and create depth without extra sweetness.
Your vanilla latte is only as good as your coffee base. Start strong, and everything else will fall into place.
Selecting the Best Vanilla Syrup
Vanilla may seem simple, but not all vanilla syrups are created equal. Some taste warm and natural. Others taste artificial and overly sweet. The difference? Quality ingredients.
When choosing vanilla syrup, you have two main options:
Store-Bought Vanilla Syrup
This is the easiest option. Look for brands that use:
- Real vanilla extract
- Natural flavors
- Cane sugar instead of high-fructose corn syrup
High-quality syrups create a smooth, balanced sweetness without leaving a chemical aftertaste. Popular café brands are convenient and consistent.
Homemade Vanilla Syrup
If you want full control over flavor and sweetness, making your own syrup is surprisingly simple. All you need is:
- 1 cup water
- 1 cup sugar
- 1 tablespoon pure vanilla extract
Simmer water and sugar until dissolved, remove from heat, and stir in vanilla extract. Let it cool, and store it in a sealed bottle in the refrigerator for up to two weeks.
The advantage? You control the sugar level and can use real vanilla beans for a richer aroma.
Now let’s talk sweetness. A typical vanilla latte uses 1 to 2 tablespoons of syrup. Start small—you can always add more. Too much syrup will overpower the espresso and turn your drink into a dessert rather than a balanced coffee.
Good vanilla syrup doesn’t scream for attention. It gently enhances the coffee’s natural notes, like a background melody supporting the lead singer.
The Importance of Milk in a Vanilla Latte
Milk isn’t just filler—it’s the element that transforms espresso into a latte. Without milk, you simply have flavored coffee. With properly steamed milk, you create texture, body, and that luxurious café feel.
The type of milk you choose makes a noticeable difference.
Whole Milk
- Creamiest texture
- Best for microfoam
- Rich, balanced taste
Whole milk produces thick, velvety foam and gives your latte a professional texture. If you want that authentic coffee shop experience, this is your best choice.
Skim Milk
- Lighter texture
- Higher foam volume
- Lower calorie
Skim milk creates more foam but less creaminess. It’s ideal if you’re watching calories but still want froth.
Plant-Based Alternatives
Dairy-free options are increasingly popular. Here’s how they compare:
| Milk Type | Frothing Ability | Flavor Profile |
|---|---|---|
| Almond | Moderate | Nutty, light |
| Oat | Excellent | Creamy, slightly sweet |
| Soy | Good | Neutral, smooth |
| Coconut | Moderate | Tropical hint |
Oat milk is often the favorite for lattes because it froths beautifully and has natural sweetness.
Temperature also matters. Milk should be heated to 150–155°F (65–68°C). Too hot, and it scorches. Scorched milk tastes flat and slightly burnt.
Properly steamed milk should feel silky—not bubbly like soap. Think of wet paint texture. Smooth, glossy, and cohesive.
Milk is what turns your vanilla latte from “just coffee” into something indulgent and comforting.
Essential Equipment for Making a Vanilla Latte
You don’t need a full café setup, but having the right tools makes the process smoother and more professional.
Espresso Machine
This is the gold standard. It produces authentic espresso with crema—the golden foam layer on top. If you’re serious about coffee, investing in one is worth it.
Milk Frother
A steam wand is ideal, but handheld frothers also work well. You can even use a French press to create foam—just pump the plunger quickly after heating the milk.
Alternative Brewing Methods
No espresso machine? No problem. Try:
- Moka pot
- AeroPress
- Strong French press coffee
The key is brewing concentrated coffee. A weak brew will make your latte taste watered down.
Thermometer (Optional but Helpful)
If you’re new to steaming milk, a thermometer helps avoid overheating.
Minimal equipment, maximum results. Even with basic kitchen tools, you can create a café-quality drink.
Step-by-Step Guide to Making a Vanilla Latte
Now comes the exciting part—actually making your vanilla latte.
Step 1: Brew the Espresso
Brew 1–2 shots of fresh espresso. If using strong brewed coffee, prepare about ½ cup. Pour it into your mug immediately to preserve aroma and crema.
Step 2: Add Vanilla Syrup
Add 1–2 tablespoons of vanilla syrup directly into the hot espresso. Stir gently to combine. This ensures even sweetness throughout the drink.
Step 3: Heat and Froth the Milk
Heat 1 cup of milk to about 150°F (65°C). Froth until you achieve smooth, silky microfoam. Tap the pitcher lightly on the counter to remove large bubbles.
Step 4: Pour the Milk
Slowly pour the steamed milk into the espresso mixture. Hold back the foam with a spoon initially, then spoon a thin layer of foam on top.
Step 5: Add Finishing Touches
Optional:
- Add whipped cream
- Sprinkle cinnamon or cocoa powder
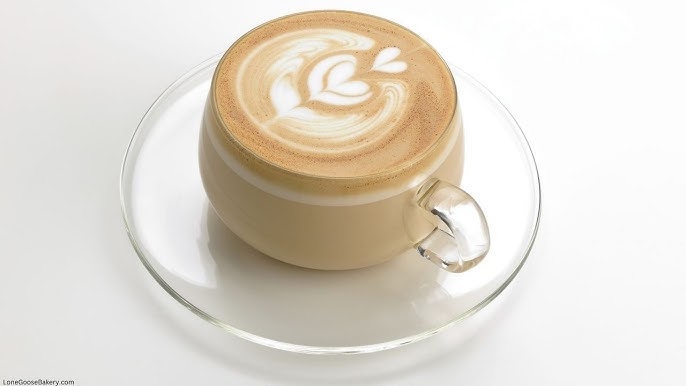
- Try simple latte art
And there you have it—a professional vanilla latte made right at home.
Pro Tips for a Café-Style Vanilla Latte
Want to take your latte from good to exceptional? Focus on technique.
- Use freshly ground beans.
- Steam milk slowly for better texture.
- Pour steadily to blend flavors evenly.
- Warm your mug before pouring to maintain temperature.
Creating microfoam is key. Inject air into milk briefly, then submerge the steam wand fully to create a whirlpool effect. This breaks down bubbles into fine, silky foam.
Small adjustments create big improvements. Precision matters.
Common Mistakes to Avoid
Even simple recipes can go wrong. Here are common pitfalls:
- Overheating milk (burnt taste)
- Using weak coffee
- Adding too much syrup
- Not mixing syrup properly
- Skipping fresh beans
Balance is everything. A good vanilla latte should taste smooth, slightly sweet, and coffee-forward—not sugary or bitter.
How to Make an Iced Vanilla Latte
Craving something cold? An iced vanilla latte is just as simple.
Ingredients:
- 1–2 shots espresso
- 1–2 tablespoons vanilla syrup
- 1 cup cold milk
- Ice cubes
Steps:
- Fill a tall glass with ice.
- Add vanilla syrup.
- Pour espresso over the syrup.
- Add cold milk and stir.
Layering creates a beautiful gradient effect before stirring. Refreshing, smooth, and perfect for warm days.
Nutritional Information and Calorie Breakdown
Here’s an approximate breakdown for a standard 12-ounce vanilla latte made with whole milk and 1 tablespoon syrup:
| Component | Calories |
|---|---|
| Espresso | 5 |
| Whole Milk (1 cup) | 150 |
| Vanilla Syrup (1 tbsp) | 50 |
| Total | 205 |
To reduce calories:
- Use skim or almond milk
- Choose sugar-free syrup
- Reduce syrup quantity
Small swaps can cut calories nearly in half.
Flavor Variations You Can Try
Once you master the basic vanilla latte, experiment.
- Sugar-Free Vanilla Latte – Use sugar-free syrup.
- Caramel Vanilla Latte – Add caramel drizzle.
- Vanilla Cinnamon Latte – Sprinkle cinnamon into milk before frothing.
- Honey Vanilla Latte – Replace syrup with honey and vanilla extract.
- Vanilla Almond Latte – Use almond milk for a nutty twist.
Creativity keeps your coffee routine exciting.
Storing and Reheating Tips
A vanilla latte tastes best fresh, but if needed, you can store it in the refrigerator for up to 24 hours.
Reheat gently on the stove—not in the microwave if possible. Avoid boiling, as it ruins texture.
However, fresh is always best. Coffee loses aroma quickly.
FAQs about Vanilla Latte Recipe
1. Can I make a vanilla latte without an espresso machine?
Yes, you can. A Moka pot or AeroPress works well as an espresso alternative. If neither is available, use very strong brewed coffee to achieve a similar flavor depth.
2. What is the best milk for frothing?
Whole milk produces the creamiest and most stable foam due to its fat content. For dairy-free options, oat milk froths the best, followed by soy milk.
3. How much vanilla syrup should I use?
Start with 1 tablespoon of vanilla syrup per cup and adjust based on your sweetness preference. You can always add more, but it’s best to begin lightly.
4. Can I make a vanilla latte sugar-free?
Absolutely. Use sugar-free vanilla syrup or natural sweeteners like stevia or monk fruit to keep the flavor without added sugar.
5. How do I make thicker foam at home?
Heat your milk until warm (not boiling), then froth using a handheld frother or a French press. Pumping the plunger rapidly creates thicker, café-style foam.
These tips will help you enjoy a smooth, flavorful vanilla latte at home with ease.
Conclusion
Making a professional vanilla latte at home isn’t complicated—it’s intentional. With quality ingredients, proper technique, and attention to balance, you can create a smooth, creamy, café-style drink anytime you want.
From selecting the right beans to mastering milk frothing, every step plays a role. Once you understand the fundamentals, customization becomes effortless. Whether you prefer it hot, iced, dairy-free, or extra strong, your perfect vanilla latte is just minutes away.
Coffee isn’t just a beverage. It’s a ritual. And now, you know how to make that ritual exceptional.