Vanilla Bean Paste Recipe: If you’ve ever baked with vanilla bean paste, you know there’s nothing quite like the deep, aromatic flavor it brings to desserts.
But store-bought vanilla bean paste? It’s pricey. That’s why learning how to make your own can save money and enhance your kitchen skills.
This step-by-step guide walks you through making rich, fragrant vanilla bean paste at home. Ready to bottle up that magic? Let’s dive in.
What is Vanilla Bean Paste?
Vanilla bean paste is a thick, syrupy blend that combines the essence of vanilla extract with actual vanilla bean seeds. Unlike vanilla extract, which is liquid and alcohol-based, vanilla bean paste offers a stronger flavor with visible flecks of real vanilla seeds. It’s the perfect choice when you want your baked goods to scream real vanilla — not just taste like it.
Imagine biting into a cupcake with tiny black specks throughout the frosting. That’s not just a visual treat; it’s a sign of real vanilla. It adds not just flavor, but a touch of luxury to any recipe. Most commercial brands use sugar, corn syrup, or glycerin as a base. But when you make it at home, you control what goes in. No artificial flavors. No fillers.
It’s ideal for recipes where you want a thick texture—like custards, ice creams, or frostings—and don’t want the added liquid that comes with extracts.
Why Make Vanilla Bean Paste at Home?
So, why go the DIY route when you can just grab a jar off the shelf?
First, let’s talk cost. A small jar of vanilla bean paste can set you back $15–$30. Meanwhile, with a few vanilla beans, some glycerin or simple syrup, and a bit of time, you can make double or triple the amount for a fraction of the cost.
Then there’s purity. Homemade vanilla paste doesn’t include preservatives, artificial colors, or sweeteners you can’t pronounce. It’s clean, real, and customizable. Want it sweeter? Add more syrup. Want it stronger? Add more beans. You’re in control.
Lastly, there’s the sheer satisfaction. There’s something undeniably rewarding about making a staple ingredient from scratch. It elevates your cooking game and makes for great DIY gift jars around the holidays.
Ingredients You’ll Need
Core Ingredients
To make a quality vanilla bean paste at home, start with these simple but essential ingredients:
- Vanilla Beans (6–10 pods) – These are the heart of the recipe. Madagascar Bourbon, Tahitian, or Mexican vanilla beans are the most popular varieties. Grade B is often preferred for paste because it’s drier, more concentrated, and less expensive.
- Food-grade Vegetable Glycerin (1 cup) – Acts as a preservative and thickener, and it’s alcohol-free. If you prefer, you can use corn syrup, simple syrup, or even honey as an alternative.
- Water (if making a simple syrup) – For thinning if you choose a sugar-based base.
- Granulated Sugar (optional) – To add sweetness if you want a syrup-style paste.
This is it—nothing complicated or overly expensive. And the best part? You can tweak quantities to make more or less, depending on your needs.
Optional Add-ins for Flavor Depth
Want to give your vanilla bean paste an extra punch? Consider these optional ingredients:
- Vanilla Extract (1–2 tsp) – Adds a bit more depth and alcohol-based sharpness to your paste.
- A pinch of Salt – Enhances the overall flavor profile.
- Lemon Zest or Orange Zest – Adds a citrusy brightness that pairs beautifully with vanilla.
Optional ingredients can elevate your paste from great to unforgettable, but they’re not mandatory. Stick with the basics if you prefer a traditional flavor.
Tools and Equipment Required
Making vanilla bean paste doesn’t require a full-on lab. Just a few kitchen staples will do:
- Sharp paring knife – For slicing and scraping the beans.
- Cutting board – To avoid mess while working with sticky vanilla pods.
- Small saucepan – For simmering your ingredients.
- High-speed blender or food processor – Essential for a smooth, cohesive paste.
- Fine mesh strainer or cheesecloth (optional) – If you prefer a smoother texture without fibrous bits.
- Glass jar or bottle with a tight lid – For storage. A sterilized jar will keep your paste fresh longer.
Got everything ready? Now, let’s roll up our sleeves and start crafting some liquid vanilla gold.
Step-by-Step Guide to Making Vanilla Bean Paste
Step 1: Gather All Ingredients and Tools
You’ll need fresh vanilla beans, vegetable glycerin or corn syrup, a sharp knife, a blender or food processor, and a small saucepan. Have sterilized jars ready for storage.
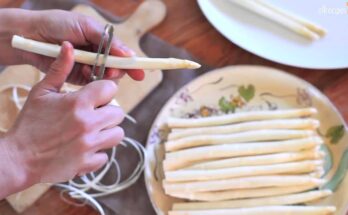
Step 2: Split and Scrape Vanilla Beans
Using a sharp knife, slice each vanilla bean lengthwise and scrape out the tiny seeds inside. These are packed with intense flavor and aroma.
Step 3: Blend with Glycerin or Syrup
Add the seeds and pods to a blender with ½ cup glycerin or syrup for every 4–5 beans. Blend until smooth and slightly thick.
Step 4: Simmer and Infuse
Transfer the mixture to a saucepan. Simmer on low heat for 10–15 minutes, stirring gently to infuse the vanilla flavor fully.
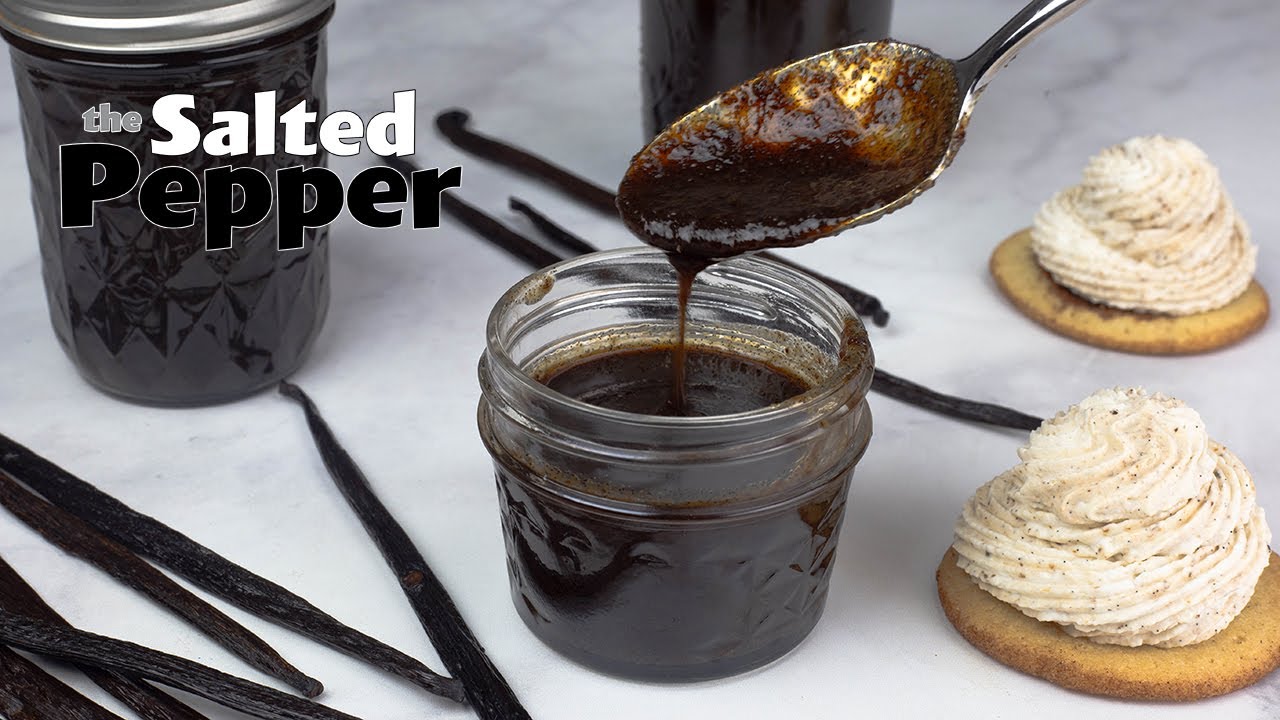
Step 5: Cool and Store Properly
Remove the pods, cool completely, and pour into jars. Store in a cool, dark place—rich, aromatic vanilla bean paste ready for baking perfection!
Tips for Best Results
Choosing the Right Vanilla Beans
Not all vanilla beans are created equal. The variety, grade, and freshness all impact your final paste. Here’s what to consider:
Variety:
- Madagascar Bourbon: Classic, rich, creamy flavor. Great for all-purpose use.
- Tahitian: Floral and fruity notes, ideal for delicate desserts.
- Mexican: Bold, spicy flavor—amazing in chocolate-based recipes.
Grade:
- Grade A: Moist and plump, typically used for baking or infusions.
- Grade B: Drier and more affordable—perfect for paste and extract.
Grade B beans are the top pick for DIY paste due to their concentrated flavor and lower price point. Plus, they blend easily thanks to their dry texture.
Preserving Flavor and Freshness
Want your paste to taste incredible even after months of storage? Follow these preservation tips:
- Use food-grade glycerin or alcohol – These act as natural preservatives and prevent spoilage.
- Keep it airtight – Oxygen is the enemy of freshness. Always use jars with tight-fitting lids.
- Avoid direct sunlight and heat – Both degrade the aromatic compounds in vanilla over time.
- Label your jar – Include the date you made it, so you know how long it’s been sitting.
Also, make a habit of giving your jar a little shake every few weeks. It helps redistribute the beans and maintain a consistent texture.
Storage Instructions
How Long Does Vanilla Paste Last?
Homemade vanilla bean paste, when stored properly, can easily last up to 12 months—sometimes even longer. The key lies in how you handle it and the ingredients you use. If you’re using food-grade glycerin or a sugar-based syrup, both act as natural preservatives, helping extend shelf life.
However, it’s important to note that flavor potency may diminish over time. The first 6 months are typically the “golden period” for maximum aroma and taste.
Here are a few signs your vanilla paste might be past its prime:
- Faded or off smell
- Mold or cloudiness in the jar
- Watery consistency
If your paste still smells richly of vanilla and has no visual signs of spoilage, it’s good to use.
Pro tip: Always use a clean, dry spoon when scooping paste. Water and dirty utensils can introduce bacteria, shortening shelf life drastically.
Best Storage Containers
For preserving the intense flavor of your homemade vanilla paste, not just any container will do. Here’s what works best:
- Dark Glass Jars or Bottles: These protect your paste from UV light, which can degrade its flavor and aroma over time. Amber or cobalt-blue jars are ideal.
- Airtight Lids: Choose jars with tight-fitting lids to prevent air exposure. Flip-top jars with rubber seals are especially effective.
- Labeling: Always label your jar with the date of production. You think you’ll remember—but trust me, six months from now you won’t.
Avoid storing your paste in plastic containers, as they can absorb the oils and affect the flavor. And steer clear of metal lids without a liner—vanilla can react with the metal and alter the taste.
Store the jar in a cool, dry cupboard away from direct sunlight. No need to refrigerate unless you’re in a tropical climate, but make sure it’s always kept in a stable environment.
How to Use Vanilla Bean Paste
Baking Applications
Vanilla bean paste shines in baking. It’s especially prized in recipes where you want the flavor to stand out and the beautiful flecks of real vanilla to be visible.
Use vanilla paste in:
- Cakes and cupcakes
- Frostings and buttercream
- Cookies and shortbread
- Custards and puddings
- Cheesecakes and tarts
A good rule of thumb is to use 1 teaspoon of vanilla paste in place of 1 teaspoon of vanilla extract. But since paste is more concentrated, you might even get away with a little less, depending on your taste preference.
Want to take your vanilla game to the next level? Try using it in:
- French toast batter
- Whipped cream
- Homemade marshmallows
- Pancake or waffle batter
You’ll love the results—those tiny black specks scream quality and taste like a bakery dream.
Using in Beverages and Sauces
Vanilla bean paste isn’t just for baked goods. It’s a powerhouse in beverages and sauces, too.
In drinks:
- Stir a small dollop into your coffee for a homemade vanilla latte
- Add to smoothies for a sweet depth of flavor
- Mix with milk and ice for a creamy vanilla shake
- Blend with cocktails (especially creamy liqueurs)
In sauces:
- Mix into caramel sauce for a luxurious twist
- Swirl into chocolate ganache or fudge
- Add to fruit compotes and berry reductions
Because paste is thick, it disperses evenly into liquids without separating or diluting the drink—unlike extract, which can be hit or miss. Just a little goes a long way, so start with a small amount and adjust to taste.
And here’s a fun bonus: swirl some into your yogurt, oatmeal, or even peanut butter for a flavor-packed breakfast.
Homemade vs Store-Bought Comparison
Cost Analysis
Let’s face it: store-bought vanilla bean paste can cost an arm and a leg—especially if you’re using it frequently. A 4-ounce jar often costs $15 to $30, depending on the brand and quality. For serious bakers or home chefs, that adds up fast.
Now compare that to making your own:
- 10 vanilla beans: ~$20 (Grade B)
- Glycerin or syrup: ~$5
- Sugar (if used): ~$1
That’s $26 total, and you’ll yield about 8–12 ounces of paste. That’s half the price for twice the product—and with full control over quality.
Plus, once you’ve bought the equipment (like jars and a blender), you can keep making batch after batch even more affordably.
Flavor and Texture Differences
Homemade vanilla bean paste has a few distinct advantages over the commercial versions:
| Feature | Homemade Vanilla Paste | Store-Bought Paste |
|---|---|---|
| Flavor | Bold, rich, customizable | Often sweetened or diluted |
| Ingredients | Simple, clean, no additives | May contain stabilizers and preservatives |
| Texture | Slightly chunky with real bean bits | Smooth and thickened uniformly |
| Appearance | Visible seeds and natural color | May include food coloring |
| Aroma | Fresh and fragrant | Sometimes artificial-smelling |
That being said, commercial pastes offer convenience and consistency. But once you taste your homemade batch, you might never go back. It’s like comparing instant coffee to a freshly brewed cup from hand-ground beans. One’s easy, but the other’s unforgettable.
Health Benefits of Real Vanilla
Natural Antioxidants and Nutrients
Vanilla bean paste isn’t just about amazing flavor—it also delivers a surprising boost of nutritional goodness. Real vanilla contains natural antioxidants like vanillin and vanillic acid, which help neutralize free radicals and reduce oxidative stress in the body.
Unlike synthetic vanilla flavorings (usually derived from wood pulp or petrochemicals), real vanilla beans offer small amounts of:
- Calcium – supports bone health
- Magnesium – aids in nerve function and metabolism
- Potassium – helps regulate blood pressure
- B Vitamins – support energy and cell function
While you’re not consuming vanilla paste in massive quantities, every little bit of natural nutrition counts—especially when compared to artificially flavored alternatives.
Vanillin, the primary compound in real vanilla, has even been studied for its anti-inflammatory, antimicrobial, and mood-boosting properties. It’s been shown to help reduce anxiety and improve cognitive function in some animal studies. So your vanilla cupcake might be doing more for your brain than you think!
Clean Label Ingredients
In today’s world of processed foods and mystery labels, making your own vanilla bean paste ensures transparency. You control every ingredient that goes in—no chemicals, no stabilizers, no synthetic colorants.
That means:
- No artificial flavors
- No preservatives
- No high-fructose corn syrup
- No caramel coloring or fillers
It’s ideal for clean-eating lifestyles, gluten-free diets, paleo, Whole30, and even vegan diets (if you use glycerin instead of honey).
With store-bought pastes, you’ll often find hidden ingredients that dilute the quality—like “natural flavors” (which aren’t always so natural). With homemade paste, what you see is what you get. Pure, wholesome vanilla, made by you.
Common Mistakes to Avoid
Overheating the Mixture
One of the biggest rookie mistakes when making vanilla paste? Turning up the heat too high during the infusion or reduction stage.
High temperatures can:
- Burn the vanilla beans, giving a bitter or burnt taste
- Cause the glycerin or syrup to caramelize or separate
- Destroy some of the delicate aroma compounds in the vanilla
Always use low heat, and stir continuously. If it starts to bubble aggressively, pull it off the burner immediately. A gentle simmer is all you need.
Using Old or Dry Vanilla Beans
Vanilla beans don’t last forever—especially if they’re stored improperly. Using dried-out or stale beans can severely impact your paste’s flavor and consistency.
Here’s how to check if your beans are fresh:
- They should be moist, flexible, and glossy
- You should be able to bend them slightly without snapping
- When cut open, they should have sticky, rich seeds inside
If your beans are brittle or smell musty, skip them. Fresh, aromatic beans will give you that luxurious, sweet, complex flavor that makes vanilla paste so special.
Storage tip: Keep your unused vanilla beans in a sealed glass vial or vacuum-sealed pouch. Store in a dark, cool place (not the fridge) for optimal freshness.
Sustainable Vanilla Sourcing
Ethically Harvested Vanilla
Vanilla is one of the most labor-intensive crops in the world. It’s hand-pollinated, hand-harvested, and cured over several months. This makes ethical sourcing extremely important.
When buying your vanilla beans, look for sources that are:
- Fair Trade Certified
- Direct trade with local farmers
- From reputable suppliers who disclose sourcing practices
Supporting ethical vanilla suppliers helps ensure fair wages, safer working conditions, and community reinvestment in vanilla-producing regions like Madagascar, Papua New Guinea, and Mexico.
Buying in bulk from sustainable farms might cost a bit more—but you get higher quality and peace of mind that your dollars support good practices.
Environmental Impact
Wild vanilla vines grow in tropical rainforests and require specific ecological conditions to thrive. Supporting sustainable vanilla farming also helps preserve biodiversity and natural ecosystems.
Many ethical farms use:
- Agroforestry techniques to maintain soil health
- No pesticides or chemical fertilizers
- Rainwater harvesting and renewable energy sources
When you make your own vanilla paste with sustainably sourced beans, you reduce the carbon footprint that comes with mass production, transportation, and packaging waste from commercial brands.
It’s a small choice with big impact—for your kitchen and the planet.
FAQs about Vanilla Bean Paste Recipe
1. Can I use vanilla extract instead of paste?
Yes, you can substitute vanilla extract in most recipes that call for vanilla bean paste. Use a 1:1 ratio. However, vanilla paste adds stronger flavor and those gorgeous black specks you won’t get with extract.
2. How do I know if my vanilla paste has gone bad?
Check for signs like mold, cloudiness, off smells, or a watery consistency. If the aroma has faded or it looks spoiled, it’s best to toss it and make a fresh batch.
3. What’s the difference between Grade A and B vanilla beans?
Grade A beans are moist, plump, and ideal for baking or visual presentation. Grade B beans are drier, more concentrated in flavor, and perfect for making paste or extract. Grade B is also more cost-effective.
4. Can I freeze vanilla bean paste?
Freezing isn’t recommended. It can cause separation and may affect the texture. Instead, store it in a cool, dark cupboard in an airtight jar. When stored properly, it can last up to a year.
5. Is it cheaper to make vanilla paste at home?
Absolutely. You can make twice the amount of paste for half the price of store-bought versions, especially if you buy vanilla beans in bulk or in Grade B quality.
Conclusion
Homemade vanilla bean paste is more than a flavor booster—it’s a rich, aromatic, and meaningful addition to your culinary toolkit. With just a handful of ingredients and a little patience, you can create a powerful, versatile ingredient that enhances everything from cakes to cocktails.
You’ll save money, reduce waste, and enjoy the deep satisfaction of knowing exactly what’s in your jar. Whether you’re baking holiday cookies or stirring up a Sunday pancake batter, your homemade vanilla paste adds that signature touch of quality.
So go ahead—get your beans, fire up that blender, and start crafting your own bottle of vanilla gold. Once you try it, you’ll never want to go back.