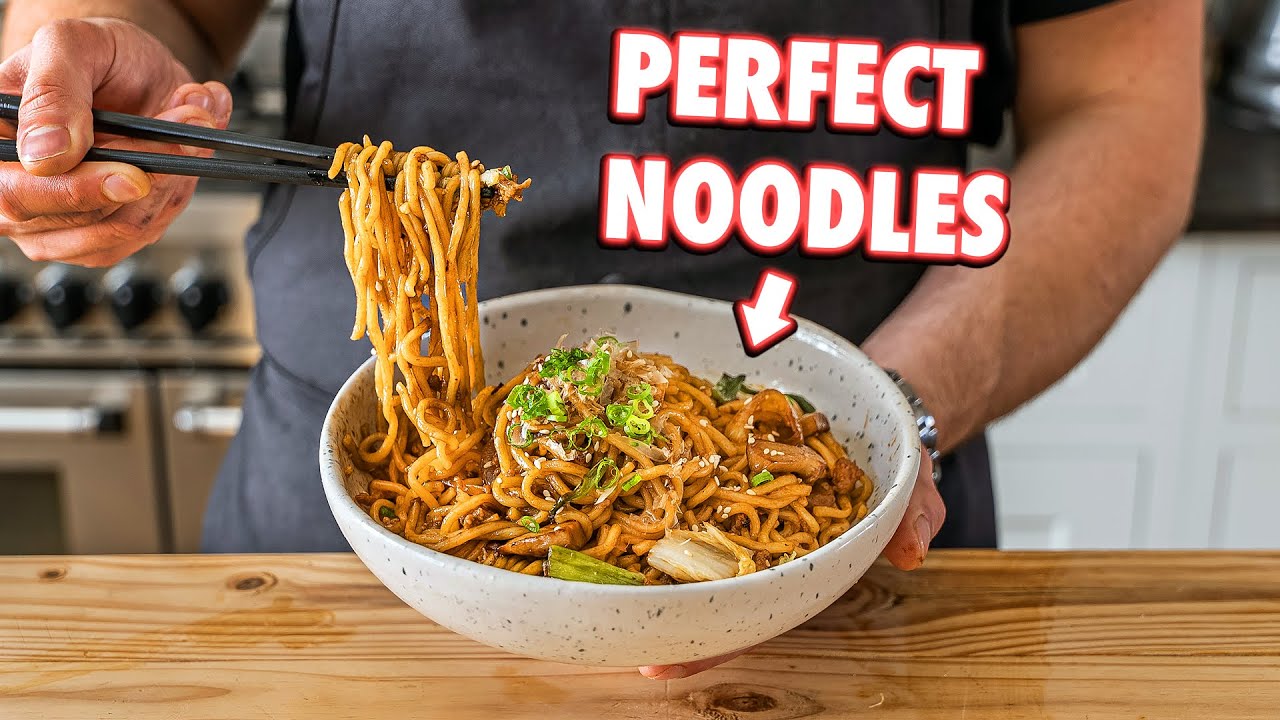
Udon Noodles Recipe: Udon noodles are one of the most comforting, satisfying dishes in Japanese cuisine. Thick, chewy, and slurp-worthy, they’re incredibly versatile and can be enjoyed hot or cold, in soups or stir-fried.
Whether you’re a beginner or a noodle enthusiast, this step-by-step guide will teach you how to make traditional udon noodles at home from scratch, including the flavorful broth and ideal toppings.
Let’s dive into this culinary journey that brings authentic Japanese flavors straight to your kitchen.
What are Udon Noodles?
Udon noodles are thick, white Japanese noodles made from wheat flour, water, and salt. Their chewy texture and mild flavor make them a perfect base for a variety of broths and stir-fry sauces. Unlike ramen or soba noodles, udon is usually softer and more substantial, offering a heartier bite.
They come in many forms—fresh, dried, and even frozen. While store-bought options are readily available, homemade udon offers a taste and texture that’s on another level. Making them at home allows you to control the ingredients, texture, and even the thickness of the noodles.
The simplicity of the ingredients belies the depth of experience you’ll enjoy. Udon can be served in countless ways: hot in broth, cold with dipping sauce (zaru udon), stir-fried (yaki udon), or even in curries. Their adaptability makes them a staple not only in Japanese homes but also increasingly popular worldwide.
Origins and Cultural Significance
Udon noodles date back to the Nara period (710–794 AD) in Japan, with roots influenced by Chinese wheat-based noodles. Over centuries, Japan has developed its own unique udon varieties, often shaped by regional ingredients and culinary preferences.
In Kagawa Prefecture, for instance, Sanuki udon is famous for its firmer texture. In Osaka and Kyoto, broth is typically lighter and flavored with kombu (kelp). These regional differences offer a beautiful tapestry of flavors and cooking techniques that tell the story of Japan’s diverse food culture.
Udon isn’t just a dish—it’s a reflection of hospitality, seasonality, and tradition in Japanese cuisine. Whether served in a humble home or a high-end restaurant, udon is a comfort food that connects people through warmth and simplicity.
Ingredients You’ll Need
Main Ingredients for the Noodles
To make fresh udon noodles at home, you only need three ingredients:
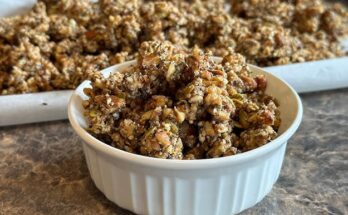
- All-purpose flour (500g) – This is the base of your noodles. Some prefer using a mix of all-purpose and bread flour for extra chewiness.
- Salt (15g) – Helps in strengthening gluten and adding flavor.
- Water (200ml) – Lukewarm water is ideal to help dissolve the salt and blend with the flour.
The beauty of udon lies in its simplicity. These three ingredients combine to create a dough that, once kneaded and rested, yields noodles with a perfectly bouncy bite.
Essential Ingredients for the Soup Base
For a traditional hot udon soup, the classic Japanese dashi broth is key. Here’s what you’ll need:
- Dashi stock – Made from kombu (kelp) and katsuobushi (bonito flakes). You can also buy instant dashi granules.
- Soy sauce – Adds saltiness and umami.
- Mirin – A sweet rice wine that balances the saltiness.
- Salt – To taste.
Basic Broth Ratio:
- 4 cups dashi
- 2 tbsp soy sauce
- 2 tbsp mirin
- 1 tsp salt
This creates a well-balanced, light but flavorful soup base that lets the noodles shine.
Optional Toppings and Variations
Here’s where you can get creative. Popular udon toppings include:
- Tempura (shrimp or vegetables)
- Kamaboko (fish cake)
- Green onions (finely chopped)
- Nori (seaweed strips)
- Boiled eggs or onsen tamago
- Tofu (fried or fresh)
- Mushrooms (shiitake, enoki)
Each topping adds its own flavor, texture, and visual appeal. Feel free to mix and match based on your preference or what’s available in your kitchen.
Making Udon Noodles from Scratch
Step-by-Step Dough Preparation
Making udon dough is a hands-on, almost meditative process. Here’s how to do it:
- Mix salt into water: Dissolve the salt completely in the lukewarm water.
- Add salted water to flour: In a large mixing bowl, gradually pour in the salted water while stirring with your hand or a wooden spoon.
- Form the dough: Once it starts to come together, use your hands to knead it into a rough dough ball.
- Knead the dough: Udon dough is dense and tough. Traditionally, people knead it by placing it in a plastic bag and stepping on it with their feet! Place the dough in a clean zip-lock bag, wrap in a towel, and gently step on it for about 5–10 minutes.
- Rest the dough: Let the dough rest for 1–2 hours. This helps the gluten relax and improves elasticity.
Kneading with your feet may sound odd, but it’s the best way to get the right elasticity without overworking your arms. Just be sure to use a strong plastic bag!
Rolling and Cutting the Dough
Once rested, your dough should feel firm but pliable.
- Roll the dough: Lightly dust your surface with flour and roll the dough into a rectangle about 1/4 inch thick.
- Fold and cut: Fold the dough like a letter, then cut into even strips. Aim for 1/4 inch width or slightly thicker if you prefer chewy noodles.
- Dust with flour: Prevent the noodles from sticking by tossing them with a bit of flour.
Consistency is key—uniform noodles will cook evenly and look more appetizing.
Cooking the Noodles Perfectly
To cook fresh udon:
- Boil water: Bring a large pot of water to a rolling boil.
- Cook the noodles: Add noodles and stir gently. Cook for 8–10 minutes or until they’re chewy but not doughy.
- Rinse with cold water: Drain and rinse under cold water to stop the cooking process and remove excess starch.
- Serve hot or cold: Depending on your recipe, serve immediately in hot broth or chill for cold dishes.
Fresh noodles cook quickly, so keep an eye on them. Taste-testing is your best tool here.
Preparing the Udon Broth
Classic Dashi Broth
A flavorful broth is the soul of any udon noodle soup. The most traditional version uses dashi, a Japanese soup stock that’s light yet packed with umami. Making dashi from scratch is easier than you think and delivers a depth of flavor that store-bought versions can’t match.
Here’s how to make it:
Ingredients:
- 4 cups of water
- 1 piece of kombu (about 4×4 inches)
- 1 cup bonito flakes (katsuobushi)
Steps:
- Soak the kombu: Place the kombu in cold water and let it soak for 30 minutes. If you’re in a rush, you can heat the water gently, but don’t let it boil.
- Simmer gently: Heat the water with kombu slowly until just before boiling. Remove the kombu right before the water starts to boil.
- Add bonito flakes: Once boiling, turn off the heat and add the bonito flakes.
- Let it steep: Allow the flakes to sink naturally for 5 minutes.
- Strain: Pour the broth through a fine sieve or cheesecloth.
This clear, golden broth is the foundation for a wide range of Japanese soups. You can use it immediately or store it in the fridge for up to 3 days.
Vegan Broth Alternatives
For those who prefer plant-based options, there are fantastic vegan alternatives to traditional dashi. Here’s one that maintains umami depth without fish:
Ingredients:
- 4 cups of water
- 1 large piece of kombu
- 3–5 dried shiitake mushrooms
Steps:
- Soak overnight: Combine kombu and mushrooms in cold water and soak overnight for maximum flavor.
- Simmer gently: Heat gently until it almost boils, then remove kombu.
- Strain: Remove mushrooms and strain for a clean, earthy broth.
The dried shiitake bring a natural savory richness, making this a delicious vegan substitute that works beautifully in udon soups.
Tips for Depth of Flavor
Want your udon broth to taste restaurant-quality? Try these tips:
- Layer your umami: Mix kombu, bonito, soy sauce, and mirin in balanced ratios.
- Simmer gently: Never let the broth boil vigorously; slow simmering maintains clarity and depth.
- Add aromatics: Ginger slices, garlic, or even a dash of sesame oil can enhance the broth.
Remember, broth isn’t just a base—it’s what pulls the entire dish together. Don’t rush it.
Assembling Your Udon Bowl
Cooking Order and Plating Tips
Assembling your udon bowl is all about timing and layering. Here’s how to do it like a pro:
- Cook the noodles last: Udon noodles are best served immediately after cooking. Have your broth and toppings ready first.
- Reheat the broth: Warm your dashi-based broth until it’s hot but not boiling.
- Add the noodles: Place freshly cooked (or reheated) noodles into a large serving bowl.
- Pour over broth: Gently ladle the broth over the noodles until just covered.
- Add toppings: Arrange toppings attractively on top. A pop of color from scallions, tempura, or an egg adds both flavor and visual appeal.
Presentation matters—Japanese cuisine celebrates aesthetics as much as taste. Use a deep bowl and arrange toppings symmetrically for the best result.
Adding Toppings the Right Way
Choosing the right toppings can elevate your udon from simple to spectacular. Here’s how to do it:
- Crispy tempura: Add just before serving to keep it crunchy.
- Boiled egg: Soft-boiled eggs (6 minutes) add richness.
- Green onions: Sprinkle last for freshness.
- Tofu: Fry firm tofu slices until golden for a protein-packed topping.
- Mushrooms: Sauté shiitake or enoki mushrooms in a little soy sauce and sesame oil.
Want extra flavor? Add a small spoonful of miso, a dash of chili oil, or a sprinkle of shichimi togarashi (Japanese 7-spice blend).
Serving Suggestions and Storage Tips
Here are some tips to serve and store your udon like a seasoned chef:
- Hot or cold? Udon can be served hot in broth or cold with dipping sauce (great for summer).
- Meal prep: Cook noodles and broth separately. Combine when ready to serve.
- Storage: Store cooked noodles in cold water in the fridge for up to 2 days. Broth can be kept in the fridge for 3 days or frozen for longer.
For busy days, freeze individual portions of broth and just boil fresh noodles when needed. Quick, satisfying, and homemade in minutes!
Customizing Udon for Every Season
Summer Udon: Cold and Refreshing Variations
During the hot months, a steaming bowl of soup may not sound appetizing, but that’s where cold udon variations shine. Zaru Udon, a chilled version served with dipping sauce, is light, refreshing, and quick to prepare.
Ingredients for Zaru Udon:
- Cooked and chilled udon noodles
- Mentsuyu (dipping sauce made from dashi, soy sauce, mirin)
- Grated ginger
- Chopped green onions
- Wasabi or grated daikon (optional)
- Shredded nori (seaweed) for topping
How to serve:
- Cook noodles and rinse thoroughly under ice-cold water until they are completely chilled.
- Plate noodles on a bamboo tray or shallow bowl.
- Prepare a side dish of dipping sauce (mentsuyu).
- Dip and slurp! Add garnishes to your sauce for extra zing.
This style is super refreshing and ideal for picnics or quick lunches. Pair with a side of tempura for a satisfying summer meal.
Winter Udon: Hearty and Warming Bowls
In colder weather, udon becomes a cozy, warming dish. Try Nabeyaki Udon, a one-pot version served in a hot clay pot with an egg, vegetables, chicken, and tempura. The bubbling broth and variety of textures make it a perfect winter comfort food.
Key ingredients:
- Hot dashi broth
- Chicken thighs
- Shiitake mushrooms
- Spinach or napa cabbage
- Udon noodles
- Raw egg
- Shrimp tempura (added just before serving)
This dish is hearty, rich, and deeply nourishing—perfect for chilly evenings when you crave warmth in every bite.
Health Benefits of Udon Noodles
Nutritional Profile
Udon noodles, though made with simple wheat flour, are surprisingly balanced in nutrition when served with the right ingredients. Here’s a general breakdown per 100g (cooked):
| Nutrient | Amount |
|---|---|
| Calories | 130 kcal |
| Protein | 3 grams |
| Carbohydrates | 25 grams |
| Fat | 0.2 grams |
| Fiber | 1 gram |
On their own, they’re low in fat and cholesterol-free. When paired with veggies, lean proteins, and a light broth, you’ve got a wholesome, well-rounded meal.
Great for Digestion and Energy
Thanks to their high carbohydrate content, udon noodles provide quick and sustained energy. The broth is hydrating, and when topped with fermented ingredients like miso or kimchi, you also get a boost of probiotics for gut health.
Udon is also less greasy than other take-out noodle dishes and can easily be customized for dietary needs—gluten-free, vegetarian, or low-sodium variations are totally doable.
Common Mistakes to Avoid
Overcooking the Noodles
The number one sin in udon prep is overcooking. Udon should be chewy, not mushy. Follow the rule: boil till tender, rinse till cold. This stops the cooking and firms them up perfectly.
Weak Broth Flavor
Don’t skimp on ingredients like kombu, bonito, or soy sauce. A bland broth can ruin even the best noodles. Taste and adjust as you go—add mirin for sweetness, soy for depth, and salt only at the end.
Wrong Toppings at the Wrong Time
Adding tempura too early makes it soggy. Overloading the bowl with too many toppings can also overwhelm the delicate balance of flavors. Stick with 2-3 carefully chosen garnishes for the best experience.
FAQs about Udon Noodles Recipe
1. What are Udon noodles made of?
Udon noodles are made from three simple ingredients: wheat flour, water, and salt. They are thick, chewy, and have a neutral taste that absorbs the flavors of broths and sauces very well.
2. Are Udon noodles gluten-free?
No, traditional Udon noodles are not gluten-free as they are made from wheat flour. However, gluten-free versions using rice or other flours are available in specialty stores.
3. Can I use Udon noodles in stir-fry dishes?
Absolutely! While Udon is often used in soups, it’s also perfect for stir-fry recipes due to its firm and chewy texture that holds up well with sauces and vegetables.
4. Do Udon noodles need to be boiled before using?
Yes. If you’re using dried Udon noodles, they need to be boiled in water until tender. Fresh or pre-cooked varieties may just require a quick warm-up.
5. How do I store leftover Udon noodles?
Store cooked Udon noodles in an airtight container in the refrigerator for up to 3 days. Add a little oil to prevent sticking. Reheat gently in broth or stir-fry.
6. What is the best broth for Udon noodle soup?
Traditional Udon soup uses a dashi-based broth seasoned with soy sauce and mirin. You can also use miso, chicken, or vegetable broth depending on your preference.
7. Can I freeze cooked Udon noodles?
Yes, but the texture might change slightly. Freeze them in portions with a bit of broth to prevent dryness. Reheat directly without thawing for best results.
Conclusion
Udon noodles are more than just food—they’re an experience. From making the dough to slurping the final bowl, every step connects you to centuries of Japanese culinary tradition. Whether you’re craving a hot, hearty soup in winter or a refreshing cold dip in summer, udon offers comfort, nutrition, and endless variety.
The best part? You don’t need a fancy kitchen or rare ingredients to get started. Just flour, salt, water, and a bit of patience. The result is a bowl of goodness that’s far better than anything store-bought.
So, roll up your sleeves, start kneading, and enjoy the art of homemade udon. Trust me—once you’ve had your own freshly made noodles, there’s no going back.