Tuna Pasta Recipe: There’s something irresistibly comforting about a warm bowl of pasta, especially when it’s paired with the rich, savory goodness of tuna. Tuna pasta is a classic, quick-to-make, and budget-friendly dish that fits beautifully into any home cook’s weekly rotation. Whether you’re looking for a simple dinner option, a meal prep solution for the week, or just a new favorite comfort food, this dish checks all the boxes. With minimal ingredients and just a few steps, you’ll have a hearty meal that’s both filling and flavorful.
What Makes Tuna Pasta Special?
It’s the perfect harmony of simplicity and taste. Canned tuna adds a protein punch without the hassle of cooking meat from scratch. Combined with your favorite pasta and a handful of kitchen staples like garlic, onion, and olive oil, this dish transforms into something surprisingly gourmet. You can keep it basic or jazz it up with herbs, spices, or even cheese. The beauty lies in its versatility.
Ideal Occasions for Tuna Pasta
Tuna pasta fits every occasion. Need a quick lunch? Done. Cooking for friends on short notice? Impress them. Craving something warm and cozy after a long day? This is your go-to dish. It even works well cold, making it a great pasta salad for potlucks and picnics. Plus, since the ingredients are usually shelf-stable or freezer-friendly, it’s also perfect when the fridge is looking bare.
Ingredients You’ll Need
Pantry Staples
One of the greatest things about this recipe is how it uses ingredients that are probably already sitting in your kitchen. Here’s what you’ll need:
- 8 oz (about 225g) pasta (penne, spaghetti, or fusilli work great)
- 1-2 cans of tuna in oil or water, drained
- 2 tablespoons olive oil
- Salt and pepper to taste
- 1 teaspoon dried oregano or Italian seasoning
Fresh Additions
To take it up a notch and add freshness, include:
- 1 medium onion, finely chopped
- 2 garlic cloves, minced
- 1-2 tomatoes (or 1/2 cup cherry tomatoes), diced
- 1/4 cup fresh parsley or basil, chopped
- Juice of half a lemon (optional but brightens the dish)
Optional Flavor Enhancers
Want to elevate the taste even more? Try these optional extras:
- Crushed red pepper flakes for heat
- Grated Parmesan or Pecorino Romano cheese
- A splash of white wine while sautéing
- Capers or olives for a briny kick
Preparing the Ingredients
Choosing the Right Pasta
When it comes to choosing pasta for your tuna dish, you have plenty of options. Short pasta like fusilli or penne hold sauce well and mix easily with tuna chunks. Long pasta like spaghetti or linguine also works beautifully if you prefer a twirl-able bite. What matters most is cooking it to the perfect al dente texture—firm but not hard, with a slight bite.
Draining and Prepping Tuna
Open your can of tuna and drain it well, especially if it’s packed in water. If it’s packed in oil, you might want to use that oil in your cooking—it’s loaded with flavor. Break up the tuna with a fork but don’t mash it completely; a few chunks add great texture to your dish.
Chopping Veggies and Aromatics
Finely chop your onions and garlic to build a flavor base. Tomatoes can be diced or even left in cherry form for little bursts of sweetness. Fresh herbs should be chopped just before serving to retain their aroma. If you’re using lemon, zest it lightly and juice it for a fresh, zippy finish at the end.
Cooking Instructions – Step by Step
Step 1: Boil the Pasta
Fill a large pot with water, add a generous pinch of salt, and bring it to a boil. Add your pasta and cook it according to package instructions, typically 8-12 minutes. Stir occasionally to prevent sticking. Once done, drain the pasta but reserve about half a cup of pasta water—you’ll need it later for mixing.
Step 2: Sauté Aromatics
While the pasta is boiling, heat olive oil in a large skillet over medium heat. Add the chopped onions and cook for 2-3 minutes until they soften and become translucent. Then toss in the garlic and cook for another minute until fragrant. If you’re using red pepper flakes, add them now for a spicy punch.
Step 3: Combine Tuna and Veggies
Add your tuna to the skillet and stir it into the onion and garlic mixture. Let it cook for 2-3 minutes to warm through and absorb flavors. Toss in your chopped tomatoes and allow them to soften. If you like a richer flavor, deglaze the pan with a splash of white wine and let it simmer down.
Step 4: Mix with Cooked Pasta
Add the cooked pasta directly to the skillet. Pour in a bit of the reserved pasta water to help blend everything together and create a light sauce. Stir thoroughly, ensuring all the pasta is coated with the tuna mixture. This is the time to adjust your seasoning—add salt, pepper, oregano, and lemon juice if using.
Step 5: Simmer and Season
Let everything simmer together for another 2-3 minutes. The flavors will meld beautifully, and the pasta will absorb some of the sauce. Turn off the heat and stir in fresh herbs and grated cheese if desired. Your tuna pasta is now ready to serve.
Tips for the Best Tuna Pasta
Boosting Flavor with Simple Tweaks
- Use tuna in oil for a richer, more satisfying flavor.
- Add a pinch of sugar if your tomatoes are too acidic.
- Stir in a tablespoon of butter at the end for a silky finish.
- Toast your pasta slightly in the pan before adding tuna for a nutty twist.
Mistakes to Avoid
- Don’t overcook the pasta—mushy pasta ruins texture.
- Avoid skimping on aromatics; garlic and onion are flavor bombs.
- Don’t drown the dish in sauce; it should be lightly coated, not soupy.
- Never forget to taste and adjust seasonings before serving.
Creative Variations of Tuna Pasta
Creamy Tuna Pasta
If you’re in the mood for something rich and indulgent, a creamy version of tuna pasta is a must-try. Start by following the basic recipe, but after adding the tuna, stir in a splash of heavy cream or a couple of tablespoons of cream cheese. Let it simmer gently, and you’ll see the sauce thicken into a velvety texture that coats every strand of pasta. To take it to the next level, sprinkle in some grated Parmesan and a pinch of nutmeg—these little touches bring a luxurious taste to a humble dish.
Another option is to mix in a spoonful of Greek yogurt or sour cream for a tangy, creamy finish with fewer calories. The result is a dish that feels like comfort food but won’t weigh you down. Perfect for colder evenings or when you’re simply craving something cozy.
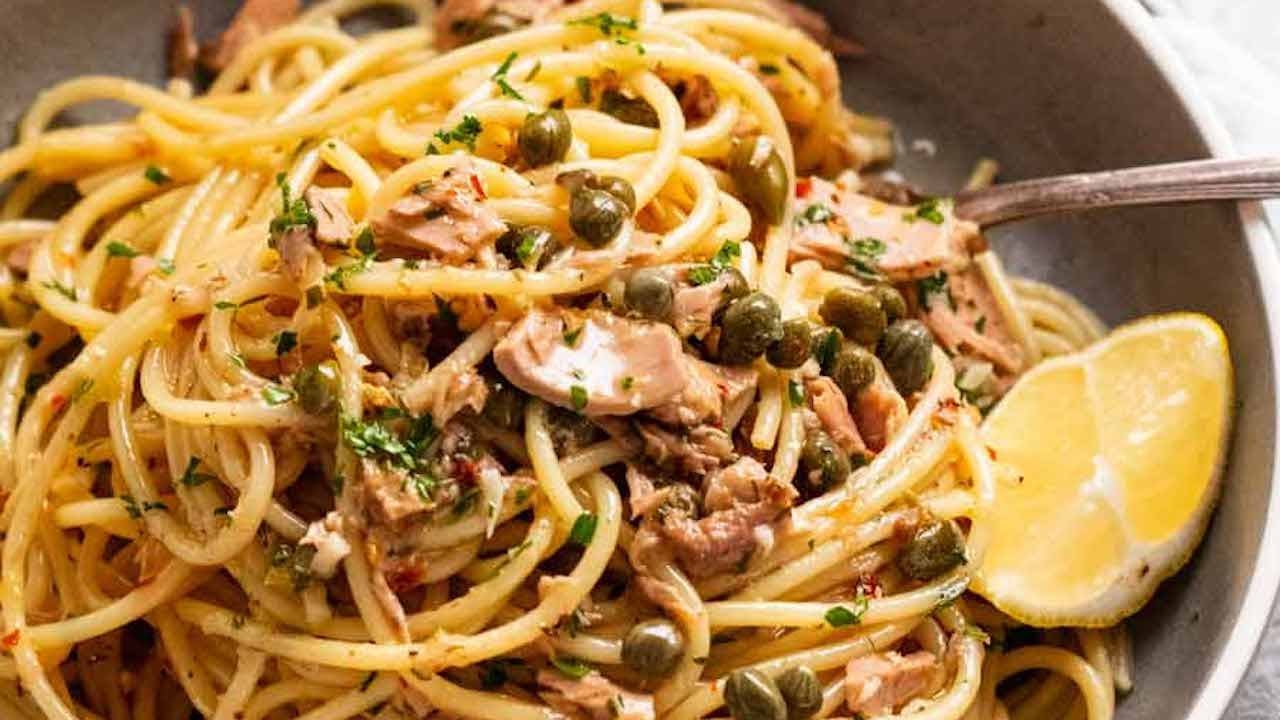
Mediterranean-Style Tuna Pasta
Take your tuna pasta on a trip to the Mediterranean by incorporating ingredients like olives, capers, sun-dried tomatoes, and a touch of lemon zest. This variation brings a salty, tangy twist that pairs perfectly with the natural umami of tuna.
Start by sautéing your onions and garlic, then add chopped sun-dried tomatoes and a handful of pitted olives. Toss in capers and your tuna, then finish with a generous squeeze of lemon juice and a sprinkle of fresh parsley. This version doesn’t need cheese—it’s bright, flavorful, and inherently satisfying. Serve it cold as a pasta salad, and you’ve got a fantastic dish for summer picnics or work lunches.
Serving Suggestions
Perfect Pairings
Tuna pasta is a hearty dish on its own, but if you want to build a complete meal, consider these sides and add-ons:
- Side Salad: A crisp green salad with a light vinaigrette balances the richness of the pasta.
- Garlic Bread: The ultimate comfort side. Crunchy, buttery, and ideal for scooping up every last bite.
- Steamed Vegetables: Broccoli, green beans, or zucchini make great healthy sides.
Drinks That Match Well
Pair your tuna pasta with a refreshing drink to elevate the dining experience. A glass of dry white wine, such as Pinot Grigio or Sauvignon Blanc, complements the dish beautifully. For non-alcoholic options, lemon-infused water or iced tea with herbs like mint or basil keeps things light and fresh.
Storing and Reheating Leftovers
How to Store Tuna Pasta Properly
If you’ve made a big batch, don’t worry—tuna pasta stores well for up to 3 days in the fridge. Allow the dish to cool completely before transferring it to an airtight container. If you’ve added fresh herbs or cheese, those might wilt or change texture, but the main flavors will still hold up nicely.
For freezing, it’s best to store the pasta and sauce separately if possible. If already mixed, it’s still fine to freeze for up to 1 month, though the texture may slightly change when reheated.
Reheating Tips
Reheat in a skillet over medium heat with a splash of water, broth, or olive oil to keep it from drying out. You can also microwave it in 30-second intervals, stirring in between to ensure even heating. If it looks dry, add a little cream or tomato sauce before microwaving to freshen it up.
FAQs about Tuna Pasta Recipe
1. Can I use fresh tuna instead of canned tuna?
Yes, you can use fresh tuna. Just sear it first, flake it, and then add it to the dish. However, canned tuna is quicker and just as tasty.
2. Is tuna pasta better with tomato or cream sauce?
That depends on your taste! Tomato sauce gives a tangy, light feel while cream sauce offers richness. Try both and pick your favorite.
3. Can I make tuna pasta spicy?
Absolutely. Add red pepper flakes, chopped chili, or even a bit of hot sauce for heat.
4. What type of pasta works best with tuna?
Penne, fusilli, spaghetti, and linguine all work well. The key is cooking it al dente.
5. Is this recipe suitable for meal prep?
Yes! Tuna pasta stores well in the fridge and reheats easily, making it ideal for meal prep.
Conclusion
Tuna pasta isn’t just a recipe—it’s a lifesaver for busy days, a flavor-packed comfort meal, and a blank canvas for creativity in the kitchen. Whether you keep it simple with pantry staples or dress it up with Mediterranean flair, this dish always delivers. With easy prep, affordable ingredients, and endless customization, it’s no wonder tuna pasta is a favorite around the globe.
So next time you’re staring into your pantry wondering what to cook, remember that a delicious, satisfying meal is just a can of tuna and a box of pasta away.