Traditional Apple Pie Recipe: There’s something magical about the smell of a freshly baked apple pie wafting through the house. A true symbol of comfort and Americana, the traditional apple pie is a classic dessert loved across generations. Whether you’re baking for the holidays, a family gathering, or just treating yourself, mastering this recipe brings a slice of nostalgic joy right to your plate. But don’t worry—making a traditional apple pie from scratch isn’t as hard as it seems. With the right ingredients, tools, and a little patience, you can bake a flaky, golden crust filled with sweet, spiced apples that’ll make everyone ask for seconds.
Ingredients You’ll Need
Before diving into the process, it’s essential to gather all your ingredients. Using fresh, quality items ensures your pie tastes as incredible as it looks.
For the Pie Crust
A good pie crust is flaky, buttery, and just slightly crisp. Here’s what you’ll need:
- 2 ½ cups all-purpose flour
- 1 teaspoon salt
- 1 cup unsalted butter (cold, cut into cubes)
- 6 to 8 tablespoons ice water
The secret here is cold butter and cold water—this helps create that perfectly flaky texture we all crave. You can also substitute half of the butter with shortening for an extra tender bite.
For the Apple Filling
The filling is the heart of the pie. Choosing the right apples makes a world of difference. Go for a mix of tart and sweet varieties like Granny Smith, Honeycrisp, or Fuji.
- 6 to 8 medium apples (peeled, cored, and sliced thin)
- ¾ cup granulated sugar
- ¼ cup brown sugar
- 2 tablespoons all-purpose flour (for thickening)
- 1 tablespoon lemon juice
- 1 teaspoon cinnamon
- ¼ teaspoon nutmeg
- 1/8 teaspoon ground cloves (optional)
- 1 tablespoon butter (to dot on top of filling before baking)
This combination brings out a deep, rich flavor with just the right amount of spice and sweetness.
Tools and Equipment Required
To ensure everything runs smoothly, gather these kitchen tools before you start:
- Large mixing bowls
- Pastry cutter or food processor
- Rolling pin
- 9-inch pie dish
- Peeler and corer
- Knife and cutting board
- Oven and timer
- Pastry brush (for egg wash, optional)
- Aluminum foil or pie crust shield
Having all your tools handy saves time and keeps your kitchen organized.
Step-by-Step Guide to Making Traditional Apple Pie
Now let’s roll up our sleeves and dive into the step-by-step guide. Each phase is simple, and together, they create a masterpiece of a pie.
Step 1: Preparing the Pie Crust
Start by making the crust since it needs some time to chill.
- In a large bowl, mix the flour and salt.
- Add the cold, cubed butter and cut it into the flour using a pastry cutter or your hands until it looks like coarse crumbs.
- Slowly add ice water, one tablespoon at a time, mixing until the dough holds together.
- Divide the dough in half, form into two discs, wrap in plastic wrap, and chill in the refrigerator for at least 1 hour.
This rest time helps the gluten relax and keeps the butter cold, both of which are key for a flaky crust.
Step 2: Preparing the Apple Filling
While the dough chills, prepare the apples.
- Peel, core, and thinly slice your apples.
- In a large bowl, combine the apple slices with lemon juice, both sugars, flour, cinnamon, nutmeg, and cloves.
- Toss gently to coat and let sit for about 15 minutes to allow the juices to mix and settle.
This filling should smell incredible already!
Step 3: Assembling the Pie
Here’s where it starts to come together.
- Preheat your oven to 425°F (220°C).
- Roll out one dough disc on a floured surface into a 12-inch circle.
- Gently transfer it to your pie dish and press it in, trimming any excess dough.
- Pour the apple filling into the crust, spreading it evenly.
- Dot the filling with small pieces of butter for added richness.
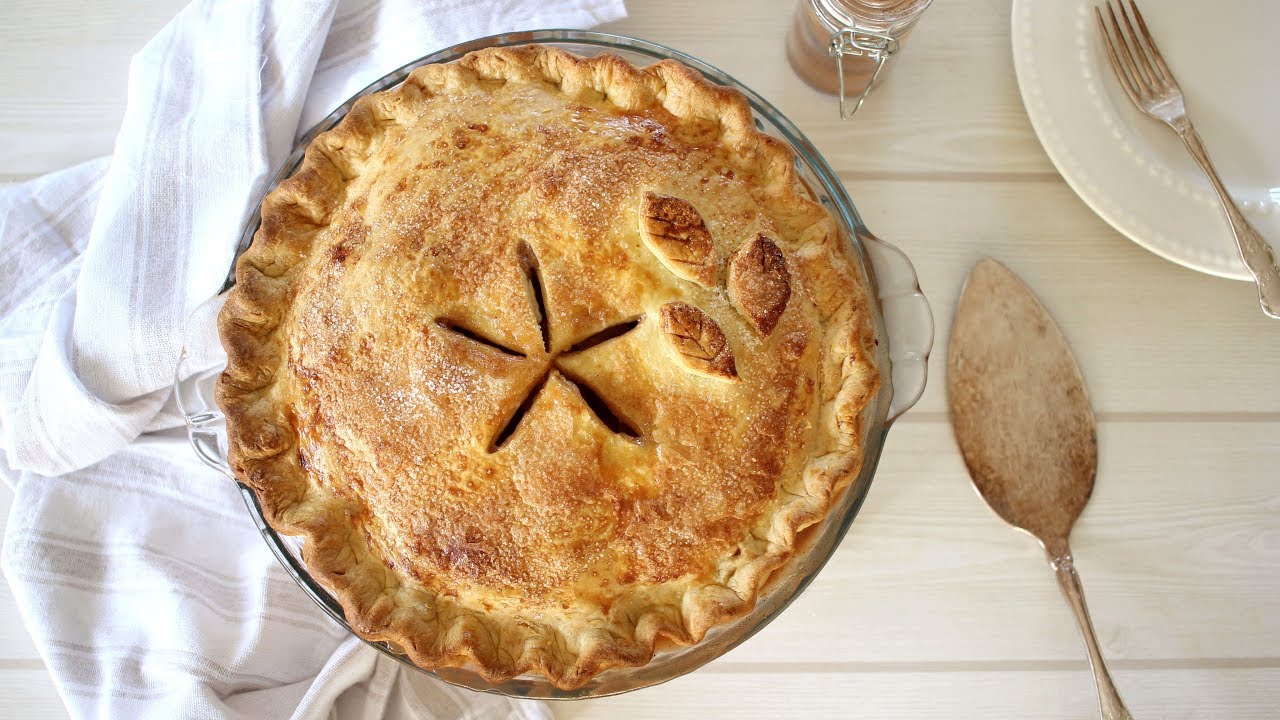
Then, roll out the second dough disc. You can lay it on top whole or get creative with a lattice design. Seal the edges by crimping with your fingers or a fork. Don’t forget to cut a few slits if you’re using a whole top crust—this lets steam escape.
Step 4: Baking the Pie
Now comes the transformation—your pie is ready for the oven.
- Optional but recommended: Brush the top crust with a lightly beaten egg mixed with a tablespoon of water. This gives it a glossy, golden finish.
- Place the pie on a baking sheet to catch any drips.
- Bake in the preheated oven at 425°F (220°C) for 20 minutes.
- Then, reduce the temperature to 375°F (190°C) and bake for another 35–45 minutes, or until the crust is golden brown and the filling is bubbling.
If the crust edges brown too quickly, cover them with foil or a pie crust shield. This ensures even baking without burning the delicate edges.
Step 5: Cooling and Serving
Once baked to perfection, let the pie cool on a wire rack for at least 2 hours.
Resist the urge to slice it immediately—cooling allows the filling to set. Serve warm or at room temperature with a scoop of vanilla ice cream or a dollop of whipped cream. It’s comfort food at its finest, each bite bursting with spiced apple goodness encased in a buttery, flaky crust.
Tips for the Perfect Apple Pie
Even seasoned bakers can benefit from a few tried-and-true tips:
- Mix your apples: A blend of sweet and tart varieties gives your pie a complex, rich flavor.
- Chill your crust: Keeping the dough cold helps maintain its structure and flakiness.
- Don’t overfill: Overpacking the pie can cause it to overflow or bake unevenly.
- Vent your crust: Steam needs to escape, especially with a solid top crust.
- Bake on the lower rack: This helps cook the bottom crust thoroughly, avoiding sogginess.
Follow these suggestions and you’ll have a pie that’s not just delicious—it’s downright unforgettable.
Common Mistakes to Avoid
Mistakes happen, but here’s how to sidestep the most common ones:
- Using warm ingredients: Always use cold butter and water for the crust.
- Skipping preheating: Always preheat your oven to the correct temperature.
- Not letting the pie cool: Cutting too soon leads to runny filling.
- Using only one type of apple: This limits the depth of flavor.
- Neglecting the foil shield: Burnt edges ruin the look and taste of your pie.
Avoid these pitfalls and you’re set for pie perfection.
Nutritional Information
Here’s a rough estimate of the nutritional content per slice (based on 8 servings):
| Nutrient | Amount |
|---|---|
| Calories | 400–450 kcal |
| Carbohydrates | 60g |
| Sugars | 30g |
| Fat | 18–22g |
| Saturated Fat | 10g |
| Protein | 3g |
| Fiber | 4g |
| Sodium | 250mg |
Keep in mind these values can vary depending on your ingredients and portion size.
Variations and Add-Ons
While the traditional apple pie is a timeless favorite, there’s no harm in putting a personal twist on it. Here are a few creative ideas to elevate your classic pie:
1. Add Caramel or Maple Syrup
Drizzle some caramel or maple syrup over the apples before placing the top crust. This not only adds richness but brings in a beautiful depth of flavor that pairs perfectly with the apples.
2. Top with Crumble Instead of Crust
Swap the top crust for a brown sugar and oat crumble for a Dutch apple pie style. Mix butter, brown sugar, flour, and oats to make a delicious streusel topping that adds crunch and sweetness.
3. Mix in Other Fruits
Pear, cranberry, or even a handful of raisins can complement the apple filling nicely. Just make sure to balance the moisture content so the filling doesn’t get too runny.
4. Add a Splash of Alcohol
A tablespoon or two of bourbon, brandy, or spiced rum can intensify the flavor. It’s subtle but adds an adult twist that enhances the spices and apple flavors.
5. Use a Butter and Shortening Crust
If you’re after a crust that’s both flaky and tender, use a combo of butter for flavor and shortening for texture. It’s the best of both worlds.
Let your creativity run wild. After all, baking is part science, part art.
Storage and Reheating Tips
Leftover pie? No problem. Here’s how to store and reheat it without losing its deliciousness.
Storing Apple Pie
- At Room Temperature: Keep covered for up to 2 days.
- In the Fridge: Wrap tightly or store in an airtight container for up to 5 days.
- In the Freezer: You can freeze apple pie whole or by the slice. Wrap in plastic and foil, then freeze for up to 3 months.
Reheating Apple Pie
- In the Oven: Reheat at 350°F (175°C) for 15–20 minutes for a fresh-from-the-oven feel.
- In the Microwave: Reheat a slice for 30–40 seconds, but the crust won’t be as crisp.
- In the Air Fryer: Pop a slice in at 350°F for 5–7 minutes for a quick and crispy finish.
Proper storage means you can enjoy that apple pie taste long after baking day.
FAQs about Traditional Apple Pie Recipe
1. What are the best apples for pie?
A mix of tart and sweet apples like Granny Smith, Honeycrisp, and Fuji provides the best texture and flavor balance.
2. How do I avoid a soggy bottom crust?
Preheat your oven well, use a metal or glass pie dish, and bake on the lower oven rack. You can also brush the crust with egg white before filling to create a barrier.
3. Can I make the crust ahead of time?
Yes, pie dough can be made and chilled up to 2 days in advance, or frozen for up to 3 months.
4. Why is my filling runny after baking?
It’s likely the pie wasn’t cooled long enough. Let it cool for at least 2 hours to allow the filling to set properly.
5. Can I freeze a whole unbaked apple pie?
Absolutely. Assemble the pie, wrap it tightly, and freeze. Bake straight from frozen, adding about 20 extra minutes to the baking time.
Conclusion
There’s a reason the traditional apple pie remains a beloved dessert—it’s a comforting blend of crisp crust, warm spices, and juicy apples that feels like home. With this step-by-step guide, you now have everything you need to create your own bakery-worthy apple pie. Whether you’re a beginner or an experienced baker, this classic recipe is one you’ll want to come back to again and again. From the aroma filling your kitchen to that first sweet bite, making apple pie is a rewarding experience that connects us to generations past and memories to come.

