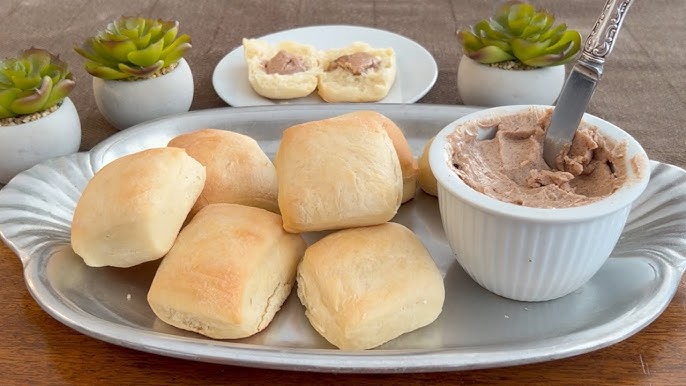
Texas Roadhouse Rolls Recipe: If you’ve ever walked into a Texas Roadhouse restaurant, you know the experience begins long before your steak hits the table. It starts with that warm basket of freshly baked rolls. Soft, fluffy, slightly sweet, and brushed generously with melted butter—these rolls are practically legendary. Many people admit they look forward to the bread just as much as the main course. And honestly, who can blame them?
These rolls aren’t just ordinary dinner bread. They have a distinct pillowy softness, a subtle sweetness, and that golden-brown finish that makes them irresistible. Pair them with homemade cinnamon honey butter, and you’ve got a show-stopping side dish that can easily become the highlight of any meal.
In this professional step-by-step guide, you’ll learn exactly how to make Texas Roadhouse rolls from scratch. From activating the yeast properly to achieving that perfectly soft texture, every detail is covered. Whether you’re a beginner or an experienced home baker, this guide will walk you through the entire process with confidence.
Ready to fill your kitchen with the smell of fresh-baked rolls? Let’s dive in.
Why Everyone Loves Texas Roadhouse Rolls
There’s something almost magical about these rolls. The moment they land on the table—warm, fragrant, and brushed with butter—self-control goes out the window. But what exactly makes them so irresistible?
First, it’s the texture. Texas Roadhouse rolls are incredibly soft and airy. When you tear one open, you’ll notice the fluffy interior strands that almost melt in your mouth. They aren’t dense like traditional dinner rolls. Instead, they feel light yet satisfying. That balance is what keeps people reaching for “just one more.”
Second, there’s the sweetness. Unlike standard bread rolls, these have a subtle hint of sugar. It’s not overpowering, but it’s enough to make them stand out. The sweetness pairs beautifully with savory dishes like steak, ribs, or grilled chicken.
Then comes the butter—specifically, cinnamon honey butter. Spread that creamy, sweet topping over a warm roll, and you’ve created a flavor combination that’s both comforting and indulgent. It’s like dessert and dinner had a perfect little baby.
Another reason people love these rolls? Freshness. At the restaurant, they’re baked throughout the day, ensuring they arrive at your table warm. When you recreate them at home, you get that same fresh-from-the-oven experience.
Finally, there’s nostalgia. For many families, Texas Roadhouse dinners are tied to celebrations, birthdays, and weekend outings. These rolls bring back memories. And when you bake them at home, you’re not just making bread—you’re recreating moments.
That’s the beauty of a great recipe. It’s not just about ingredients. It’s about experience.
The Secret Behind Their Soft and Fluffy Texture
Have you ever wondered why homemade rolls sometimes turn out dense instead of soft and airy? The difference lies in technique. Texas Roadhouse rolls achieve their signature fluffiness because of three key factors: yeast activation, proper kneading, and correct rising time.
Let’s start with yeast. Yeast is alive. It feeds on sugar and produces carbon dioxide, which creates air pockets in the dough. If your yeast isn’t activated correctly, those air pockets won’t form properly. That means flat, heavy rolls. The water temperature must be just right—warm but not hot. Too hot, and you kill the yeast. Too cold, and it won’t activate.
Next comes kneading. Kneading develops gluten, the protein structure that gives bread its elasticity. Think of gluten like a stretchy net that traps air bubbles. Without proper kneading, your dough won’t have the strength to hold that air. But here’s the trick: don’t overdo it. Over-kneading can make rolls tough instead of tender.
Then there’s rising time. Patience is everything. The first rise allows the dough to double in size, building flavor and texture. The second rise—after shaping—creates that final lift that makes the rolls light and fluffy.
Another subtle secret? Enriched dough. Texas Roadhouse rolls contain milk, butter, and eggs. These ingredients add moisture and richness, resulting in a softer crumb compared to basic bread recipes.
When all these elements work together, the result is magic: warm, cloud-like rolls that practically dissolve in your mouth.
Ingredients You’ll Need
Before you begin, gather everything. Having your ingredients measured and ready makes the baking process smooth and stress-free.
Here’s what you’ll need:
- 4 cups all-purpose flour
- 1 packet (2 ¼ teaspoons) active dry yeast
- 1 cup warm milk (110°F)
- ¼ cup granulated sugar
- 1 large egg
- ¼ cup melted butter
- 1 teaspoon salt
- Extra melted butter for brushing
These simple pantry staples come together to create something extraordinary. The flour forms the structure. The yeast provides lift. Milk adds softness. Sugar feeds the yeast and enhances flavor. Butter delivers richness. And salt balances everything out.
Using high-quality ingredients matters. Fresh yeast ensures proper rising. Whole milk adds more richness than skim. Real butter (not margarine) gives the best flavor.
Room temperature ingredients also make a difference. Cold eggs or milk can slow down yeast activity. Let them sit out for a bit before mixing.
With your ingredients ready, you’re officially prepared to start baking soft, golden, restaurant-style rolls right in your kitchen.
Step-by-Step Guide to Making Texas Roadhouse Rolls
Now comes the fun part—bringing everything together. Baking is both science and art, and when you follow these steps carefully, you’ll achieve consistent, bakery-quality results.
Step 1: Activating the Yeast Properly
Start by warming your milk to about 105–110°F (lukewarm, not hot). Stir in a little sugar, then sprinkle the yeast over the top. Let it sit for 5–10 minutes until it turns foamy. This foam is your green light—it means the yeast is alive and ready to work. If it doesn’t foam, start over with fresh yeast.
Step 2: Mixing the Dough to the Right Consistency
In a large bowl, combine the activated yeast mixture with melted butter, sugar, eggs, and salt. Gradually add flour while mixing. The goal is a soft, slightly sticky dough that pulls away from the sides of the bowl but still feels tender—not stiff or dry.
Step 3: Kneading Techniques for Soft Rolls
Turn the dough onto a lightly floured surface and knead for 6–8 minutes. Use the push–fold–turn method until the dough becomes smooth and elastic. Proper kneading develops gluten, which traps air and gives the rolls their signature fluffy texture.
Step 4: First Rise – Letting the Dough Rest
Place the dough in a lightly greased bowl, turning once to coat. Cover with a clean towel and let it rise in a warm place for about 1 hour, or until doubled in size. This rest allows the yeast to create air pockets for softness.
Step 5: Rolling and Shaping the Dough
Punch down the dough gently to release excess air. Roll it out to about ½-inch thickness and cut into squares or rectangles. Don’t overwork the dough—gentle handling keeps the rolls light.
Step 6: Second Rise – The Secret to Fluffiness
Arrange the shaped rolls on a greased baking sheet, leaving space between them. Cover and let rise again for 30–40 minutes, until puffy. This second rise is key to that pillowy interior.
Step 7: Baking to Golden Perfection
Bake in a preheated oven at 350°F (175°C) for 12–15 minutes, until the tops are lightly golden. Avoid overbaking; soft rolls should be pale, not deeply browned.
Step 8: Brushing with Honey Butter
As soon as the rolls come out of the oven, brush generously with warm honey butter. This final touch adds shine, sweetness, and that unmistakable Texas Roadhouse flavor.
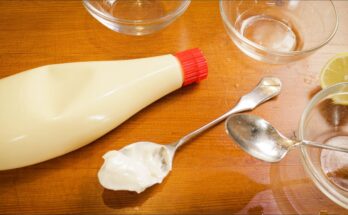
How to Make Texas Roadhouse Cinnamon Honey Butter
You can’t talk about these rolls without mentioning the famous cinnamon honey butter. It’s sweet, creamy, and absolutely addictive.
Here’s what you’ll need:
- ½ cup softened butter
- ¼ cup powdered sugar
- ¼ cup honey
- 1 teaspoon ground cinnamon
In a mixing bowl, beat all ingredients together until smooth and fluffy. That’s it. Simple, right?
The texture should be light and spreadable. If it feels too firm, let it sit at room temperature for a few minutes.
Spread it generously over a warm roll and watch it melt into every fluffy layer. The combination of sweet cinnamon and honey with warm bread is unbeatable.
Pro Tips for Bakery-Style Results at Home
Want to take your rolls from good to unforgettable? Keep these tips in mind:
- Measure flour correctly by spooning it into the measuring cup and leveling it off.
- Use fresh yeast for reliable rising.
- Don’t overbake—softness is key.
- Let the dough fully double during the first rise.
- Brush with butter immediately after baking.
Small details make a big difference. Baking is about precision, but it’s also about feel. Trust your senses.
Common Mistakes to Avoid
Even simple recipes can go wrong. Here’s what to watch for:
- Using water that’s too hot and killing the yeast.
- Adding too much flour, making rolls dense.
- Skipping the second rise.
- Overbaking and drying them out.
- Not kneading enough.
Avoid these pitfalls, and your rolls will turn out light and fluffy every time.
How to Store and Reheat Rolls Properly
Store leftover rolls in an airtight container at room temperature for up to 3 days.
To reheat, wrap them in foil and warm in a 300°F oven for about 10 minutes. You can also microwave them for 10–15 seconds with a damp paper towel to retain moisture.
Warm rolls always taste better than cold ones.
Freezing Instructions for Long-Term Storage
Want to make them ahead? No problem.
Allow baked rolls to cool completely. Place them in a freezer-safe bag and freeze for up to 3 months.
To reheat, thaw at room temperature and warm in the oven. They’ll taste freshly baked.
Nutritional Information Overview
While these rolls are indulgent, they’re perfect for special occasions.
Approximate values per roll:
| Nutrient | Amount |
|---|---|
| Calories | 180–200 |
| Carbs | 25g |
| Fat | 7g |
| Protein | 4g |
Moderation is key—but enjoying a warm roll now and then is part of life.
Serving Suggestions and Pairings
These rolls pair beautifully with:
- Grilled steak
- BBQ ribs
- Roasted chicken
- Creamy soups
- Holiday dinners
They also work great as mini sandwich buns. Slice them in half and fill with ham, turkey, or pulled pork.
FAQs about Texas Roadhouse Rolls Recipe
1. Can I use instant yeast instead of active dry yeast?
Yes, you can. Instant yeast works perfectly for this recipe. Simply skip the proofing step and mix the yeast directly into the dry ingredients. Keep in mind that instant yeast often works a bit faster, so watch the dough during rising.
2. Why are my rolls dense?
Dense rolls are usually caused by adding too much flour or not allowing the dough enough time to rise. Measure flour carefully and make sure the dough doubles in size during both rises. A soft, slightly sticky dough produces the fluffiest rolls.
3. Can I make the dough ahead of time?
Absolutely. After the first rise, cover the dough tightly and refrigerate it overnight. When ready to bake, let the dough come to room temperature, shape the rolls, and allow the second rise before baking.
4. How do I keep rolls soft overnight?
Store the rolls in an airtight container or tightly wrapped at room temperature. Avoid refrigeration, as it dries out bread quickly. Brushing with extra honey butter before storing also helps retain moisture.
5. Can I make these rolls dairy-free?
Yes. Replace regular milk with plant-based milk such as almond or soy, and use dairy-free butter or margarine. The rolls will still be soft, flavorful, and delicious.
Conclusion
Texas Roadhouse rolls aren’t just dinner bread—they’re an experience. Soft, fluffy, slightly sweet, and brushed with butter, they bring comfort to the table. With the right ingredients, proper kneading, and patience during rising, you can recreate this restaurant favorite in your own kitchen.
Baking these rolls at home fills your space with warmth and nostalgia. And when paired with homemade cinnamon honey butter, they become unforgettable.
Now that you have the full step-by-step guide, it’s time to preheat your oven and start baking.