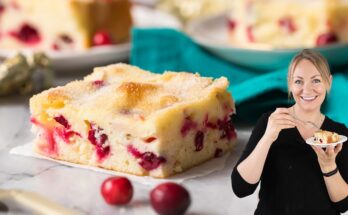
Tart Crust Recipe: There’s something incredibly satisfying about a perfectly golden, buttery tart crust that melts in your mouth.
Whether you’re baking a sweet fruit tart or a savory quiche, the foundation of a great tart is the crust. If you’ve struggled with soggy bottoms or crumbly disasters, don’t worry—this guide has your back.
We’re walking through a foolproof, professional-style tart crust recipe that’ll upgrade your baking game, no matter your skill level.
What is a Tart Crust?
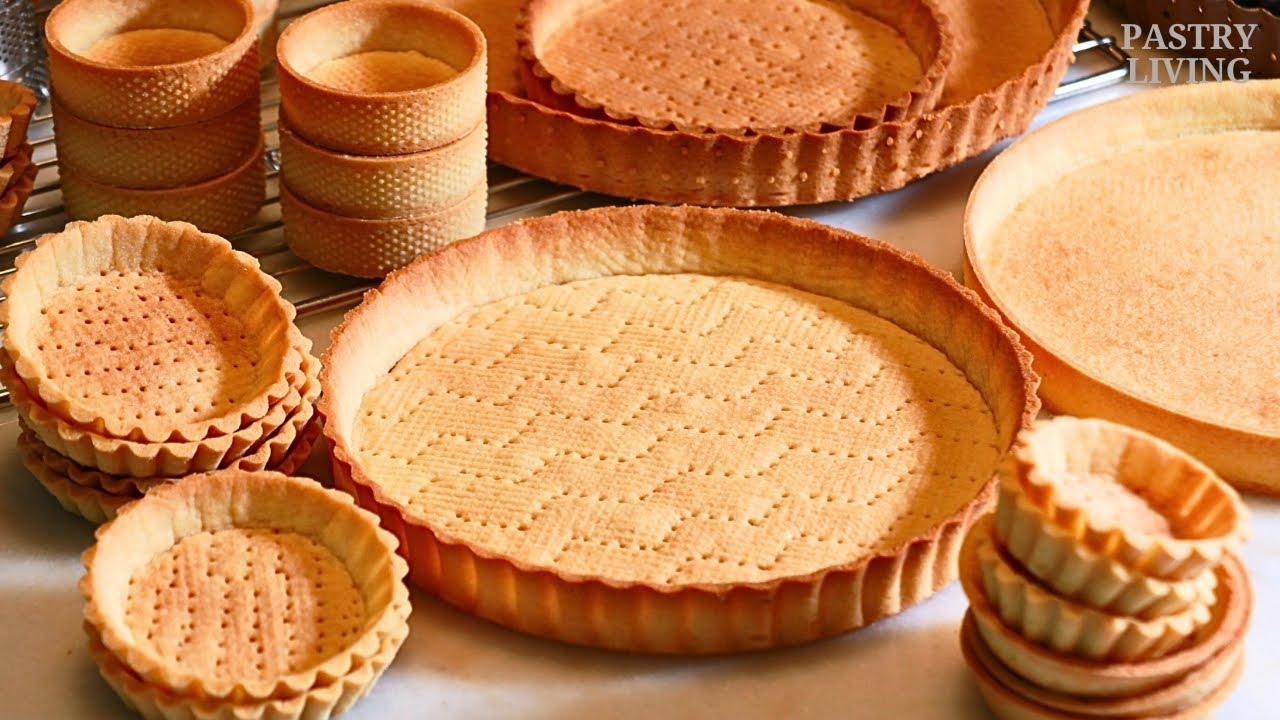
A tart crust is the structured, buttery base used in tarts—a type of open-faced pastry dish. It’s usually thinner and crisper than a pie crust, with more elegance and precision. The tart crust holds both sweet and savory fillings and is baked in a tart pan with fluted edges and a removable bottom.
Unlike traditional pie dough, tart crusts are more shortbread-like. They’re typically more tender and less flaky, designed to hold their shape beautifully while providing a melt-in-your-mouth texture. And trust me, when you nail the tart crust, the rest of your tart becomes ten times better.
Why a Perfect Tart Crust Matters
You could have the most delicious lemon curd or velvety chocolate ganache in the world, but if the crust underneath is soggy, tough, or bland—well, that’s all anyone will notice. A tart crust isn’t just a container; it’s a flavor and texture experience all its own.
The perfect tart crust should:
- Be buttery and crisp
- Hold its shape without shrinking
- Complement, not compete with, the filling
- Slice cleanly without crumbling
Mastering this crust means you can whip up tarts for brunches, holiday dinners, or just as a sweet treat for yourself.
Types of Tart Crusts
Let’s talk varieties. Not all tart crusts are made the same, and each serves a unique purpose depending on your filling or style.
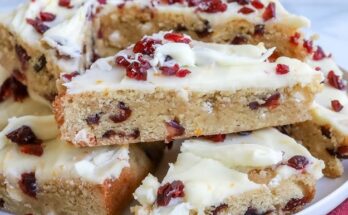
Sweet Crust (Pâte Sucrée)
Pâte Sucrée is the go-to for dessert tarts. It’s sweet, buttery, and slightly crumbly—think of a cross between a sugar cookie and a shortbread base. Perfect for fruit tarts, chocolate ganache, or custard fillings.
Shortcrust (Pâte Brisée)
This is your classic unsweetened tart crust. It’s simple and flaky, made with just flour, butter, and a touch of salt. Ideal for savory recipes like quiches, tomato tarts, or cheese-filled options.
Almond Tart Crust
Want something more luxurious? Almond crusts add a subtle nutty richness to your tart base, elevating both sweet and savory flavors.
List of Ingredients You’ll Need
Let’s break down exactly what you’ll need to pull this off:
Basic Ingredients:
- 1 1/4 cups (160g) all-purpose flour
- 1/2 cup (115g) unsalted butter, cold and cubed
- 1/4 cup (30g) powdered sugar (for sweet crust)
- 1/4 teaspoon salt
- 1 large egg yolk
- 1–2 tablespoons ice water or milk (as needed)
Optional Add-ins for Flavor:
- 1/4 teaspoon vanilla extract (sweet crust)
- 1/4 teaspoon almond extract
- 2 tablespoons ground almonds or almond flour
- Zest of 1 lemon or orange
These ingredients strike the perfect balance between tender and firm, rich and crisp. Just be sure everything is cold—especially the butter. That’s key to a great tart texture.
Kitchen Tools Required
Before you dive in, gather these tools:
- Mixing bowls
- Pastry cutter or food processor
- Measuring cups and spoons
- Rolling pin
- Tart pan (preferably with removable bottom)
- Plastic wrap
- Parchment paper
- Pie weights or dried beans (for blind baking)
Having the right tools prepped makes the process smooth and stress-free.
Tips Before You Start
Let’s set you up for success with some pro-level advice:
- Keep everything cold: Cold butter = flaky layers.
- Don’t overwork the dough: Mix until just combined to avoid toughness.
- Use a scale if possible: It’s more accurate than cups.
- Let it chill: Don’t skip resting the dough in the fridge.
- Blind bake for wet fillings: Prevents sogginess and gives crispness.
Ready to start baking? Let’s roll (pun intended).
Step-by-Step Guide to Making Tart Crust
Step 1: Measure Your Ingredients Accurately
Accuracy is everything in baking. Weigh your flour and butter for the best results. Use cold butter straight from the fridge and pre-chill your mixing bowl if your kitchen is warm. Sift the flour if it’s clumpy to avoid dry pockets in the dough.
Step 2: Mix Dry Ingredients
In a large bowl, whisk together your flour, salt, and powdered sugar. This ensures an even distribution of all dry ingredients. If using almond flour or zest, add them here too.
Step 3: Cut in the Butter
Add the cubed, cold butter to your dry ingredients. Using a pastry cutter or your fingertips, work the butter in until the mixture resembles coarse crumbs with pea-sized pieces. This step creates pockets that make the crust tender and flaky.
Step 4: Add Liquid and Form Dough
Whisk your egg yolk and add it in. Slowly drizzle in ice water, one tablespoon at a time. Stir with a fork or your hands until the dough just comes together—it should hold when pressed but not feel wet or sticky. Don’t overmix.
Step 5: Chill the Dough
Form the dough into a disk, wrap it in plastic, and chill for at least 30 minutes (or up to 24 hours). This step relaxes the gluten and firms the fat, preventing shrinkage and cracking during baking.
Step 6: Roll Out the Dough
Lightly flour your surface and rolling pin. Roll out the dough into a circle about 1/8-inch thick, rotating to maintain shape. If it cracks, patch it gently with extra dough.
Step 7: Fit Dough into Tart Pan
Carefully lift the dough and press it into your tart pan, starting from the bottom and working up the sides. Don’t stretch it. Trim the edges flush with the top of the pan. Chill again for 15 minutes.
Step 8: Blind Bake the Crust (Optional)
If your filling is wet or doesn’t require baking (like ganache), blind baking is essential.
- Preheat oven to 375°F (190°C).
- Line the crust with parchment and fill with pie weights or beans.
- Bake for 15–20 minutes.
- Remove weights, bake 5–10 minutes more until golden.
Let it cool before filling.
Common Mistakes to Avoid
Even the most experienced bakers slip up from time to time. Here are the most common tart crust pitfalls—and how to steer clear of them:
- Using warm butter: Warm or soft butter blends too thoroughly with flour, eliminating those crucial flaky layers. Always use cold butter, and chill the dough after handling.
- Overmixing the dough: As tempting as it is to keep mixing, don’t. Overworking activates gluten, making the crust tough and chewy instead of tender and crisp.
- Not chilling the dough: Skipping the chill time can cause your crust to shrink, crack, or lose its shape in the oven. Always chill before and after rolling.
- Rolling too thin or too thick: Aim for about 1/8 inch. Too thin, and it may tear or burn. Too thick, and it won’t crisp up properly.
- Skipping blind baking (when needed): If you’re filling the crust with something wet like custard or ganache, blind baking prevents sogginess.
Avoid these errors, and you’re well on your way to tart perfection.
How to Store Tart Dough or Baked Tart Shell
Having tart dough on hand is like holding a golden ticket to dessert whenever you need it. Here’s how to store it properly:
- Unbaked dough: Wrap tightly in plastic and refrigerate for up to 3 days or freeze for up to 2 months. Thaw overnight in the fridge before rolling.
- Rolled and shaped dough: Once pressed into the tart pan, freeze it (pan and all!) for up to 1 month. No need to thaw before blind baking—just bake from frozen, adding 5–7 extra minutes.
- Baked tart shell: Store at room temperature in an airtight container for 2–3 days, or freeze for up to 1 month. Re-crisp in a 350°F oven for 5–7 minutes before filling.
This kind of prep makes entertaining—or satisfying a last-minute sweet tooth—a breeze.
Creative Flavor Variations
Want to level up your tart crust game? There are plenty of ways to add personality to the base without overwhelming your filling.
Here are a few fun twists:
- Cocoa Crust: Replace 2 tablespoons of flour with unsweetened cocoa powder. Perfect for chocolate tarts or raspberry pairings.
- Nutty Crust: Swap 1/4 cup flour for ground almonds, hazelnuts, or pecans. Adds richness and crunch.
- Citrus Zest: Lemon, lime, or orange zest brightens up fruit tarts beautifully.
- Spiced Crust: A pinch of cinnamon, cardamom, or even ginger warms up fall-inspired fillings like apple or pumpkin.
- Savory Crust: Omit sugar and mix in Parmesan, black pepper, or herbs like thyme for quiches or cheese tarts.
Play with your ingredients and let your imagination (and tastebuds) lead the way.
Using the Crust for Sweet vs. Savory Tarts
This versatile recipe can shift depending on your flavor direction. Here’s how to tweak it:
For Sweet Tarts:
- Use powdered sugar for a smoother, shortbread-like texture.
- Add vanilla or almond extract for a hint of aroma.
- Ideal fillings: pastry cream, fruits, ganache, lemon curd, mascarpone.
For Savory Tarts:
- Skip the sugar.
- Add 1–2 tablespoons of grated cheese or dried herbs.
- Great for fillings like roasted vegetables, eggs and cheese, spinach and feta, or bacon and onion.
The base is basically a blank canvas—you just have to decide if you’re in the mood for dinner or dessert.
Expert Tips for a Flaky and Buttery Texture
Professional bakers all swear by a few simple techniques that make all the difference. Here’s the inside scoop:
- Butter chunks should be visible in the dough: When you see small butter pieces, you’re doing it right. They’ll melt in the oven, creating steam and flakiness.
- Work quickly and keep things cool: Warm hands and kitchens can cause butter to melt prematurely. Chill your tools or even your flour if needed.
- Use your fingers carefully: If you don’t have a pastry cutter, use your fingertips—not your palms—to break up the butter. This minimizes heat transfer.
- Dock the bottom of the crust: Prick with a fork to let steam escape during baking. No puffing = perfectly flat bottom.
- Use pie weights properly: Don’t just drop a few beans in the middle. Fill to the edges to keep the sides from collapsing.
These pro tips help your tart crust turn out flawless, every time.
Serving Suggestions
Once your tart crust is baked to golden perfection, what comes next? Let’s explore some tasty ideas:
Sweet Tart Ideas:
- Fresh berry tart with pastry cream
- Classic French lemon tart (tarte au citron)
- Chocolate ganache tart with sea salt
- Apple tart with almond cream (frangipane)
- Mini tarts for brunches or parties
Savory Tart Ideas:
- Caramelized onion and goat cheese tart
- Tomato and mozzarella tart with pesto
- Broccoli and cheddar quiche
- Mushroom tart with Gruyère
- Mediterranean vegetable tart with olives
With one crust recipe, your tart possibilities are nearly endless.
FAQs about Tart Crust Recipe
1. Can I make tart crust without a food processor?
Absolutely! Use a pastry cutter or your fingertips to cut the butter into the flour. Just be gentle and work quickly to keep the butter cold.
2. Why does my tart crust shrink in the oven?
Shrinking happens when the dough is overworked or not chilled properly. Always rest the dough in the fridge before baking and avoid stretching it when placing it in the tart pan.
3. Can I make this crust gluten-free?
Yes! Use a 1:1 gluten-free flour blend designed for baking. Add a little xanthan gum (if not included in the mix) to help the dough hold together.
4. How do I prevent a soggy bottom crust?
Blind baking is key. Also, avoid overfilling with wet ingredients and allow hot fillings to cool slightly before pouring into the shell.
5. Is this tart crust recipe suitable for mini tarts or tartlets?
Definitely! Just divide the dough accordingly and press into mini tart pans. Baking time may be slightly shorter, so keep an eye on them.
Conclusion
Mastering a tart crust might seem intimidating at first, but once you understand the process and use the right techniques, it becomes second nature. A great tart crust is more than just a base—it’s the beginning of something delicious. Whether you’re going sweet or savory, classic or experimental, this crust will never let you down.
Now that you’ve got the step-by-step guide, ingredients, tools, and tips in your back pocket, it’s time to roll up your sleeves and bake with confidence. Don’t be afraid to try new flavor twists or tackle that tart recipe you’ve been saving for months.
So go ahead—make your tart crust from scratch and wow everyone at your next gathering. Or better yet, enjoy it all by yourself. You earned it.