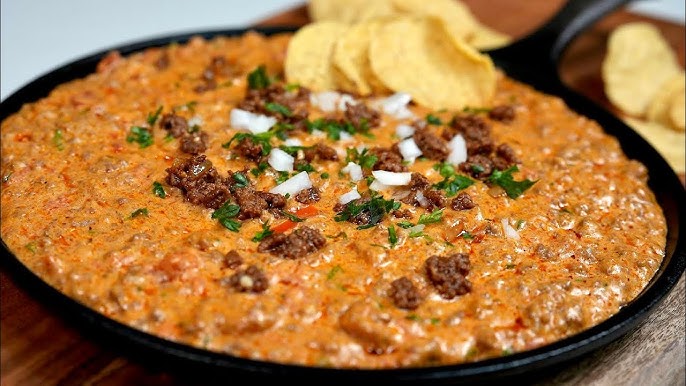
Taco Dip Recipe: Taco dip is a creamy, flavorful appetizer layered with classic taco ingredients like seasoned ground beef, sour cream, shredded cheese, and fresh toppings like tomatoes and lettuce. It’s a crowd-pleaser that’s perfect for parties, game days, or casual gatherings. With its customizable layers and rich taste, it’s easy to see why taco dip is a favorite across households.
Why This Recipe is Perfect for Any Occasion
This recipe is not only versatile but also incredibly simple to make. Whether you’re hosting a potluck or a family movie night, taco dip is the perfect snack to bring people together. It’s easy to prepare in advance, and the vibrant layers make it visually appealing and appetizing.
Ingredients Needed for Taco Dip
Essential Ingredients
To make a classic taco dip, you’ll need the following:
- Cream Cheese (8 oz): Softened to make a smooth base layer.
- Sour Cream (1 cup): Adds tanginess to the dip.
- Taco Seasoning (2 tbsp): For a rich, spiced flavor.
- Shredded Cheese (2 cups): A mix of cheddar and Monterey Jack works best.
- Refried Beans (1 can): Adds a hearty texture to the dip.
- Diced Tomatoes (1 cup): Fresh or canned.
- Chopped Lettuce (1 cup): For a crunchy topping.
- Black Olives (½ cup): Sliced for a savory garnish.
- Green Onions (¼ cup): Adds freshness to the dip.
Optional Add-Ons for Extra Flavor
- Guacamole: A creamy layer for avocado lovers.
- Jalapeños: For a spicy kick.
- Salsa: Adds moisture and extra zest.
- Corn or Black Beans: To make the dip heartier.
Tools and Equipment Required
Kitchen Tools You’ll Need
- Mixing bowls (various sizes)
- Hand mixer or spatula
- 9×13-inch baking dish or serving platter
- Knife and cutting board
- Measuring cups and spoons
Tips for Setting Up Your Workspace
Keep all ingredients prepped and organized in bowls before assembling the dip. This ensures the process flows smoothly and prevents last-minute scrambling. Clean as you go to keep your workspace tidy.
Step-by-Step Preparation
Step 1: Preparing the Base Layer
Start by mixing the softened cream cheese with sour cream in a bowl. Use a hand mixer for a smooth consistency. Add in the taco seasoning and mix until well-blended. Spread this mixture evenly at the bottom of your baking dish or serving platter.
Step 2: Making the Taco Seasoning
If you prefer homemade seasoning, combine chili powder, cumin, garlic powder, onion powder, paprika, and a pinch of salt. Adjust the spice levels to suit your taste.
Step 3: Layering the Ingredients
Spread the refried beans over the cream cheese mixture, followed by a layer of guacamole if desired. Sprinkle shredded cheese generously on top. Add the diced tomatoes, chopped lettuce, black olives, and green onions in layers for a colorful finish.
Assembling Your Taco Dip
How to Layer for Maximum Flavor
For the best flavor, ensure each layer is evenly distributed. Start with the cream cheese mixture as the foundation, as it holds the other ingredients in place. Keep the cheese layer slightly thicker for a rich, indulgent bite.
Adjustments Based on Dietary Preferences
For a lighter option, use Greek yogurt instead of sour cream. Swap regular cheese with vegan cheese for a dairy-free version. Gluten-free taco seasoning ensures everyone can enjoy the dish.
Cooking and Serving Instructions
Should You Bake or Serve Cold?
Taco dip is traditionally served cold, but you can bake it at 350°F for 10–15 minutes to melt the cheese and serve it warm. Both methods are equally delicious, so choose based on your preference.
Best Ways to Serve Taco Dip
Serve the dip with tortilla chips, crackers, or even veggie sticks. A serving spoon ensures each guest can scoop the perfect portion without mixing the layers.
Pairing Taco Dip with Snacks
Ideal Chips and Crackers
Taco dip pairs perfectly with tortilla chips, especially sturdy ones that can hold up to the weight of the layers. Choose corn chips or flavored tortilla chips for an extra kick. Pita chips and baked crackers also make excellent alternatives, providing a different texture that complements the creamy and crunchy layers of the dip.
Creative Alternatives for Dipping
Looking for healthier or more unique options? Try these:
- Veggie Sticks: Carrots, celery, cucumber slices, and bell pepper strips add a refreshing crunch.
- Pretzels: Their salty profile works surprisingly well with taco dip.
- Mini Flatbreads or Naan Slices: Perfect for scooping up large portions of the dip.
- Sweet Potato Chips: A sweet and savory pairing for an adventurous twist.
Storing Leftover Taco Dip
How to Refrigerate Taco Dip
Cover the leftover dip tightly with plastic wrap or transfer it to an airtight container. Store it in the refrigerator for up to 3 days. When you’re ready to serve it again, give the dip a gentle stir if the layers have shifted or settled.
Freezing and Reheating Tips
While taco dip is best enjoyed fresh, you can freeze it for up to a month. Place it in a freezer-safe dish, ensuring it’s well-covered to prevent freezer burn. Thaw it in the refrigerator overnight and enjoy it cold, or reheat in the oven at 300°F for 10–12 minutes to refresh the flavors.
Common Mistakes to Avoid
Overmixing the Base
Avoid overmixing the cream cheese and sour cream base, as it can become too runny. Stick to a smooth but firm consistency to keep the layers stable.
Skipping Key Layers
Each layer adds to the overall flavor, so don’t skip important components like cheese or refried beans. Missing layers can make the dip feel incomplete and unbalanced.
Healthier Variations of Taco Dip
Substituting Ingredients for a Lighter Option
- Replace sour cream with Greek yogurt for a tangy and protein-rich alternative.
- Use low-fat cream cheese and shredded cheese to cut down on calories without compromising taste.
- Add more veggies, like diced bell peppers or corn, to boost the nutritional value.
Vegan and Gluten-Free Alternatives
For a vegan option, swap cream cheese and sour cream for dairy-free substitutes made from cashews or coconut. Use plant-based shredded cheese and ensure your taco seasoning is free of gluten or animal products.
FAQs about Taco Dip Recipe
What ingredients do I need for a taco dip?
To make a classic taco dip, you will need cream cheese, sour cream, taco seasoning, shredded lettuce, diced tomatoes, shredded cheddar cheese, black olives, and sliced green onions. You can also add ground beef or refried beans for a heartier dip.
Can I make taco dip ahead of time?
Yes, taco dip can easily be made ahead of time. Simply prepare the dip as directed, cover it, and refrigerate. For best taste, it’s recommended to serve it within 24 hours. Add fresh ingredients like lettuce and tomatoes right before serving to maintain their crispness.
Is taco dip served hot or cold?
Taco dip can be served either hot or cold, depending on your preference. For a cold version, layer the ingredients and serve. If you prefer it hot, add layers that include cooked meat and bake in the oven until the cheese is melted and bubbly.
What are some variations of taco dip?
There are many ways to customize taco dip. Vegetarians can skip the meat and add extra beans and veggies. For a spicier dip, include jalapeños or a dash of hot sauce. You can also experiment with different types of cheese or add a layer of guacamole.
How should I serve taco dip?
Taco dip is best served with tortilla chips for dipping. It also pairs well with sliced baguettes or crackers. For a low-carb option, you can serve it with sliced cucumbers or bell peppers.
How long does taco dip last in the fridge?
When stored in an airtight container, taco dip can last in the refrigerator for up to 3-5 days. Be sure to check the freshness of your ingredients before serving it again.
Conclusion
Taco dip is an irresistible and versatile dish that’s as easy to make as it is to enjoy. Whether served at a festive gathering, a casual potluck, or a cozy night in, it’s guaranteed to be a hit with everyone. By following this step-by-step guide, you’ll have a delicious taco dip ready in no time.
Don’t forget to personalize the layers to suit your preferences and enjoy the explosion of flavors in every bite!


