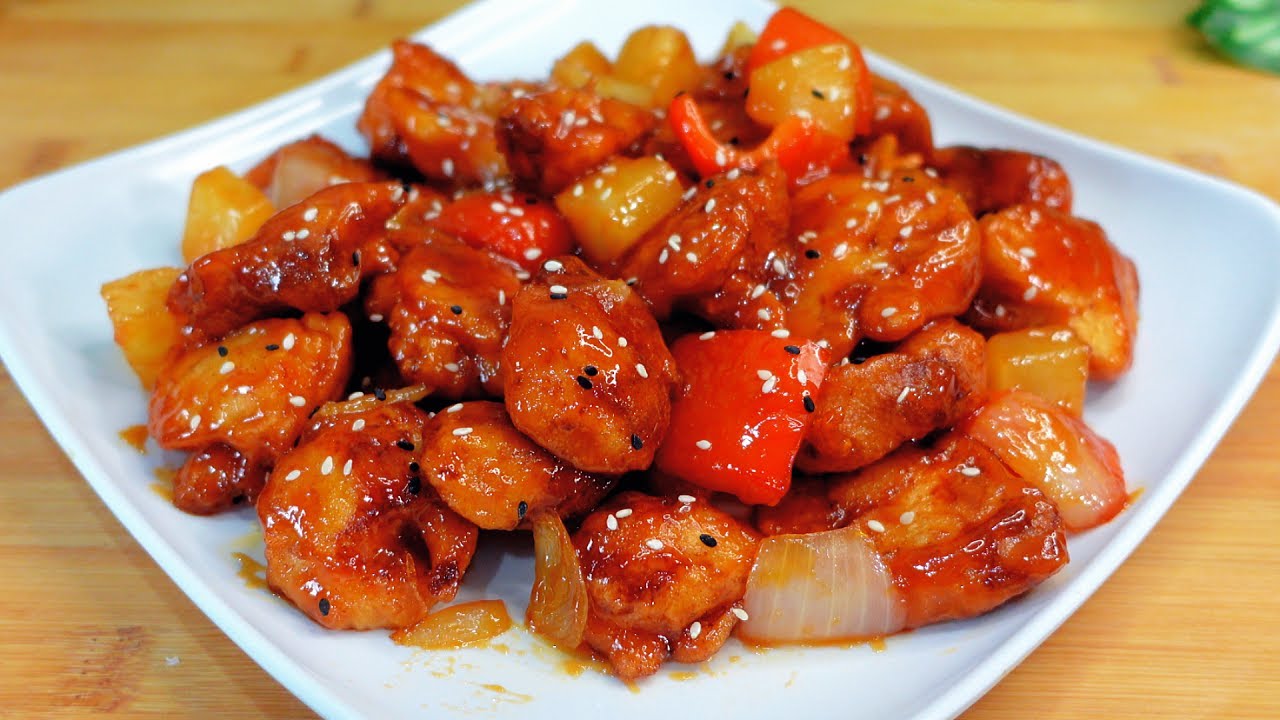
Sweet Sour Chicken Recipe: Sweet and sour chicken has become one of the most beloved dishes across the globe. Rooted in Chinese-American culinary traditions, this dish represents the perfect harmony of flavors: tangy, sweet, and slightly savory, all in one bite. You know those golden crispy chunks of chicken coated in that glossy, bright orange sauce? That’s the beauty of this dish—it brings comfort and excitement to your plate at the same time.
This recipe has gained massive popularity because it’s easy to make, customizable, and a total crowd-pleaser. Whether you’re preparing a family dinner or hosting friends, sweet and sour chicken offers both flavor and presentation that feels restaurant-quality. Best of all? You don’t need to be a master chef to pull it off. It’s simple enough for beginners but rewarding enough for seasoned home cooks.
What makes this dish stand out is the bold sauce—its tanginess comes from vinegar, while ketchup and sugar add the sweetness. Paired with crispy chicken and crunchy stir-fried veggies, you get a dish that hits every texture and flavor note. Let’s dive into the ingredients and step-by-step instructions so you can make this delicious favorite right at home.
Ingredients You’ll Need
Main Ingredients for Chicken
To make the perfect sweet and sour chicken, start with quality chicken pieces and the right coating for that classic crunch. Here’s what you’ll need:
- Boneless chicken breast or thighs – 1.5 pounds (cut into 1-inch cubes)
- Cornstarch – ½ cup (for coating)
- All-purpose flour – ½ cup (for coating)
- Eggs – 2 (beaten, helps with breading)
- Salt & pepper – to taste
- Oil for frying – vegetable, canola, or peanut oil
The combination of flour and cornstarch gives your chicken the golden, crispy texture that soaks up the sauce perfectly. Chicken thighs tend to be juicier, but breasts work well too if you prefer lean meat.
Ingredients for Sweet and Sour Sauce
The sauce is the heart of this dish. Tangy, sweet, and incredibly flavorful, it’s a simple mix of pantry staples:
- Ketchup – ½ cup (adds that rich color and sweet tomato base)
- White vinegar – ⅓ cup (for the tang)
- Brown sugar – ⅓ cup (adjust for sweetness)
- Soy sauce – 2 tbsp (adds umami)
- Pineapple juice – ¼ cup (optional but enhances flavor)
- Cornstarch – 1 tbsp (to thicken the sauce)
- Water – ¼ cup (for mixing with cornstarch)
Some recipes add a touch of garlic or ginger for extra depth, which is totally optional but highly recommended.
Optional Ingredients and Add-ons
Want to add more flair or nutrition? Here are some popular optional ingredients:
- Bell peppers – 1 red and 1 green, chopped (adds color and crunch)
- Pineapple chunks – ½ cup (fresh or canned, brings a tropical sweetness)
- Onion – 1 medium, cut into large chunks (adds savoriness)
- Chili flakes or hot sauce – for those who like a spicy kick
- Sesame seeds and green onions – for garnish
These additions not only enhance the taste but also elevate the visual appeal of the dish. Think of it like upgrading your basic chicken nuggets to a full-blown gourmet entrée.
Tools and Equipment Required
Basic Kitchen Tools
Before jumping into the cooking process, gather your kitchen tools. You’ll need:
- Sharp knife and cutting board – for prepping chicken and veggies
- Mixing bowls – for marinating, breading, and sauce mixing
- Measuring cups and spoons – for accurate ingredient portions
- Whisk or spoon – for mixing the sauce
Having these tools ready ahead of time keeps your cooking smooth and stress-free.
Frying Essentials
Since sweet and sour chicken involves frying, make sure you have:
- Wok or deep frying pan – non-stick or cast iron preferred
- Tongs or slotted spoon – to flip and remove chicken from oil
- Paper towels and wire rack – for draining excess oil
- Thermometer (optional) – helps monitor oil temperature (350–375°F is ideal)
These tools ensure you get that crispy, golden chicken without any mess or sogginess.
Preparation Before Cooking
Cutting and Marinating the Chicken
Start by cutting your chicken into bite-sized chunks. Consistent size ensures even cooking. Lightly season the chicken with salt and pepper, then let it marinate for 15–20 minutes. If you like, add a splash of soy sauce or a bit of garlic powder to the marinade for more flavor.
While marinating isn’t mandatory, it does help the chicken stay juicy and flavorful after frying. If you’re short on time, a quick 10-minute rest works fine too.
Prepping the Vegetables
Chop your veggies into large, even pieces. Bell peppers and onions should be cut into squares or strips. If using pineapple, drain and cut into small chunks. Keep everything in separate bowls for easy access during stir-frying.
This step might seem simple, but having your veggies ready and portioned makes cooking much smoother, especially when working over high heat.
Organizing Ingredients for Easy Access
Lay out your ingredients and tools on your countertop. Arrange your breading station with one bowl for flour and cornstarch, one for beaten eggs, and a tray to place the coated chicken. Mix the sauce ingredients in advance so you can pour it right in when the time comes.
This kind of mise en place (everything in its place) keeps you focused and helps avoid last-minute scrambling.
Step-by-Step Cooking Guide
Step 1: Marinate the Chicken
This first step is where your flavor foundation begins. Even though sweet and sour chicken gets most of its punch from the sauce, seasoning the chicken beforehand ensures each bite is savory and satisfying.
After cutting the chicken into bite-sized chunks, place them in a bowl. Add salt, pepper, and a teaspoon of soy sauce. Optionally, add garlic powder or a dash of sesame oil for an extra layer of depth. Toss the chicken well to coat evenly, then cover the bowl and let it sit for about 20 minutes. If you’re short on time, 10 minutes will still do the trick.
This quick marinade infuses flavor and tenderizes the chicken slightly. It’s the difference between “pretty good” and “wow, what is this amazing chicken?”
While the chicken marinates, you can start prepping the sauce and coating.
Step 2: Prepare the Sweet and Sour Sauce
Here’s where the magic happens—the sauce. That sticky, shiny glaze is what makes this dish iconic. It’s surprisingly easy to make.
In a small bowl or saucepan, combine:
- ½ cup ketchup
- ⅓ cup white vinegar
- ⅓ cup brown sugar
- 2 tablespoons soy sauce
- ¼ cup pineapple juice (optional but recommended)
Whisk these ingredients together until smooth. In another cup, mix 1 tablespoon cornstarch with ¼ cup water to create a slurry. This helps thicken the sauce.
Heat the sauce mixture in a saucepan over medium heat. Once it begins to simmer, slowly whisk in the cornstarch slurry. Continue stirring until the sauce thickens to a glaze-like consistency. Turn off the heat and set it aside.
Pro tip: Taste your sauce before finishing it. Too tangy? Add a little more sugar. Too sweet? A splash more vinegar will balance it out.
Step 3: Coat and Fry the Chicken
Time to get crispy! This step gives the dish its signature crunch before the saucy finale.
Set up a breading station with three containers:
- Flour + cornstarch mix (½ cup each)
- Beaten eggs
- A tray for the coated chicken
Dip each marinated chicken piece into the flour mixture, then into the eggs, and back into the flour again. This double coating ensures an ultra-crispy exterior. Shake off excess and place on a tray.
In a deep pan or wok, heat about 2–3 inches of oil to 350°F (you can check this with a thermometer or test with a bread crumb—it should sizzle immediately).
Carefully add the coated chicken in batches. Don’t overcrowd the pan. Fry each batch for 4–6 minutes or until golden brown and crispy. Use a slotted spoon to remove the chicken and drain on a wire rack or paper towels.
Let the chicken rest while you prepare the veggies and sauce for the final mix.
Step 4: Stir-Fry Vegetables
The stir-fried veggies bring color, texture, and balance to the richness of the chicken.
In a clean wok or skillet, add 1 tablespoon of oil over medium-high heat. Toss in:
- 1 chopped onion
- 1 red bell pepper
- 1 green bell pepper
- ½ cup pineapple chunks
Sauté for about 3–4 minutes, just until the veggies are slightly tender but still crisp. You’re not trying to soften them completely—just give them a bit of heat and char for flavor.
If you like your dish spicy, this is where you can add a pinch of red pepper flakes or a splash of chili sauce.
Step 5: Combine Everything Together
Now comes the fun part—bringing it all together.
Once your veggies are stir-fried, lower the heat and add your prepared sweet and sour sauce to the pan. Stir well to coat the veggies, and let the sauce bubble for 1–2 minutes.
Then, gently add the fried chicken pieces into the sauce and veggie mix. Stir carefully to coat every chunk in that glossy sauce. Toss until everything is well combined and heated through—this usually takes another 2–3 minutes.
Your kitchen will smell amazing at this point. The dish is ready to serve!
Tips for the Perfect Sweet and Sour Chicken
Avoiding Common Mistakes
Even though this dish is simple, a few key mistakes can make a big difference. Here’s how to avoid them:
- Overcrowding the pan while frying: This cools down the oil and leads to soggy chicken. Fry in small batches.
- Skipping the cornstarch in the coating: Cornstarch is essential for that light, crispy texture.
- Using low heat for the sauce: It won’t thicken properly. Always simmer it until it bubbles gently.
- Overcooking the vegetables: You want them to retain some crunch to contrast the tender chicken.
Avoid these traps, and your sweet and sour chicken will turn out just like the takeout version—if not better.
Balancing the Flavors
This dish is all about finding the right balance between sweet and sour. Here’s a flavor guide:
- Too sour? Add a touch more sugar or pineapple juice.
- Too sweet? A splash of vinegar or lemon juice helps.
- Too salty? Balance it with a little water or sugar.
The sauce should be bold but not overwhelming. Once you get it right, you’ll find yourself making this dish on repeat.
Nutritional Information
Calorie Count Per Serving
If you’re watching your intake or simply want to know what’s on your plate, sweet and sour chicken sits in the moderate-to-high calorie range, especially when fried. Here’s a general estimate per serving (based on a standard portion of about 1 cup with sauce and vegetables):
- Calories: ~450-550 kcal
- Protein: 25-30 grams
- Fat: 20-25 grams
- Carbohydrates: 40-50 grams
- Sugar: 20-25 grams
- Fiber: 2-3 grams
Frying adds a fair amount of calories from oil, and the sauce contributes most of the sugar and carbs. If you’re looking to reduce the calorie load, consider baking the chicken instead of frying and cutting back on the sugar in the sauce.
Macronutrient Breakdown
Understanding the macronutrient distribution can help you plan your meals better. Here’s how the macronutrients stack up:
- Protein: Comes mainly from the chicken. Using breast meat will give you a leaner protein source compared to thighs.
- Carbs: Mostly from the sauce (ketchup, sugar, pineapple juice) and the coating flour. You can use less sugar or swap ketchup for tomato paste if you’re on a low-carb plan.
- Fats: Most of the fat comes from frying oil. To reduce fat content, opt for an air fryer or bake the chicken pieces instead.
For those on a specific diet (like keto or low-carb), you can make simple swaps to adapt this dish—use almond flour and a sugar-free sauce base.
Serving Suggestions
Best Side Dishes to Serve With
Sweet and sour chicken is flavorful and hearty on its own, but pairing it with the right sides can make your meal feel complete. Here are some perfect companions:
- Steamed white rice – The go-to base that soaks up all that delicious sauce.
- Fried rice – Adds extra flavor and texture. You can use leftover rice and toss it with eggs, veggies, and soy sauce.
- Lo mein noodles – Soft and savory noodles complement the sweet and tangy chicken.
- Cauliflower rice – A great low-carb alternative that keeps things light.
- Steamed broccoli or bok choy – Helps cut the richness of the dish with something fresh and green.
If you’re serving guests or making a full dinner, a simple soup like hot and sour or egg drop works wonderfully as a starter.
Presentation Tips
Make your sweet and sour chicken look as good as it tastes! Try these presentation tricks:
- Garnish with sesame seeds and chopped green onions for a pop of color and texture.
- Serve in a bowl over steamed rice, letting the sauce drizzle down the sides.
- Add a slice of lime or lemon on the side to offer a tangy squeeze right before eating.
Remember, we eat with our eyes first. Even a simple home-cooked meal becomes a showstopper with thoughtful plating.
Variations of Sweet and Sour Chicken
Baked Version
If you’re trying to keep things lighter or avoid deep frying, baking is a fantastic alternative. Here’s how:
- After coating the chicken, lay the pieces on a parchment-lined baking sheet.
- Lightly spray with cooking oil to help crisp the coating.
- Bake at 400°F (200°C) for 20–25 minutes, flipping halfway through.
The result? A crispy, golden crust that’s much healthier but still delicious. You can even broil them for 2–3 minutes at the end to add extra crunch.
Once baked, toss the chicken in your pre-cooked sweet and sour sauce just like in the original recipe.
Vegan or Vegetarian Version
Craving the same flavor without the meat? You’ve got options:
- Tofu: Use extra-firm tofu, press it to remove moisture, and cube it. Coat and fry or bake as you would with chicken.
- Cauliflower: Break into florets, coat, and bake or air-fry. Cauliflower absorbs the sauce beautifully and offers a satisfying bite.
- Tempeh or Seitan: Great plant-based protein options with a dense texture. Marinade and pan-fry for best results.
The sauce remains the same, so you’ll still get that classic sweet and tangy flavor without compromising on taste.
Storage and Reheating Tips
How to Store Leftovers
Sweet and sour chicken makes excellent leftovers. Just be sure to store it properly:
- Refrigerator: Transfer the cooled dish to an airtight container. It will stay fresh for up to 3 days.
- Freezer: While freezing is possible, it may change the texture of the sauce and make the coating soggy. If you do freeze it, place in freezer-safe bags or containers for up to 2 months.
For best results, store the sauce separately from the chicken if you know you’ll have leftovers. That way, you can reheat the chicken to crispiness and add the sauce fresh.
Best Reheating Methods
- Oven or toaster oven: Preheat to 350°F (175°C) and bake the chicken on a tray for about 10–15 minutes. This helps it regain some of its original crunch.
- Air fryer: Perfect for reheating! Heat at 375°F (190°C) for 5–8 minutes.
- Stovetop: Reheat the sauce in a pan, then add the chicken and toss until warmed through.
- Microwave: Not ideal, but quick. Just note it will soften the coating. Heat for 1–2 minutes in intervals.
FAQs about Sweet Sour Chicken Recipe
1. Can I make sweet and sour chicken ahead of time?
Yes! You can prep the chicken and sauce ahead of time. Store them separately and combine just before serving for the best texture.
2. What type of vinegar works best in sweet and sour sauce?
White vinegar is most commonly used, but apple cider vinegar or rice vinegar can add a more mellow, fruity flavor.
3. Can I make this dish gluten-free?
Absolutely! Just use gluten-free soy sauce (like tamari) and a gluten-free flour blend for coating.
4. Is there a way to reduce the sugar in the sauce?
Yes, you can cut the sugar by half or use honey, agave, or a sugar substitute like stevia or erythritol to suit your taste.
5. What protein alternatives can I use instead of chicken?
You can use shrimp, tofu, tempeh, or pork. All work beautifully with the same sauce and cooking method.
Conclusion
Sweet and sour chicken is a timeless favorite for a reason—it’s quick, flavorful, and incredibly satisfying. Whether you’re making it for a quiet night in or serving it up for friends and family, this dish is guaranteed to impress. With this detailed step-by-step guide, you’ll master the art of creating crispy chicken coated in a bold, tangy sauce that rivals any takeout joint.
Now that you know the secrets to nailing the perfect sweet and sour chicken, why not make it tonight? With a handful of pantry ingredients and some simple prep, you’re only 30 minutes away from pure deliciousness.
Bon appétit!