Sugar Wax Recipe: Ever thought about ditching the salon and switching to a more natural, affordable way to remove hair? Say hello to sugar waxing! This ancient hair removal method has stood the test of time, offering a cleaner, simpler alternative to chemical-laden waxes. Unlike the hot, sticky wax at salons, sugar wax is gentle, made with just a few kitchen staples, and perfect for a DIY spa day.
Sugar waxing, also known as sugaring, isn’t just a trend—it’s a revival of a centuries-old beauty ritual that dates back to Ancient Egypt. Cleopatra herself is believed to have used it to maintain her smooth skin. Fast forward to today, and people love it for its minimal ingredients and ease of use.
So why go through the trouble of making it yourself? First off, it’s crazy cheap. Second, you know exactly what’s going onto your skin—no parabens, no artificial colors, no mystery ingredients. Plus, it’s a lot less painful and can even be reused a few times in one sitting. That’s right—less pain, more gain.
Ready to become your own at-home waxing expert? Let’s break it down step by step!
Benefits of Sugar Waxing
Before diving into the kitchen, let’s talk perks. Sugar waxing isn’t just a fun DIY project—it comes with real benefits that make it worth trying.
1. 100% Natural and Skin-Friendly
At its core, sugar wax is made from just sugar, water, and lemon juice. That’s it. No synthetic ingredients, no preservatives, no artificial fragrances—just three things you probably already have at home. That makes it perfect for sensitive skin types or those who are allergic to the chemicals found in conventional waxing products.
Lemon juice acts as a natural astringent and helps break down the hair while sugar gently exfoliates your skin during the process. Win-win!
2. More Affordable Than Salon Waxing
Salon wax sessions can cost a fortune over time. A full-body waxing session can run you upwards of $100—and that’s not even including tips. In contrast, a single batch of sugar wax might cost you under $2. Think about all the cash you’ll save by switching to DIY sugaring.
3. Less Painful Than Traditional Waxing
Traditional wax sticks to both your hair and skin, which can make ripping it off a painful experience. Sugar wax only binds to your hair—not your skin—so it’s way gentler and less likely to cause redness, irritation, or that awful post-wax burning sensation.
4. Environmentally Friendly
No need for single-use strips or plastic containers. You can use cotton cloth strips that are washable and reusable. And the wax itself? Completely biodegradable. Nature approves!
Ingredients Needed for DIY Sugar Wax
Let’s talk ingredients. You don’t need a chemistry set—just three everyday items:
Basic Sugar Wax Recipe Ingredients:
- 1 cup white granulated sugar
- ¼ cup lemon juice (fresh or bottled)
- ¼ cup water
These ratios make enough wax for one to two medium-size areas like your legs or arms. If you’re planning to do a full body wax, you might want to double the batch.
Optional Additions:
- A drop of essential oil (lavender, tea tree, or chamomile) – for added skin-soothing properties.
- Honey (1 tablespoon) – some people add honey for extra nourishment and antibacterial effects.
- Brown sugar instead of white – gives a gentler texture, great for exfoliation.
All these extras are optional, but they can turn your sugaring session into a mini spa retreat.
Tools and Equipment You’ll Need
Cooking up sugar wax is easy, but you’ll need a few tools to get it done safely and effectively:
Kitchen Tools:
- Medium-sized saucepan – preferably non-stick to prevent burning
- Wooden spoon or silicone spatula – to stir the mixture
- Candy thermometer (optional) – helps you get the right consistency
- Glass container or mason jar – to store the finished wax
Application Tools:
- Cotton cloth strips – you can cut up an old t-shirt or pillowcase
- Wooden spatula or butter knife – to apply the wax
- Talc-free baby powder or cornstarch – to prep your skin before waxing
Trust me, having everything ready ahead of time makes the whole process smoother (pun totally intended).
Step-by-Step Guide to Making Sugar Wax at Home
Now for the fun part—making your own sugar wax! Don’t worry, it’s not rocket science, but precision does matter a bit. Follow this step-by-step guide and you’ll nail it on your first try.
Step 1: Measuring Your Ingredients
Start by measuring out:
- 1 cup sugar
- ¼ cup lemon juice
- ¼ cup water
Pour everything into a medium-sized saucepan. Make sure the pan has a heavy bottom so the mixture heats evenly.
Step 2: Cooking the Sugar Mixture
Turn the stove to medium heat. Stir continuously to prevent burning. The mixture will start bubbling and shift in color from clear to golden.
Here’s what you’re looking for:
- At 250°F (use that candy thermometer!), the mixture should look like honey.
- If you don’t have a thermometer, watch for a deep amber color and test it by dropping a bit in cold water. It should be malleable but not hard like candy.
Tip: Don’t walk away while it’s cooking. Sugar burns fast.
Once it hits the right consistency and color, remove it from heat immediately.
Step 3: Cooling and Storing the Wax
Let the mixture cool for at least 20-30 minutes. You want it warm and pliable—not hot. Pour it into your glass jar for storage.
The wax should have a thick, taffy-like consistency. If it’s too runny, you may have undercooked it. If it’s too hard, you might have overcooked it. But don’t worry—there’s always the next batch!
Once cooled, your wax is ready to use. You can even store leftovers for up to four weeks in an airtight container. Just microwave for 10-15 seconds before reuse.
How to Use Sugar Wax Properly
So you’ve got your homemade sugar wax sitting pretty in a jar. Now what? Time to put it to work. But wait—before you slather it on, there are a few essential things you need to know for smooth, successful hair removal.
Prepping Your Skin
The first step to effective sugaring starts with clean, dry skin. Here’s what to do:
- Exfoliate gently a day before waxing. This helps lift any trapped hairs and sloughs off dead skin cells.
- Wash the area with warm water and mild soap to remove oils, lotions, and sweat.
- Dry completely and dust a light layer of cornstarch or talc-free baby powder on the area. This absorbs any remaining moisture and lets the wax grip only your hair—not your skin.
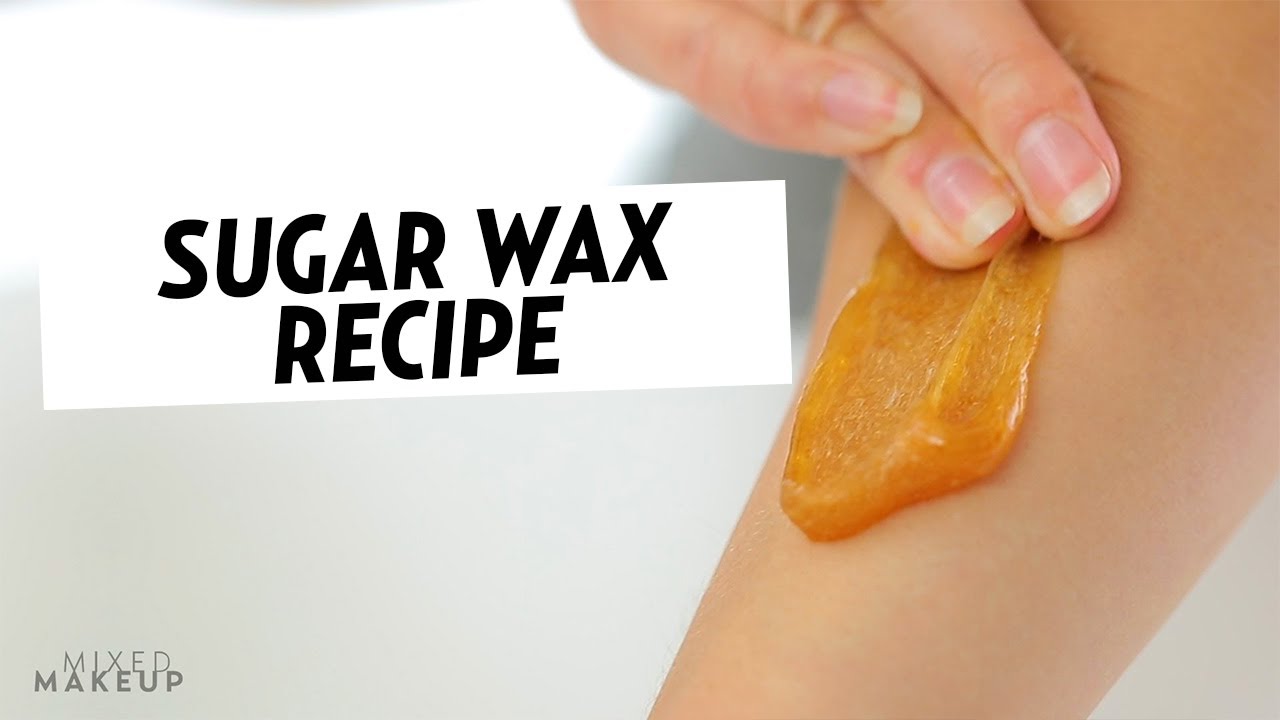
Applying the Wax
Now comes the application. Here’s how to do it like a pro:
- Scoop a small amount of wax with your fingers or a spatula. If it’s too sticky, warm it up a little.
- Spread it against the direction of hair growth in a thin, even layer. This helps the wax wrap around the hair better.
- Press a cotton strip over the wax, smoothing it down firmly a few times.
- Hold your skin taut and yank the strip off quickly in the direction of hair growth. Yes, it feels counterintuitive, but that’s one of the secrets to why sugaring hurts less and leads to fewer ingrown hairs.
Repeat as needed. Use a damp cloth to wipe off any residue (though sugar wax is water-soluble, so it rinses right off!).
Post-Wax Care
Aftercare is key to avoiding irritation or bumps:
- Apply aloe vera gel or witch hazel to soothe the skin.
- Avoid hot showers, tight clothes, and sweaty workouts for at least 24 hours.
- Skip lotions or oils that contain alcohol or fragrance for the next day or so.
Troubleshooting Common Sugar Wax Issues
Let’s be honest—your first batch might not come out perfect. But hey, practice makes perfect! Here are some quick fixes for common hiccups:
Problem: Wax Is Too Runny
If your sugar wax is more like syrup and doesn’t stick properly, it probably didn’t cook long enough.
Fix: Pour it back into the pan and reheat it on low. Let it simmer until it darkens slightly and thickens up. Test a drop in cold water to check texture.
Problem: Wax Is Too Hard or Crumbly
Overcooked it? No biggie.
Fix: Add a tablespoon or two of water, reheat it gently while stirring until it loosens up.
Problem: It Won’t Stick to Hair
The most common reasons are:
- Hair is too short (needs to be at least ¼ inch)
- Skin is too oily (didn’t use powder)
- Wax is too cool or too warm
Fix: Adjust temperature and make sure your skin is prepped right.
Problem: You’re Bruising or Irritated
This usually happens if:
- You’re pulling the strip upward instead of close to the skin
- You’re waxing over the same spot too many times
- Your skin isn’t taut enough during the pull
Fix: Pull parallel to your skin, not up. Limit each area to 1–2 passes max.
How Often Should You Use Sugar Wax?
One of the perks of sugaring is that it actually slows down your hair growth over time. Since it pulls hair out from the root, you won’t need to wax nearly as often as you would shave.
General Guidelines:
- Legs & arms: Every 3–5 weeks
- Underarms & bikini line: Every 2–3 weeks
- Face or eyebrows: Every 2 weeks (but use smaller amounts and be super gentle)
Eventually, hair starts to grow back finer and sparser, meaning less work for you.
Here’s a tip: Set a waxing schedule in your calendar so you stay on top of it and your skin stays smooth.
Is Sugar Waxing Safe for All Skin Types?
Generally speaking—yes! Sugar waxing is one of the safest forms of hair removal out there. But everyone’s skin is different, and it’s smart to do a patch test first, especially if you have super sensitive skin.
Great for These Skin Types:
- Sensitive skin: No harsh chemicals or heat
- Dry skin: Gently exfoliates while removing hair
- Oily skin: Lemon helps cut through oil while sugar balances the skin
Use Caution If You Have:
- Skin conditions like eczema, psoriasis, or sunburn
- Varicose veins or broken capillaries—pulling can worsen these issues
- Recently used retinoids or acids—your skin may be too thin or sensitive
When in doubt, check with a dermatologist before trying it out.
Tips to Get the Best Results from Sugar Waxing
Want that flawless, just-left-the-spa glow? These pro tips will help you nail your sugar waxing routine every time.
1. Let Your Hair Grow Out First
You need about ¼ inch of hair for the sugar wax to grip. That’s usually 10–14 days of growth after shaving.
2. Don’t Wax Right Before or After Your Period
Hormonal changes can make your skin extra sensitive. Aim for the middle of your cycle if possible—it’ll hurt way less.
3. Keep the Wax at the Right Temperature
Warm wax spreads easier and works better, but it shouldn’t be hot. If it burns your fingers, it’s too hot for your skin.
4. Always Pull Fast and Close to the Skin
This reduces pain and prevents bruising. Think of it like removing a band-aid—quick and parallel.
5. Don’t Panic if It Doesn’t Work Right Away
Your first few tries might be messy or awkward. That’s normal. By the third or fourth session, you’ll be a sugaring superstar.
Comparing Sugar Wax vs. Traditional Wax
Wondering how sugar wax stacks up against traditional waxing? Let’s break it down. While both methods aim to remove hair from the root, their approach—and impact on your skin—can be pretty different.
Ingredients Comparison
- Sugar Wax: Made of sugar, water, and lemon. That’s it. 100% natural.
- Traditional Wax: Often contains synthetic resins, dyes, fragrances, and preservatives, which can irritate sensitive skin.
Application and Removal
- Sugar Wax: Applies at room temperature or just warm, and is removed with the direction of hair growth, reducing breakage and ingrowns.
- Traditional Wax: Applied hot and ripped against the direction of hair growth—ouch!
Residue and Clean-Up
- Sugar Wax: Water-soluble, so it rinses off easily with warm water.
- Traditional Wax: Leaves sticky residue and requires oil-based removers.
Pain Factor
- Sugar waxing is generally less painful. Since it doesn’t stick to the skin—only to hair—it feels more like a firm pull than a skin-yanking tear.
Bottom line? If you’re looking for a gentler, natural, and more affordable way to wax at home, sugar wax wins by a landslide.
Can You Use Sugar Wax on All Body Areas?
Absolutely! One of the best parts about sugar waxing is its versatility. You can safely use it on almost every part of your body—yes, even the delicate ones.
Safe Zones for Sugar Waxing:
- Legs and arms
- Underarms
- Face (upper lip, sideburns, chin)
- Eyebrows (with caution!)
- Stomach and back
- Bikini line and Brazilian area
However, always do a patch test first, especially on more sensitive areas like your bikini line or face.
Tips for Different Areas:
- Face: Use smaller amounts and be extremely gentle.
- Underarms: Hair grows in multiple directions, so work in sections.
- Bikini/Brazilian: If you’re new to sugaring, start with the bikini line before going full Brazilian.
With practice, you’ll find what works best for each body part—and sugar waxing will become your go-to routine.
How to Store and Reheat Sugar Wax
Made a big batch? Awesome. The good news is sugar wax has a great shelf life—no need to make a fresh batch every time.
Storage Tips:
- Use an airtight glass jar (like a mason jar) to keep it fresh.
- Store in a cool, dry place—no need to refrigerate unless it’s very hot where you live.
- Wax can last up to 4–6 weeks at room temperature.
How to Reheat:
- Microwave Method: Warm in 10-second intervals, stirring between each burst.
- Stovetop Method: Place the jar in a pot of warm water until it softens.
Always test the wax temperature before applying. If it’s too hot for your fingers, it’s too hot for your skin.
Myths About Sugar Waxing Debunked
Let’s bust a few common myths that might be stopping you from trying sugar wax.
Myth 1: It Doesn’t Work on Thick Hair
Wrong! Sugar wax can handle coarse hair just as well as traditional wax. You may need a couple of passes, but it gets the job done.
Myth 2: It’s Too Messy
It might get sticky your first few tries, but sugar wax is actually less messy than hot wax—plus, it cleans up easily with water!
Myth 3: It Won’t Remove Short Hair
Hair needs to be about ¼ inch long. That’s the same as traditional waxing. Let it grow a little and you’re good to go.
Myth 4: You Can’t Make It at Home
Absolutely false. With just sugar, lemon, and water, you can whip up salon-worthy wax in your own kitchen—no chem degree required.
FAQs About Sugar Wax Recipe
1. What are the main ingredients in sugar wax?
Sugar wax only needs three basic kitchen staples: sugar, lemon juice, and water. That’s it! No need for fancy chemicals or hard-to-pronounce additives.
2. Can I use brown sugar instead of white sugar?
Yes, but with a heads-up: brown sugar makes the wax softer and trickier to work with. White sugar gives you that classic honey-like consistency most recipes aim for.
3. How long should I cook the sugar wax?
Cook it over medium heat for about 7–10 minutes, until it turns a golden-amber color. Stir often, and don’t walk away—this stuff can burn fast!
4. Does sugar waxing hurt?
It’s not a spa day, but it’s also not torture. Most people say sugar waxing is less painful than regular waxing because it sticks to the hair, not your skin.
5. How long should my hair be before sugaring?
You’ll want at least 1/4 inch of hair (about the size of a grain of rice). Too short and it won’t grip; too long and ouch.
6. Can I reuse homemade sugar wax?
Yes! Store leftovers in an airtight container. Warm it up slightly before reuse—but make sure it’s not lava-hot before applying.
7. Is sugar wax safe for sensitive skin?
Absolutely. It’s all-natural, gentle, and usually doesn’t trigger reactions. But if you’re super sensitive, do a small patch test first.
8. How long do results last?
You’ll stay smooth for around 3–4 weeks, depending on your hair growth. Regular use can even slow it down over time.
9. Can I use sugar wax on my face or bikini area?
Yes, just be extra gentle. The sugar mix is skin-friendly, but these areas are delicate—so apply carefully and pull quickly.
10. What’s the best way to clean up sugar wax?
No stress—sugar wax is water-soluble. Just rinse with warm water and soap. It’s way less messy than store-bought waxes.
Final Thoughts
Sugar waxing is more than just a DIY trend—it’s a smart, sustainable, and skin-loving way to keep things smooth. Whether you’re tired of shaving every two days or fed up with pricey salon appointments, sugaring puts the control back in your hands.
It’s safe for all skin types, less painful than traditional wax, and easy to make from ingredients in your pantry. Plus, it doubles as a gentle exfoliator—hello, glow-up!
So, the next time you feel that itch to remove unwanted hair, skip the trip to the salon. Mix up a little sugar magic in your kitchen and enjoy the freedom of smooth skin on your own terms.