Sugar Cookie Dough Recipe: Sugar cookies are one of those timeless desserts that never go out of style. Whether you’re baking them for the holidays, birthdays, or just as a weekend treat, their buttery sweetness and versatility make them a go-to recipe in many households. Unlike other fancy desserts that require professional-level baking skills, sugar cookies are simple enough for beginners yet customizable enough for advanced bakers to get creative.
One of the reasons sugar cookies have remained so popular is their adaptability. You can roll them out and cut them into festive shapes, decorate them with colorful icing, or keep them plain and simple with just a dusting of sugar. They are perfect for making memories with kids in the kitchen or preparing a thoughtful homemade gift for friends and family.
Think of sugar cookies as a blank canvas—you can keep them classic or use them as a base to explore endless flavor and decoration possibilities. Before we dive into the recipe, let’s talk about why these cookies hold such a special place in kitchens around the world.
Why Sugar Cookies Are a Classic Treat
Sugar cookies are considered a baking staple for good reason. Their origins can be traced back to 18th-century Pennsylvania, where German settlers first introduced the recipe. Over time, sugar cookies became a symbol of simplicity, comfort, and celebration. Unlike heavier desserts, they strike a balance between sweet and buttery, making them universally loved.
Another reason for their popularity is that they’re incredibly easy to customize. With just a few tweaks, you can make them soft and chewy or crisp and crunchy. Add a hint of citrus, roll them in cinnamon sugar, or top them with frosting and sprinkles—the possibilities are endless.
And let’s not forget their role in holiday traditions. From Christmas cutouts to Valentine’s hearts, sugar cookies have become a festive must-have. They’re more than just a treat—they’re a memory-making tradition.
Perfect Occasions for Sugar Cookies
Sugar cookies aren’t limited to just one event or season. They’re versatile enough to fit into almost any occasion. During the winter holidays, you’ll often find them shaped like snowflakes, stars, or Christmas trees. In spring, they take the form of flowers and bunnies. For birthdays, they can be customized with initials, numbers, or colorful designs.
But sugar cookies aren’t just for special occasions—they’re great for everyday enjoyment too. Bake a batch for a cozy weekend at home, bring them to school bake sales, or make them for your coworkers as a thoughtful surprise. They also make excellent edible gifts, especially when beautifully decorated and packaged in a festive tin or bag.
Whether you’re planning a holiday baking marathon or just craving something sweet and simple, sugar cookies fit the bill perfectly. Now that we’ve set the stage, let’s dive into the ingredients you’ll need to whip up your very own sugar cookie dough.
Ingredients You’ll Need for Sugar Cookie Dough
Every great recipe starts with the right ingredients, and sugar cookies are no exception. The beauty of this recipe is that it doesn’t require anything exotic—most of the ingredients are everyday pantry staples you probably already have at home. However, using high-quality ingredients can make a noticeable difference in taste and texture.
Essential Pantry Staples
Here’s a list of the basic ingredients you’ll need to make sugar cookie dough:
- Unsalted butter (1 cup, softened): Butter gives sugar cookies their rich flavor and tender texture. Always use softened butter at room temperature for easy mixing.
- Granulated sugar (1 cup): The star of the show! Sugar not only sweetens the cookies but also helps create that light, golden texture.
- Eggs (2 large): Eggs bind the dough together and add structure, making the cookies soft and chewy.
- All-purpose flour (3 cups): This provides the base structure for your cookies. Sift it to avoid lumps.
- Vanilla extract (2 teaspoons): Vanilla enhances the sweetness and gives cookies that warm, comforting aroma.
- Baking powder (1 teaspoon): Helps the cookies rise just enough without becoming too puffy.
- Salt (½ teaspoon): Balances out the sweetness and brings out the flavor.
With these staples, you’ll have the foundation for perfect sugar cookie dough.
Recommended Baking Tools
Aside from ingredients, having the right tools can make the baking process much smoother:
- Mixing bowls (at least two sizes)
- Electric mixer or stand mixer
- Measuring cups and spoons
- Rubber spatula for scraping the sides
- Rolling pin for flattening dough
- Cookie cutters in fun shapes
- Baking sheets lined with parchment paper
- Wire cooling rack
These tools help ensure that your sugar cookies come out consistent every time.
Optional Add-ins for Extra Flavor
Want to take your sugar cookies to the next level? Here are a few add-in ideas:
- Almond extract for a nutty twist.
- Citrus zest (lemon, orange, or lime) for freshness.
- Sprinkles or colored sugar for festive flair.
- Mini chocolate chips for a fun variation.
These little extras can make your cookies stand out and add a unique touch that reflects your personal taste.
Step-by-Step Guide to Making Sugar Cookie Dough
Now that we’ve gathered everything we need, it’s time to roll up our sleeves and make the dough. The process is simple, but paying attention to each step will ensure the best results.
Step 1 – Measuring Ingredients Accurately
Accuracy matters when baking. Unlike cooking, where you can add a pinch of this or a dash of that, baking is more like chemistry—it requires precise measurements. Always level off dry ingredients with the flat edge of a knife and use liquid measuring cups for wet ingredients.
A small difference in flour measurement can make the dough too dry or too sticky. To be extra accurate, you can even weigh your ingredients with a kitchen scale. This is especially useful if you’re baking often or want consistently perfect cookies.
Taking an extra minute to measure properly can save you from dough disasters later on.
Step 2 – Creaming Butter and Sugar
This step is where the magic begins. In a large mixing bowl, beat the softened butter and granulated sugar together until the mixture is light and fluffy. This process is called “creaming,” and it’s essential for incorporating air into the dough, which helps the cookies bake with a tender texture.
Use an electric mixer for best results—it’ll make the job easier and ensure everything blends smoothly. You’ll know it’s ready when the mixture turns pale and has a whipped consistency.
Creaming properly sets the stage for the rest of the ingredients to blend beautifully. Skipping or rushing this step can lead to dense cookies, so take your time.
Step 3 – Adding Eggs and Vanilla Extract
Once the butter and sugar are creamed, add in the eggs one at a time. Beat well after each addition to ensure they’re fully incorporated. Eggs are crucial because they provide structure and richness to the dough.
Next, add the vanilla extract. This small ingredient makes a big difference in flavor. For a deeper taste, you can even use vanilla bean paste or scrape seeds from a vanilla pod.
At this stage, your mixture should be smooth, creamy, and fragrant. You’ll start noticing that classic sugar cookie aroma filling the kitchen—it’s a sign that you’re on the right track.
Step 4 – Mixing in Dry Ingredients
Now comes the part where everything comes together. In a separate bowl, whisk your flour, baking powder, and salt. Mixing dry ingredients beforehand ensures that the baking powder and salt are evenly distributed throughout the dough, which prevents uneven baking.
Gradually add the dry mixture to your wet mixture (butter, sugar, eggs, and vanilla). Don’t dump it all in at once—add it in small batches while mixing on low speed. This prevents flour from flying everywhere and helps the dough come together smoothly.
The dough will start to look thick and slightly sticky but should still hold its shape. If it feels overly sticky, don’t panic. Once chilled, it will firm up and become easier to work with. On the other hand, if the dough feels too dry or crumbly, add a teaspoon of milk or water at a time until it reaches the right consistency.
The key here is not to overmix. Overmixing develops the gluten in the flour, which can make your cookies tough instead of soft and tender. Stop mixing as soon as the dough is fully combined.
Step 5 – Chilling the Dough
This step is often skipped, but it makes all the difference. Chilling sugar cookie dough allows the butter to firm up again, which prevents the cookies from spreading too much while baking. It also makes the dough easier to roll and cut into shapes.
To chill the dough, divide it into two portions, flatten them into disks, and wrap them tightly in plastic wrap. Place them in the refrigerator for at least one hour (or overnight if you’re planning ahead).
Not only does chilling improve the texture, but it also deepens the flavor. Just like marinating meat makes it tastier, giving sugar cookie dough time to rest enhances its buttery sweetness.
When you’re ready to use it, let the dough sit at room temperature for 5–10 minutes so it’s pliable enough to roll out. Skipping this step could lead to sticky dough that’s frustrating to handle.
Rolling, Cutting, and Baking the Cookies
Once your dough has chilled, it’s time to shape and bake your cookies. This part is where the fun really begins, especially if you’re making cookies for a holiday or special occasion.
Preparing the Dough for Rolling
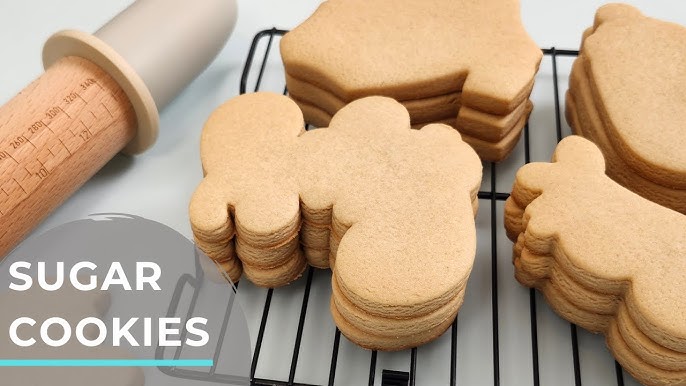
Lightly flour your work surface and rolling pin to prevent sticking. Place one disk of chilled dough on the surface and begin rolling it out evenly. Aim for about ¼-inch thickness—that’s the sweet spot for cookies that are soft but still hold their shape.
If the dough starts to crack around the edges, gently press it back together. If it’s sticking too much, sprinkle a little more flour, but be careful not to overdo it or your cookies may turn out dry.
Using Cookie Cutters Effectively
Dip your cookie cutters in flour before pressing them into the dough. This prevents sticking and ensures clean edges. Transfer the cut-out cookies carefully onto a parchment-lined baking sheet, leaving at least 2 inches of space between each one.
If you don’t have cookie cutters, don’t worry—you can use a glass to make round cookies or simply cut squares with a knife. The beauty of sugar cookies is that they taste amazing no matter the shape.
Baking Tips for Perfect Results
Preheat your oven to 350°F (175°C) before placing your cookies inside. Bake them for 8–10 minutes, depending on the size and thickness. Keep a close eye on them—sugar cookies can go from perfectly golden to overbaked in a matter of minutes.
You’ll know they’re done when the edges are just beginning to turn light golden. The centers may look slightly soft, but they’ll firm up as they cool. Allow the cookies to rest on the baking sheet for 5 minutes before transferring them to a wire rack to cool completely.
Decorating Sugar Cookies
Once your cookies are baked and cooled, the real creativity begins. Decorating sugar cookies can be as simple or elaborate as you like. From a light dusting of sugar to intricate designs, this step allows you to make your cookies truly unique.
Simple Icing Options
The easiest icing to make is a basic glaze with powdered sugar and milk. Just mix 1 cup of powdered sugar with 2–3 tablespoons of milk until smooth. For extra flavor, add a splash of vanilla or almond extract.
If you want your icing to harden (perfect for stacking or gifting), go with royal icing made from powdered sugar, egg whites (or meringue powder), and water. This type of icing allows you to pipe detailed designs and layer colors.
Creative Decoration Ideas
Here are some fun ways to decorate your cookies:
- Use food coloring to create vibrant designs.
- Add sprinkles before the icing dries.
- Use edible glitter for a festive sparkle.
- Pipe names or messages for personalized cookies.
You don’t have to be a professional baker to make them look good—sometimes a drizzle of icing or a dusting of colored sugar is all you need.
Tips for Storing Decorated Cookies
Once decorated, let your cookies sit at room temperature until the icing is completely dry. Store them in an airtight container between sheets of parchment paper to prevent smudging. Decorated cookies can last up to a week at room temperature or longer if refrigerated.
If you plan to gift them, let the icing dry overnight before packaging. This ensures they look as pretty when given as they did when you decorated them.
Tips for Perfect Sugar Cookie Dough Every Time
Even with a simple recipe, little details can make a big difference. Here are some tips to help you avoid common pitfalls and bake cookies like a pro.
Common Mistakes to Avoid
- Skipping the chilling step – leads to cookies spreading too much.
- Overbaking – results in dry, crunchy cookies instead of soft ones.
- Overmixing the dough – develops too much gluten and makes cookies tough.
- Using melted butter instead of softened – causes the dough to be greasy.
How to Fix Dough That’s Too Sticky or Too Dry
- If too sticky, add a tablespoon of flour at a time until manageable.
- If too dry, add a teaspoon of milk or water until it comes together.
Adjusting Recipes for Dietary Needs
- Use gluten-free flour blends for gluten-sensitive bakers.
- Swap butter with vegan margarine or coconut oil for a dairy-free version.
- Replace eggs with a flaxseed or chia seed mixture for a vegan option.
With these adjustments, you can enjoy sugar cookies that everyone can eat, no matter their dietary needs.
Variations of Sugar Cookie Dough
One of the best things about sugar cookie dough is its versatility. While the classic vanilla version is timeless, you can easily tweak the recipe to create exciting flavors and textures. These variations let you experiment and give your cookies a unique twist while keeping the same simple base.
Chocolate Sugar Cookies
For chocolate lovers, this variation is a dream come true. Simply replace ½ cup of flour with ½ cup of unsweetened cocoa powder. The result? Rich, chocolatey sugar cookies that still hold their shape for cutting and decorating.
You can enhance the flavor further with a touch of espresso powder or a handful of mini chocolate chips. These cookies are especially popular for Valentine’s Day or as an elegant dessert when dusted with powdered sugar.
Lemon or Citrus-Flavored Sugar Cookies
If you prefer something light and refreshing, try adding citrus zest to your dough. Lemon, orange, or lime zest works beautifully with the buttery sweetness of sugar cookies.
Just add 1–2 teaspoons of freshly grated zest to your dough along with the vanilla extract. For extra zing, replace part of the vanilla with lemon extract. These cookies pair perfectly with a simple glaze made from powdered sugar and fresh lemon juice.
Gluten-Free and Vegan Options
Baking for dietary restrictions doesn’t mean missing out on sugar cookies. For a gluten-free version, use a high-quality 1:1 gluten-free flour blend. Make sure it contains xanthan gum to mimic the elasticity of gluten.
For vegan cookies, swap the butter with plant-based margarine or coconut oil, and replace eggs with a flax egg (1 tablespoon ground flaxseed mixed with 3 tablespoons water). The dough handles just as well, and the cookies turn out soft and flavorful.
Storing and Freezing Sugar Cookie Dough
If you’re not planning to bake all your cookies at once, storing and freezing dough is a game-changer. This way, you can enjoy fresh-baked sugar cookies any time without starting from scratch.
Refrigerating Dough for Short-Term Use
Wrapped tightly in plastic wrap or stored in an airtight container, sugar cookie dough can be refrigerated for up to 3 days. Let it soften slightly at room temperature before rolling it out.
If you’ve already cut the cookies into shapes, place them on a parchment-lined baking sheet, cover with plastic wrap, and refrigerate until you’re ready to bake. This method is perfect for prepping dough ahead of a big holiday baking day.
Freezing Dough for Long-Term Storage
Sugar cookie dough freezes beautifully. Wrap each disk of dough in plastic wrap and then in aluminum foil for extra protection. Store in the freezer for up to 3 months.
You can also freeze pre-cut cookie shapes. Place them in a single layer on a baking sheet, freeze until solid, then transfer to a freezer-safe bag. This allows you to bake cookies straight from the freezer without thawing—just add an extra minute or two to the baking time.
Thawing and Baking Frozen Dough
When you’re ready to bake, transfer frozen dough disks to the refrigerator overnight to thaw. If you’re baking pre-cut frozen cookies, place them directly in the oven as mentioned above.
This method is especially handy during the holiday season when you want freshly baked cookies ready at a moment’s notice without the hassle of making dough from scratch.
FAQs about Sugar Cookie Dough Recipe
1. Why does my sugar cookie dough spread too much in the oven?
This usually happens if the butter was too warm or if you skipped chilling the dough. Always chill for at least an hour before baking.
2. Can I use salted butter instead of unsalted?
Yes, but reduce the added salt in the recipe. Salted butter can slightly alter the flavor, but it still works.
3. How can I make my sugar cookies softer?
Bake them for less time and keep them slightly underbaked in the center. Adding an extra egg yolk can also make them softer.
4. Can I decorate sugar cookies without icing?
Absolutely! You can sprinkle sugar on top before baking, roll them in cinnamon sugar, or press in chocolate chips or nuts.
5. Why is my dough crumbly and hard to roll out?
This could be due to adding too much flour. Add a teaspoon of milk at a time and gently knead until the dough comes together.
Conclusion
With the right ingredients, careful measuring, and a little patience, you can create dough that’s easy to roll, shape, and decorate. Remember to chill your dough, watch your baking time, and have fun with decorations.
The best part? Sugar cookie dough can be made ahead and stored, meaning fresh cookies are always just a few steps away. Whether you’re baking for the holidays, a birthday, or just because, this step-by-step guide ensures success every time.
So grab your rolling pin, some cookie cutters, and your favorite sprinkles—it’s time to make sugar cookies that taste as good as they look!