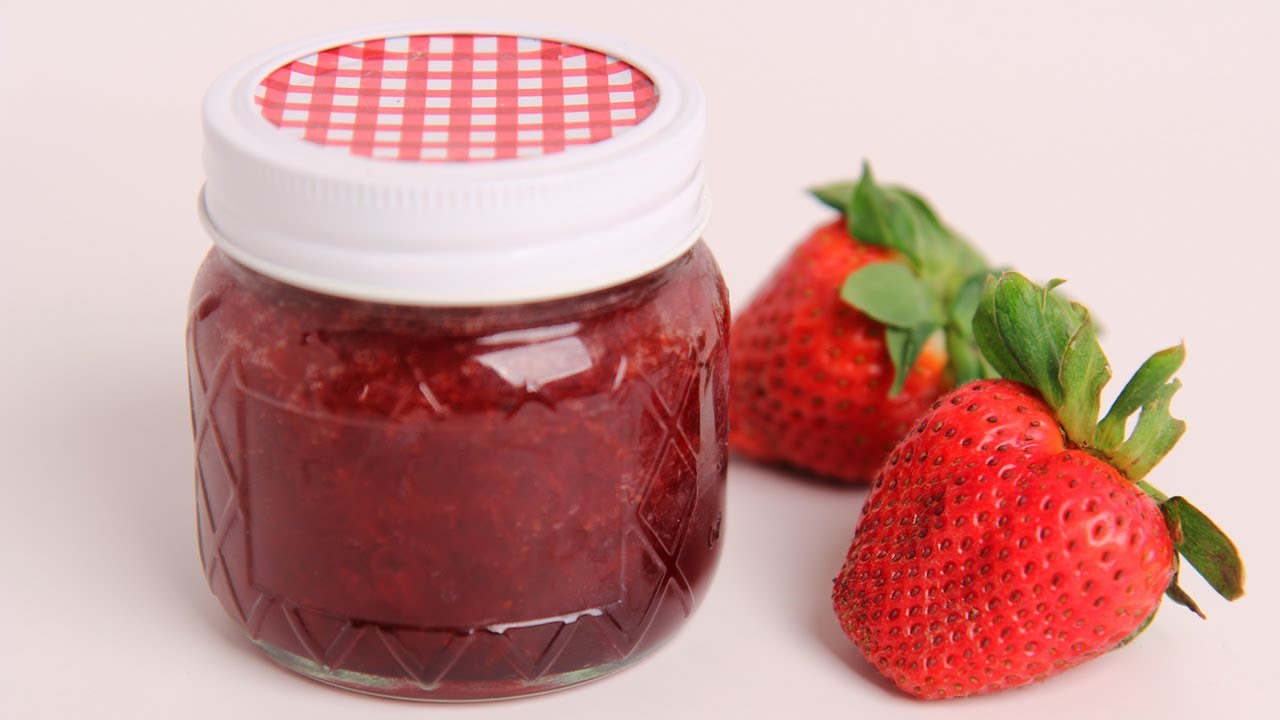
Strawberry Preserves Recipe: There’s something magical about opening a jar of homemade strawberry preserves. The burst of sweet, tangy flavor instantly takes you back to summer days, no matter the season. Unlike store-bought jams and jellies, homemade preserves let you control the sweetness, texture, and freshness. The result is a spread that not only tastes better but also feels more authentic.
So, what makes strawberry preserves so special compared to jam or jelly? The main difference lies in texture. Jams are usually made with crushed fruit and have a smoother consistency, while jellies are made only from fruit juice and set firmly with pectin. Preserves, on the other hand, keep larger chunks of fruit, giving you that juicy, rustic bite every time you spread it on bread or drizzle it over desserts.
Making strawberry preserves at home might sound intimidating at first, but it’s simpler than you think. With just a few ingredients and some basic kitchen tools, you can create a batch that’s fresh, flavorful, and far more satisfying than anything you’ll find on the grocery store shelf.
Ingredients You’ll Need
To make classic strawberry preserves, you’ll only need a handful of simple ingredients—most of which you probably already have in your kitchen.
- Fresh strawberries – The star of the recipe! Choose ripe, sweet berries for the best flavor.
- Granulated sugar – Helps thicken the preserves and enhances sweetness.
- Lemon juice – Adds brightness, balances the sugar, and acts as a natural preservative.
- Optional extras – For a twist, you can add vanilla extract, a cinnamon stick, or even a splash of balsamic vinegar.
The beauty of homemade preserves lies in the balance of flavors. The sugar prevents spoilage and gives the preserves that glossy finish, while lemon juice not only sharpens the taste but also helps with the setting process since strawberries are naturally low in pectin. Optional flavorings can elevate the preserves, turning a simple recipe into something truly unique.
When measured carefully, these few ingredients transform into a luscious spread that can last for months if stored correctly. That’s why it’s worth investing just a little time to prepare them the right way.
Choosing the Best Strawberries
The flavor of your preserves depends heavily on the quality of strawberries you use. Not all berries are created equal, so here are a few tips to ensure you’re getting the best ones:
- Look for ripeness – The reddest, most fragrant berries yield the sweetest preserves. Pale or white-tipped strawberries tend to be underripe and less flavorful.
- Check the firmness – You want berries that are soft enough to mash easily but not mushy or spoiled.
- Go for organic if possible – Strawberries often top the list of fruits with pesticide residue, so organic can be a healthier choice.
- Buy in season – Strawberries taste their best in late spring to early summer, depending on your location.
Before cooking, always wash strawberries gently under cold water. Avoid soaking them, as strawberries absorb water quickly, which can dilute flavor. Then, remove the green leafy tops, also known as hulling. A small paring knife or strawberry huller makes this step easier.
Prepping your strawberries with care ensures that every spoonful of your preserves bursts with natural sweetness and vibrant color.
Essential Tools for Making Preserves
You don’t need fancy equipment to make strawberry preserves, but having the right tools makes the process smoother and more enjoyable.
Here’s what you’ll need:
- Heavy-bottom saucepan – Prevents scorching and helps cook the preserves evenly.
- Wooden spoon or silicone spatula – Perfect for stirring without scratching your pan.
- Potato masher – Helps break down the strawberries while still keeping chunks intact.
- Candy or kitchen thermometer – Useful for checking the setting temperature (around 220°F or 104°C).
- Sterilized canning jars with lids – Essential for safe storage. Mason jars are a popular choice.
- Canning funnel and ladle – Makes filling jars less messy and ensures consistent amounts.
If you plan to make preserves regularly, consider investing in a full canning kit. It includes jar lifters, magnetic lid wands, and racks that make the process safer and faster. However, for beginners, a saucepan and a few clean jars are more than enough to get started.
Remember: sterilization is key when storing preserves. Even the best batch can spoil if jars aren’t properly prepared.
Step-by-Step Guide to Making Strawberry Preserves
Step 1 – Wash and Hull Strawberries
Start by giving your strawberries a gentle rinse. Pat them dry with a clean towel, then hull them by removing the green tops. Cutting them into halves or quarters will help them cook down faster.
Step 2 – Mash the Strawberries
Once your strawberries are clean and hulled, place them in a large, heavy-bottomed saucepan. This type of pan ensures even heating and prevents burning. Using a potato masher or the back of a wooden spoon, mash the strawberries until they release their juices. You don’t want to turn them into a puree—leave some chunks for that classic preserve texture.
The beauty of preserves is that they keep pieces of fruit intact, giving you a chunky, rustic finish. Think of it as the sweet middle ground between smooth jam and jelly. If you prefer a thicker consistency, mash less. If you want a smoother spread, mash a little more. This step is all about personal preference.
As the strawberries break down, their vibrant red color deepens, and the aroma fills your kitchen. This is the moment when you’ll realize just how fresh and natural homemade preserves are compared to the overly processed ones from the store.
Step 3 – Add Sugar and Lemon Juice
Now it’s time to transform your mashed strawberries into something magical. For every 2 pounds of strawberries, you’ll typically need about 4 cups of sugar and 2 tablespoons of fresh lemon juice. Add both directly into the saucepan with your fruit.
The sugar will dissolve into the juices, creating a syrupy mixture that will thicken as it cooks. Lemon juice plays a double role here: it balances the sweetness with a subtle tartness, and it also acts as a natural preservative and setting agent. Without it, your preserves may not firm up as nicely.
Stir everything together until the sugar is evenly mixed in. Don’t worry if the mixture looks too liquidy at first—cooking will take care of that. At this stage, if you’re feeling adventurous, you can add a flavor twist like vanilla extract, cinnamon, or even a splash of balsamic vinegar for depth.
Step 4 – Cook the Mixture Slowly
This is where the real magic happens. Place the saucepan over medium heat and bring the strawberry mixture to a gentle boil. Stir often to prevent sticking or burning at the bottom. Once it boils, lower the heat slightly and let it simmer.
Cooking time can vary, but usually, it takes about 25–40 minutes for the mixture to reach the perfect consistency. The key here is patience. You want the strawberries to soften, the sugar to dissolve completely, and the liquid to thicken into a glossy preserve.
As it cooks, foam may form on the surface. Skim this off with a spoon—it’s just air bubbles mixed with natural fruit proteins and won’t affect flavor, but removing it gives your preserves a cleaner finish.
Your kitchen will smell heavenly during this step, with the sweet and tangy aroma filling the air. Stirring slowly and steadily ensures that every spoonful of preserves will taste as rich and flavorful as possible.
Step 5 – Test for Proper Consistency
The biggest question when making strawberry preserves is: how do you know when it’s ready? Luckily, there are a few easy tests.
- Plate Test: Place a small plate in the freezer before you start cooking. When you think the preserves are ready, drop a spoonful onto the cold plate and let it sit for 30 seconds. Push it gently with your finger—if it wrinkles slightly and doesn’t flow back quickly, it’s done.
- Thermometer Test: Strawberry preserves set at around 220°F (104°C). Using a candy thermometer can take out the guesswork.
- Spoon Test: Lift a spoonful of preserves and let it drip back into the pot. If it falls off in a thick sheet rather than a runny stream, it’s ready.
If your preserves still look runny, keep cooking for a few more minutes and test again. Don’t rush this step—it’s the difference between perfectly spreadable preserves and a watery mess.
Once the mixture passes the test, remove it from heat and get ready for the next crucial step: sterilizing and filling your jars.
Step 6 – Sterilize and Prepare Jars
Before you fill your jars, you must make sure they are sterilized. This step is non-negotiable if you want your strawberry preserves to last for months without spoiling. Even the tiniest trace of bacteria can ruin a batch.
To sterilize, wash your jars and lids in hot, soapy water. Rinse them thoroughly and place them in a large pot of boiling water for at least 10 minutes. If you’re using Mason jars, remove the lids and sterilize them separately. You can also run jars through a hot dishwasher cycle, but boiling is the safest method.
Once sterilized, keep the jars warm until you’re ready to fill them. This prevents thermal shock (which could cause jars to crack) when you pour in the hot preserves. You can keep them warm by placing them in an oven set at 200°F (93°C) or by leaving them in the hot water until needed.
Have your funnel, ladle, and a clean cloth ready. When the preserves are cooked, you’ll want to move quickly to get them sealed while still hot.
Step 7 – Fill Jars and Seal Properly
Now comes the most satisfying part: filling your jars with that rich, ruby-red preserve. Using a ladle and a canning funnel, carefully pour the hot strawberry mixture into the jars, leaving about ¼ inch of headspace at the top. This small gap is crucial for proper sealing.
After filling, wipe the rims of the jars with a damp cloth to remove any sticky residue that might prevent a good seal. Place the lids on and screw on the bands just until fingertip tight—don’t over-tighten.
For long-term storage, process the jars in a boiling water bath. Submerge the jars in boiling water, ensuring they are completely covered, and let them process for about 10 minutes. This step helps create a vacuum seal and extends the shelf life of your preserves.
As the jars cool, you’ll hear that satisfying pop sound, signaling that the lid has sealed correctly. If a jar doesn’t seal, don’t worry—just refrigerate and use it within a couple of weeks.
Step 8 – Cool and Store Safely
Once processed, carefully remove the jars from the water bath and place them on a towel-lined counter. Avoid placing them directly on a cold surface, as the sudden temperature change could cause cracking.
Allow the jars to cool completely, undisturbed, for at least 12 hours. During this time, the lids will seal tightly. After cooling, check the seals by pressing down on the center of each lid. If it doesn’t pop back, your jar is sealed properly.
Label each jar with the date and store it in a cool, dark place like a pantry. Properly sealed strawberry preserves can last up to a year unopened. Once opened, store in the refrigerator and use within a month.
There’s nothing quite like pulling out a jar of your homemade preserves in the middle of winter—it’s like opening a jar of summer sunshine.
Tips for Perfect Strawberry Preserves
Making preserves is simple, but mastering the process comes with practice. Here are some expert tips to ensure success every time:
- Balance the sweetness: Strawberries vary in natural sweetness. Taste your berries before cooking and adjust the sugar accordingly. If they’re very sweet, reduce the sugar slightly.
- Avoid overcooking: While you want a thick consistency, cooking too long can darken the preserves and give them a caramelized taste.
- Skim the foam: Removing foam while cooking gives you a cleaner, clearer finish.
- Don’t skip the lemon juice: It’s not just for flavor—it helps your preserves set properly.
- Stir constantly in the last 10 minutes: This prevents scorching and ensures even thickening.
The secret to excellent strawberry preserves is patience. Don’t rush the process, and always test consistency before finishing. A little care goes a long way in turning good preserves into unforgettable ones.
Flavor Variations to Try
One of the joys of making your own preserves is experimenting with flavors. While classic strawberry is always a winner, adding small twists can make your preserves unique. Here are some ideas:
- Strawberry Vanilla Preserves: Add a split vanilla bean or 1 teaspoon of pure vanilla extract during cooking for a rich, dessert-like flavor.
- Strawberry with Balsamic Vinegar: A tablespoon of balsamic vinegar adds depth and a subtle tang, pairing beautifully with cheese.
- Strawberry Cinnamon or Cardamom: A stick of cinnamon or a pinch of cardamom brings warmth and spice—perfect for colder months.
- Strawberry-Lemon Twist: Add extra lemon zest for a zesty, refreshing preserve that pairs well with scones or pancakes.
- Strawberry-Chili Preserves: For adventurous eaters, a tiny pinch of chili flakes adds a gentle heat that complements the sweetness.
Experimenting with flavors means you can create different batches for different occasions—sweet, tangy, spicy, or aromatic. Each jar becomes a new adventure.
Storage and Shelf Life
One of the biggest perks of making strawberry preserves is how long they last when stored correctly. With proper canning techniques, a single afternoon in the kitchen can give you jars of goodness that keep for months, even up to a year.
If your jars have been sealed properly through the boiling water bath method, they can be stored in a cool, dark place like a pantry or cupboard. The ideal temperature range is between 50°F and 70°F (10°C–21°C). Sunlight and heat can affect the flavor, color, and safety of preserves, so avoid keeping them on open shelves near windows or appliances.
Once opened, preserves should always be kept in the refrigerator. They typically last for about 3 to 4 weeks after opening. Always use a clean spoon when scooping preserves out of the jar to prevent bacteria from getting in and causing spoilage.
Signs your preserves may have spoiled:
- A bulging lid or broken seal
- Mold on the surface
- Off smell or sour taste
- Discoloration or watery separation
If you notice any of these, it’s best to discard the jar. Food safety is always more important than saving a batch. With good storage practices, though, most jars will last you through the seasons, letting you enjoy the taste of fresh summer strawberries all year round.
Serving Suggestions
Strawberry preserves are wonderfully versatile. Beyond the classic toast-and-butter combination, there are countless ways to use them in everyday meals and desserts.
Here are a few delicious serving ideas:
- Breakfast favorites: Spread on pancakes, waffles, or croissants for a fruity twist. Mix into yogurt or oatmeal for a natural sweetener.
- Desserts: Use as a filling for cakes, tarts, and pastries. Drizzle over ice cream or cheesecakes for an extra pop of flavor.
- Savory pairings: Pair with a cheese board—brie, goat cheese, or sharp cheddar all complement the sweetness perfectly. Try it as a glaze for roasted chicken or pork.
- Snacks: Swirl into smoothies, layer into parfaits, or simply spread on crackers for a quick bite.
- Holiday treats: Use as a filling for thumbprint cookies or swirl into holiday breads for a festive touch.
The beauty of preserves is their flexibility. Whether you’re making a quick breakfast or hosting a dinner party, they can elevate your dishes in a simple, flavorful way.
Health Benefits of Strawberries
Besides being delicious, strawberries come packed with nutrients and health benefits. Making preserves lets you enjoy these benefits in a tasty, spreadable form.
- Rich in antioxidants: Strawberries contain anthocyanins and ellagic acid, both known for their anti-inflammatory and anti-aging properties.
- High in vitamin C: A single cup of strawberries provides more vitamin C than an orange, supporting a healthy immune system.
- Heart health: Studies suggest strawberries can help lower blood pressure and reduce cholesterol levels.
- Fiber content: Preserves still retain fiber from the fruit, aiding digestion and helping you feel fuller for longer.
- Low calorie: Even with sugar added, homemade preserves are often healthier than store-bought options, which may contain artificial additives and excessive sweeteners.
Of course, moderation is key—since preserves contain sugar, it’s best to enjoy them as a treat rather than a daily staple. Still, when compared to processed spreads, homemade strawberry preserves are a more wholesome choice with plenty of natural goodness.
Strawberry Preserves vs Store-Bought Jam
If you’ve ever wondered why homemade preserves taste so different from the ones at the store, here’s why:
- Ingredients: Store-bought jams often include high-fructose corn syrup, artificial flavors, and preservatives. Homemade preserves use just fruit, sugar, and lemon juice.
- Flavor: Fresh, chunky fruit pieces in preserves give a fuller, richer flavor than the smooth, uniform taste of commercial jams.
- Health factor: With homemade preserves, you control the sugar levels and avoid unnecessary additives.
- Cost-effectiveness: Buying strawberries in bulk (especially in season) and making your own preserves can save money compared to premium store-bought jars.
- Tradition and satisfaction: There’s something deeply rewarding about enjoying a jar of preserves you made yourself—it’s like bottling up a memory.
While store-bought jam is convenient, nothing beats the authenticity and customization of homemade strawberry preserves. Once you taste the difference, it’s hard to go back.
FAQs about Strawberry Preserves Recipe
1. Can you use frozen strawberries?
Yes! Frozen strawberries work well, especially if fresh ones are out of season. Just thaw and drain them before cooking to avoid excess water.
2. How much sugar is necessary?
Sugar is essential for both flavor and preservation. A common ratio is equal parts sugar to fruit, but you can reduce it slightly if your strawberries are very sweet.
3. Do preserves need pectin?
No, strawberries naturally contain some pectin, and lemon juice helps the mixture set. Pectin is optional if you want a firmer consistency.
4. Can they be made without lemon juice?
Lemon juice not only balances flavor but also helps preserves set. If you don’t have fresh lemon juice, you can use bottled, but skipping it altogether may result in runnier preserves.
5. How long do they stay fresh?
Unopened, properly sealed jars last up to a year. Once opened, store in the fridge and use within 3–4 weeks.
Conclusion
Homemade strawberry preserves are more than just a recipe—they’re a tradition, a treat, and a way to savor summer all year round. With just strawberries, sugar, and lemon juice, you can create something that’s both delicious and deeply rewarding. From spreading it on toast to pairing it with cheese boards, the possibilities are endless.
So next time strawberries are in season, grab a basket and try this recipe. You’ll not only fill jars but also your kitchen with the sweet aroma of homemade goodness. And when winter rolls around, you’ll thank yourself for preserving a little taste of sunshine.