Steamed Buns Recipe: Have you ever bitten into a soft, warm, pillowy steamed bun and instantly felt like you were wrapped in a cozy food hug? That’s the magic of steamed buns—delicate on the outside, often filled with rich, flavorful fillings on the inside, and completely satisfying. Originating from Chinese cuisine, these buns have taken over street food scenes and home kitchens across the globe, and for good reason.
Making steamed buns from scratch might sound like a project for a seasoned chef, but guess what? It’s surprisingly doable—even for beginners. Whether you want to fill them with something savory like BBQ pork or keep it sweet with custard or red bean paste, this step-by-step guide is going to walk you through everything.
We’ll start from the very basics—what ingredients you need, how to prep the dough, how long to steam them, and even how to store leftovers. So roll up those sleeves, because you’re about to master one of the fluffiest treats ever invented!
What Are Steamed Buns?
Steamed buns are a traditional type of bread or dumpling, typically made from wheat flour and steamed rather than baked. Known in Chinese as baozi (when filled) or mantou (when plain), these buns are iconic in Chinese and other East Asian cuisines. They’ve even made their way into modern culinary trends thanks to their soft texture and incredible versatility.
They can be sweet or savory, plain or filled, mini-sized for snacking or big enough to be a full meal. Think of them like the Asian version of a sandwich—only warmer, softer, and cloud-like. While they’re most often associated with Chinese dim sum or street food stalls, variations can be found throughout Asia: Japan has nikuman, Korea has hoppang, and the Philippines enjoy siopao.
The texture is key: light, fluffy, and slightly chewy with a smooth exterior. That’s all thanks to the steaming method, which keeps the buns moist and gives them that signature “cloud” vibe. They’re typically made with yeast for rise and flavor, but baking powder is often added to enhance fluffiness. The combinations of fillings are endless—from pork and cabbage to sweet taro or custard. There’s truly something for everyone.
List of Ingredients You’ll Need
If you’re ready to dive into steamed bun-making, let’s first gather your ingredients. Most of these are pantry staples, with a few optional ingredients depending on the filling you’re going for.
For the Dough:
- All-purpose flour – 3 cups (make sure it’s fresh and sifted for fluffier results)
- Instant yeast – 2¼ tsp (equivalent to one standard packet)
- Sugar – 2 tablespoons (adjust to taste)
- Baking powder – 1 tsp (gives extra puffiness)
- Warm water or milk – 1 cup (not hot—around 100°F/38°C)
- Vegetable oil or shortening – 2 tablespoons
- Salt (optional) – ½ tsp (enhances flavor, but optional)
For the Filling (Choose One):
- BBQ pork (char siu) – chopped, about 1 cup
- Sweet red bean paste – 1 cup
- Custard filling – thickened and cooled
- Mushroom and veggie mix – sautéed and cooled
- Minced meat (pork, beef, chicken) – seasoned and cooked, about 1 cup
Basic Equipment:
- Mixing bowls
- Measuring cups and spoons
- Rolling pin
- Parchment paper
- Steamer (bamboo or metal)
- Clean towel or plastic wrap
- Kitchen scale (optional but helpful)
Pro Tip: If you’re making buns regularly, a bamboo steamer not only gives the best results but also adds that authentic aroma.
How to Make Steamed Buns from Scratch
Making steamed buns at home is easier than you might think. It does take some time—mainly for the dough to rise—but the steps are straightforward. Let’s break it down step by step.
Step 1: Activate the Yeast
Mix yeast with warm water or milk and a little sugar. Stir gently and let it sit for 5–10 minutes until foamy. This means the yeast is active and ready to work.
Step 2: Prepare the Dough
Combine flour, sugar, and salt in a bowl. Add the yeast mixture and oil, then mix until a dough forms. Knead for 8–10 minutes until smooth and elastic. For soft, fluffy dough, keep it slightly tacky but not sticky.
Step 3: First Rise (Proofing)
Place the dough in a lightly oiled bowl and cover. Let it rise in a warm spot for 1–1½ hours. The dough should double in size, feel airy, and slowly spring back when pressed.
Step 4: Divide and Shape the Dough
Punch down the dough and divide evenly. Roll each piece into a ball, then flatten and roll into a small wrapper with thinner edges and a thicker center.
Step 5: Add the Filling
Place filling in the center. Gather the edges, pinch, and pleat to seal. Make sure seams are tight to prevent bursting during steaming.
Step 6: Second Rise
Place buns on parchment paper and let them rest for 30–40 minutes until slightly puffy. Avoid over-proofing, which can cause collapse.
Step 7: Steam the Buns
Steam over gently boiling water for 10–12 minutes. Leave space between buns and avoid lifting the lid during cooking to keep them light and fluffy.
Tips for Perfect Steamed Buns Every Time
Steamed buns might seem simple, but a few insider tricks can make all the difference between a flat, chewy bun and one that’s light, fluffy, and full of flavor. Here’s what you need to know to get them perfect every single time:
1. Use Fresh Ingredients
Start with fresh yeast and flour. Old yeast may not activate properly, which means your buns won’t rise. Fresh flour absorbs water better and contributes to the soft texture you’re aiming for.
2. Measure Properly
Baking is all about accuracy. Use measuring cups or, better yet, a kitchen scale for best results. Too much flour will dry out the dough, and too much liquid can make it sticky and hard to work with.
3. Don’t Skip the Second Rise
Many beginners skip the second proofing after filling the buns, but this step is crucial. It allows the dough to relax and puff up again, which leads to a more tender bite and better overall shape.
4. Avoid Over-Steaming
More steam doesn’t mean better buns. Too much steaming time can lead to dense or soggy buns. Stick to about 12–15 minutes max for medium-sized buns, and make sure the lid stays closed during steaming.
5. Let Them Sit After Steaming
Once the buns are done steaming, let them rest for a few minutes before opening the lid. A sudden temperature drop can make them deflate. Allowing them to rest keeps the texture intact and gives you picture-perfect results.
6. Control the Dough Texture
If your dough is too sticky, add a little more flour—but don’t overdo it. If it’s too dry, sprinkle in a bit of water. Aim for a soft, slightly tacky dough that doesn’t cling to your hands.
7. Don’t Overfill the Buns
Too much filling can cause the buns to burst open during steaming. It’s tempting to stuff them to the brim, but a modest spoonful of filling is the sweet spot for sealed, fluffy buns.
With these tips in your back pocket, you’re well on your way to mastering steamed buns like a pro.
Different Types of Fillings You Can Try
One of the best things about steamed buns? You can fill them with just about anything! Whether you have a sweet tooth or crave something savory, the possibilities are endless. Here are some delicious filling ideas to inspire your next batch.
Sweet Fillings
- Sweet Red Bean Paste (Anko): A classic in Asian cuisine, this paste is made from adzuki beans and sugar. It’s sweet, smooth, and pairs beautifully with the soft bun dough.
- Custard: Creamy, rich, and slightly eggy, custard buns are often served in dim sum. You can use a homemade custard or a shortcut using instant custard powder.
- Chocolate or Nutella: For a modern twist, try filling your buns with chocolate chips or a spoonful of Nutella. It melts slightly when steamed and creates a gooey, irresistible center.
- Lotus Seed Paste: This mildly sweet paste is another traditional option with a smooth texture and light nutty flavor.
- Coconut and Sugar: Mix grated coconut with sugar and a touch of condensed milk for a tropical filling that’s sweet and chewy.
Savory Fillings
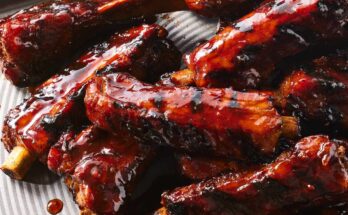
- Char Siu (BBQ Pork): Perhaps the most iconic filling for savory buns, char siu is sweet, smoky, and full of umami. Combine chopped pork with hoisin sauce, oyster sauce, and soy sauce for an authentic taste.
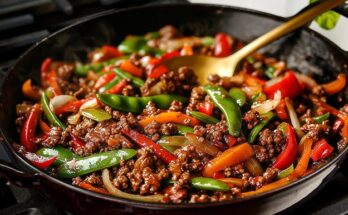
- Ground Pork and Cabbage: A common homemade filling made with seasoned pork, shredded cabbage, garlic, and ginger. Juicy and satisfying.
- Mushrooms and Tofu: A great vegetarian option that still brings deep flavor. Use sautéed shiitake mushrooms, tofu, soy sauce, and sesame oil.
- Chicken Curry: For a fusion twist, try a mild chicken curry filling. The spiced, creamy flavor works surprisingly well in a fluffy bun.
- Egg and Chive: A simple yet tasty combo. Scramble eggs with chopped Chinese chives, a pinch of salt, and sesame oil.
Feel free to experiment with combinations and create your own signature filling. Once you’ve got the dough down, the sky’s the limit!
How to Store and Reheat Steamed Buns
Made a big batch of steamed buns? No worries—you can store and reheat them easily without losing that soft, fluffy texture. Whether you want to keep them fresh for a few days or freeze for future cravings, here’s how to do it right.
Storing Fresh Buns (Short-Term)
If you plan to eat your steamed buns within 2–3 days:
- Let them cool completely after steaming.
- Place them in an airtight container or wrap them individually in plastic wrap.
- Store in the refrigerator for up to 3 days.
Be sure they’re not stacked on top of each other, or they might get squished. Use parchment paper between layers if needed.
Freezing Steamed Buns (Long-Term)
Steamed buns freeze beautifully and can be kept for up to 2 months:
- Allow buns to cool fully after steaming.
- Wrap each bun in plastic wrap or place them on a baking tray and freeze until solid.
- Once frozen, transfer to a zip-top freezer bag or airtight container.
This method prevents freezer burn and makes it easy to pull out one or two buns at a time.
How to Reheat Steamed Buns
There are several ways to bring steamed buns back to life:
Steamer (Best Method):
- Place buns in a steamer over boiling water.
- Steam for 5–7 minutes (if refrigerated) or 10–12 minutes (if frozen).
- They’ll come out soft and fresh, just like the first time.
Microwave (Quick Method):
- Wrap a bun in a damp paper towel to retain moisture.
- Microwave on high for 30–45 seconds (refrigerated) or 1–2 minutes (frozen).
- Not as fluffy as steaming, but works well in a pinch.
Oven (For Crispy Buns):
- Preheat oven to 350°F (175°C).
- Wrap buns in foil and bake for 10–12 minutes.
- This will create a slightly firmer, more bread-like texture.
Avoid reheating buns without moisture (like directly in a microwave without wrapping) or they’ll dry out fast and lose that signature softness.
Can You Make Steamed Buns Without a Steamer?
No steamer? No problem. You can still make steamed buns using a few clever kitchen hacks. While a bamboo or metal steamer is ideal, here are some easy alternatives:
DIY Steamer Hack #1: Plate in a Pot
- Place a heat-safe bowl or small rack upside down in a large pot.
- Add enough water to come just below the rack.
- Place a plate with parchment-lined buns on top.
- Cover tightly and steam as usual.
This creates a makeshift steamer using items you already have!
DIY Steamer Hack #2: Microwave Steaming
- Place a bun on a microwave-safe plate.
- Cover with a damp paper towel.
- Microwave for 30–60 seconds until heated through.
While this method is faster, it doesn’t create the same texture as traditional steaming. Still, it’s a good option for reheating.
DIY Steamer Hack #3: Oven Steaming
If you’re making large batches:
- Place buns in a baking tray with some water at the bottom.
- Cover the tray tightly with foil to trap steam.
- Bake at 350°F (175°C) for about 15–20 minutes.
It’s not the most traditional method, but it can give similar results in terms of softness and heat distribution.
With these methods, you can enjoy fluffy steamed buns even if you don’t own specialized equipment. Pretty convenient, right?
Serving Suggestions
Steamed buns are incredibly versatile when it comes to serving. Whether you’re putting together a meal, offering them as snacks, or serving at parties, here are some tasty ideas to elevate the experience:
1. With Dipping Sauces
A good sauce takes your steamed bun game to the next level. Here are some popular choices:
- Soy sauce + vinegar + chili oil – Classic dipping combo for savory buns
- Hoisin sauce – Sweet and tangy, great for BBQ pork buns
- Peanut sauce – Rich and nutty, especially good with veggie-filled buns
- Sweetened condensed milk – Yes, for sweet buns, this is a heavenly dip!
2. Side Dishes
Pair your buns with:
- Asian slaw or pickled vegetables
- Hot and sour soup
- Egg drop soup
- Stir-fried greens like bok choy or Chinese broccoli
These add freshness and balance out the richness of the buns.
3. Presentation Tips
Want to impress guests or make your buns Instagram-worthy?
- Steam in a bamboo basket for that authentic look.
- Garnish with a sprinkle of sesame seeds or chopped green onions before serving.
- Arrange buns on a platter with dipping sauces in the center.
Whether you’re eating solo or sharing with family and friends, steamed buns are always a hit on the table.
Nutritional Info (Per Bun Approx.)
If you’re watching your diet or simply curious about what goes into a steamed bun, here’s a general breakdown of the nutritional values. Keep in mind that exact numbers will vary depending on the size of your bun and the filling you choose.
| Nutrient | Plain Bun (Approx.) | Savory Filled Bun (e.g., Pork) | Sweet Filled Bun (e.g., Red Bean) |
|---|---|---|---|
| Calories | 140–160 kcal | 200–250 kcal | 180–220 kcal |
| Carbohydrates | 28–30 g | 30–35 g | 32–36 g |
| Protein | 4–6 g | 8–12 g | 5–7 g |
| Fat | 2–4 g | 7–10 g | 4–6 g |
| Fiber | 1–2 g | 2–3 g | 1–2 g |
| Sugar | 2–5 g | 4–8 g | 6–10 g |
| Sodium | 150–250 mg | 300–450 mg | 200–350 mg |
Health Considerations:
- Low in oil: Because they’re steamed, buns are naturally lower in fat compared to fried foods.
- Customizable: You can control ingredients, sodium, and sugar when making them at home.
- Allergen Alert: Most buns contain wheat and may contain dairy or egg in some versions, so plan accordingly for allergies.
Pro tip: If you’re aiming for a healthier version, try using whole wheat flour or adding finely chopped veggies into the dough for extra fiber.
Gluten-Free or Vegan Steamed Buns – Is it Possible?
Absolutely! Whether you’re gluten-intolerant or following a vegan diet, steamed buns can still be a part of your food lineup with just a few tweaks.
Gluten-Free Steamed Buns
While traditional steamed buns use wheat flour, you can make a gluten-free version with a mix of alternative flours. The texture won’t be identical, but it can come surprisingly close.
- Flour options: Use a blend of gluten-free all-purpose flour with xanthan gum for structure.
- Tip: Add tapioca starch or potato starch to help mimic the soft, chewy texture.
Keep in mind: Gluten-free dough tends to be more delicate, so be gentle during shaping and avoid overfilling.
Vegan Steamed Buns
Most steamed bun dough is already vegan-friendly since it typically contains just flour, water (or plant milk), sugar, and oil. Just make sure to:
- Skip dairy and eggs: Use plant-based milk like soy or oat instead of regular milk.
- Filling ideas: Try mushrooms and tofu, sweet red bean, curried lentils, or even jackfruit.
Going vegan with steamed buns doesn’t mean sacrificing flavor. In fact, plant-based buns can be just as rich and satisfying!
FAQs about Steamed Buns Recipe
1. Can I freeze the dough and use it later?
Yes! You can freeze the dough after the first rise. Wrap it tightly in plastic wrap and freeze for up to 1 month. When ready to use, thaw in the fridge overnight and let it come to room temperature before shaping.
2. Why are my steamed buns yellowish instead of white?
This often happens due to the type of flour or sugar used. Bleached flour and white sugar help achieve the bright white look. If you’re using unbleached flour or brown sugar, the color will be slightly off-white or golden.
3. How do I prevent the filling from leaking out?
Make sure the dough edges are thicker when rolling and pinch them together tightly. Overfilling is also a common cause—stick to 1–2 tablespoons of filling per bun.
4. Can I use bread flour or cake flour instead of all-purpose flour?
Yes. Bread flour makes chewier buns, while cake flour results in softer ones. For balanced texture, all-purpose flour is ideal, but you can experiment with blends for different results.
5. What’s the difference between baozi and mantou?
Great question! Baozi are steamed buns with filling (either sweet or savory), while mantou are plain steamed buns with no filling. Both use similar dough, but their purpose and texture may vary slightly depending on the region.
Conclusion
With this step-by-step guide, you’ve learned how to make the dough, proof it properly, shape and fill your buns, and steam them to perfection. Whether you’re keeping it traditional with BBQ pork or experimenting with chocolate or vegan fillings, the possibilities are endless.
And don’t stress if your first batch isn’t flawless—each time you make them, you’ll get better. Like anything homemade, it’s all about practice, patience, and enjoying the process (and, of course, the results).
So why not give it a try this weekend? Your tastebuds will thank you—and you might just find a new favorite dish to share with friends and family.