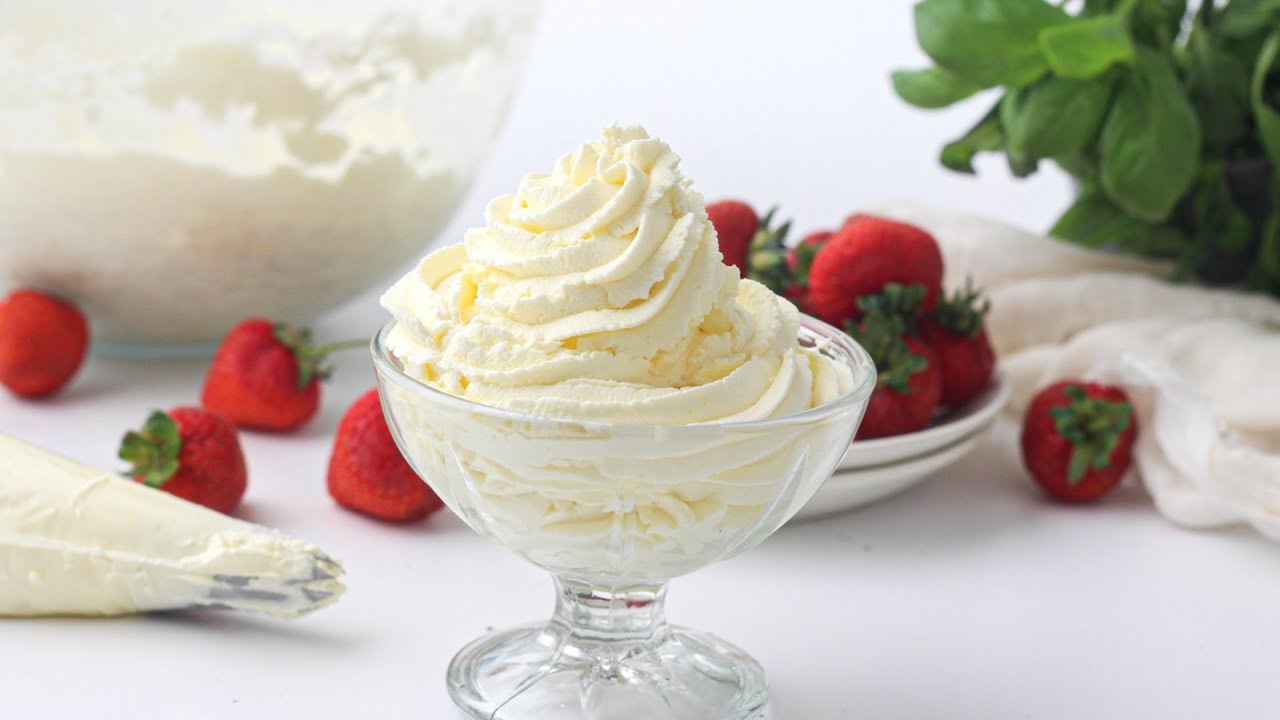
Stabilized Whipped Cream Recipe: Whipped cream is like the fluffy cloud of desserts—it’s soft, light, and adds the perfect finishing touch. But here’s the catch: regular whipped cream tends to lose its shape and deflate, especially if you try to use it for frosting or leave it out for a while. That’s where stabilized whipped cream comes in. It’s just as creamy and dreamy as the original, but with one major upgrade—it holds its shape for hours, even days!
Whether you’re frosting a cake, piping rosettes on cupcakes, or topping a pie for a party, stabilized whipped cream ensures your dessert looks and tastes fresh longer. The best part? It’s super easy to make with just a few extra steps.
Let’s dive in and learn how to make the perfect stabilized whipped cream with simple ingredients and foolproof techniques. This guide has everything you need—from ingredient lists to a detailed step-by-step tutorial. Ready? Let’s whip it up!
List of Ingredients You’ll Need
To make stabilized whipped cream, you don’t need a long grocery list. Most of the ingredients are already in your pantry or fridge. Here’s a complete breakdown:
Essential Ingredients:
- Heavy Whipping Cream (1 cup) – Make sure it’s cold (at least 36% fat)
- Unflavored Gelatin (1 teaspoon) – Key for stabilization
- Cold Water (4 teaspoons) – To bloom the gelatin
- Powdered Sugar (2–4 tablespoons) – For sweetness and slight stability
- Vanilla Extract (1 teaspoon) – For flavor
Optional Ingredients for Variations:
- Cream cheese (for a rich, tangy version)
- Cornstarch (for an eggless, no-gelatin option)
- Cocoa powder (for chocolate whipped cream)
- Instant pudding mix (for quick stabilization)
Ingredient Measurements for Different Batch Sizes:
| Servings | Cream | Gelatin | Sugar | Water | Vanilla |
|---|---|---|---|---|---|
| Small batch (1 cup) | 1 cup | 1 tsp | 2 tbsp | 4 tsp | 1 tsp |
| Medium (2 cups) | 2 cups | 2 tsp | 4 tbsp | 8 tsp | 2 tsp |
| Large (4 cups) | 4 cups | 4 tsp | 8 tbsp | 16 tsp | 4 tsp |
Having your ingredients pre-measured and ready makes the process super smooth. You can even adjust sweetness to your taste. If you like it richer, use more sugar; if you want a hint of flavor, try almond or coconut extract instead of vanilla.
What Makes Whipped Cream ‘Stabilized’?
You’ve probably noticed that freshly whipped cream starts to soften and melt after just an hour or so, especially if it sits on a dessert. That’s because it’s mostly air and fat, and without any support, it just collapses over time.
Stabilized whipped cream includes an ingredient—like gelatin, cornstarch, or cream cheese—that gives it structure. Think of it like adding a light scaffolding inside your cream. It doesn’t change the flavor, but it keeps the whipped cream from deflating, melting, or separating. That means your beautiful cake decorations or dessert toppings stay picture-perfect longer.
This is a total game-changer for bakers, especially when you’re prepping desserts ahead of time or serving them at room temperature. So if you’re planning a party, making a wedding cake, or just want your cream to hold its shape for more than 20 minutes, stabilization is the secret weapon.
Common Uses for Stabilized Whipped Cream
You might be wondering, “Do I really need stabilized whipped cream?” The answer is yes—especially if you’re doing any of the following:
- Frosting cakes and cupcakes – It holds beautiful peaks and piping shapes.
- Topping pies and cheesecakes – No more weeping or melting messes!
- Layering in trifles or parfaits – Great structure keeps your layers neat.
- Filling pastries or eclairs – Doesn’t ooze out as easily as plain cream.
- Decorating desserts for events – Perfect for anything that needs to sit out for a while.
Basically, if you want your whipped cream to look good and stay that way, this is the recipe to keep in your back pocket.
Different Methods to Stabilize Whipped Cream
There’s more than one way to stabilize whipped cream, and the method you choose can depend on your dietary preferences, what you have on hand, and the final dessert you’re making. Here are the most popular methods, each with its pros and cons:
1. Gelatin Method (Most Common)
- Why it works: Gelatin creates a firm structure within the cream.
- Best for: Cakes, piping, and hot environments.
- Flavor impact: None, if used correctly.
2. Cornstarch Method
- Why it works: Cornstarch thickens the cream slightly and reduces moisture.
- Best for: People avoiding gelatin or animal-based products.
- Flavor impact: Slightly less smooth texture.
3. Powdered Sugar Method
- Why it works: The cornstarch in powdered sugar helps slightly stabilize the cream.
- Best for: Quick-use whipped cream.
- Flavor impact: Sweetens the cream more.
4. Instant Pudding Mix Method
- Why it works: Contains modified cornstarch and stabilizers.
- Best for: Flavored whipped cream like chocolate or vanilla.
- Flavor impact: Adds the flavor of the pudding mix used.
5. Cream Cheese Method
- Why it works: Cream cheese thickens and stabilizes the whipped cream.
- Best for: Frosting, layered cakes, no-bake desserts.
- Flavor impact: Adds a rich, slightly tangy flavor.
Each method has its place, but for ultimate structure and neutral flavor, gelatin is the go-to. And that’s what we’ll cover in our detailed step-by-step guide below.
Tools You’ll Need Before You Start
Before whipping up stabilized whipped cream, get your tools ready. Here’s what you’ll need for best results:
- Mixing bowl – Stainless steel or glass works best; chill it in the fridge.
- Electric mixer – Hand or stand mixer, both work fine.
- Small saucepan – Needed for dissolving gelatin.
- Measuring spoons and cups – Precision matters!
- Sifter (optional) – For lump-free powdered sugar.
- Spatula – For folding and scraping.
Bonus tip: Place your mixing bowl and beaters in the fridge or freezer for 10–15 minutes before whipping. Cold tools help the cream whip up faster and hold better.
Step-by-Step Guide: Stabilized Whipped Cream with Gelatin
Let’s dive into the foolproof method for making perfect stabilized whipped cream using gelatin. Follow this carefully for the best results.
Step 1: Chill Your Tools and Ingredients
Cold temperature is key for stable whipped cream. Chill the mixing bowl, whisk or beaters, and the heavy cream in the refrigerator for at least 15–30 minutes. Cold tools help the cream whip faster and hold its shape longer.
Step 2: Bloom the Gelatin
Blooming gelatin means hydrating it before use. Sprinkle powdered gelatin over cold water in a small bowl and let it sit for about 5 minutes. This allows the gelatin granules to absorb moisture and soften evenly.
Step 3: Dissolve the Gelatin
Gently heat the bloomed gelatin until fully melted and smooth. You can microwave it in short bursts or warm it over low heat. Do not boil—overheating weakens its setting power and can cause clumps.
Step 4: Whip the Cream
Pour the cold cream into the chilled bowl and begin whipping at medium speed. When it starts to thicken, add powdered sugar and vanilla extract. Continue whipping until soft peaks form—watch closely to avoid overwhipping.
Step 5: Add the Gelatin
With the mixer running on low speed, slowly drizzle the melted gelatin into the whipped cream. Increase speed briefly until stiff peaks form. The cream should be smooth, stable, and able to hold its shape without deflating.
Alternative Method: Stabilized Whipped Cream with Cornstarch
If you’re out of gelatin or want a vegetarian-friendly option, this cornstarch method is simple and works well for short-term use.
Ingredients:
- 1 cup cold heavy whipping cream
- 2–3 tablespoons powdered sugar
- 1 tablespoon cornstarch
- 1 teaspoon vanilla extract
Directions:
- Sift cornstarch into powdered sugar.
- Whip the cold cream until it starts to thicken.
- Add the sugar/cornstarch mix and vanilla.
- Continue whipping until firm peaks form.
This version won’t hold up as long as the gelatin version, but it’s great for topping pies, cupcakes, or trifles that will be served within a few hours.
Alternative Method: Stabilized Whipped Cream with Cream Cheese
This method is perfect if you’re going for a richer, more frosting-like whipped cream that still feels light.
Ingredients:
- 1 cup cold heavy cream
- 3 ounces softened cream cheese
- 3 tablespoons powdered sugar
- 1 teaspoon vanilla
Instructions:
- Beat cream cheese until smooth.
- In a separate chilled bowl, whip the cream until soft peaks form.
- Add sugar and vanilla.
- Gradually fold or mix in the cream cheese until fully combined.
- Whip just until firm peaks form.
This whipped cream is thick, stable, and has a slight tang that pairs well with fruits and chocolate.
Tips for Perfect Whipped Cream Every Time
Even though making whipped cream seems simple, a few small tweaks can make the difference between a soft, airy masterpiece and a runny mess. Follow these expert tips to ensure success every time:
1. Use Heavy Cream with High Fat Content
Not all creams are created equal. For best results, choose heavy cream or heavy whipping cream with at least 36% fat content. Lower fat creams won’t hold peaks and may turn watery when whipped.
2. Keep It Cold
Temperature is critical when whipping cream. Everything should be cold:
- The cream
- The mixing bowl
- The beaters
This ensures your whipped cream holds volume and doesn’t curdle or separate.
3. Don’t Overwhip
Once your cream reaches stiff peaks, stop mixing immediately. Overwhipping causes the fat to separate from the liquid, turning your whipped cream into a gritty, almost buttery texture.
If you accidentally overwhip it a bit, gently fold in a tablespoon or two of fresh cream by hand to soften the texture.
4. Add Gelatin Slowly
When using gelatin, make sure it’s cooled slightly before adding it to the cream. Pour it in slowly while whipping on low speed to avoid clumps and ensure it blends smoothly.
5. Use Powdered Sugar Instead of Granulated
Powdered sugar dissolves more easily and helps stabilize the cream slightly on its own, thanks to the small amount of cornstarch it contains.
Storage and Shelf Life
One of the biggest benefits of stabilized whipped cream is its staying power. Unlike regular whipped cream, which starts deflating after an hour or two, stabilized versions can hold their shape and texture for up to 3 days in the refrigerator.
Here’s how to store it:
- Transfer to an airtight container
- Keep in the coldest part of your fridge
- Use within 2–3 days for best texture and taste
If you’ve already piped it onto cakes or cupcakes, those can also be stored in the fridge and will hold their shape beautifully.
Can You Freeze Stabilized Whipped Cream?
Yes, you can! Freeze piped shapes or scoops on a baking sheet, then transfer them to a freezer bag. They’ll keep for up to a month, and you can defrost them in the fridge when needed.
However, the texture might change slightly after thawing, depending on the stabilization method used. The gelatin and cream cheese versions freeze best.
Common Mistakes to Avoid
Even the most experienced bakers run into issues sometimes. Here are a few common mistakes and how to avoid them:
❌ Using Warm Tools or Cream
Always keep everything cold. Warm cream won’t whip, and warm tools won’t help. Chill your bowl, beaters, and cream before starting.
❌ Skipping the Blooming Step for Gelatin
Failing to bloom gelatin properly will result in lumps or a rubbery texture. Always allow it to bloom in cold water for at least 5 minutes.
❌ Overwhipping
This is the number one mistake. Watch your cream closely as it thickens, and stop as soon as you reach stiff peaks.
❌ Adding Gelatin Too Fast or While Too Hot
Gelatin needs to be warm but not hot. If it’s too hot, it will melt the cream. If it’s too cold, it’ll clump up. Let it cool slightly before slowly adding it in.
❌ Using Low-Fat Cream
Avoid whipping cream labeled as “light” or “half & half.” They simply won’t whip up properly.
Stabilized vs. Non-Stabilized: Visual and Functional Differences
You might be wondering, “Can’t I just use regular whipped cream?” Sure, but the difference is noticeable—especially after a few hours.
| Feature | Non-Stabilized Whipped Cream | Stabilized Whipped Cream |
|---|---|---|
| Texture | Soft, airy | Firm, structured |
| Holding time | 1–2 hours | Up to 3 days |
| Ideal for piping | No | Yes |
| Heat resistance | Poor | Excellent (especially gelatin method) |
| Suitable for frosting | Not really | Absolutely |
Visually, stabilized whipped cream keeps its peaks sharp and doesn’t collapse over time. It’s the difference between a bakery-style cake and a homemade dessert that melts in the heat.
Can You Flavor Stabilized Whipped Cream?
Absolutely! One of the best parts about making your own whipped cream is being able to flavor it any way you like. Here are some delicious ways to switch it up:
1. Cocoa Powder or Melted Chocolate
- Add 1–2 tablespoons unsweetened cocoa powder or 2 oz melted and cooled dark chocolate for chocolate whipped cream.
2. Fruit Purees
- Add a few spoonfuls of strawberry, raspberry, or mango puree.
- Make sure to strain the puree to remove seeds or pulp.
3. Coffee or Espresso Powder
- Mix in 1 teaspoon instant espresso powder for a coffee-flavored cream that pairs perfectly with chocolate cakes.
4. Extracts and Spices
- Use almond, peppermint, or coconut extract in place of vanilla.
- Add a pinch of cinnamon or pumpkin spice for seasonal desserts.
Just remember, if you’re adding anything with moisture (like fruit puree), you may need to slightly increase the stabilizer to maintain firmness.
FAQs about Stabilized Whipped Cream Recipe
1. Can I make stabilized whipped cream ahead of time?
Yes! You can make it up to 2–3 days in advance. Store it in an airtight container in the fridge, and it’ll stay fluffy and ready to use.
2. Is stabilized whipped cream okay for hot weather or outdoor events?
Absolutely. The gelatin or cream cheese version holds up well even in warmer conditions—just don’t leave it in direct sun too long.
3. Can I pipe stabilized whipped cream onto cupcakes?
Yes! It’s perfect for piping and holds its shape beautifully. Just make sure it’s fully whipped to stiff peaks before piping.
4. Will the gelatin or cream cheese affect the taste?
Not really. Gelatin has no flavor, and cream cheese adds a mild tang that many people love. Both result in a delicious whipped topping.
5. How do I color stabilized whipped cream?
Use gel or powder food coloring to avoid thinning the cream. Add color once soft peaks form, then continue whipping to stiff peaks.
Final Thoughts
Stabilized whipped cream is one of those secret weapons every home baker should have. It’s easy to make, lasts longer, and adds an elegant touch to every dessert you top with it. Whether you’re hosting a dinner party, baking for a birthday, or just leveling up your weeknight dessert, this creamy, fluffy topping is the cherry on top (literally!).
The best part? Once you’ve mastered the base method, you can play around with different flavors and styles to make it your own. So go ahead—experiment with that chocolate version or try it with cream cheese. You’re going to love the results.


