Split Chicken Breast Recipe: Split chicken breasts are like the hidden gem of poultry cuts. Not only are they more flavorful and juicy compared to boneless breasts, but they also come with the skin and rib bone intact—adding extra moisture and richness during cooking. If you’ve been stuck in a cycle of dry, bland chicken dinners, this guide is your escape route.
Whether you’re cooking for family, meal-prepping, or just want a foolproof method to elevate your protein game, this step-by-step guide is designed to make your split chicken breast recipe a guaranteed success.
Why Choose Split Chicken Breasts?
You might be wondering, “Why not go with the boneless kind?” Well, here’s the truth: split chicken breasts have flavor-packed potential. They retain moisture better, have more depth in taste, and they’re typically more affordable. Plus, the skin crisps up beautifully when baked or grilled—something you just can’t get with skinless cuts.
Cooking with bone-in meat adds natural richness, and the slow roasting method enhances it further. Once you try it, you’ll likely never go back to dry, flavorless chicken breasts again.
Benefits of Cooking Split Chicken Breasts
Health Benefits
Split chicken breasts are packed with lean protein while also delivering essential nutrients like niacin, selenium, and vitamin B6. They provide muscle support and keep you full longer, which is ideal if you’re watching your calories or aiming for high-protein meals.
Budget-Friendly Option
Let’s be real—groceries aren’t getting cheaper. Split chicken breasts are often more affordable than their boneless counterparts, making them a smart pick for meal preppers and families feeding multiple people.
Rich Flavor Profile
With the skin and bone intact, these cuts trap in moisture and allow for more robust flavor absorption, especially when marinated or roasted with herbs and spices.
Ingredients You’ll Need
Basic Ingredients
Here’s what you’ll need to make the perfect oven-baked split chicken breast:
- 2-4 split chicken breasts (bone-in, skin-on)
- 2 tbsp olive oil or melted butter
- 1 tsp garlic powder
- 1 tsp onion powder
- 1 tsp paprika
- Salt and black pepper (to taste)
Optional Seasonings and Add-ons
- Fresh rosemary or thyme sprigs
- Lemon zest or juice
- Crushed red pepper flakes
- Honey or mustard glaze
- Sliced onions or garlic cloves for roasting
These add-ons are great for bringing a gourmet touch to your dish, especially if you’re entertaining or meal prepping for variety.
Kitchen Tools Required
You don’t need fancy equipment for this recipe, just a few basics:
- Baking dish or sheet pan
- Aluminum foil (optional, for easier cleanup)
- Meat thermometer
- Mixing bowl
- Silicone brush (for applying oil or butter)
- Tongs or spatula
Keeping things simple means this recipe is accessible for cooks at all levels—from total beginners to seasoned foodies.
How to Choose the Best Split Chicken Breasts
Freshness matters. Here’s what to look for:
- Color: Pale pink flesh with creamy white skin is ideal.
- Odor: There shouldn’t be any strong or unpleasant smell.
- Packaging: Go for vacuum-sealed or tightly wrapped pieces with no leakage.
If possible, buy from a butcher or store with high turnover to ensure freshness. Organic or pasture-raised options can offer better taste and nutritional quality.
Prepping Your Chicken Breasts
Before you even think about seasoning, proper prep is key.
Cleaning and Pat Dry
- Rinse the chicken under cold water briefly.
- Use paper towels to pat dry thoroughly—this helps the skin get crisp when cooked.
Trimming Excess Fat or Skin
Use a sharp knife to cut off any large fatty chunks or extra skin hanging off the sides. Leave most of the skin intact for flavor and texture.
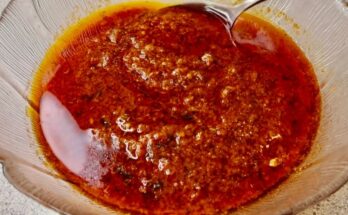
How to Marinate Split Chicken Breasts
Want to add even more flavor? A marinade can make a world of difference.
Quick Marinade Recipe
- ¼ cup olive oil
- Juice of 1 lemon
- 1 tbsp Dijon mustard
- 1 tsp crushed garlic
- 1 tsp dried oregano
- Salt and pepper to taste
Mix all ingredients and place the chicken in a zip-lock bag or container for at least 1 hour—or overnight for best results.
Marination Tips
- Always marinate in the fridge.
- Avoid over-marinating (over 24 hours) to prevent mushy texture.
- Pat off excess marinade before baking to help the skin crisp up.
Cooking Methods for Split Chicken Breast
Oven-Baked
This is the go-to method for ease and consistent results. Great for weeknights!
Pan-Seared
Sear skin-side down first for a crispy crust, then finish in the oven.
Grilled
Perfect for summer BBQs. The bone helps keep the meat moist even on high heat.
Slow-Cooked
Low and slow in a Crockpot yields fall-off-the-bone tenderness.
Step-by-Step Guide: Oven-Baked Split Chicken Breast
Step 1: Preheat Your Oven
Set your oven to 400°F (204°C). This is the sweet spot for crispy skin and juicy meat.
Step 2: Prepare the Chicken
Place your chicken breasts skin-side up in a greased baking dish. Rub olive oil or melted butter all over each piece.
Step 3: Season Generously
Sprinkle garlic powder, onion powder, paprika, salt, and pepper evenly over each piece. If you’re using fresh herbs or lemon zest, tuck them under the skin or scatter around the pan.
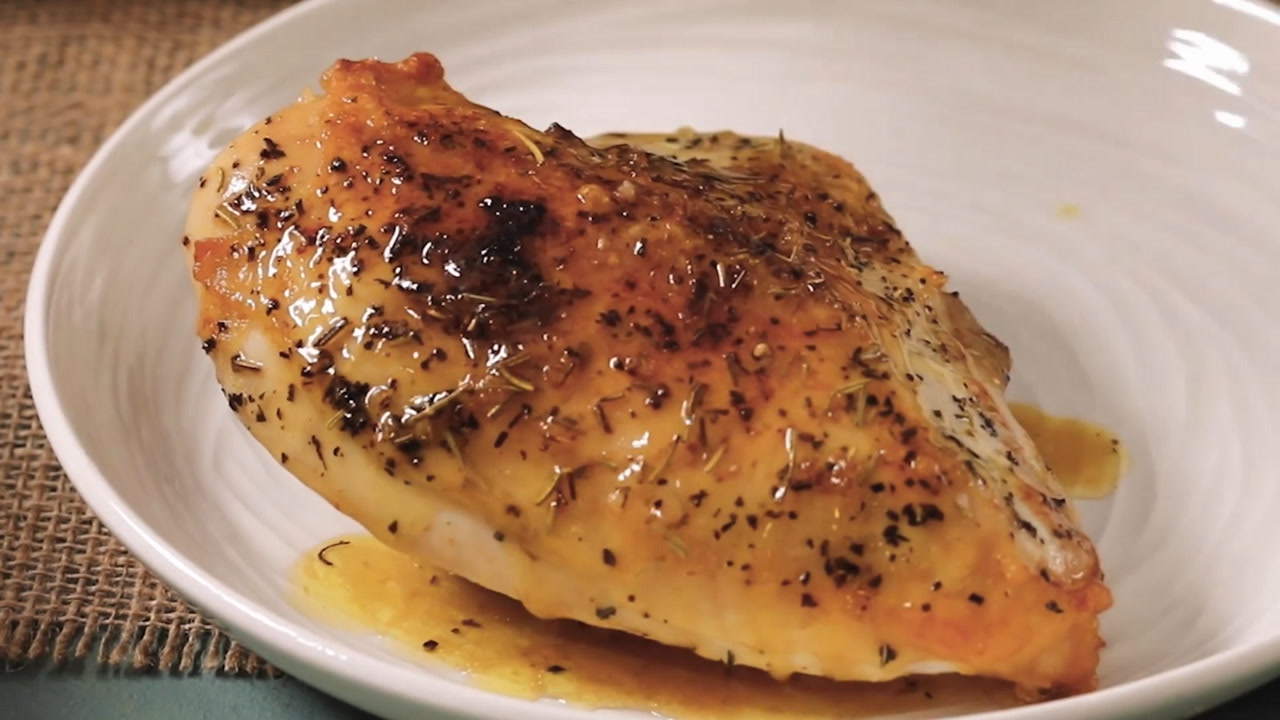
Step 4: Bake to Perfection
Bake uncovered for 40–45 minutes, or until internal temperature reaches 165°F (74°C). The skin should be golden and crisp.
Step 5: Let It Rest
Remove from oven and rest for 5–10 minutes. This helps redistribute juices and keeps the meat tender.
How to Check Doneness
Let’s face it—nobody likes undercooked chicken, and dry chicken isn’t any better. So, how do you hit that perfect spot every time? It all comes down to temperature and technique.
Temperature Guide
- The USDA recommends chicken be cooked to an internal temperature of 165°F (74°C).
- Use a meat thermometer and insert it into the thickest part of the breast, making sure it’s not touching the bone.
- If you’re baking multiple pieces, check each one individually—oven hotspots can lead to uneven cooking.
Visual and Texture Cues
- Juices should run clear when you pierce the thickest part.
- The meat should feel firm but still moist—not rubbery or dry.
- The skin should be golden brown and crisped up nicely, which is a great visual clue that it’s ready.
These cues combined ensure that you’re not serving chicken that’s dry or worse, unsafe to eat.
Serving Suggestions
What you serve with split chicken breast can totally transform the meal. Want to keep it healthy? Go with roasted veggies or a crisp salad. Feeling indulgent? Bring on the mashed potatoes and gravy!
Side Dishes to Pair
- Roasted potatoes or sweet potatoes
- Steamed or grilled vegetables (like asparagus, broccoli, or carrots)
- Rice pilaf or wild rice
- Garlic bread or crusty artisan rolls
- Fresh garden salad with vinaigrette
Sauces or Garnishes
- Honey mustard glaze for a tangy finish
- Garlic herb butter melting over the top
- Cranberry sauce for a holiday twist
- Avocado salsa for a zesty, modern flavor
You can also slice it up and add it to pastas, wraps, or salads for leftovers that don’t feel like leftovers.
How to Store Leftovers Properly
Made too much? No worries—split chicken breast stores and reheats beautifully.
Refrigeration
- Let the chicken cool completely.
- Store in an airtight container or tightly wrapped with foil.
- Keeps well in the fridge for 3–4 days.
Freezing
- For longer storage, freeze portions in zip-top bags or vacuum-sealed pouches.
- Add a label with the date.
- Can be stored for up to 3 months.
When ready to eat, thaw overnight in the fridge and reheat in the oven or microwave with a splash of broth or water to keep it moist.
Common Mistakes to Avoid
Even the best cooks mess up sometimes—but you can avoid these common pitfalls:
- Skipping the pat-dry step: This results in soggy skin, not crispy.
- Overcooking: Use a thermometer. Guesswork ruins chicken.
- Underseasoning: Bone-in meat needs extra flavor—don’t be shy.
- Not resting the meat: Cutting too soon leads to dry, juice-less chicken.
- Crowding the pan: This causes steaming instead of roasting—leave space between each piece.
Avoiding these can make the difference between “meh” and mouthwatering.
Nutritional Information (Per Serving)
Here’s a general breakdown for one oven-baked split chicken breast (about 8 oz, skin-on):
| Nutrient | Amount |
|---|---|
| Calories | 320 kcal |
| Protein | 35g |
| Fat | 18g |
| Carbohydrates | 1g |
| Fiber | 0g |
| Sugars | 0g |
| Sodium | 180mg |
| Cholesterol | 110mg |
Note: Values may vary slightly depending on the size of the chicken breast and the seasonings used.
FAQs about Split Chicken Breast Recipe
1. Can I use boneless chicken breasts for this recipe?
You can, but boneless chicken won’t have the same depth of flavor or moisture. You’ll also need to reduce cooking time by about 10–15 minutes.
2. What’s the best way to keep the chicken skin crispy?
Pat the chicken dry before seasoning, cook uncovered, and don’t overcrowd the pan.
3. Can I cook split chicken breasts in the air fryer?
Absolutely! Set your air fryer to 375°F and cook for 25–30 minutes, flipping halfway through. Always check internal temp.
4. Is marinating really necessary?
Not required, but highly recommended. It boosts flavor and keeps the chicken even more moist and tender.
5. How do I keep leftover chicken from drying out when reheating?
Add a splash of broth or water and cover the container when reheating. A quick oven warm-up at 300°F for 10–15 minutes works best.
Conclusion
Split chicken breasts are one of the most underrated cuts in the kitchen. They’re flavorful, juicy, affordable, and easy to prepare once you get the hang of it. With the right seasoning and a few smart cooking techniques, they’ll quickly become a go-to in your weekly meal rotation.
Whether you’re baking them in the oven or throwing them on the grill, this step-by-step guide should give you the confidence to cook them right—every single time. Plus, with the added bonus of crispy skin and a bone-in punch of flavor, what’s not to love?
So, next time you see split chicken breasts at the store—grab them. Your taste buds (and your budget) will thank you.