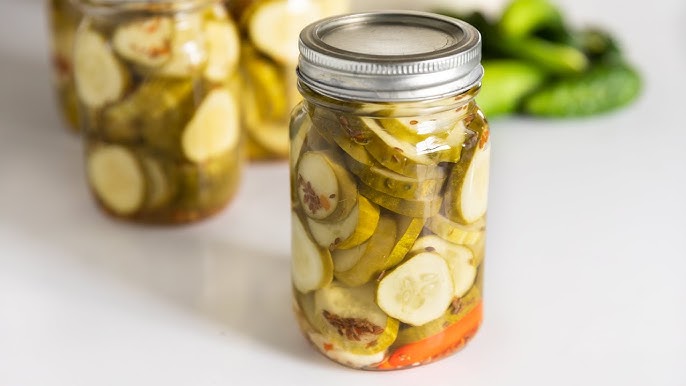
Spicy Pickle Recipe: If you love bold flavors that make your taste buds dance, spicy pickles might become your next kitchen obsession. Whether you’re spicing up a sandwich, adding tang to your charcuterie board, or just craving a crunchy snack with heat, homemade spicy pickles hit the spot. This detailed guide will walk you through every step of making your own spicy pickles at home – from selecting ingredients to perfecting the brine.
Let’s fire things up!
Why Spicy Pickles Are a Must-Have
Pickles aren’t just a garnish – they’re a flavor bomb. And when you add heat to the mix, it takes the crunch and tang to a whole new level. Spicy pickles blend acidity, saltiness, and that fiery kick that makes you go back for more. Whether it’s jalapeños, habaneros, or chili flakes, that heat pairs perfectly with everything from BBQ to burgers.
What makes them so irresistible?
- They elevate boring meals instantly.
- Perfect as a guilt-free snack.
- Offer probiotic benefits (when fermented).
- You can customize the heat to your taste.
Plus, they’re super easy to make at home, even for beginners.
The Art of Homemade Pickling
Pickling has been around for thousands of years. From Korean kimchi to Indian achar, cultures all over the world have their own take on preserving vegetables with salt, acid, and spices. Making your own spicy pickles lets you skip the preservatives and load up on the flavor.
It’s not just about storing food – it’s a creative, rewarding, and even relaxing kitchen ritual. You control the ingredients, texture, spice level, and even the jar aesthetics.
And let’s be real – a jar of fiery homemade pickles on the shelf just looks cool.
List of Ingredients You’ll Need
Before diving into the steps, here’s everything you need to craft the perfect batch of spicy pickles. These ingredients can vary based on your style, but this is a rock-solid base recipe.
Fresh Vegetables
You’ll want crisp, fresh, and firm vegetables – no soft or bruised produce.
Popular choices:
- Cucumbers (Kirby or pickling cucumbers) – classic choice
- Carrots – sweet and crunchy
- Radishes – peppery bite
- Cauliflower – holds brine well
- Green beans or okra – for Southern-style pickles
- Onions and garlic cloves – for extra zest
Pro tip: Stick to uniform slices for even pickling and a prettier jar.
Essential Spices and Seasonings
Spices are what give your pickles personality. Here’s a basic flavor arsenal:
- Mustard seeds – classic pickle spice
- Coriander seeds
- Black peppercorns
- Bay leaves
- Dill seeds or fresh dill – if making dill pickles
- Red chili flakes – for that slow burn
- Turmeric – adds color and earthy flavor
- Sugar – balances the acidity and heat
Want more heat? Bring in the firepower…
Vinegar and Brining Liquids
Your base brine is typically vinegar + water + salt.
Options:
- White vinegar – clean, neutral flavor
- Apple cider vinegar – slightly fruity
- Rice vinegar – mild and sweet
- Distilled water – avoid tap water with chlorine
Ratio tip: Use a 1:1 vinegar-to-water ratio for a balanced brine.
Don’t forget kosher or pickling salt. Table salt can contain anti-caking agents that cloud the brine.
Optional Add-ins for Extra Heat
- Jalapeños (sliced or whole)
- Habaneros – be careful, super hot!
- Serrano peppers
- Thai chilies
- Ghost peppers (only for the brave)
- Fresh ginger – adds warmth
You can also make chili paste or infuse chili oil into the brine for a rich, layered heat.
Tools and Equipment Needed
You don’t need fancy gear to pickle at home. A few simple tools are all it takes.
Basic Kitchen Tools
- Cutting board and knife – for slicing veggies
- Measuring cups and spoons – accuracy matters
- Saucepan – to make the brine
- Wooden spoon – stir without reacting to vinegar
Sterilization Essentials
Clean jars are key to safe, delicious pickles.
- Glass jars (mason or Weck) – with tight lids
- Tongs or jar lifter
- Large pot – to boil and sterilize jars
Sterilization tip: Boil jars for 10 minutes before using.
Storage Containers and Jars
Always use glass – plastic can absorb odors and flavors.
Choose:
- Wide-mouth mason jars – easy to pack
- Flip-top jars – great for refrigerator pickles
- Small jars – for gifting or variety batches
Label with date and ingredients so you know what’s inside.
Preparation Before You Start
Choosing the Right Produce
Freshness makes all the difference. Look for:
- Firm, blemish-free vegetables
- Bright color and crisp texture
- Local and organic, if possible
Avoid wax-coated cucumbers—they repel brine.
Cleaning and Cutting the Vegetables
- Wash thoroughly under cold water.
- Scrub any root veggies like carrots or radishes.
- Trim off ends, especially blossom ends of cucumbers (they cause mushiness).
- Slice evenly – matchstick, spears, rounds, or whole.
You can even use a mandoline slicer for pro-level uniformity.
Organizing Your Workspace
Set yourself up for success by prepping your station:
- Line up your ingredients
- Sterilize your jars
- Keep a clean towel nearby
- Lay out all your tools so you’re not scrambling
Tip: Work quickly once the brine is hot to preserve crunch and seal freshness.
Step-by-Step Guide to Making Spicy Pickles
Now we get into the good stuff – let’s make your kitchen smell like spicy pickle heaven.
Step 1 – Prepare the Brine
In a medium saucepan, combine white vinegar, water, salt, and sugar. Bring it to a gentle boil, stirring until the salt and sugar dissolve completely. For that fiery twist, add red pepper flakes, garlic cloves, mustard seeds, black peppercorns, and sliced fresh chili peppers. Let the mixture simmer for a few minutes to infuse the flavors — your kitchen will smell tangy and spicy in the best way possible.
Step 2 – Layer the Ingredients in Jars
Pack your clean glass jars tightly with sliced cucumbers, jalapeños, or any veggies of choice. Add a few extras like dill sprigs, garlic, or onion slices between layers for more depth of flavor.
Step 3 – Add the Hot Brine
Carefully pour the hot brine over the packed vegetables, covering them completely. Leave a little headspace at the top and gently tap the jars to release air bubbles.
Step 4 – Seal and Store
Wipe the rims clean, seal tightly with lids, and let them cool at room temperature. Store in the refrigerator or pantry depending on your method.
Step 5 – Let It Ferment or Chill
For quick pickles, chill for at least 24–48 hours before tasting. For fermented pickles, leave the sealed jars at room temperature for 2–3 days before moving them to the fridge. The longer they sit, the bolder and spicier they become — pure flavor perfection in a jar.
Different Types of Spicy Pickles to Try
Once you’ve mastered the basic method, it’s time to experiment. Different cultures bring unique heat and tang combinations to the table. Here are a few styles worth trying.
Jalapeño Pickles
Jalapeños are the gateway pepper — spicy, but not overwhelming. Sliced thin and pickled in a vinegar brine with garlic, they’re perfect for nachos, burgers, or just snacking straight from the jar.
Flavor tips:
- Add honey for sweet heat
- Mix with carrots for a Mexican escabeche twist
They only need 1–2 days in the fridge before they’re ready.
Spicy Garlic Dill Pickles
Classic dill pickles meet a spicy makeover. This is perfect for cucumber lovers who want a bold, garlicky crunch.
Key ingredients:
- Fresh dill (or dill seeds)
- Smashed garlic cloves
- Crushed red pepper or sliced habaneros
Ideal for sandwiches, Bloody Mary garnishes, or chopped into egg salad for an extra zing.
Korean Spicy Pickled Radish (Danmuji)
If you want something different, try this Korean favorite. Crunchy daikon radish is pickled with vinegar, sugar, and gochugaru (Korean chili flakes).
Flavor profile:
- Sweet, spicy, and slightly funky
- Great alongside fried chicken or in bibimbap
Cut the radish into cubes or thin rounds. Add turmeric for that vibrant yellow color.
Tips for Customizing Heat Levels
Choosing Your Chilies
Not all chilies are created equal. The type of chili you use dramatically affects the spiciness, flavor, and aroma of your pickles. Here’s a quick breakdown of common chili peppers and their heat levels, measured in Scoville Heat Units (SHU):
| Chili Pepper | Heat Level (SHU) | Flavor Profile |
|---|---|---|
| Jalapeño | 2,500 – 8,000 | Mild, grassy, slightly sweet |
| Serrano | 10,000 – 23,000 | Hotter, cleaner heat |
| Thai Chili | 50,000 – 100,000 | Sharp, pungent, very spicy |
| Habanero | 100,000 – 350,000 | Fruity, floral, extremely hot |
| Ghost Pepper | 800,000 – 1,000,000 | Intense, smoky, prolonged burn |
Pick your pepper based on your spice tolerance. If you’re new to spicy pickles, start with jalapeños and work your way up.
Controlling Spice with Seeds and Skins
Here’s a trick: the real heat in a chili isn’t just in the flesh – it’s in the seeds and membranes.
- More seeds = more heat.
- Remove seeds for a milder taste.
- Leave the skin on for added texture and bite.
Slicing the chilies thinly will allow more surface area for the heat to blend into the brine, intensifying the burn over time. Want a slow burn? Add whole chilies instead of slices.
Balancing Flavor with Sweetness
Heat alone isn’t enough—you need balance.
Why add sugar?
- Sugar rounds out the heat and acidity.
- It helps your brain register flavor before fire.
- Adds a subtle caramelized taste, especially in longer ferments.
Try adding 1–2 tablespoons of sugar to your brine for every cup of vinegar. For a twist, substitute white sugar with honey, maple syrup, or even brown sugar for a deeper flavor.
How to Store and Preserve Your Pickles
Short-Term Storage
If you’re making refrigerator pickles, they can be enjoyed quickly and stored for several weeks.
- Keep in an airtight glass jar.
- Always use a clean utensil to avoid contamination.
- Store in the coldest part of your fridge.
Over time, the flavor will intensify, and the texture may soften slightly.
Long-Term Canning Techniques
Want to make a big batch that lasts for months or even a year? Go the water bath canning route.
How to do it:
- Sterilize jars and lids by boiling for 10 minutes.
- Fill with hot pickles and brine, leaving ½ inch headspace.
- Wipe rims clean and seal tightly.
- Submerge in a boiling water bath for 10–15 minutes.
- Cool and store in a dark, cool pantry.
Check for a proper seal by pressing the lid. If it doesn’t pop, it’s sealed.
Shelf life: 6–12 months (unopened).
Signs of Spoilage to Watch Out For
Even the best picklers can make mistakes. Here’s how to know if your pickles have gone bad:
- Foul or rotten smell
- Mold growing inside the jar
- Bulging lid or signs of pressure
- Slimy texture or cloudy brine (in vinegar-based pickles)
When in doubt, throw it out. It’s better to be safe than sorry.
Serving Suggestions and Pairings
Once your spicy pickles are ready, the fun begins — eating them!
Pairing with Meals
Spicy pickles go with just about everything:
- Burgers and sandwiches: Add a kick with jalapeño slices or spicy dill chips.
- Tacos and burritos: Toss in pickled onions or radishes.
- BBQ plates: Serve with brisket or pulled pork for a sharp contrast.
- Rice bowls and noodles: Add pickled veggies for brightness.
They’re the unsung hero of many dishes — elevating even the most basic meals.
Using in Recipes
Think beyond the side dish:
- Chop them into salsas or relishes
- Mix into potato or pasta salads
- Add to grilled cheese or quesadillas
- Use brine as a marinade for chicken or tofu
The possibilities are endless when you get creative.
Snack Ideas
Sometimes, you don’t need a meal. Just pop a jar and snack.
- Pair with sharp cheddar and crackers
- Add to a pickle platter with olives and nuts
- Eat straight from the jar (we won’t judge)
Keep a few styles in your fridge at all times for any craving or occasion.
Common Mistakes to Avoid When Pickling
Even experienced picklers can make rookie errors. Here are the top mistakes to avoid:
Not Sterilizing Properly
Your jars and tools need to be germ-free to avoid spoilage.
- Boil jars before use
- Use clean towels and utensils
- Don’t touch the inside of jars after sterilizing
Skipping this step is the fastest way to ruin a good batch.
Overcrowding the Jars
Cramming too many vegetables or spices can prevent even brining and create air pockets. This can cause:
- Uneven flavor
- Spoilage
- Soft, mushy texture
Leave space between veggies and keep them fully submerged.
Ignoring Fermentation Basics
If fermenting instead of quick pickling:
- Use non-chlorinated water
- Add fermentation weights to keep produce submerged
- Watch for mold or funky smells
Fermenting takes patience, but the flavor payoff is worth it.
Nutritional Value of Spicy Pickles
Health Benefits
Spicy pickles aren’t just a treat for your taste buds—they come with a surprising number of health perks. If made properly and without excessive preservatives or sugars, they can be a nutritious addition to your diet.
Here are a few key benefits:
- Probiotic Potential (for fermented pickles): Natural fermentation fosters healthy gut bacteria that aid digestion and boost immune function.
- Low-Calorie Snack: Most spicy pickles are incredibly low in calories—perfect for guilt-free snacking.
- Hydration and Electrolytes: The vinegar and salt combo helps replenish electrolytes, especially after exercise or hot weather.
- Blood Sugar Regulation: Vinegar has been shown to help stabilize blood sugar levels when consumed with meals.
- Rich in Antioxidants: Spices like garlic, turmeric, and chilies contain antioxidants that help fight inflammation.
Just be mindful of the sodium content if you’re on a low-salt diet.
Calorie and Sodium Content
Here’s a general idea of what you’re consuming per serving (based on a standard cucumber pickle):
| Nutrient | Approximate Value per 1 spear |
|---|---|
| Calories | 5–10 |
| Sodium | 300–600 mg |
| Fat | 0g |
| Carbohydrates | 1–2g |
| Protein | 0g |
| Fiber | 0.5g |
The sodium level can vary depending on how much salt you add to the brine. You can always tweak the recipe to use less salt or a salt substitute if needed.
Are They Good for Gut Health?
Fermented pickles are a gut health superstar.
When you let your pickles ferment naturally (without vinegar), the process produces lactobacillus, a beneficial bacteria that supports your digestive system.
Benefits of fermented pickles:
- Reduce bloating and indigestion
- Improve nutrient absorption
- May help reduce anxiety and inflammation (gut-brain connection)
Just be sure you’re making fermented pickles, not quick vinegar-based ones, if you’re looking for that probiotic benefit.
FAQs about Spicy Pickle Recipe
1. Can I make spicy pickles without vinegar?
Yes! Use a saltwater brine and ferment them naturally. It’s called lacto-fermentation and creates probiotic-rich pickles.
2. Do I need to peel vegetables before pickling?
Not always. Leave the skin on for cucumbers and carrots, but you might want to peel thicker-skinned items like beets.
3. Can I pickle frozen vegetables?
No, frozen vegetables lose their texture and become mushy during pickling. Always use fresh produce.
4. How do I make my pickles extra crunchy?
Add a few grape leaves or black tea leaves to the jar. They contain tannins that help keep pickles crisp.
5. Is it okay if the brine turns cloudy?
In fermented pickles, cloudiness is normal. In vinegar pickles, it can mean spoilage—especially if paired with odor or slime.
Conclusion
Spicy pickles are more than just a tangy snack—they’re a flavorful journey you can completely control from your kitchen. With just a few ingredients and a little patience, you can whip up batches of crunchy, fiery pickles that rival any store-bought brand. Whether you’re a heat seeker or just testing the waters, this DIY method is endlessly customizable and ridiculously satisfying.
From jalapeños to ghost peppers, sweet to sour, mild to molten, there’s a spicy pickle out there for every palate. So grab your jars, turn up the heat, and start pickling!
Happy crunching!


