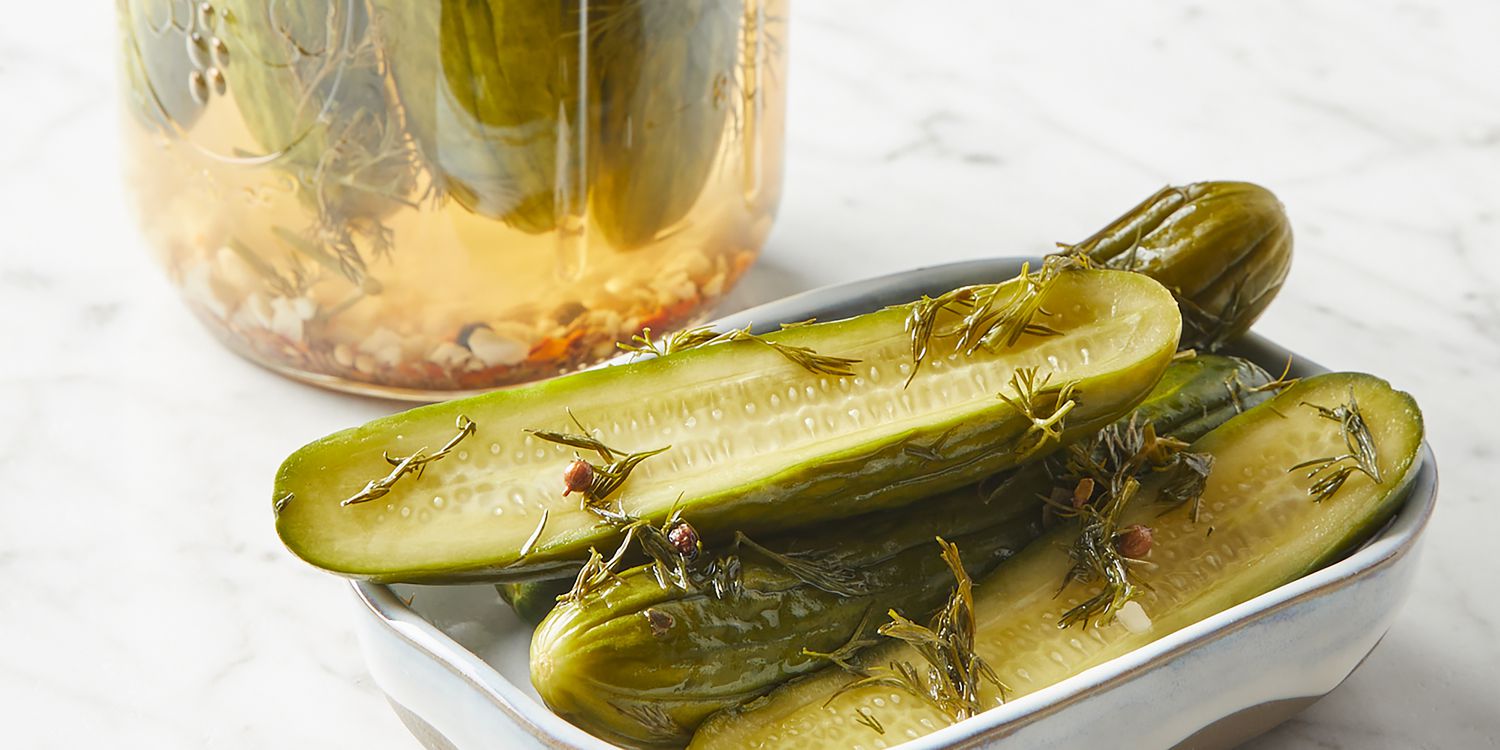
Spicy Dill Pickle Recipe: Let’s be honest—store-bought pickles just don’t hit the same once you’ve tried the homemade kind. Especially when it comes to spicy dill pickles, the difference is night and day. Tangy, crunchy, a little fiery, and bursting with flavor, these pickles bring a serious punch to your sandwiches, snacks, and even straight from the jar. The best part? You don’t need to be a master chef to make them. With the right ingredients, a little patience, and our easy step-by-step guide, you’ll be stocking your fridge with homemade spicy dill pickles in no time.
Why go homemade? Because you control the flavor, the heat level, and the ingredients. No mystery preservatives or weird aftertastes. Just fresh, bold pickles exactly the way you like them.
In this complete guide, we’ll walk you through everything: from selecting the right cucumbers to sealing your jars tight. So, grab your apron and let’s get pickling.
Ingredients You’ll Need
Before you dive into the pickling process, let’s round up everything you’ll need. Don’t worry—it’s not a massive grocery list, and you might already have many of these ingredients at home.
Main Ingredients:
- Fresh cucumbers (pickling cucumbers like Kirby are ideal)
- Fresh garlic cloves (4–6 per jar)
- Fresh dill (or dill seeds if fresh isn’t available)
- White vinegar (5% acidity)
- Water
- Pickling salt (or kosher salt)
Spicy Add-ins:
- Red pepper flakes (½ tsp to 1 tsp per jar)
- Fresh chili peppers (jalapeños, serranos, or habaneros, sliced)
- Black peppercorns
- Mustard seeds
- Coriander seeds
Optional Flavor Boosters:
- Bay leaves
- Onion slices
- Horseradish
- Sugar (for sweet heat style pickles)
You can customize this list based on your flavor preference. Want it scorching hot? Add more peppers or even a few dashes of hot sauce. Want a more herbaceous flavor? Add more dill and garlic. The real beauty of this recipe is how flexible it is.
Essential Equipment
While the ingredients make the pickles taste amazing, the right tools make the process smoother and safer. If you’re planning to make spicy dill pickles more than once, these items are worth having in your kitchen.
Must-Have Tools:
- Quart-size mason jars with airtight lids (wide-mouth jars are easier to pack)
- Large pot (for boiling brine or sterilizing jars)
- Jar lifter or tongs
- Funnel (to help pour brine without mess)
- Measuring cups and spoons
- Cutting board and sharp knife
Sterilizing Your Equipment: Why It Matters
Before you get into pickling, sterilizing your jars and lids is critical to prevent bacteria growth and extend shelf life. Here’s how:
- Wash jars and lids in hot, soapy water and rinse well.
- Place jars in a pot of boiling water for 10 minutes.
- Use tongs to remove and let them air dry on a clean towel.
Sterilization ensures your pickles stay fresh, flavorful, and safe to eat—especially if you plan to store them for weeks or months.
Types of Cucumbers to Use
Not all cucumbers are created equal—especially when it comes to pickling. Using the right type ensures your spicy dill pickles are crunchy, not mushy.
Best Varieties for Pickling:
- Kirby cucumbers: The gold standard. They’re small, firm, and have fewer seeds.
- Persian cucumbers: Thin-skinned, crunchy, and flavorful.
- Gherkins: Tiny but flavorful—great for mini pickle bites.
Avoid regular slicing cucumbers from the grocery store; they’re too watery and have soft skins that lead to soggy pickles.
Pro Tips:
- Choose cucumbers that are fresh, firm, and bright green.
- Avoid ones that are yellowing, wrinkled, or too large.
- Wash them thoroughly and trim the blossom end (it contains enzymes that can soften pickles).
You can also cut them into spears, chips, or leave them whole, depending on how you want to enjoy them later.
Understanding the Role of Brine
The brine is where the magic happens. It’s the soul of the pickle—bringing the perfect balance of salty, sour, spicy, and tangy. So let’s break down what makes a solid brine.
Basic Brine Formula:
- 2 cups water
- 1 cup white vinegar (5% acidity)
- 1 tablespoon pickling salt
This base can be multiplied depending on how many jars you’re making. Once heated and poured over cucumbers, it starts the pickling process immediately.
Adding Heat and Flavor:
To make it spicy, you’ll want to toss in:
- Red pepper flakes
- Sliced jalapeños or serranos
- Crushed garlic
- Mustard seeds, coriander, and peppercorns
Customize the spice level by adjusting the quantity of chili elements. Want a mouth-burning pickle? Toss in a habanero. Prefer just a subtle zing? Stick to mild jalapeños and a pinch of pepper flakes.
How to Choose the Right Vinegar
Not all vinegars are equal, and your choice will definitely affect the flavor and safety of your pickles.
Top Choices:
- White distilled vinegar: Clean, sharp, and the most common. Perfect if you want the spices and cucumbers to shine.
- Apple cider vinegar: Slightly sweet and fruity, giving your pickles a richer taste.
Whatever vinegar you choose, make sure it’s 5% acidity—this is crucial for safe pickling and proper preservation.
Avoid These:
- Balsamic or malt vinegar: They’re too overpowering.
- Flavored or low-acid vinegars: They can affect food safety and taste odd in brine.
You can mix vinegar types for a custom flavor, like half white, half apple cider. Just keep the total ratio correct.
Must-Have Spices for Spicy Dill Pickles
Here’s where your pickles take on personality. The spices you choose bring out the heat, tang, and depth of flavor.
Essential Spices:
- Fresh garlic: Sliced or smashed cloves add bold flavor.
- Dill (fresh sprigs or seeds): The backbone of all dill pickles.
- Red pepper flakes: The classic kick.
- Whole black peppercorns: For heat and aroma.
- Mustard seeds: Earthy, tangy background flavor.
- Coriander seeds: Citrus-like depth.
Optional Add-Ins for Extra Kick:
- Jalapeño slices or habanero rings
- Bay leaf (one per jar)
- Horseradish root (spicy and pungent)
- Onion slices (adds sweetness and bite)
Play around with spice levels based on your tolerance. If you love spicy food, don’t hold back.
Prepping Your Pickling Jars
Clean jars = long-lasting pickles. You don’t want to skip this part, especially if you’re storing them for more than a few days.
Steps to Prep Your Jars:
- Wash with soap and hot water, rinse thoroughly.
- Sterilize jars by boiling them for 10 minutes or using a dishwasher with a sterilize cycle.
- Let jars air dry upside down on a clean towel.
- Keep jars warm until use—placing hot brine in cold jars can crack the glass.
Lids and bands also need a quick boil to kill bacteria. Don’t reuse lids from old canning projects; it’s not worth the risk.
Step-by-Step Guide to Making Spicy Dill Pickles
Time to bring it all together. Below is a simple, foolproof step-by-step guide to making your own spicy dill pickles. Whether you’re a first-timer or a seasoned home cook, this process will give you consistently delicious results.
Step 1: Wash and Cut the Cucumbers
Rinse fresh, firm cucumbers under cold water and scrub off any dirt. Trim the blossom ends, which can cause soft pickles. Slice into spears, chips, or leave whole, depending on your preference.
Step 2: Prepare the Brine Mixture
In a saucepan, combine water, white vinegar, and salt. Heat gently until the salt fully dissolves. Remove from heat and let the brine cool slightly—boiling brine can soften the cucumbers.
Step 3: Pack the Jars with Cucumbers and Spices
Place garlic cloves, fresh dill, red pepper flakes, mustard seeds, and peppercorns into clean jars. Pack the cucumbers tightly but without crushing them. This keeps them crisp.
Step 4: Pour the Brine Into the Jars
Carefully pour the warm brine over the cucumbers until fully submerged. Leave a little space at the top to prevent overflow.
Step 5: Seal the Jars Properly
Wipe jar rims clean and close tightly with lids. If using refrigerator pickles, no special canning is needed. For shelf-stable pickles, follow proper water-bath canning steps.
Step 6: Let Them Sit and Pickle
Refrigerate for at least 24–48 hours before eating. Flavor deepens over 3–5 days. The longer they sit, the spicier and tangier they become.
Tips to Make Pickles Extra Crunchy
Let’s talk about crunch, because no one likes a limp pickle. Luckily, there are a few tried-and-true tricks to keep your spicy dill pickles crisp and satisfying.
1. Use the Right Cucumbers
As mentioned earlier, Kirby or Persian cucumbers are ideal. Stay away from waxed or overripe cucumbers.
2. Ice Bath Pre-Soak
Before packing them into jars, soak your sliced cucumbers in ice water for 1–2 hours. This helps firm them up and retain their snap.
3. Use Grape Leaves or Tannins
Grape leaves contain tannins, which naturally help maintain crunchiness.
Other sources of tannins you can safely add:
- Black tea leaves (1 tsp per jar)
- Oak leaves
- Cherry leaves
Place a leaf at the bottom of each jar before adding cucumbers.
4. Avoid Overheating During Processing
If canning, don’t boil jars longer than needed. Overprocessing leads to mushy pickles.
Pro tip: Add a small amount of Pickle Crisp (calcium chloride), available in most grocery or canning stores. It’s a safe additive that helps maintain crunch.
How Long to Ferment or Refrigerate
Now that your jars are packed, sealed, and spiced to perfection, the big question is: how long do you wait before digging in?
Refrigerator Pickles (Quick Pickles)
These are the easiest and safest for beginners. They don’t require any special equipment like water bath canners or pressure sealers. Just pop them into the fridge and let the flavors do their thing.
- Minimum time: 48 hours
- Best flavor: 7–10 days
- Peak quality window: Up to 2 months (though they’re usually gone by then!)
The longer they sit, the more intense and balanced the flavor becomes. By the second week, your spicy dill pickles will be fully infused with that garlicky, fiery tang.
Fermented Pickles
If you’re going the fermentation route (using no vinegar, just salt water), you’ll need to leave the jars at room temperature (65–75°F) for 5–10 days, depending on your climate and flavor preference. Fermentation is a more complex process and isn’t covered fully in this recipe, but the result is a traditional, probiotic-rich pickle.
Canned Pickles (Shelf-Stable)
If you’ve gone the extra step of water bath canning, here’s the breakdown:
- Let them rest for at least 2 weeks in a cool, dark pantry.
- Full flavor typically sets in around 4–6 weeks.
- Shelf life: Up to 1 year, unopened and properly stored.
Once opened, move to the fridge and consume within a few weeks for best texture and flavor.
Storage Tips for Homemade Pickles
So you’ve made a bunch of spicy dill pickles—great! Now let’s make sure they stay fresh, flavorful, and safe to eat.
Refrigerated Pickles
- Store in the coldest part of your fridge.
- Make sure cucumbers are always submerged in brine.
- Use clean utensils (not fingers!) to grab pickles from the jar.
- Best used within 2–3 months.
Canned Pickles
- Store in a cool, dark place like a pantry or basement.
- Avoid direct sunlight and temperature fluctuations.
- Check the seal before using: if the lid pops or bulges, toss it.
Pro tip: Always label your jars with the date and contents (especially helpful if you’re experimenting with different heat levels!).
Signs They’ve Gone Bad:
- Cloudy brine that smells off
- Mold growth on top or inside
- Slimy pickles
- Lid bulging or leaking
When in doubt, throw it out. Your health is worth more than one questionable pickle.
Common Mistakes to Avoid
Even though making pickles is a fun and fairly easy process, there are a few pitfalls to watch out for—especially if you’re doing it for the first time. Here’s what not to do:
1. Using the Wrong Salt
Table salt often contains anti-caking agents and iodine, which can cloud your brine or alter the flavor. Use pickling salt or kosher salt for the best results.
2. Skipping Sterilization
Dirty jars can lead to spoilage or harmful bacteria. Always sterilize your jars and lids properly before use.
3. Overcooking the Brine
Boiling the brine too long can dull the flavor of the spices. Just heat it enough to dissolve the salt and combine the flavors.
4. Using Overripe or Soggy Cucumbers
Soft cucumbers = mushy pickles. Choose firm, fresh cucumbers for maximum crunch.
5. Not Letting Them Sit Long Enough
Patience is key. Pickles need time to absorb flavor, especially spicy ones. Don’t judge your pickles too soon—they get better with age!
Creative Ways to Use Spicy Dill Pickles
Okay, so now you’ve got jars of these bold, spicy dill pickles. What now? There’s more to life than just eating them straight from the jar (though that’s totally fine too).
Here are some awesome ideas:
- Add to sandwiches: Turkey, ham, or grilled cheese gets a serious upgrade.
- Chop into potato salad: Add kick and crunch.
- Serve on charcuterie boards: Pairs beautifully with cheeses and meats.
- Use the juice: In Bloody Marys, marinades, or even as a hangover cure!
- Top burgers or hot dogs: Classic and unbeatable.
- Snack attack: Dip them in ranch or eat with sharp cheddar cheese.
The tangy spice cuts through rich dishes and adds a zing to anything savory. You can even fry them for spicy pickle chips—trust us, they’re addictive.
FAQs about Spicy Dill Pickle Recipe
1. How spicy can I make these pickles?
As spicy as you want! Add more red pepper flakes, fresh chili slices, or even habaneros. Just be careful not to overdo it—you can always add more heat, but you can’t take it out once it’s there.
2. Do I need to can them, or is refrigeration enough?
Nope, refrigeration is enough for quick pickles. Just be sure to eat them within 2–3 months. Canning is great if you want to store them long-term or give them as gifts.
3. Can I use dried dill instead of fresh?
Yes, you can. Use about 1 teaspoon of dried dill weed or dill seed per jar if fresh isn’t available. The flavor will be slightly different but still delicious.
4. What’s the shelf life of homemade spicy pickles?
Refrigerated pickles last about 2–3 months. Canned pickles, if properly sealed and stored, can last up to a year or more.
5. Can I reuse the brine?
Technically, yes—but it’s not recommended for another round of pickling. The brine loses acidity and can be unsafe. However, you can reuse it in salad dressings, marinades, or as a zesty drink shot!
Conclusion
And there you have it—your complete guide to making homemade spicy dill pickles that are crunchy, tangy, garlicky, and packed with heat. Whether you’re tossing them in a sandwich or munching straight from the jar, there’s nothing quite like that first bite of a pickle you made yourself.
From choosing the perfect cucumbers to sealing up your jars, the process is not only fun, but incredibly rewarding. You’ll never want to go back to store-bought again.
So grab some jars, spice things up, and give homemade pickling a try. You’ll be amazed how easy it is—and how delicious the results can be.


