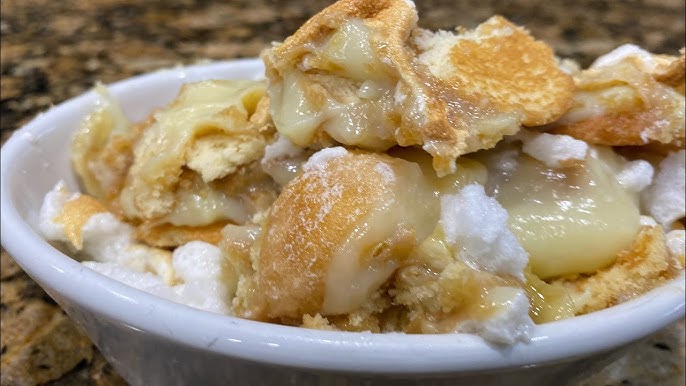
Southern Banana Pudding Recipe: If you’ve ever been to a Southern family reunion, church picnic, or Sunday dinner, chances are you’ve had a scoop of banana pudding nestled between your fried chicken and sweet tea. This classic dessert is rich, creamy, nostalgic, and downright irresistible. Whether you’re a seasoned cook or a kitchen newbie, this easy-to-follow guide will walk you through creating a mouthwatering banana pudding that’ll have everyone begging for seconds. Let’s get into it!
What Makes It “Southern”?
Banana pudding isn’t just any dessert in the South—it’s a tradition. What sets Southern banana pudding apart from other pudding recipes isn’t just the bananas or the pudding itself. It’s the love, the layering, the nostalgia, and yes—the Nilla wafers. A true Southern banana pudding is made with real bananas, a luscious vanilla custard or pudding, crispy-yet-soft cookies, and a whipped or meringue topping that ties it all together like a warm Sunday hug.
The Southern version stands out because of its emphasis on simple, accessible ingredients and the way it’s usually served chilled, straight from Grandma’s refrigerator, layered in a glass dish that showcases every creamy, golden layer.
Why This Dessert Is a Southern Staple
Banana pudding is more than just a sweet treat—it’s part of the South’s culinary identity. Its appeal lies in its balance of textures and flavors: the silky pudding, the softening cookies, the fresh banana slices, and the cloud-like topping. It’s one of those desserts that reminds people of home, love, and family.
Plus, it’s budget-friendly and easy to scale up for large gatherings, making it perfect for potlucks and family reunions. Whether it’s made with instant pudding or cooked from scratch, the result is always a comfort-food classic.
Ingredients You’ll Need
Essential Ingredients Breakdown
To make a traditional Southern banana pudding, you’ll only need a handful of ingredients. Here’s the basic list for a no-bake version:
- Bananas – Ripe but firm, for perfect texture and flavor.
- Vanilla Pudding Mix – Instant works, but homemade pudding levels it up.
- Whole Milk – For mixing the pudding and keeping it rich.
- Sweetened Condensed Milk – Adds extra creaminess and sweetness.
- Whipped Topping (or Meringue) – For that light, fluffy finish.
- Nilla Wafers – The essential cookie that gets soft and cake-like over time.
- Vanilla Extract – A splash enhances the flavor of the pudding.
Optional add-ons include cream cheese for a tangy base, or a pinch of salt to balance out the sweetness.
Choosing the Right Bananas
The bananas you choose can make or break your pudding. You want bananas that are ripe but still slightly firm—no mushy, overripe ones that’ll turn to mush. Look for yellow bananas with a few brown specks. They should be sweet and fragrant but still hold their shape when sliced.
Cut the bananas into even slices (about ¼ inch thick) so that every bite has a consistent texture. Don’t slice them too early—bananas start to brown once exposed to air. If you do need to prep ahead, toss them lightly in lemon juice to slow the browning.
Kitchen Tools Required
Basic Tools You Probably Already Own
You don’t need any fancy equipment to whip up this Southern classic. Here’s what you’ll want to have on hand:
- Mixing Bowls – At least two: one for pudding, one for layering.
- Whisk or Electric Mixer – For mixing pudding until smooth.
- Spatula – For spreading layers evenly.
- Measuring Cups and Spoons – Precision matters, even for dessert.
- 9×13 Glass Baking Dish or Trifle Bowl – Show off those layers in style!
Optional Tools to Make It Easier
While not essential, these tools can make your banana pudding game even stronger:
- Mandoline or Slicing Tool – For perfectly even banana slices.
- Piping Bag – For a decorative whipped topping finish.
- Stand Mixer – If you’re whipping your topping from scratch.
- Plastic Wrap – To cover and chill the pudding without skin forming.
Keeping it simple is totally fine—this dessert is about flavor and love, not kitchen gadgets.
Step-by-Step Banana Pudding Recipe
Step 1 – Preparing the Vanilla Pudding
If you’re going with instant pudding (no shame!), follow the box instructions, but elevate it by using whole milk and adding a splash of vanilla extract. For a richer flavor, mix in half a can of sweetened condensed milk and fold in a little whipped topping for extra creaminess.
If you’re feeling adventurous and want to make it from scratch:
Ingredients for homemade pudding:
- 3 cups whole milk
- ¾ cup sugar
- ⅓ cup all-purpose flour
- ¼ teaspoon salt
- 3 egg yolks
- 2 teaspoons vanilla extract
- 2 tablespoons butter
Instructions:
- In a saucepan over medium heat, whisk together sugar, flour, and salt.
- Gradually add milk while stirring constantly to avoid lumps.
- In a separate bowl, beat the egg yolks. Temper with a bit of hot milk mixture, then add them back to the saucepan.
- Cook until thickened (about 10–12 minutes), then remove from heat.
- Stir in vanilla extract and butter. Let cool slightly before layering.
Creamy, velvety, and packed with flavor—this is the heart of your pudding.
Step 2 – Layering Nilla Wafers, Bananas, and Pudding
Now that your pudding is ready, it’s time to bring this dessert to life. The layering process is not just about flavor—it’s about texture, structure, and that beautiful Southern presentation. A classic Southern banana pudding is built in three main components: Nilla wafers, sliced bananas, and pudding.
Here’s how to layer like a pro:
- Base Layer – Nilla Wafers
Start by lining the bottom of your dish with Nilla wafers. Place them neatly to cover the entire base. This gives the pudding a cake-like foundation and absorbs moisture as it sits. - Second Layer – Bananas
On top of the wafers, evenly spread a layer of banana slices. Don’t overlap too much, but ensure every inch has some banana goodness. - Third Layer – Pudding
Spoon a generous layer of pudding over the bananas. Use a spatula to spread it evenly, covering every slice. - Repeat the Layers
Continue layering: more wafers, more bananas, more pudding. Typically, two to three rounds of layers work well in a standard 9×13 dish. - Top it Off
Finish with a final layer of pudding, smoothing it out nicely. This final layer should be clean and ready for topping.
If you’re using a trifle bowl, try to make the layers as even and clean as possible so that each layer is visible from the side. It’s all about that “wow” factor when serving.
Layering isn’t just for show—it ensures that every bite delivers a balanced mix of cookie, banana, and creamy custard. This is what makes Southern banana pudding so addictive!
Step 3 – Adding the Whipped Topping or Meringue
The final touch on any good banana pudding is the topping. Here, you have two traditional options: whipped topping (easy and light) or meringue (classic and a bit fancy). Let’s break down both.
Option 1: Whipped Topping
This is the simpler choice and perfect if you’re short on time.
- Use store-bought whipped topping or make your own by whipping 1 cup heavy cream, 2 tablespoons sugar, and 1 teaspoon vanilla extract until stiff peaks form.
- Spread it evenly over the top of your pudding, covering every edge.
- For a pretty presentation, use a piping bag and swirl it on top.
Option 2: Meringue
If you want to go the old-school Southern route, meringue is the way.
Ingredients for meringue:
- 3 egg whites
- ¼ teaspoon cream of tartar
- 6 tablespoons sugar
- ½ teaspoon vanilla extract
Instructions:
- Beat egg whites with cream of tartar until soft peaks form.
- Gradually add sugar and continue beating until stiff, glossy peaks form.
- Beat in vanilla extract.
- Spread meringue over the pudding, sealing to the edges to prevent shrinkage.
- Bake at 350°F (175°C) for 10–12 minutes until golden.
Once done, let it cool to room temperature and then refrigerate for at least 4 hours before serving. This allows the flavors to meld and the wafers to soften just enough.
Tips to Make It Just Like Grandma’s
This dish is more than just a recipe—it’s a family heirloom. Want to make it unforgettable? Use these classic tips straight from Southern kitchens.
How to Avoid Soggy Wafers
Nobody wants a banana pudding with soggy, mushy wafers. The trick is to let the pudding chill just long enough. If it sits too long, the cookies get too soft and lose that wonderful cake-like texture.
- Ideal Chill Time: 4–6 hours is the sweet spot.
- Don’t Overdo the Pudding: Use just enough to coat each layer—not drown it.
- Consider Layer Spacing: Don’t pack layers too tightly. Allow a little airflow between bananas and wafers for better texture.
If you’re serving it at a party, prep it the same day or the night before for the best results.
When to Serve – Fresh vs. Chilled
Banana pudding can be eaten fresh, but it’s best served cold, after a few hours in the fridge.
- Freshly Made: Great for a warm, custardy dessert.
- Chilled: Allows the flavors to develop and gives you that traditional texture where the wafers are soft yet structured.
Store it in the fridge, covered tightly with plastic wrap to prevent a skin from forming. It’ll keep well for up to 3 days, though chances are, it won’t last that long!
Variations of Banana Pudding You’ll Love
Traditional vs. Modern Twists
While the classic Southern banana pudding recipe is hard to beat, modern kitchens love a good remix. Some families swear by the traditional custard and meringue, while others go full no-bake with instant pudding and whipped topping. Here’s a quick comparison:
| Feature | Traditional Version | Modern Twist |
|---|---|---|
| Pudding Base | Homemade custard | Instant vanilla pudding |
| Topping | Baked meringue | Whipped topping or whipped cream |
| Time to Make | 45–60 minutes | 20 minutes |
| Flavor Depth | Rich, eggy, and warm | Light, sweet, and creamy |
| Texture | Dense layers with baked topping | Soft, chilled with fluffy topping |
Modern twists can also include flavoring upgrades like banana extract, caramel drizzle, or even a chocolate layer for an extra decadent treat.
Vegan and Dairy-Free Options
If you or someone you love is dairy-free or vegan, you don’t have to miss out on banana pudding bliss. Here’s how to make it plant-based and still drool-worthy:
- Use almond, soy, or oat milk in place of regular milk.
- Choose vegan vanilla pudding mix or make your own with cornstarch and plant-based milk.
- Swap out whipped topping with coconut whipped cream.
- Use dairy-free vanilla wafers (many store brands offer them).
- For an egg-free meringue, try aquafaba meringue—whipped chickpea brine that acts just like egg whites.
It might be a twist on the original, but the result is every bit as satisfying.
Serving and Storage Tips
Best Way to Serve Southern Banana Pudding
Presentation is everything when it comes to banana pudding. For a family-style approach, you can serve it in a clear glass dish or trifle bowl to show off the beautiful layers. If you want to go fancy, spoon it into individual mason jars or dessert glasses for a neat and portable treat.
Top with a few crumbled wafers or a single banana slice for a photo-worthy finish. If using meringue, serve with a spoon that cuts cleanly through the layers, preserving the fluffy top and creamy center.
Pro Tip: Always chill for at least 4 hours before serving for the best texture and flavor blend.
How to Store Leftovers
Have some leftovers (though we doubt it)? Here’s how to keep them tasting fresh:
- Store in the refrigerator, tightly covered with plastic wrap or in an airtight container.
- Best consumed within 2–3 days. After that, the bananas begin to brown and the wafers can get overly soggy.
- Do not freeze banana pudding. The texture will be ruined upon thawing.
If you’re prepping ahead for a gathering, make it the night before for a chilled, cohesive dish that holds its structure beautifully.
Making Banana Pudding for a Crowd
Doubling the Recipe
Need to feed a large family or a party of friends? Banana pudding is one of the easiest desserts to scale up.
- Simply double all ingredients.
- Use a large 11×15-inch baking dish or two 9×13 pans.
- Stick with two to three layers to keep the structure intact.
This is perfect for church potlucks, BBQs, or summer cookouts. Everyone loves it, and you’ll be lucky if there’s any left to bring home.
Transporting Without the Mess
Bringing banana pudding to an event? Here’s how to make sure it survives the trip:
- Use a dish with a secure lid or tightly seal with plastic wrap and foil.
- Place the dish in a cooler bag with ice packs if you’re traveling far or in warm weather.
- Don’t top with whipped cream or meringue until just before serving to keep it looking fresh and fluffy.
Pack some extra Nilla wafers in a ziplock bag to sprinkle on top just before serving for added crunch.
Healthier Banana Pudding Alternatives
Lower Sugar and Low-Fat Swaps
Trying to keep things a little lighter? Here’s how you can make banana pudding a tad healthier without losing that Southern soul:
- Use low-fat or plant-based milk.
- Choose sugar-free vanilla pudding or make homemade with less sugar.
- Go for light whipped topping or coconut cream.
- Use whole grain vanilla cookies or even graham crackers as a substitute.
- Add a layer of fresh strawberries or blueberries for a fruity upgrade.
With just a few swaps, you can enjoy your favorite comfort food guilt-free.
FAQs about Southern Banana Pudding Recipe
1. What makes Southern banana pudding different?
Traditional Southern banana pudding is known for its use of layers—vanilla wafers, fresh bananas, and a rich homemade vanilla custard (not instant pudding). It’s often topped with meringue or whipped cream and baked to perfection.
2. Can I use instant pudding instead of homemade custard?
Yes, you can, especially if you’re short on time. Instant vanilla pudding offers a quicker alternative, though it may lack the depth and richness of a homemade custard.
3. How ripe should the bananas be?
Use ripe but firm bananas—yellow with a few brown spots. Overripe bananas tend to get mushy and overpower the dessert with a strong flavor.
4. Can I make banana pudding ahead of time?
Absolutely! Southern banana pudding is even better when chilled for a few hours or overnight. This allows the flavors to meld and the wafers to soften into that signature pudding texture.
5. How long does banana pudding last in the fridge?
Stored in an airtight container, it lasts up to 3 days. After that, the bananas may start to brown, and the texture might get too soggy.
6. Can I freeze banana pudding?
Freezing is not recommended. The bananas can become watery and unpleasant in texture once thawed.
7. What can I use instead of vanilla wafers?
You can substitute with graham crackers, ladyfingers, or shortbread cookies. But if you want that authentic Southern flair, stick with Nilla Wafers.
8. Is it necessary to bake banana pudding?
Not always. If you’re using whipped cream instead of meringue and skipping homemade custard, there’s no need to bake. However, baking adds a golden top and warms the custard for that nostalgic Southern comfort.
Conclusion
Southern banana pudding is more than just a dessert—it’s a legacy. With its comforting layers of vanilla pudding, sweet bananas, and tender cookies, it brings people together across generations and geographies. Whether you make it with grandma’s secret custard recipe or opt for the convenience of instant pudding, the heart of banana pudding lies in its simplicity, its Southern roots, and the love poured into each spoonful. It’s easy to make, hard to resist, and impossible to forget. Go ahead—whip up a batch and let the nostalgia hit you right in the taste buds.